How To Grow Thicker Hair Naturally – 10 Best Tips

Are you wondering how to get thick and strong hair? Although you can't alter the diameter of your hair follicles, still there's a lot you can do to enhance your hair growth and protect them from breakage. There's a myth that long and thick hair is all about having good genes; however, the truth is that you can improve your hair volume naturally. Read this complete article to know all the reasons for loss in hair thickness and to learn how to grow thicker hair.

Why Does Your Hair Lose Thickness?

The thickness of the hair is entirely dependent upon the diameter of the follicle of your hair. A hair follicle is simply a hair strand structure that is present inside the skin pore. So, if the diameter of the hair follicle increases, it makes the hair strand thicker; otherwise, the hair strand gets thinner. Further, hair loss is quite natural because as we get older, our hair starts losing its volume and strength. So, you must wisely analyze the reason behind your hair loss. Some of the common reasons behind thinning of hair are as follows:

  1. Hormonal imbalance weakens the androgen hormones, which results in shrinking of your hair follicles.
  2. Over treating your hair also results in thinning of hair. 
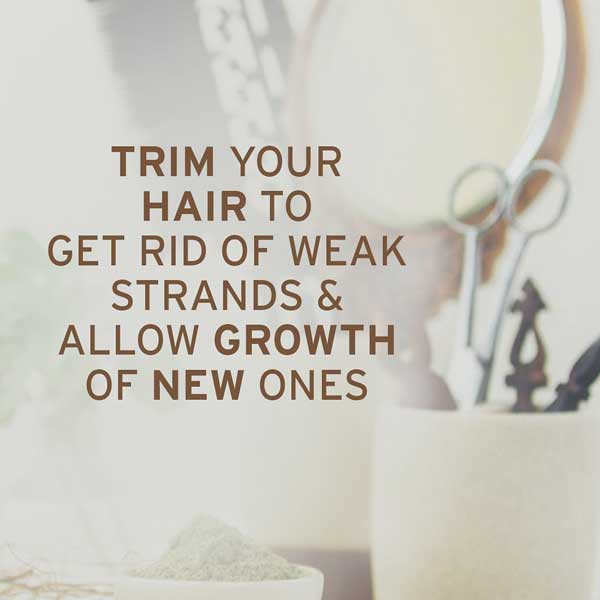
  3. Using tight hairstyles results in breakage of your hair follicles that causes thin spots with time.
  4. Not including enough folic acid, iron, and other essential minerals in your diet also decreases hair follicles' growth, which ultimately leads to thinning of hair.
  5. Taking too much stress is also a significant cause of hair loss among adults.

Can You Get Thick Hair?

Many people wonder whether it is possible to get thicker hair or not. Well, the truth is that 'Yes' you can make your hair thicker by reopening the shrunken hair follicles. However, you can't change the texture of your hair follicles. 

Hair follicles demand nourishment through blood vessels. Therefore, stimulating blood circulation across your scalp is a primary way to reopen your hair follicles. In addition, according to Ayurveda, hormonal balance leads to regulation of metabolism in your hair stem cells and supports regeneration which further makes your hair thicker and more robust.

How To Get Thicker Hair Naturally?

Thick hair is no less than magic for any individual, whether inherited or artificially gained. Fuller and bouncy hair always enhance your external beauty. However, maintaining thick hair is not possible if you're losing hair now and then. 

Now, if you're thinking of visiting a salon to get a solution to this problem, they might make your hair situation worse than before. The chemical treatments destroy your hair follicles and affect your hair volume in the long term. So, instead of jumping over the chemical treatments, how about you try these fantastic natural ways to make your hair thicker?

1. Follow Ayurvedic Hair Care Routine

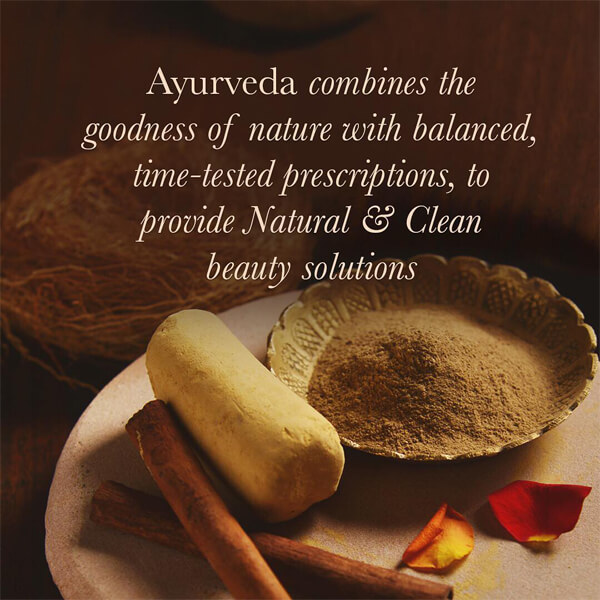
If you've been spending a lot of your time on finding the best way to get thicker hair, then go for an Ayurvedic hair care routine. Ayurveda can address the root cause of hair problems and provide a natural solution to tackle that problem. Therefore, if you're willing to have thick hair naturally, you should try out some of the ayurvedic hair care routines, such as

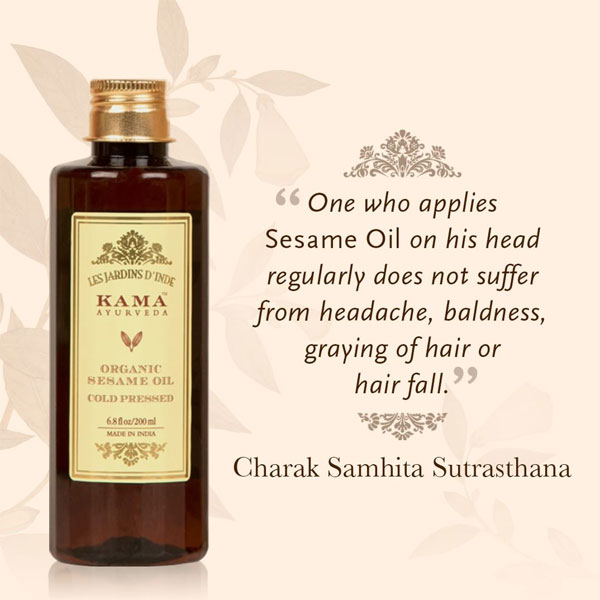
  1. Selecting an organic hair oil per your hair type.
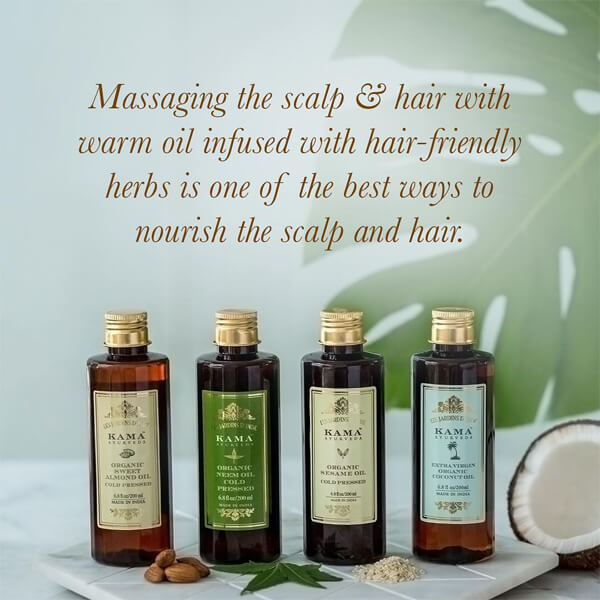
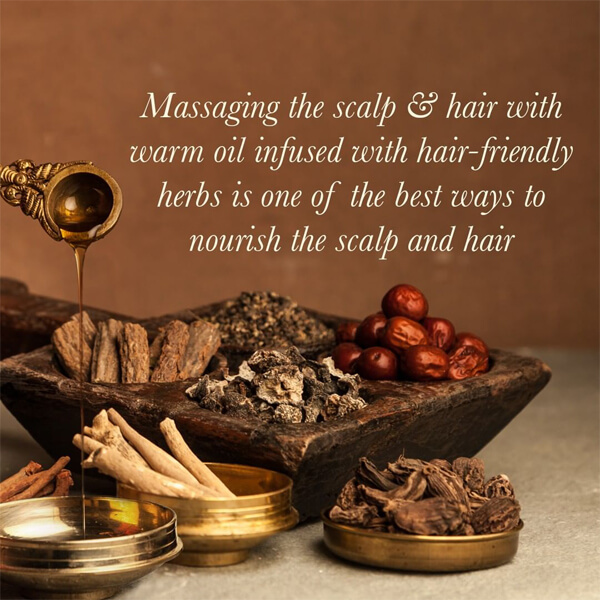
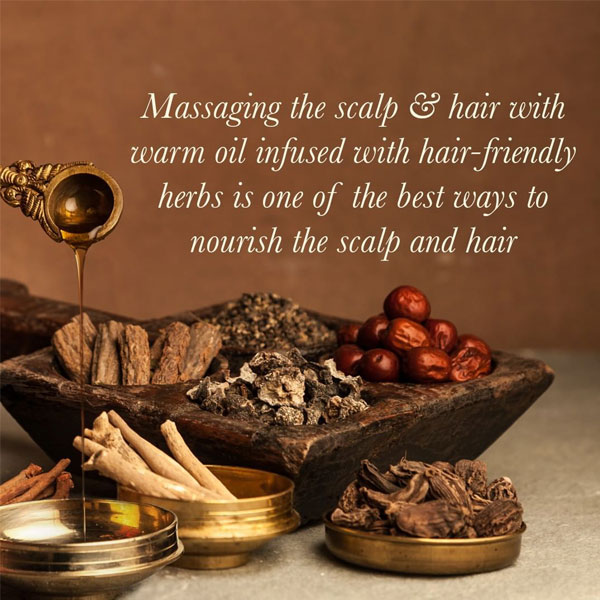
  2. Oiling your hair daily boosts up the blood circulation in the scalp and helps to nourish your hair follicles.
  3. Washing off your hair with herbal shampoo to remove excess oil build-up.
  4. Conditioning your hair with a hair mask regularly.
  5. Protecting your hair from all the harsh environmental conditions and avoiding chemical products.
  6. Ensuring intake of food rich in nutrients and proteins.

Here’s the recommended Ayurvedic hair care regime to grow thicker hair.

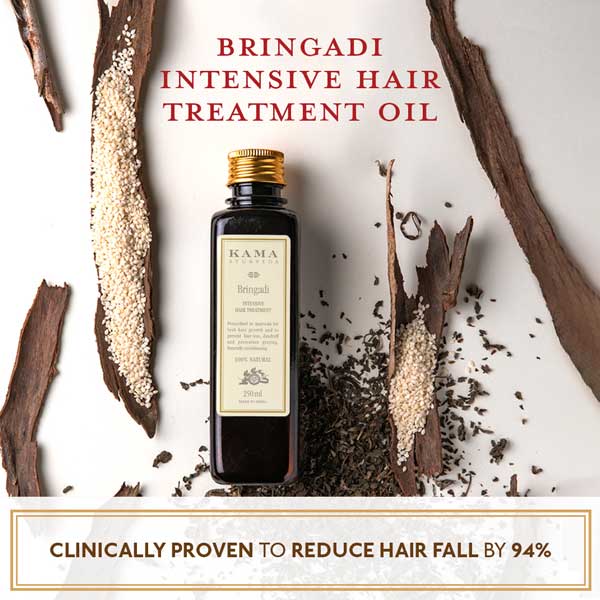
  1. Oil your hair with Bringadi Intensive Hair Oil and keep it for at least 30 minutes.
  2. Before washing your hair, Nourish your hair with Bringadi Kesh Lepam, a pre-wash restoring hair mask.
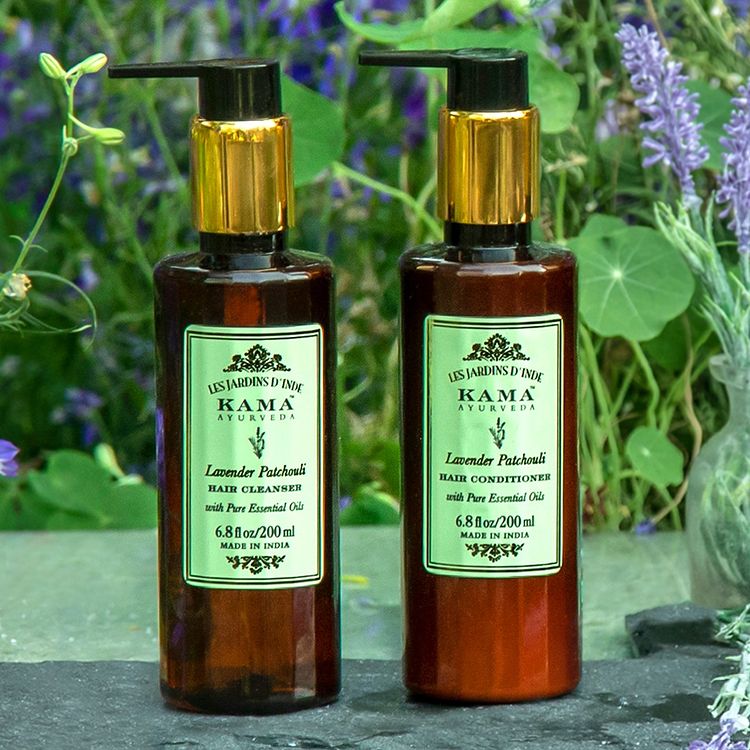
  3. Using Bringadi Hair Cleanser, a volumizing, nourishing and repairing natural hair cleanser.
  4. Condition your hair with Bringadi Intensive Repair Posh Wash Hair Mask to restore and protect your hair. 

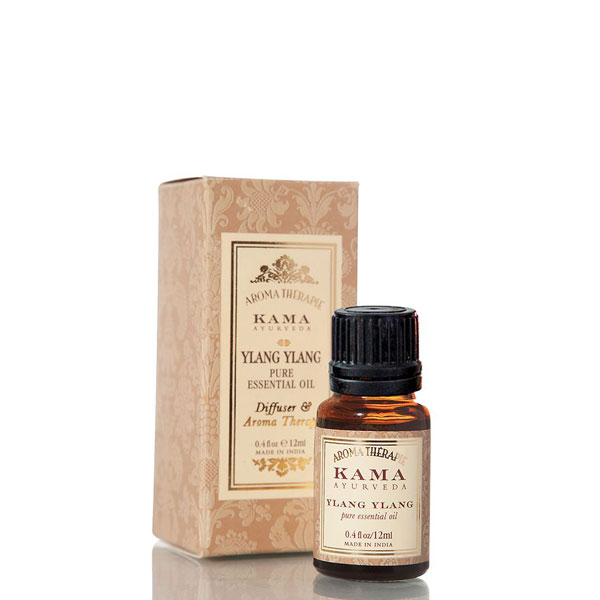
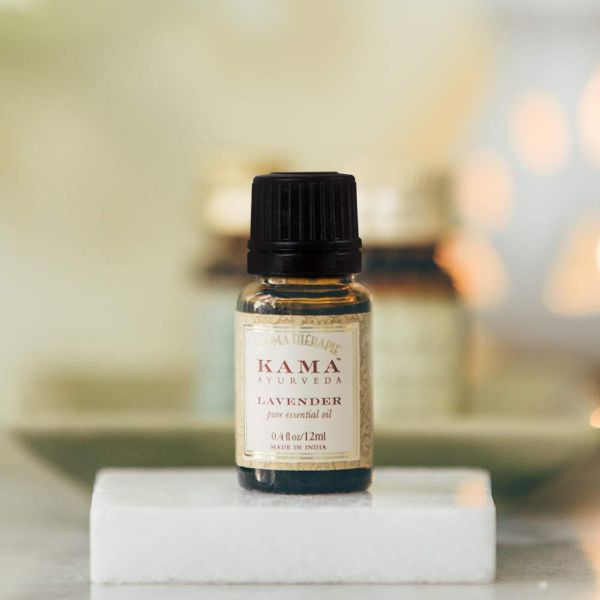
2. Use Essential Oils For Hair

Essential oils are best known for their aromatic capability, but they also inherit some solid chemical properties beneficial for hair growth. The essential oils are extracted from different plants through processes like evaporation and distillation. Further, essential oils are beneficial for making your hair thicker and shinier. Some of the essential oils that you can choose from are:

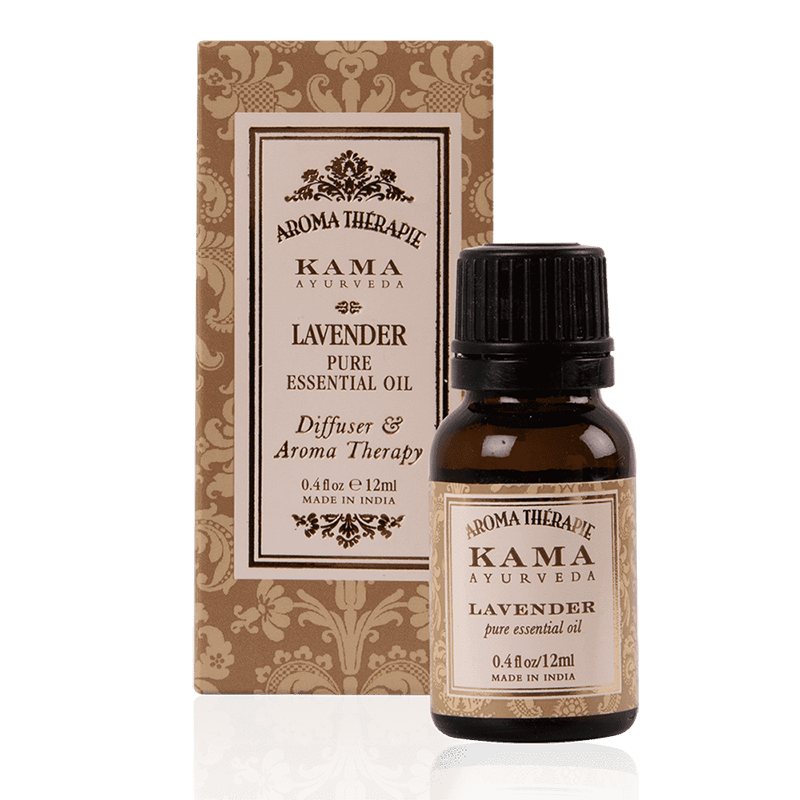
  1. Lavender Essential Oil - This oil is beneficial in accelerating hair growth as it contains some properties that generate cell growth and reduce stress in the body.
  2. Peppermint Essential Oil - This oil causes a remarkable and tingling feeling while increasing the blood circulation in the scalp. It is known to increase hair follicles' depth, number, and overall hair growth.
  3. Lemongrass Essential Oil - Lemongrass oil is best known for treating dandruff. It also contains some anti-fungal properties and helps in blood circulation, which is beneficial for preventing hair loss.


Read - 12 Best Essential Oils For Hair That Work Wonders

3. Ayurvedic Herbs

Ayurveda utilizes the therapeutic properties of natural herbs to deal with different types of hair problems. Using ayurvedic herbs can help you get permanent solutions to hair problems, whether hair fall or a flaky scalp. Some powerful ayurvedic herbs best for hair growth are

  1. Amla - Amla is loaded with Vitamin C and is an essential ingredient for hair care.
  2. Fenugreek seeds - It is regarded as the best ayurvedic medicine as it is rich in Vitamin K, C, A, proteins and folic acids.
  3. Aloe Vera - This herb has some anti-inflammatory properties which are effective for itchy scalp and also promotes hair growth.
  4. Curry leaves - These leaves help in removing the dead hair follicles and are effective in moisturizing your scalp.
  5. Brahmi - This herb is best for thickening of hair and is helpful in treating dry scalp.
  6. Bhringraj - It is full of magnesium, calcium, vitamins and iron. Bhringraj acts as the best remedy for hair growth and increases blood flow of the scalp.

All these ayurvedic herbs have moisturizing properties that are efficient for naturally stopping hair fall and help in getting thick, long hair. Choose herbal hair products that have these herbs as the key ingredients. 


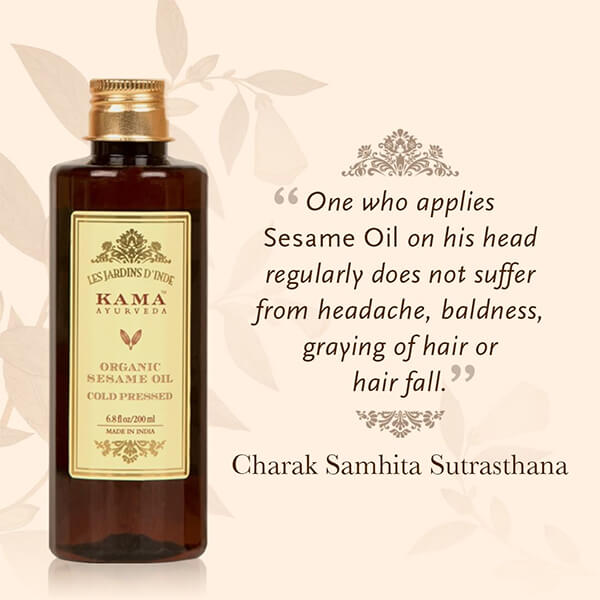
For instance, our Bringadi Oil is rich in nature’s wonderful ingredients - Bhringraj, Sesame Oil, Liquorice, Indigo, Hibiscus, and Amla. It relieves hair loss, promotes hair growth & prevents dandruff.

Read - Best Hair Oil For Your Hair Type – How To Find The Right One?

4. Hair Masks

Using a herbal hair mask, you can hydrate your hair strands deep from the roots to tips. The impact of such masks penetrates to a suitable depth into your scalp and helps in increasing your hair thickness and bringing back its natural shine. Some of the herbal hair masks that are effective for having thick hair are:

Amla and Shikakai Hair Mask

Both of these ingredients are rich in Vitamin C, which boosts hair growth by promoting collagen boost in your scalp. The antioxidant property of shikakai helps fight the damage caused by free radicals, while the mineral composition of Amla accelerates blood circulation.

Take two teaspoons of amla powder and two teaspoons of Shikakai powder and mix it in a bowl with some water. Make a smooth paste and apply it to your scalp. Leave this mask for at least 45 minutes, and then rinse off with water and shampoo to get the best results.

Jojoba oil and Egg Yolk Hair Mask

Rich in antifungal properties, Jojoba oil effectively keeps the scalp healthy and removes the dead skin. It fights against the free radicals responsible for causing hair damage and unclogs the hair follicles.

Take one teaspoon of Jojoba oil, Egg yolk, one teaspoon of Honey, few Lemon drops and then blend all the ingredients. Apply this herbal mask on your hair and scalp and leave for 45 minutes. Rinse off the mask with a herbal shampoo and see noticeable results.

Bhringraj and Neem Hair Mask

Neem and Bhringraj are the most prevalent ingredients for healthy hair growth. On the one hand, Amla is known to promote thickness and shine, while on the other hand, bhringraj is an antihypertensive herb that helps calm your mind and relieve stress.

Take some neem leaves, Bhringraj leaves or powder and grind them with water. Apply this mask all over your scalp, especially on your hair roots. Leave the mask on for a few hours, and then rinse off with water.

5. Shampoo/Conditioning

The chemical shampoos available in the market contain harsh surfactants like sulfonates and sulfates that strip off the necessary and unnecessary materials from your hair roots. So, you should always think twice before choosing a chemical shampoo.

However, when we talk about herbal shampoo, it inherits some natural surfactants which retain the necessary oils for a healthy scalp. Also, herbal shampoos are free of harsh chemicals and suitable for all hair types. Further, shampoo followed by a hair conditioner can improve your hair thickness to the next level. So, try avoiding chemical-based hair conditioners and use a natural conditioner to treat your hair problems.

6. Follow A Healthy Diet

Following a balanced and healthy diet helps regulate the cellular metabolism in your hair follicles' stem cells. Therefore, you should feed your hair with nutritious food items to support hair growth and make hair grow stronger and thicker.

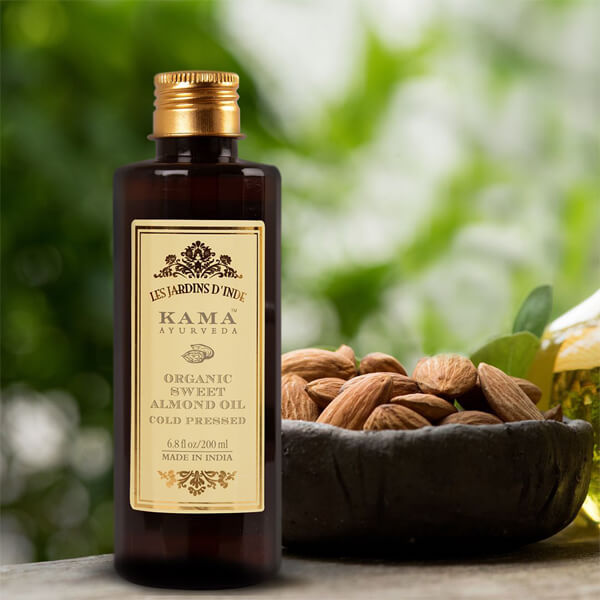
Try looking out for food items that are rich in proteins, fatty acids and Vitamins A, B, C and E. Food that supports hair thickness includes Eggs, Spinach, Salmon fish, Sunflower seeds, Almonds, Flax seeds, Amla, Fenugreek seeds, Curry leaves, Peanuts and Pumpkin seeds.

7. Use The Right Shampoo

Buying the right shampoo for your hair type can be challenging but should be done wisely. Always consider a shampoo that deeply nourishes your hair from the roots. While buying a shampoo, it is essential not to look at the hair goals they offer but the formulation and ingredients they contain to help reach those goals.

Further, check the pH level of shampoo before deciding whether it'll work for you or not. Natural ingredients such as Green Tea, Aloe Vera, Shea Butter and Soy Protein are excellent for hair thickness, so do not miss out on browsing through different herbal shampoos.

8. Avoid Heat Styling And Chemical Hair Treatments

One thing that we all are worried about is hair damage. Hair damage is caused mainly due to using heat styling tools and products with chemical components. Therefore, you should try improving your hair care practices like:

  1. Avoid using heating tools without using a thermal protector.
  2. Always use a moderate heat setting to lessen hair damage.
  3. Invest in suitable quality hair dryers and brushes to protect hair from consistent heat
  4. Opt for herbal shampoos instead of using chemical shampoos that cause great damage to your hair follicles.
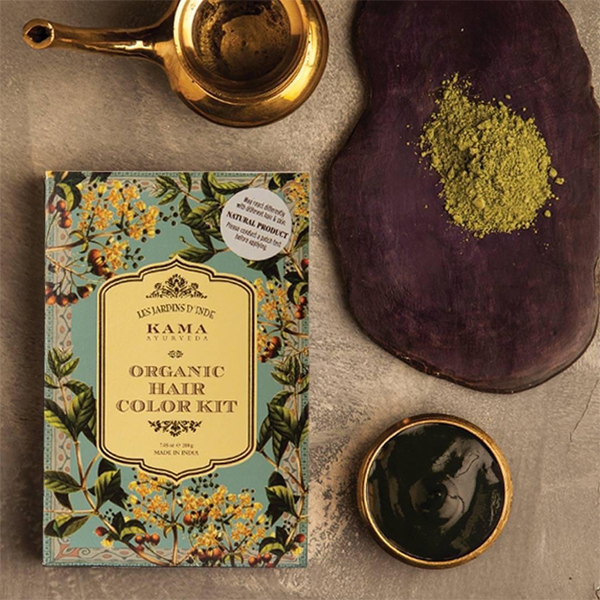
  5. Use natural hair dyes over chemical dyes for colouring your hair.

Read - How To Repair Damaged Hair Naturally Without A Salon Visit?

9. Don’t Over Wash Your Hair

A shampoo is specially designed to cleanse the scalp and remove excess oil. But if a shampoo is overused, it can cause severe damage to your hair. This is because shampoo removes the essential oils in the scalp and leaves it too dry. 

So, to prevent this, always shampoo your hair roots and do not wash your hair daily. Overwashing your hair also makes way for dandruff which can further hinder your wish for getting thick hair.

Read - ​​How To Take The Best Care Of Damp Hair?

10. Address Hormone Imbalance With Healthy Lifestyle

A hormonal imbalance can significantly impact the health of your hair follicles. Even small changes in the hormone levels can result in some adverse effects and extra stress on your body. Therefore, addressing the hormonal imbalance with a healthy lifestyle is essential. You can do so in several ways like:

  1. Getting an appropriate amount of sleep to maintain hormonal balance in the body.
  2. Lowering your stress helps in the growth of new hair follicles.
  3. Include exercise in your lifestyle to maintain a hormonal balance and promote healthy hair growth.
  4. Keep yourself hydrated so that your body functions properly.
  5. Keep everything natural and avoid using chemical products for nourishing your scalp.

Read - How To Calm Your Mind – 6 Ayurvedic Breathing Techniques

How Long Does It Take To Get Thick Hair?

You can get long and thick hair in just a few months if you follow a healthy and effective hair care routine. Try not to get impulsive by opting for conventional treatments for hair thickening. However, natural methods for growing thick hair might not show results instantly but result in long-lasting health of the hair follicle and help in getting bouncy and thick hair. All the remedies require your time and patience. So, don't be tempted to use any chemical products on your scalp to get quick results.

To conclude, you can get thick and long hair if you follow a natural hair care routine. Natural products bring long-lasting results and protect your hair against several hair problems. Therefore, always choose the correct hair care products and be patient to watch out for the results. So, get ready to have thick, long and bouncy hair!

7 Reasons To Use Lavender Oil For Hair & How To Do It?

Scientifically called Lavandula Angustifolia, Lavender has a distinct sweet and floral smell that can instantly relax, calm, and promote a sense of harmony and well-being in you. Queen Elizabeth cherished this flower and used it in her tea and perfumes.

The oil was even considered an antiseptic during the first world war! But did you know that there are immense benefits of using Lavender oil for hair growth? 

For years, people have turned to lavender for better hair. Lavender oil, with its soothing and protective qualities, gives hair a real boost. It deeply nourishes, keeps our hair roots strong, and helps guard against everyday wear and tear from the environment and heat.

It also has anti-inflammatory, antibacterial, and anxiolytic properties that improve hair’s health. 

lavender oil for hair

Read - How To Use Lavender Essential Oil for Beauty & Aromatherapy

Want to know more about what Lavender can do to your hair? In this article, we talk about the top benefits of lavender oil for hair and explain different ways to incorporate it into your hair care regimen.

Lavender Oil: What Makes It So Special For Hair?

As per the science of Ayurveda, the stability of the three doshas (Kapha, Pitta, and Vata) is crucial to maintaining good hair health. Do you know that your major hair issues relate to your different Prakriti and dosha situations? The calming nature of Lavender oil works on all three doshas keeping many hair conditions at bay.

Lavender essential oil helps in promoting hair growth and preventing baldness. Its antimicrobial properties will not allow the formation of fungi or any bacteria, thus keeping dandruff away.

Regular application of Lavender oil for hair ensures lustrous, thick, and healthy-looking strands that can withstand many environmental damages.

Lavender oil offers essential antioxidants and nutrients that help stimulate blood flow, boosting hair growth. This incredible botanical coming from the mint family benefits don't end here; scroll a little down to find more exciting benefits of using lavender essential oil for hair. 

7 Top Benefits Of Lavender Oil For Hair 

Lavender is popular for its floral and relaxing scent. Apart from providing a sweet soothing aroma, the flower also offers many hair, body, and mental benefits.

The Lavender essential oil has a variety of natural solutions that benefit hair in several ways. Wondering how? Here we compiled a list of the of Lavender essential oil benefits for hair -

1. Soothe Scalp Irritation & Itching

Lavender oil has analgesic and anti-inflammatory properties that can soothe any irritated skin. Both Linalyl and Linalool, compounds present in Lavender, are known to ease pain and help inflammation. 

2. Stimulates Hair Growth

The use of Lavender oil for hair growth gained attention recently. The oil is beneficial for hair thickening, developing new hair, and hair loss prevention. It also helps in conditioning the hair, controlling frizz & boosting shine. Lavender oil even helps with problems such as alopecia or pattern baldness. (2)

3. It's Antimicrobial

Lavender oil has antimicrobial properties that are known to prevent fungi & bacteria from growing. It can treat many scalp conditions, including dandruff, dry and itchy scalp, etc.

4. Prevent Head Lice

Head lice are an undesirable and uncomfortable occurrence. Do you know that Lavender essential oil can help get rid of head lice and prevent them from occurring again? Yes, Lavender oil can reduce the risk of having lice. Use Tea tree oil with Lavender oil to see better results.

Read - 8 Simple Ways To Use Tea Tree Oil For Hair

5. Suppress Headaches

Owing to its stress-boosting properties, Lavender oil is widely utilized in aromatherapy. A simple head massage with Lavender oil clears the brain toxins and enhances cognitive abilities such as focus, concentration, and memory.

It even balances the pitta and Vata doshas in the body, thus soothing headaches. Stress-relieving effect of Lavender Oil helps in reducing hair fall and promotes healthy hair growth.

6. Help You Catch Some Sleep

Be it stress or an approaching deadline; sleeplessness is a common factor in today's fast-paced lifestyle. Loss of sleep is debilitating and leads to disturbance to the emotional & physical well-being.

Lavender oil is used in various head massage therapies as it reduces the cortisol levels that offer peaceful sound sleep. According to Ayurveda, external beauty is deeply connected to our internal health. When you rest well, your hair also becomes healthier.

lavender oil for stress

Shop Kama Ayurveda Pure Lavender Essential Oil

7. Fights With Hair Loss

Several factors cause hair loss. It could be genetic or could be accelerated with an unhealthy scalp environment. With a powerful pack of antibacterial and antiseptic properties, Lavender essential oil protects your scalp against bacteria.

It helps in improving blood circulation in the scalp, which strengthens the hair follicles. This, in turn, prevents hair loss and enables hair growth. 

How To Use Lavender Oil for hair?

If you have less time but like to work the magic for your tresses, then a DIY hair mask with Lavender oil is all you want.

Any hair condition can be easily treated and pampered with these simple DIY Hair Masks. Look at the ingredients and discover how you can make these spa-worthy hair care recipes.

1. Coconut Oil - Lavender Hair Mask Recipe for healthy hair

Coconut and Lavender oil hair mask is a powerful three-ingredient mask that can boost hair health noticeably. You can also store the mixture in a bottle and use it frequently. 

Ingredients:

Virgin Coconut Oil - 2 tablespoons

Rosemary Essential Oil - 3 drops

Lavender Essential Oil - 3 drops

Preparation: 

  1. Take a small bowl and add coconut oil to the Lavender & Rosemary essential oils.
  2. Blend it well together.

How To Use: 

  1. Dampen your hair with water.
  2. Coat this mixture on hair using a brush or your fingertips. 
  3. Let it sit on hair for 30 minutes.
  4. Rinse the mask off the hair, and then shampoo & condition it. 

2. Jojoba & Lavender for Hair Growth

Jojoba oil is popular for hair care remedies as it conditions the scalp. Lavender oil cleans the toxins from follicles and boosts hair growth.

Ingredients:

Jojoba oil – 2 tablespoons

Lavender oil – 2-3 drops

Preparation: 

  • Take a mixing bowl and add Lavender oil and Jojoba oil.
  • Mix the above mixture well.

How To Use: 

  • Massage the above mixture gently in circular motions on the scalp. 
  • Leave it for an hour.
  • Then wash it off using warm water
  • Repeat this at least once a week.

3. Lemon Juice & Lavender Oil for Dandruff

Lemon juice is perfect for controlling hair dandruff. You could mix it with the lavender essential oil for making a robust anti-dandruff solution. This mask also soothes an itchy scalp.

Ingredients:

Fresh lemon juice - 2 Tbsp

Olive oil - 2 Tbsp

Lavender essential oil - 5 drops

Preparation: 

  1. Heat the olive oil for a 10 seconds.
  2. Then mix it with Lemon juice and Lavender oil.

How To Use: 

  1. Apply the above mixture and massage the scalp gently for 5-10 mins
  2. Wash it after an hour by using mild anti-dandruff shampoo.

4- Honey - Lavender Hair Mask For Brittle Hair

This Honey and Lavender oil mask deeply nourishes, hydrates, and soothes the hair, promoting a healthier scalp and shinier locks.

Ingredients:

2 tablespoons of raw Honey
2 tablespoons of Olive oil or Coconut oil
5-6 drops of Lavender essential oil

Preparation: 

  1. Combine all ingredients together to prepare the hair mask.

How To Use: 

  1. Apply it on the damp hair 
  2. Massage hair gently and allow it to rest for 3o min.
  3. Rinse the hair mask off by using shampoo.

5. Castor oil - Cedarwood oil - Lavender Oil Hair Mask For Growth

Want thick and strong hair this winter? Then this DIY hair mask with cedarwood, castor, and lavender essential oil can be your hair's good friend. Both castor oil and cedarwood oil are known to boost hair growth. Lavender essential oil makes sure hair stays healthy and robust.

Ingredients:

  1. Avocado oil - 2 tablespoons
  2. Castor oil - 1 teaspoon
  3. Lavender essential oil - 10 drops
  4. Cedarwood essential oil - 5 drops

Preparation: 

  • Take a mixing bowl and combine Lavender, Castor oil, and Avocado oil, as well as cedarwood essential oils.

How To Use: 

  1. Apply this hair mask on the scalp, then massage it gently.
  2. Let it rest for 1 hour or even overnight.
  3. Wash the hair mask with water and shampoo 

6. Olive oil - Lavender Oil Hair Mask For Frizzy Hair

Frizzy hair is too annoying, but this DIY summer hair mask keeps your frizzy hair at bay.

Ingredients:

  1. Olive or avocado oil - 2 Tbsp
  2. Egg whites - 2 eggs
  3. Lavender essential oil - 10 drops

Preparation: 

  1. In a mixing bowl, mix the egg whites & olive oil, then whisk it well.
  2. Include the lavender essential oil, then whisk it again till it's combined fully.

How To Use: 

  1. On the damp hair, massage the hair mask from the hair root to the tips.
  2. Tie your hair in a bun or cover your hair using a shower cap for about 30 mins.
  3. Rinse it with water and then shampoo

7. Rosemary - Basil - Lavender Hair Mask for Ultra-Shiny Hair

Are you looking for an easy lavender oil hair mask to bring back that shine to the tresses? Say hello to this mask.

Ingredients:

Rosemary oil – 10 drops

Lavender oil – 10 drops

Basil oil – 5 drops

Jojoba oil – 2 Tbsp

Coconut or Olive oil – 4 Tbsp

Preparation: 

  1. Take a small bowl and add rosemary oil, basil oil, and Jojoba oil.
  2. Now, add lavender oil along with olive or coconut oil to the mix.
  3. Combine this mixture well.

How To Use: 

  1. Apply the mixture to dry hair & scalp. 
  2. Let it sit on the hair for an hour before washing it off using warm water and shampoo.
  3.  As jojoba oil is quite greasy, it is better to shampoo the hair twice.

8. Lavender Oil and Yogurt Deep Conditioning Mask

This natural mask combines the deep conditioning benefits of lavender oil with the moisturizing properties of honey, the nourishing touch of basil oil, and the cleansing power of yogurt.

Ingredients:

  1. Lavender oil: 5-6 drops
  2. Basil oil: 5-6 drops
  3. Honey: 2 tablespoons
  4. Yogurt: 1 cup (unsweetened, plain)

Preparation:

  • Add honey and a few drops of lavender and basil oil to a cup of yogurt.

How To Use: 

  1. Blend into a paste.
  2. Apply on the scalp and through the length of your hair.
  3. Keep for 20 to 30 minutes and wash off.

Adding Lavender Oil To Your Hair Care Products

The easiest and effective way to prevent scalp concerns, boost hair growth and maintain hair health is by adding Lavender essential oil to your hair products. 

Lavender essential oils are quite effective in small quantities because they are highly concentrated. So, you could include a small amount of lavender oil in your hair conditioner, shampoo, hair serums, or any hair product. 

Lavender Oil For Hair Massage

Lavender oil for hair growth could be mixed in the carrier oil such as Sweet Almond Oil or Jojoba oils for a good hair massage. Try to add this oil to your homemade shampoo too.

Remember to add five drops per ounce of the product. Then, utilize hair products as directed. You can also add one to two drops of Lavender Essential Oil to a dollop of your hair product directly in the palm before you apply it. 

Buy Lavender Oil Shampoo and Conditioner

Alternatively, you can opt for Kama Ayurveda’s Lavender Patchouli Hair Cleanser & Hair Conditioner. Combining the essential oils of Handpicked Lavender from the wilds of the Himalayas with Antibacterial Patchouli, these products soothe & calm damaged hair & scalp to naturally nourish while cleansing.

lavender oil hair cleanser

Make Lavender Oil And Aloe Vera Hair Serum

Combining the natural shine-enhancing properties of aloe vera with the moisturizing benefits of lavender oil, this serum can combat dryness, reduce frizz, and prevent split ends.

Ingredients:

  1. Lavender oil: 4-5 drops
  2. Aloe vera gel: 1-2 tablespoons (or a generous dollop)

Method:

  1. In your palm, mix 4-5 drops of lavender oil with a generous dollop of aloe vera gel.
  2. Blend them together and then apply as a serum, working it through the length of your hair.

Lavender Oil Side Effects for Hair and Safety Precautions

Lavender oil is renowned for its numerous benefits, especially for hair. However, it's essential to approach its use with caution to avoid potential adverse reactions.

Side Effects:

  • Irritation: Excessive use of lavender oil can irritate the scalp or skin. It's crucial to conduct a patch test before fully applying it to your hair or scalp.
  • Toxicity: Lavender oil can be toxic if consumed in large amounts, leading to symptoms like vomiting and nausea. Additionally, inhalation in excessive amounts might also be harmful.
  • Allergic Reactions: Those with sensitive skin should be especially cautious. Always mix lavender oil with a carrier oil, like coconut or almond oil, to reduce the risk of skin irritations.
  • Eye Contact: Lavender oil can cause burning or irritation if it comes into contact with the eyes. If this happens, rinse immediately with cool water and seek medical attention if the irritation persists.

Safety Precautions:

  • Always dilute Lavender oil in a carrier oil before application. If you find the aroma too potent, consider diluting it further with olive oil.
  • Do not consume lavender oil and ensure it is out of reach for children and pets.
  • When applying, use a minimal amount, especially when starting out, and massage gently into the scalp.
  • While lavender oil offers numerous health benefits, it's important to remember that it might not suit every skin or body type.


By taking these precautions, you can safely enjoy the many benefits lavender oil offers for hair care.

FAQS about using Lavender Essential Oil For Hair

How To Use Lavender Oil For Hair Growth?

Want the best of the lavender oil's hair growth benefits? Then here is how to do that perfectly. 

  • Use It As A Massage Oil: Give a good massage to the scalp with diluted lavender oil. You could dilute Lavender oil with a carrier oil, like coconut or jojoba oil, in comparable parts. This massage is suggested following a bath. Leave it on the hair for 5 - 10 minutes, then rinse it afterward. You could leave it overnight by wrapping your hair in a towel. (3)
  • Use Lavender Oil As Serum: You can use lavender oil as a hair serum. Dilute the lavender essential oil with any carrier oil like coconut or jojoba oil and apply evenly to the hair after wash. It gives you instant shine and luster. Your hair smells heavenly too.

Can Lavender Essential Oil Be Used For Hair Loss?

A specific study proved that few essential oils could impact hair loss and boost growth. Out of them, Lavender oil is the top-most remedy for hair loss. 

Can I Add Lavender Oil To My Shampoo?

Yes, the easiest and effective way to utilize lavender oil for hair growth is by adding it to the shampoo routine. Include 2 or 3 drops of the lavender oil to the usual shampoo amount, then use it for washing hair. Also, try to massage the scalp for a minute longer for better results.

Where Can I Buy Lavender Oil?

We recommend Kama Ayurveda's Lavender Essential Oil as it is 100% natural. The flowers are hand-picked from the wild in the Himalayas, giving them remarkable soothing properties.  Lavender essential oil from Kama Ayurveda isn't just ideal for hair care and is effective for skincare, massage, steam inhalation, aromatherapy, bath, air freshening, and all-time relaxation. 

where can i buy lavender oil

Your Complete Guide To A Nourishing Oil Massage For Hair

Even if oiling hair seems cumbersome, it’s still totally worth it. Afterit’s the most effective way to nourish our hair. Moreover, nothing beats the relaxation we get from an oil massage for hair! 

Most Indians grow up with the awareness of a good oil massage. Our grandmothers and mothers have lauded the benefits of oil massages for ages.  Did you know that oiling your hair can protect your follicles from a harsh and polluted environment?

However, if you’re unsure if your hair and scalp will benefit from oiling, this guide will help you out. We’ll also cover the best hair oils and explain how to use them to oil your hair the right way. 

Before that, let’s address the big question -

Why Should You Apply Hot Oil To Your Hair?

If your hair is dry, brittle, frizzy, color-treated, or prone to split ends, a hot oil treatment is just what you need. 

Apart from providing your hair a good dose of hydration, hair oils even nourish your hair with essential vitamins and minerals needed to keep it strong and healthy.

A good hot oil head massage can heal through the Marmas (the vital points) of convergence that are located in our heads. It can also help in regulating the energy (Vayu) and the driving force of all our body activities, thereby resulting in a healthy mane. 

Further, a hot oil head massage helps in inducing stretching force in our roots, lubricating our scalp, and conditioning our tresses. Thus, resulting in lustrous and healthy hair naturally.

best oils for oil massage

Top 10 Benefits Of Oil Massage For Hair Growth

Did you know that frequent washing of hair often strips them of essential nutrients? Hair oil works as a perfect replenishing agent that provides excellent hair nourishment. 

Massaging the oil on the scalp helps in opening your pores for excellent oil absorption. Regular oil massages can also overturn the harmful effects of the chemicals and hair medications.

Not only this, it also increases blood circulation, strengthens roots, and improves hair growth. Below are a few other benefits of an oil massage. (1) (2) (3)

benefits of oil massage

1. Strengthens Hair

Extreme dryness, split ends, hair breakage and flat hair are the signs of weak hair roots. Some of the factors that can cause weak roots are poor diet, heat tools, cold temperatures, certain hair products, and more. 

It is normal to lose 120 to 150 hair strands daily. But if you are experiencing more hair fall, then an oil massage could help you strengthen your hair. Oil massage increases the blood circulation in your scalp and stimulates the transfer of the nutrients to your hair roots, thus strengthening the hair.

Good oil can also unclog pores, allowing better absorption of nutrients and boosting hair growth.

Read - Scalp Massage for Hair Growth - Does It Really Work?

2. Prevents Dandruff

Dandruff, which is caused by scalp dryness, is one of the main reasons for hair fall. It damages roots, causes itching and hair breakage. A regular oil massage for hair keeps your scalp nourished and stimulates oil glands to generate more natural oil. When sufficient oil is produced, it keeps your scalp moisturized and healthy, thus preventing dandruff. 

Also, remember that excess oil can hinder growth by clogging your pores. So it is always recommended to wash your hair regularly with a mild natural shampoo for maintaining a good balance.

Read - How To Get Rid Of Dandruff Naturally - 10 Best Remedies

3. Lessen Frizz

According to Ayurveda, high Vata dosha leads to thin, frizzy, and dry hair. Regular oiling helps in balancing Vata dosha. 

Applying oil to the hair develops a defensive sheath on your hair that staves off the harmful UV rays from making the hair dry and frizzy. Oiling moisturizes the hair, which also helps to lessen frizz and flyaways.

hair oil to remove frizz

4. Nourishes Your Hair

Oil, when massaged on the scalp, thoroughly penetrates deep into the skin of our scalp in a way no shampoo or hair product can. Therefore, when the oil gets absorbed deep into the scalp, it nourishes your hair tissues and follicles from within. 

Lipids are essential for hair health. However, they are lost due to exposure to pollution or chemical treatments. Oils have fatty acids that help in replenishing the lipids and natural hair shine.

5. Adds Luscious Shine

A luscious glossy finish is the main impressive component of healthy hair. Hair oil increases the shine by turning your hair shaft hydrophobic, which deters the external cuticle from swelling and forming a scaled texture.

A glossy and smooth cuticle contributes to healthy and shining hair. Heat damage makes the hair more brittle that develops the split ends. Oil massage treats the split ends and nourishes your hair from the inside out to maintain the luscious shine. 
Read - How To Make Hair Silky Naturally - 10 Best Hair Care Tips

6. Prevents Premature Greying

Premature hair greying is another common hair concern faced by teens and adults these days. It can happen when your body doesn't produce enough melanin. The more the concentration of the melanin, the darker the hair color. And the lack of the melanin in hair results in greying.

Oil massage provides adequate blood flow and nourishment to the hair follicles that retain the hair color by producing melanin. Regular oiling also forms a defensive sheath across the hair strands. Due to this, our hair gets the much needed protection from the UV rays and pollution (one of the main factors that can contribute to hair lightening).

Read - Home Remedies For Grey Hair - 10+ Ayurvedic Methods

oil for premature graying

7. Relaxes Mind And Body

Oil massaging your scalp facilitates blood circulation, which soothes nerves and capillaries. Oiling hair regularly relaxes the body and mind, improves mood, and alleviates stress. As stress is the main contributor to hair loss, oil massages could boost hair growth too.

8. Protects Hair

Just as the skin requires protection from the harsh weather and sun, the hair also needs good shielding. Oil massages could help create a protective layer for the hair strands so that the hair develops resistance and doesn't get damaged.

9. Prevents Hair Fall And Split Ends

Hair fall is the direct consequence of an unhealthy hair and scalp. A healthy scalp doesn't shed hair follicles. An oil massage can significantly improve scalp and hair health, thus decreasing hair loss.

Split ends are also one of the main inhibitors hair growth and they can also be treated with a hot oil massage.

Read - How To Stop Hair Fall - 36 Best Tips & Home Remedies

hair oiling for hair fall

10 Prevents Scalp Infection

The clogged pores on the scalp can lead to many problems like irritation, bacterial and fungal infections, etc. These infections can further lead to dandruff and provide a suitable environment for hair lice. A hot oil massage can nourish your scalp and help prevent any infections.

5 Best Hair Oils For Head Massage

It looks like an oil massage is a definite need to nurture the hair. However, did you know that these benefits can double when you use the right oil? There are a few oils that could do great wonders for the hair which you might not know. All you need is just 10 minutes to crimp your hair strands smoothly with oil-dipped fingers.

Are you ready to find out the best hair oil to massage your hair? Scroll down for the five best hair oils that are well suited for every hair type. These oils are all free from chemicals and are known to offer crucial nourishment and nutrients to the hair. Let's get started! (4)

1. Coconut Oil

Coconut Oil has huge quantities of fatty acids that allow the oil to enter the hair without evaporating. Coconut oil has plenty of minerals, vitamins, and carbohydrates, which are needed for hair health. (5)

coconut oil for hair

Lauric acid is its primary affinity and works as a hair protein that can easily penetrate the hair shaft. With low molecular weight, coconut oil is very light and offers deep conditioning and natural protection. And the best part is - this oil is a good choice for any hair type.
Read - Why Is Virgin Coconut Oil So Good For Your Hair & Skin?

2. Almond Oil

Looking for an aromatic and light hair oil? Then, go for Almond Oil. Almond oil is another commonly available oil after Coconut oil. It is suitable for any hair type and helps heal frizzy, dry hair with split ends. This non-sticky, light oil is loaded with tons of vitamins to strengthen hair and keep it moisturized. (6)

Sweet Almond oil is best suited for your hair as it’s obtained from an Almond tree (Prunus amygdalus var. Dulcis) whose seeds do not contain any poisonous chemicals. It has four most important nutrients for hair - Vitamin E, Vitamin A, Omega-3 Fatty Acids, and Zinc. Adding Brahmi herb to the oil makes it even more beneficial for hair.

almond oil for hair

Read - 10 Amazing Benefits Of Almond Oil For Hair

3. Sesame Oil

Say hello, to the Sesame Oil that's better known as a protein shake for your hair. This oil is rich in copper, phosphorus, calcium, vitamin B1, manganese, magnesium, and zinc. The abundant source of these minerals helps in deep conditioning and gives you the smooth, shiny, and lustrous hair you ever wished for.

Sesame oil also has antifungal and antibacterial properties which help prevent dandruff and any kind of scalp infections. (7)

sesame oil for oil massage

This oil is excellent if you suffer from dry or thin hair that is suffering from split ends. Mixing Sesame oil with ayurvedic herbs such as Hibiscus and Brahmi maximizes the benefits.

4. Bhringraj Oil

Introducing another oil that's very popular in Ayurveda - Bhringraj Oil. Bhringraj oil is known to tackle the whole host of hair crises. The oil is a good source of minerals and vitamins like Vitamin D,  Vitamin E, and Magnesium.

Extracted from the boiling leaves of the Bhringraj, this oil reduces dandruff and offers quick relief to the itchy and dry scalp, thanks to its antibacterial properties. Bhringraj is best known for its earthy smell that offers a meditative and relaxing effect. 

Ayurveda’s most revered formulation, Kama Ayurveda's Bringadi Intensive Hair Treatment Oil is made with the finest Bhringraj, and is clinically proven* to reduce hair fall and treat flaky scalp.

This powerful and nourishing earthy oil works like magic when it's massaged on your scalp and hair. It helps in nourishing your hair follicles and promoting hair growth. Bringadi hair oil can also help in darkening your hair and preventing premature greying of hair.

bhringraj oil for hair

5. Argan Oil

Looking for soft and manageable hair? Then Argan oil should be your go-to oil. Argan oil is rich in antioxidants, minerals, and vitamins. It is an age-old secret and there is nothing that it cannot do to your hair ( right from hydrating to softening your hair). With its richness in antioxidants, vitamin E, and essential fatty acids, argan oil increases the hair's elasticity and restores the lustrous shine from the lifeless and dull hair. (8)

It also helps in treating the hair damage that is caused from the harmful radicals and external factors like the sun, heat, pollution, etc. Whether you realise it or not, our hair gets damaged everyday with chemical treatments, daily pollution, and hot tools. Argan oil can help you in reversing this damage.

How To Do A Hot Oil Hair Treatment at Your Home?

Hot oil treatment is a concept of self-care that brings life back to the hair locks. But that doesn't mean pouring steaming oil on our heads. There is a proper way to execute this treatment much more safely and flawlessly.

Before starting the hot oil treatment, make sure to pay attention to the oil temperature. Never apply hot oil to dirty or dry hair. The cuticle opens when hair is wet, which makes it the best time to use conditioner or oils. Before applying the oil to the scalp, it is vital to know which oil is best for the hair type, so choose one among the five mentioned above.

1. Hot Oil Preparation

Once you decide on the oil to use, it is time to start the procedure. It is always suggested to do the hot oil hair treatment at home when you are free and aren't going anywhere.

Supplies:

  • Any oil of your choice (coconut, olive, almond, avocado oil, etc) - 2-3 tablespoons 
  • Glass container or heat-safe bowl - 1
  • Large bowl - 1
  • Hot water
  • Plastic Shower cap - 1
  • Shampoo & conditioner

Preparation:

  • Take 2-3 tablespoons or enough of the oil in a glass container or a heat-safe bowl.
  • Place the glass container or heat-safe bowl in a huge bowl with hot water. Allow the small one to be partly immersed for some time. 
  • After the oil has surpassed the applicable temperature, do a trial on the wrist before applying it to the hair.

2. Massaging The Scalp And Hair By Using Hot Oil

After you prepare the oil, it's time to get a relaxing massage with the hot oil:

  • Make sure to brush your hair by splitting it vertically down and creating two equal hair sections on the head.
  • If you have thick hair, you can split the two sections further into two sections to make it smaller. Clip these sections to keep them away from troubling you while applying the oil.
  • Now, using your fingers, scoop a bit of oil and spread it onto your palms. Bring it onto  the scalp and massage it in circular motions. Begin from the top of the hair, then work the way down. 
  • Hold up the sections of the hair to apply underneath them. After finishing half of the hair, then keep your hair down and start with another side.
  • After applying the oil throughout your scalp, try to pull the product to the hair ends by using a wide-tooth comb.
  • The hair ends need good moisture so take oil and massage in the mid-shaft of the hair by dragging fingers to the ends.
  • After coating your whole head with oil, cover it up with a plastic bag or shower cap as it keeps the hair in place as you wait. 
  • Let the oil sit for 30 minutes. This gives enough time to repair and hydrate your hair.
  • You can also leave it overnight if you want.
  • For better results, wrap the hair in the hot towel for 20 - 30 minutes till the oil perfectly sits in the hair.
  • Now you can hop in the shower and work some lather using a mild shampoo.
  • If your hair feels greasy after washing, you can shampoo it for the second time and rinse the oil out thoroughly.
  • You can also apply a good conditioner that leaves the hair feeling healthy, soft, and shiny.

You could use this hot oil treatment three times a week or once a week according to your schedule and your hair type.  

FAQs for Oil Massage for hair

When To Apply Your Hot Oil Treatment For Hair?

Applying hot oil treatment for the hair is much-needed when you are experiencing dryness of the scalp, broken or damaged hair strands, prickling scalp with dandruff, hair thinning, and severe hair fall. Hot oil massage is ideally suited for oily hair too. But, it needs less fatty oil to prevent any oily sediment on the scalp.

Is It Good To Wash Your Hair Before Or After A Hot Oil Treatment?

Well, what if I say both times? Yes, washing your hair before the hot oil massage helps in penetrating the cuticles suitably. It is advised to apply the hot oil on the clean scalp. So, washing the hair thoroughly in the morning or night before applying is good. Hot oil treatment might not have a positive impact if pollutants and dirt plug up the hair roots.

Washing the hair after hot oil treatment is similar to taking a shower after a heavy workout. It restores the activities in the scalp then refreshes your mind and body. Deep natural conditioning to the hair offers better results for the hair. 

Should Hot Oil Treatment Be Done On Wet Or Dry Hair?

Hot oil treatments are more effective on semi-dry hair than damp or dry hair. Pores get opened on the washed scalp, where the moist hair strands absorb oil. Try to avoid a hairdryer and let your hair dry naturally, or just pat dry it by using a muslin cloth. Wash the hair before one hour of the treatment, and you can apply hot oil on the semi-dry hair if you want. 

How Long Do You Leave Hot Oil In Your Hair?

After giving a soothing massage on the scalp for 5 -10 minutes, the oil isn't warm. So, wrap the hair with a hot towel, then leave the oil on the scalp for 20 mins.  You can happily relax by listening to music or reading a book. After your hot oil massage, the average time for leaving oil on the scalp is  20 - 40 minutes.

How Often Should You Use Hot Oil Treatment On Hair?

It should depend upon the hair type.

  • For dry hair, use hot oil treatment daily for the dry scalp or till the dryness is controlled. 
  • For normal hair, you can use this hot oil massage treatment 1-3 times a week.
  • For oily hair, once a week is good.

Frequent hot oil treatment can relieve stress and prevent many hair issues, making it the ideal option.

Home Remedies For Grey Hair – 10+ Ayurvedic Methods

Most of us ignore the initial gray strands, but it becomes a nightmare when hundreds of hair go grey. So, it is never suggested to ignore your greying hair problems. You need to keep an eye on your diet and take supplements to support mane health.

Just as the skin loses firmness and sag with age, hair goes through the aging process. They start turning gray naturally in your mid-40s, and this can't be reversed. However, finding grey hairs in your 20s can be disturbing. Dealing with and accepting these silver streaks might feel difficult. 

Let’s start by understanding the reasons why our hair turns grey before we cover some of the most effective home remedies for grey hair.

home remedies for gray hair

Why Does Our Hair Turn Gray?

For understanding the whole greying process, one needs to understand the basic structure of the hair. Every hair strand consists of concentric layers. The outer surface layer is the cuticle; it is made up of small transparent scales that help protect your hair and give them a shiny finish.

The cortex is the second layer; it is responsible for the color of the hair. Due to some external factors, the cortex can become incapable of producing the color pigment, melanin. Without this pigment, your hair turns white. 

When this white hair blends with your other dark hair, it will give you the grey hair impression. This is one of the main reasons for grey hair. (1)

While heredity, smoking, chewing tobacco, and emotional stress can cause grey hair, lack of nourishment is also one of the main reasons for greying. A few of the external factors behind premature greying can include:

  • Genetic tendency
  • A household history of early grey hair
  • Premature aging circumstances such as thyroid disorder, managerial and progeria
  • Iron deficiency 
  • Anemia 
  • Lessened melanocytes generation
  • Stress and pressures
  • Over usage of the soaps and synthetic shampoo 

Exposure to the UV rays which damages the healthy hair follicles

Ayurveda has other reasons for the cause of grey hair. Let us get to know them!

What Does Ayurveda Say About Grey Hair? 

As per the ancestral Ayurveda, the three doshas, Vata, Kapha, and pitta, regulate body activity. Depending upon the environment, geography, and natural genetics, every individual has a different mixture of these three doshas. This harmony is referred to as the intrinsic 'Prakriti' of the person. Any inequality happening in these dosha levels can result in diseases.

remedies for premature ageing

"Premature greying, known as 'Akala Palitya' in Ayurveda, is the outcome of a disturbance in Pitta-Vata doshas. The Bhrajaka pitta, a subtype of the Pitta dosha, is responsible for your hair, skin complexion, and color. 

It is associated with melanocytes that generate melanin pigment responsible for your hair's natural color. Suppose there is any kind of inequality in the Bhrajaka Pitta. In that case, it results in insufficient melanin generation, which in turn results in premature greying.

Home Remedies For Grey Hair

Using hair products with toxic chemicals can result in more greying of the hair. But, don't worry!  Mother Nature blessed us with many natural ingredients, not one or two. Many home remedies will help you get back your dark hair. Help is right in the kitchen. It is possible to get rid of that grey hair naturally. 

It is always ideal to use natural remedies for your hair to get rid of those pesky greys rather than going behind the chemical treatments. Here are the top 10 home remedies for grey hair. These remedies do more than prevent those pesky greys.

1. Curry Leaves And Coconut Oil

Curry leaves do an extraordinary job of revitalizing the roots of the hair. The vitamin B present in the curry leaves helps the hair follicles restore their biological color pigment while keeping premature greying at bay.

Coconut oil is best known as a natural coolant for the scalp and turns as the true combination with the curry leaves to restrain unnecessary Pitta dosha that controls your grey hairs. (2)

coconut oil for grey hair

Ingredients

  • Curry leaves - one cup
  • Coconut oil - one cup

Instructions

Step 1: Mix a cup of curry leaves in one cup of oil

Step 2: Boil this mix till it turns black

Step 3: Strain and cool it. Then store the mixture.Step 4: Massage this mixture into the hair 2-3 times weekly and leave it overnight.

Read - Why Is Virgin Coconut Oil So Good For Your Hair?

2. Almond Oil And Lemon Juice Mask

Both Lemon and Almond oil are the most accessible ingredients in your kitchen. Did you know that both elements assist you in getting rid of your grey hair naturally? Almond oil is an excellent source of Vitamin E that helps nourish hair roots and prevent premature greying of the hair.

Lemon juice helps in accelerating hair growth and adds color, bounce, and gloss to the hair. This mixture of lemon and almond oil works better as the remedy to treat grey hair in millennials. (3)

almond oil for grey hair

Ingredients

  • Lemon juice - 2 tbsp
  • Almond oil - 3 tbsp

Instructions

Step 1:Take a bowl and mix the almond oil and lemon juice 

Step 2: Then massage the mixture generously on your scalp.

Step 3: Leave it for about half an hour. Then wash it using a mild shampoo.

Read - 10 Amazing Benefits of Almond Oil For Hair

3. Amla and Fenugreek Seeds Hair Mask

Amla is a great ingredient that nourishes hair and keeps it healthy. As it's rich in vitamin C, antioxidants, and more nutrients, it can eliminate graying. Both Fenugreek and Amla treat any hair issue while making it strong.

The amino acids in the Fenugreek seeds help the hair follicles fight premature greying. Amino acids that are very helpful for the dark hair color are rich in Fenugreek seeds. Therefore Fenugreek seeds can help you in treating your grey hairs. (4)

Ingredients

  • Amla - 6- 7 pieces
  • Oil - 3 tablespoons
  • Fenugreek powder - one tablespoon

Instructions

Step 1: Add 6-7 pieces of Amla in 3 tbsps oil of your choice (almond, olive, coconut, etc.).

Step 2: Heat it for a few minutes.

Step 3: Then, mix one tablespoon of the fenugreek powder into the oil mixture.

Step 4: Strain, cool, and apply the mixture on the scalp before going to bed. 

Step 5: Use a mild herbal shampoo in the morning to wash it off.


Read - Using Amla for hair - Top 10 Benefits & Ways To Use It

4. Black Tea rinse

Yes, you heard it right, black tea.  Black tea can cover gray hair as it stains the hair then darkens it while adding that shine to the hair. Black tea rinse offers a great keratin and melanin boost that restores the hair pigment. It is known to cover your grey hair effectively. 

So, this black tea is a win-win deal for your hair. It not just covers up the grey hair but makes mane supple and soft. Now you must be thinking about how to utilize black tea. Read on to know!

Ingredients

  • Black tea - 2 tbsp
  • Water - 1 cup
  • Salt - 1 tbsp

Instructions

Step 1: Take 2 tbsp of the black tea, boil it in a cup of water and then add one teaspoon of salt.

Step 2: Cool the mixture and apply it to your washed hair.

Step 3: By doing this once a week, you can get rid of the gray hair.

5. Onion Juice hair mask

Onions are the best remedy and the effective solution for gray hair. It enhances the catalase, an enzyme that darkens the hair. Onion juice is also known to promote hair growth. If it is mixed with lemon juice, it offers more shine to the hair. Being rich in sulfur content, onion makes a noticeable option for the hair. (5)

Ingredients:

  • Onions juice - 2-3 tsp
  • Olive oil -1 tbsp
  • Lemon juice - 1 tsp

Instructions

Step 1: Add 2-3 tsp of onion juice to 1 tsp of olive oil and lemon juice in a bowl.

Step 2: Ten massage your scalp gently in circular motions.

Step 3: After an hour, rinse your hair with a mild shampoo and lukewarm water. 

6. Henna and Coffee 

Henna and coffee mask is the best alternative to dye your hair dark brown. This natural DIY recipe truly adds that rich dark brown with a lovely shine to the tresses without destroying your hair health. 

Henna is an age-old home remedy for hair coloring. But, it is vital to make sure that the henna you picked should be made from organic sources. Because commercially accessible henna comes with many toxic colors and chemicals. (6)

Ingredients

  • Coffee powder - 1 tbsp
  • Any oil - 1 tbsp
  • Henna powder 

Instructions

Step 1: Add one tablespoon of coffee powder to the boiling hot water

Step 2: After cooling the mixture, add the henna powder to make it into a smooth paste.

Step 3: Cover and rest it for a few hours

Step 4: Then add 1 tbsp of any oil (Coconut, Amla or Almond, etc.) and apply all over the hair

Step 5: Then, wash after an hour using a mild shampoo.

Read - How To Use Henna To Dye and Nourish Your Hair?

7. Ghee Mask

What's the main reason for grey hair, lack of nutrition? So, maintaining a healthy diet is helpful, also utilizing ghee could also have positive effects. Vitamins E, K, D, and A in Ghee prevents premature greying. The enzymes in the milk and ghee of cows are known to reverse and prevent the graying process.

Ingredients

  • Pure Ghee 

Instructions

Step 1: Heat your clarified butter or pure ghee, then massage it on the roots.

Step 2: You can cover your hair by using a hot towel

Step 3: Rest it for 20 minutes, then wash it off

8. Ridge Gourd Oil Mask

Ridge gourd contains enzymes that restore the melanin pigment in your hair root. Coconut oil is known to be a natural conditioner that gives unruly hair. Both Ridge gourd and coconut are surely beneficial ingredients for greying prevention.  

Ingredients

  • Ridge gourd pieces  - 1 cup 
  • Coconut oil 

Instructions

Step 1: Add a cup of ridge-gourd pieces in a cup of coconut oil and leave it for about 3-4 days

Step 2: Boil the oil for a few minutes.

Step 3: Then, strain the oil and store it in a container.

Step 4: Massage the oil on your hair and scalp before going to bed, then wash it off with a herbal shampoo the following day.

9. Bhringraj Hair Mask

Bhringraj, also known as the 'King of Hair', is a popular natural remedy for premature grey hair issues. Brahmi Bringaraj is a homegrown herb that deals with heavy stress. This oil fixes the scalp's dryness and prevents the hair from greying.

Furthermore, it lessens hair fall by giving extensive sustenance to the hair roots. It also corrects your metabolism then works on the process of rebuilding the hair's natural color. Bhringraj powder is powerful in retaining color and reducing hair loss.

Ingredients

  • Bhringraj - 1 tsp
  • Coconut oil - 2 tbsp

Instructions

Step 1: Take a small pan, put in on low heat, and add 2 tbsp of coconut oil & 1 teaspoon of Bhringraj leaves or powder.

Step 2: Apply this warm mix on scalp and hair 

Step 3: Leave it on for about one hour and wash it off.

Alternatively, you can also use Bringadi Intensive Hair Treatment Oil to prevent premature greying of hair. One of the key ingredients in the oil is Bhringraj herb. It also has other beneficial natural ingredients for hair such as Amla, Balloon Vine, Hibiscus and Indigo.

10. Black Pepper and Lemon juice

Skip all your chemical dyes and turn to this natural hair dye solution to naturally turn the greys into black. Not just maintaining the hair's natural color, Black Pepper can benefit your hair in numerous ways.

Being rich in antioxidants, black pepper helps in fighting all the signs of greying hair. It enables you to maintain your healthy hair by delaying the process of hair graying. Lemon is also a great ingredient to suppress the premature greying of your black hair. 

Ingredients

  • Lemon juice - 1 tbsp
  • Ground black pepper - 1 tbsp
  • Yogurt - ½ cup

Instructions

Step 1: Add 1 tbsp of lemon juice and ground black pepper in half a cup of yogurt

Step 2: Blend it well, then massage it on the scalp and apply to the entire hair from roots to tips.

Step 3: Let it sit on the hair for an hour, then rinse it off with lukewarm water.

Lifestyle Changes As Remedy For Grey Hair

Are you worried about the few gray hairs that you spotted? Then you have to make a few lifestyle changes that could help you maintain the original hair color longer. We know that premature greying results from stress, genetics, poor diet, hormonal imbalance, and lifestyle. 

So, Ayurvedic experts offered advice on certain aspects that can play an important role in reversing your gray hair. Here are the few things which you can put in place to say adios to your gray hair.

1. Healthy Diet

Aging is unavoidable, yet gray hair doesn't need to be! The primary and major way to stop gray hairs is to eat right. It makes a huge difference. Greens, fresh veggies, fruits with lots of yogurts are what you need to eat regularly. Eating right makes your hair soft and smooth. It even helps in achieving long glossy hair without those sparkling white hair strands hanging around.

There are certain foods with rich properties that prevent gray hair. What is the best part? These are simple and delicious and also provide minerals and vitamins that keep the body humming along. So, you can easily add them to the diet and prevent those white hairs -

A.Ginger

Ginger benefits the body, hair, and skin in many ways. It is even effective in protecting your hair against that premature greying. Have a teaspoon of grated ginger mixed with 1 tbsp of honey to prevent grey hairs. (7)

B. Black Sesame Seeds

Do you want hair that is as black as the black sesame seeds? These black sesame seeds are known to be powerful elixirs for grey hair; they boost melanin production, which helps in giving the hair a tremendous pigment. They are super filled with antioxidants which can neutralize your hair's aging effect. Take one tablespoon of black sesame seeds two to three times a week to reverse the hair graying process.

C. Amla Juice

Amla is the best home remedy in terms of treating your hair. As it's packed with antioxidants and Vitamin C  properties, it doesn't just prevent hair from premature graying but can even make it healthy and give the lustrous shine we all desire for. Try to intake six ounces of amla juice daily or massage your hair one time weekly.

D. Wheatgrass Juice

Drink one-two ounces of wheatgrass juice daily. You can also mix one tablespoon of fresh wheatgrass powder into the smoothies or soups. Fresh wheatgrass juice is healthy and offers many benefits for the body. Using it regularly can turn the gray hair back to its natural color. The lesser-known fact about wheatgrass is that it can enhance your hair health too. (8)

E. Ashwagandha

Ashwagandha is also known as Indian ginseng.  The amino acid named 'Tyrosine' in the Ashwagandha helps stimulate the melanin generation in the hair follicles. Ashwagandha also deters melanin loss. So, girls or guys, you can prevent premature graying with Ashwagandha.  

2. Stop Smoking

Did you know that more than 1 billion people smoke across the world? This statistic is very mind-boggling, yet it's true. Smoking has always been linked with the premature aging of your skin and hair.

A study that is circulated in Indian Dermatology discovered that people who smoke are 2.5 times more likely to start greying prematurely than non-smokers. But why? Because smoking produces H2O2 and more toxic free radicals. We also know how much free radicals can break down your color-generating cells, melanocytes.

3. Protect Hair From Sun

Staying long hours in the sun could be the main cause of premature hair greying. Those toxic UV rays from the sun aren't just bad for your skin, but for your hair too. Staying outside in the sun for a long time damages the scalp and hair, which results in grey and dry hair. So, it is advised to cover your hair with a scarf, umbrella to protect your hair from sun exposure.

4. Reduce The Intake Of Caffeine

Not just smoking, even drinking too much caffeine or tea can also cause grey hair. Drinking caffeine can lower energy levels and can make you mal-nutrition which in turn is responsible for premature greying.

5. Avoid Hair Damage

Few hair care actions could damage the hair. A few are listed below.

  • Bleaching hair
  • Utilizing a brush than a wide-toothed comb, mainly on wet hair
  • Applying much heat through a hair dryer or curling iron 
  • Utilizing harsh shampoo and soaps
  • Washing hair frequently

6. Yoga And Pranayama

Premature graying of the hair is mostly observed in most young men and women these days. The main culprit is stress and an unhealthy lifestyle. Most of the time, it can be due to a deficiency of nutrients. Trying many hair dyeing medicines might not work yet; yoga and pranayama can save your hair from greying. Both yoga and pranayama are known for increasing the scalp blood circulation that improves healthy hair growth. Few yoga poses even help you in dealing with graying hair and offer natural and healthy black hair.

How To Dye Grey Hair Naturally 

The basic and the most obsolete way to hide your grey hair is by dyeing it. Are you looking for any home remedies to dye hair naturally? We got you covered. There are several healthy alternatives for those synthetic hair dyes. Henna and Indigo natural dyes are an ideal option among those choices.

dye grey hair naturally

Read - How To Use Henna and Indigo Powder As Natural Hair Dye

What Is Indigo Hair Dye?

Indigo hair dye is a raw dye from the Indigo plant, also known as Indigofera Tinctoria. The leaves of this plant are refined, sun-dried then granulated to a soft powder. When this mix is blended with water, it releases the blue dye. The application of Indigo over hair not only dyes your hair but also offers incredible hair benefits. It improves hair growth and treats scalp infections. The best part is the indigo hair dye is completely free of chemicals, so it doesn't harm your skin, scalp, and hair in any way.

Benefits Of Indigo Powder For Your Hair:

  • Indigo provokes hair growth.
  • It is a cure for treating dandruff.
  • It is an all-time remedy for premature grey hair.
  • If it's mixed with henna, you get the best source of gorgeous shades of brown.  

What Is Henna Hair Dye?

Henna is also referred to as Mehndi across India. It is the natural hair dye that comes from the henna plant. We could use dried leaves powder or fresh leaves to dye your hair. To make the henna hair dye, collect the henna leaves, sundry until they are crisp and have no moisture and then powder it finely. (9)

Just like Indigo, henna has huge hair benefits. It conditions and strengthens the hair while also promoting hair growth.

Benefits Of Natural Henna For Hair

  • Maintains good health of hair and scalp 
  • It makes your hair thick.
  • A trustworthy source of hair nourishment.
  • Act as a natural conditioner for your hair 
  • Lessens the hair fall 
  • Repair and treat damaged hair and split-ends 
henna for hair

How To Use Henna & Indigo To Dye Hair Black

  • Make a paste of Organic Henna Powder with tea/coffee decoction & leave overnight. Apply to clean/dry hair.
  • Post 1.5 to 2 hours rinse clear with only water & let it dry
  • Make a paste of Organic Indigo Powder with lukewarm water & apply to clean, dry hair, due immediate color release.
  • Post 1.5 to 2 hours rinse clear with only water.
  • Patch/Strand test advised prior to global application, as some skin/ hair react to even natural products.
  • Allow 5-6 weeks if chemical dye used

How To Use Henna as Hair Pack or mask for Conditioning

  • Mix Henna with curd/egg or water to make a paste
  • Apply from root to tip wearing hand gloves & leave for 30 minutes. Cleanse off the hair using mild shampoo.
natural hair dye

Our Organic Hair Colour kit has Organic Henna Powder as well Organic Indigo Powder. This hair colour kit helps you dye grey hair naturally without harming your hair in any way.
With this, we conclude our top hair greying tips and remedies. If you’ve any other questions or concerns regarding premature graying, you can book a free consultation with our Ayurvedic beauty experts.

How To Get Clear Skin – 13 Expert Tips That Work

At times it can be challenging to understand what exactly your skin needs to remain healthy and nourished. Many beauty routines are hyped by social media influencers and cosmetic companies to promote their products, hence there is a mammoth of information bombarding the internet, and a lack of clarity about what exactly would be suitable for your skin. With this being said, for most of us, the ultimate quest to get clear skin still remains.

What Is Clear Skin?

Having clear skin means having a naturally radiant and even skin complexion that is free from scars and blemishes. Moreover, clear skin is also free from acne and pimples.

how to get clear skin

Sounds like a dream, right? Well, it’s indeed very difficult to have clear skin all the time. In fact, it helps to embrace those tiny scars and spots that appear on your skin from time to time. Aspiring for perfectly smooth, radiant, and clear skin might make you obsess over it negatively.

It also helps to remember that while some people are naturally gifted with clear skin, others might need to put in that extra work. Various factors like exposure to dirt and pollution, genetic factors, lifestyle and diet, and your cosmetic products' quality determine your overall skin complexion. One or more of these factors could be the reason you struggle to maintain clear skin.

One thing that remains in our hands is the ability to take good care of our skin. We can see our skin becoming clearer when we start following a healthy skincare regime.

The following are some of the tips based on recommendations from the top dermatologists and from research and studies conducted on ‘How to get clear skin’.

  • 1. Wash your face twice a day with a mild cleanser

Do you know that our face is exposed to bacteria, dust, pollutants throughout the day? Washing your face helps by preventing these elements from harming your skin. Moreover, if you frequently face breakouts or have oily skin, you must stick to the routine of washing your face in the morning and evening. 

A study was conducted, focused majorly on face washing. In the study, the participants were instructed to wash their faces once, twice, or four times daily for six weeks. By the end of the study, it was reported that the participants who washed their face twice daily experienced a significant reduction in the acne lesions than those who washed their face once a day.

While washing your face, it is best to use a cleanser that is mild and doesn’t contain an excess of ingredients or chemicals and is fragrance-free. When it comes to cleansers, it is best to keep it simple, as another study revealed no extra benefit of using cleansers with too many ingredients. We strongly recommend using natural face cleansers.

Our recommendation -
We recommend using our award-winning Rose Jasmine Face Cleanser, made from Pure Essential of Kannauj Roses. Each Kannauj Rose is handpicked by our experts and steam-distilled for an unmatched level of purity. It is a gentle cleanser that deeply hydrates and keeps the skin soft and smooth. It is suitable for all skin types and can be used twice a day.

natural face wash for clear skin

Read - 8 Best All Natural Face Wash and Soaps For Your Skin

  1. 2. Moisturize Daily


Now, you might be wondering, what role does moisturization play in helping you achieve clear skin? Well, moisturizing is an essential step in maintaining suppleness and providing the necessary nourishment to the skin’s healthy cells. This secures your skin from dryness, irritation, and resultant breakouts. When your skin is dehydrated it tries to compensate for the dryness by producing more oil. And then what happens next? Breakouts.

Similar to cleansers, it is not at all necessary to purchase moisturizers that are loaded with ingredients. Look out for non-comedogenic moisturizers so that your pores remain unclogged. Those who have oily skin should opt for moisturizers labeled as ‘lightweight’ so that you don’t feel that heavy, greasy texture on your skin. It is also suggested to switch to heavier moisturizers during winters since the air's coldness and dryness leave the skin tight and dried out.

Our recommendation -
We recommend Eladi Hydrating Ayurvedic Face Cream to enhance your skin texture through daily moisturization. This formula is prescribed in the ancient Ayurvedic text of Ashtanga Hrudayam as the ideal skin treatment. It contains natural ingredients like Costus and Cardamom processed in pure Coconut Milk and Sesame Oil. Together, they work on your skin to reveal a hydrated, nourished, and clear complexion.

natural moisturizer to get clear skin

Read - Which is the best face cream for women?

  1. 3. Use sunscreen


Sunscreen isn’t to be applied just during summers. Your skin needs protection every day, including winters and even those times when you are indoors. Does your face become extra oily on the application of sunscreen? Then, opt for one that reduces the oiliness so that your face remains matte and free of pimples.

Ensure that your sunscreen has a good amount of SPF (at least 20+) and is lightweight. Prefer the ones with a PA++ rating, as they protect you from both UVA and UVB rays while also guarding your skin against sunburns and wrinkles.

Our recommendation -
We recommend our natural-origin Natural Sun Protection to protect your skin against the harmful rays of the sun. It is made using natural-origin, UV protection minerals such as Titanium Dioxide and Zinc Dioxide that reflect the sun rays from exposed skin. Its natural Glycerine and Olive Oil condition skin without making it greasy.

sunscreen for clear skin

Read - Which Sunscreen Lotion Is The Best For You?

  1. 4. Use a toner, but not just any toner


Toners help to eradicate the final traces of dirt and grime that remain in your pores, even after cleansing your face. It also tightens the skin and prevents premature aging. Hence, a toner is important. However, did you know that toners with a high level of alcohol could strip the moisture from your skin and make it extremely dry? This could even worsen acne issues. Hence, you should opt for natural toners that are free from alcohol.

Our recommendation -

We recommend Kama Ayurveda’s range of natural floral distillations of Rose, Lavender, Vetiver & Mogra that act as wonderful natural skin toners. They keep the skin fresh, hydrated, and lightly fragranced. These toners help in the removal of oil and debris from the surface of skin’s cells while repairing and smoothening the skin’s surface. 

toner for clear skin

Read - How To Use Toner - The Complete Guide To Skin Toners

  1. 5. Exfoliate

When achieving clear skin is your target, exfoliation is a must. The very realization of having dead skin cells on your face isn’t a pleasant thought. While many assume that exfoliation is restricted to certain skin types only, the same isn’t true. Every skin type benefits from exfoliation! However, using the right products and not overdoing exfoliation is the key. While some skin types can daily handle exfoliation, others need to do it just once or twice a week. So, pay heed to what your skin needs, and you’ll be good to go!  

Our recommendation -We recommend Kumkumadi Brightening Ayurvedic Face Scrub for gentle regular exfoliation.  Unlike the chemical scrubs with plastic microbeads, this herbal face scrub is made with natural substances that give an exfoliating effect to the skin. This ultimate complexion polisher has the finest Kashmir Saffron and finely ground Sweet Almonds that lift away pollutants and impurities for a glowing complexion.

face scrub for clear skin

Read - Which natural scrub is best suited for your skin?

  1. 6. Relax and get plenty of sleep


Lack of proper sleep could also be the reason behind unclear skin. Did you know insufficient sleep could cause your skin to break out often? Based on a study performed in 2015, 65 percent of the participants who affirmed to have acne also reported being tired most of the time. The theory states that reduced sleep could cause the body to release compounds that cause inflammation. These compounds end up causing the skin to break out or worsen acne concerns. So, make it a point to get at least six to eight hours of sleep every day to support the skin to remain healthy.

  1. 7. Go Easy On The Sugar


Even though there aren’t many studies conducted to establish the connection between your skin and the diet you consume, some studies prove that food items higher on the glycemic index could be linked with acne and breakouts. To reduce the food with a high glycemic index begin to lessen your intake of processed carbs, which include white bread and even baked goods. Turn down the cravings for sugary sodas and sweets. Instead, kindle a fondness towards fruits, vegetables, and healthy sources of protein. Last but not least, cut down on the consumption of alcohol.   

  1. 8. Maintain hygiene


Several factors come into play towards maintaining good hygiene for a clear face. Firstly, change the pillow covers regularly. While sleeping, the dirt, bacteria sweat present on the skin gets transferred to the pillowcase. Just cleansing and following the skincare routine isn’t sufficient to prevent acne breakouts. Using fresh pillow covers regularly is also important to avoid dirt from accumulating on your skin.

Next, remember to clean your makeup brushes frequently. Do you know makeup brushes carry dirt and debris that could block your pores? Hence, gently wash your brushes every other day! Lastly, make it a point to clean your phone. Since your cell screen is prone to picking up lots of bacteria, this could very easily be transferred onto your face while having a phone conversation. Wiping your phone with an antibacterial wipe multiple times could destroy these germs. 

  1. 9. Don't pop those pimples


No matter how much you are tempted to pick up at a zit, you have to resist it for the sake of your skin. Popping a pimple or zit ends up exposing the pore to bacteria that could even be present on your hands. This could cause an infection and leave a scar on your face which would be the last thing you wish to have on your quest to achieve clear skin. If your pimple hurts, book an appointment with your dermatologist. They could suggest specialized treatments to heal the pimple while minimizing the risk of infection. 

  1. 10. Stay hydrated and eat a healthful diet


The most common health tip shared by numerous dermatologists is to keep your body hydrated at all times. It not only supports the healthy functioning of your body but also flushes out the toxins that could harm your skin. With that being said, there is no substitute for water, every cell in our body requires water. Drinking water aids in keeping the skin cells healthy. Also, what diet you consume reflects on your skin. Remember to have a healthy, balanced, and nutritious diet so that it benefits the body as a whole. Diet rich in plant food and lean protein would provide the nourishment that your skin requires. 

diet for clear skin
  • 11. Minimize stress

Did you know there is a connection noted between stress and acne by researchers? Hence, if you are facing stressful times, pick up an activity that could help you de-stress and hit the goal of acquiring the perfect skin you desire! One of the activities that you could rely on for maintaining the health of your body and your skin could be exercising for 30 minutes at a moderate intensity level. Practicing meditation and breathing exercises could help you to calm your mind and lower stress levels. You could even maintain a journal or write it out to de-clutter your mind.

  1. 12. Use non-comedogenic products

You may often come across the word non-comedogenic written on beauty products. However, not everyone is aware of what it means. Comedogenic products are those which could block your pores and worsen your skin concerns. Did you know pores are also called comedones? So if a product is stated to be non-comedogenic, what it means is that the ingredients present in that product would not clog your pores. Hence, when you are to manage your acne breakouts and acne flare-up, it is essential to opt for non-comedogenic products only. 

  1. 13. Use clay masks

Clay is an excellent way to keep oil away from oily and acne-prone skin. It can clear the impurities and absorb excess oil present on your face. If you use natural clay masks, they never leave your skin feeling dry or irritated. You could apply a clay face mask once a week.

Our recommendation - 

We recommend our Suvarna Haldi Chandan Face Pack, a 100% natural, skin-illuminating clay mask with purifying, antibacterial Haldi (Turmeric) and soothing, anti-aging Chandan(Sandalwood). Regular use helps clarify and smoothen skin texture, as acne and blemishes are reduced in intensity and frequency.

clay mask for clear skin

So, these were the simple tips that you could implement in your skincare routine to get clear skin. Remember to consult with your dermatologist before making significant changes in your skincare regimen and especially if your skin is highly sensitive. You can also book a free virtual consultation with our Ayurvedic beauty experts.

Your Guide To Get Rid Of Uneven Skin Tone Naturally

Everyone desires clear, even, and glowing skin. Although there is no such thing as perfect skin, certain skin issues like hyperpigmentation might make your skin tone appear more uneven than normal.

You might notice your skin tone appearing darker in some areas (like the area around the mouth and eyes) and lighter in others. And this can be worrisome.

uneven skin tone

Using a face primer and a layer of concealer and foundation can help in hiding those uneven patches. But did you know that you can even out your skin tone naturally? 

Rather than dedicating hours to perfecting makeup blending, consider finding an uneven skin tone home remedy that works for you.

For this, the first and foremost step you need to take is to find the root cause. Let us discuss some of the leading causes of uneven skin tone - the biggest one being hyperpigmentation.

How Hyperpigmentation Causes Uneven Skin Tone?

Hyperpigmentation isn’t a skin condition but rather a term that refers to dark spots on the skin. Hyper means above. Pigment means color. Together, hyperpigmentation refers to excess production of melanin. Melanin is a pigment that is produced by melanocytes. It is responsible for the color of our hair, eyes, and skin.

You can observe the excess production of melanin after a day in the sun when your skin gets tanned. This happens because the complex polymer is a part of our body’s natural defense against harmful UV rays. Melanocytes increase their production of melanin in response to sun exposure. As the production levels of melanin increase, the dark brown colored pigment spreads across our skin. These spots are formed when melanin is overproduced and can range in color, size, and shape.

Prevention is always better than cure when it comes to warding off the harmful effects of the sun. But, if you already have hyperpigmentation, uneven skin tone treatment is possible naturally with home remedies.

Unfortunately, hyperpigmentation isn’t the only cause of uneven skin tone. 

What Else Causes Uneven Skin Tone?

Various other factors besides hyperpigmentation can trigger uneven skin tone. Some of the most common ones are listed below.

Sunlight

Do you love to bask in the winter sun during chilly days? Well, who doesn’t! But when this love affair with the sun becomes too intense, you have problems to face. Your skin produces excessive melanin, as discussed above. The UV rays damage your skin cells by making the exposed areas darker than the others. (4)

Skin Inflammation

Skin inflammation, caused by acne or injuries like cuts, eczema flare-ups, and burns, is never fun. Besides being uncomfortable, it can also leave a reminder in the form of scars or dark spots. When the skin undergoes the healing process, our natural protector, melanin, gets triggered. As a result, our skin tone becomes uneven. (5)

Dryness

Dry skin often lacks sebum, making it vulnerable to cracking up easily. Unhealthy or damaged skin triggers melanin which leads to discoloration and patchy skin.

Aging

Age spots, also known as solar lentigines, are dark patches caused by sun damage as we age. Over time, these dark patches tend to darken and become more noticeable and pronounced. Age spots are most common for people with lighter skin tones, though they can affect all skin tones. They are usually flat, oval-shaped, and beige, brown, or black colored. Generally, age spots are observed in the most exposed areas to the sun for many years (like on the face, shoulders, arms, hands, and chest.) (6)

Hormonal Imbalances

Going through the hormonal changes in the body is enough as it is, but alas, they can also cause uneven skin tone. Especially if you are on some form of contraceptives or pregnant, the imbalance in hormones leads to high melanin production. Another word for all of this is melasma. You may also develop melasma if your skin reacts to certain drugs or cosmetic products.

Air Pollution

Though you can’t see them, floating particles in the air like smoke, chemicals, dust, and carbon dioxide are always present. These particles can seep into your pores, and as they get into your pores, your immune system gets into defense mode. Your skin starts producing excess melanin. As a result, your skin becomes more uneven. (7)

How To Correct Uneven Skin Tone

Armed with the knowledge about the underlying causes of uneven skin tone, you can now begin treating it. Let us take the first step towards correcting your complexion. Ready to get started? Read on.

1. Opt For A Skincare Routine That Suits Your Skin Type

You need to choose products that suit your skin type. Using the wrong products can lead to additional problems like acne or dry, flaky skin instead of treating discoloration. If you are not sure which formulas are best suited for your skin type, don’t worry. 

Here is some help -

Dry Skin

If you have dry skin, you need to look for mixtures with more oils or lipids than water (water-in-oil emulsions). Products with lipid film will smooth out cracked skin and prevent further loss of water from the epidermis (skin’s outermost layer). So, use products that have water-binding ingredients like urea, glycerin, and lactic acid. These ingredients enhance the hydrating effects of moisturizers.

Check Kama Ayurveda’s Recommended Products For Dry, Dehydrated Skin

Combination Skin

If you have combination skin, you need to take special care. For dry areas, you need to use products that contain more oils or lipids than water (water-in-oil emulsions). And for oily areas, to prevent clogged pores, you need to use products that contain more water than oils and lipids (oil-in-water emulsions).

Normal Skin

If you have normal skin, you need to focus on keeping the skin clean and moisturized without making it too oily. So, use water in oil emulsion formula for daytime, and an oil-in-water emulsion formula is recommended for nighttime use.

Check Kama Ayurveda’s Recommended Products for Normal Skin

Oily Skin

Oily skin types should only use oil-free fluids. Find oil-in-water emulsion skincare products that are labeled “non-comedogenic.” These products decrease the likelihood of clogging enlarged pores.

Check Kama Ayurveda’s Recommended Products for Oily Skin

2 Exfoliate Your Skin Regularly

Exfoliation is key to addressing uneven skin tones. It enhances the effectiveness of cleansers, toners, serums, and moisturizers by allowing them to better penetrate the skin's epidermis. 

To let these products work their magic, it's essential to clear away dead and dull skin cells. Choose an exfoliator suited to your skin type and use it bi-weekly to diminish dark spots.

For optimal results, apply the exfoliator to clean, damp skin and gently massage in circular motions using your fingers. Rinse with lukewarm water. Remember, over-exfoliating or being too rough can disrupt the skin's balance, potentially exacerbating issues.

3. Stay Hydrated

As we all know, drinking at least eight water glasses helps keep the skin youthful and glowy. It also helps in replenishing the skin and reducing the early signs of aging. Drinking water is the best way to stay hydrated. Also, avoid consuming carbonated drinks or have added sugars as these drinks cause pimples and build-up oils. Alcohol, too, can dry out the skin.

4. Apply Sunscreen

As discussed above, staying out in the sun for too long causes hyperpigmentation. To protect your skin from the sun to some extent, make sure to apply good sunscreen during the day, even in winters. Reapply it whenever you are directly under the sun. This also helps in keeping the age spots at bay. (8)

Read - Which Sunscreen Lotion Is The Best For You?

5. Maintain A Balanced Diet

Don't just limit your skin treatment to using suitable skin care products. Consider taking it to the next level and treat it from the inside by consuming only the best food for glowing skin. Avoiding all types of junk food is essential when it comes to maintaining good skin health.

These foods may trigger flushed, uneven complexions. Certain foods like sugary snacks can also speed up the development of age spots and uneven complexions. So, avoiding them helps in achieving the even skin tone that you desire.

Foods items to avoid are -

  1. Alcohol - alcohol causes blood vessels to dilate. This leads to a flushed face.
  2. Spicy foods - Spicy foods increase redness.
  3. Foods that are high in refined sugars.
  4. Dairy products - dairy products can trigger various skin irritations, including acne.
  5. Greasy or overly processed foods.

Consuming large quantities of fresh fruits and vegetables will heal your skin from within. They also help in fighting sunspots and give your skin deserved protection against free radicals. Maintaining a balanced diet is a more permanent and long-term solution for treating uneven skin tone.

Foods to include are -

  1. Green tea - As we all know, green tea is great for skin as it is rich in antioxidants. These antioxidants help in improving the quality of your skin while reducing the visible aging effects.
  2. Citrus - Citrus-rich foods like oranges and tomatoes help reduce pigment, repair skin cells, and minimize the effects of UV exposure. Grapes, carrots, and watermelons, a great source of a powerful antioxidant called Lycopene, can quench free radicals.
  3. Salmon - Salmon, Tuna, and other kinds of seafood are rich in healthy fatty acids and Omega 3. These foods help in preventing hyperpigmentation and allow your body to repair the damaged skin.

6. Regular Exercise

If you desire a healthy and fit lifestyle, you should work out for at least thirty minutes five days a week. When you keep your body fit, you ensure better circulation, which will help with the production of new skin cells. Production of skin cells is really important when it comes to achieving even skin tone and healthy-looking skin

Home Remedies For Uneven Skin Tone Treatment

The following are the different home remedies that can give you the even skin tone you dream of.

1. Lemon

Dark patches that cause uneven skin tone always get weaker when treated with the high acidity levels of lemon or lemon juice. The richness of vitamin C and other anti-inflammatory compounds in lemon makes it an excellent remedy for any skin issue. However, before using it on the sunburn affected area, make sure it is diluted so that your skin doesn’t burn.

lemon for uneven skin

Step 1: Mix one part of freshly squeezed lemon juice with five parts of plain water. (Alternatively, you can also add honey)

Step 2: Using a sponge or cotton ball, dab the mixture on the affected area.

Step 3: About ten minutes later, rinse off with cool water to reveal brightened, glowing skin.

2. Baking Soda

The minerals and carbonate salt content present in baking soda are excellent for lightening uneven specks on your skin. The exfoliating properties of baking soda also help provide a natural cleansing and calming effect to the skin.

Step 1: Make a paste with baking soda and a little bit of water. 

Step 2: Apply the paste onto the skin and use your fingers, moving in circular motions, slightly scrub your face.

Step 3: Leave it on for about 15 to 20 minutes. Then, rinse off with cool water.

3. Turmeric Powder

As we all know, Turmeric is a time-tested herbal medicine for numerous skin issues. It is popularly used as a natural remedy for brightening dull skin.

As we all know, Turmeric is a time-tested herbal medicine for numerous skin issues. It is popularly used as a natural remedy for brightening dull skin.

Step 1: Mix a pinch of turmeric powder with milk and water to make a smooth paste. (Alternatively, you can also add gram flour to create a paste.)

Step 2: Apply the paste to the affected areas of the skin.

 Step 3: You can leave this overnight and wash it off the following day for reinvigorated skin with an even complexion.

4. Multani Mitti

Multani Mitti, also known as Fuller's Earth, is considered mother nature's gift to rectify a host of skin woes. Its inherent antimicrobial properties and skin-fortifying components help in visibly brightening the skin, clearing all impurities' pores, and preventing acne.

Step 1: Mix Multani Mitti with water or milk of your choice to make a fine paste.

Step 2: Apply the paste all over the face, leave it on for about 20 minutes. Then wash off with lukewarm water. You can repeat this process once a week.

5. Honey And Oatmeal Exfoliant

Honey is an excellent source of antimicrobial compounds. These compounds help in killing bacteria that cause acne and irritation (11). On the other hand, Oatmeal helps in soothing irritation and minimizing redness while gently buffing away dead skin (12). These two ingredients together make for a skin-evening powerhouse.

Step 1: Mix one tablespoon or 15 mL of raw honey with one tablespoon or about 6 grams of ground oatmeal. 

Step 2: Apply this paste on the face and gently rub your skin in a circular motion using your fingertips. Then, wash it away with cool water.

Step 3: You can also add skin-soothing essential oils like peppermint, tea tree, chamomile, or cinnamon oil (13). But, always dilute these essential oils in a carrier oil like jojoba or olive oil.

6. Apple Cider Vinegar And Onion Juice

Apple cider vinegar has become popular these days as a cure-all and is suggested for skin, nails, hair’s good health. When combined with onion juice, it serves as a great remedy to lighten dark spots. 

Step 1: Cut onion and collect the juice that comes from it. Mix this juice with equal parts of apple cider vinegar. 

Step 2: Apply this mixture all over the face and leave it on for about 10 to 15 minutes.

Step 3: Rinse off with cool water.

Best Natural Skin Care Products To Treat Uneven Skin Tone

The following are the six best Kama Ayurveda products proven to give you an even skin tone free of dark spots, blemishes, and age spots. They are made from natural ingredients, so you can be assured of their benefits without having to worry about side-effects.

1. Kumkumadi Miraculous Beauty Fluid Ayurvedic Night Serum

Kama Ayurveda's Kumkumadi Thailam is an Ayurvedic formulation that contains a blend of authentic natural oils and herbs that help the skin appear radiant and youthful. Kumkumadi Tailam is prescribed as an essential beauty treatment for the face in the ancient Ayurvedic text of Ashtanga Hrudaya.

skin care products for uneven skin tone

This aesthetic formulation is clinically proven to illuminate and brighten skin while delaying the signs of aging. This serum also contains pure Kashmiri Kumkuma to give your skin an everlasting natural glow. While the extracts of Indian Madder help tone the skin, Vetiver, and Lotus help calm and cleanse the skin. 

How To Use?

You can use this serum in your nighttime ritual after cleansing and toning your face. After toning your skin with Rose water or any water-based toner, massage the Kumkumadi Miraculous Beauty Fluid Ayurvedic Night Serum gently in upward stroke until it gets fully absorbed.

2. Kama Ayurveda Suvarna Haldi Chandan

Kama Ayurveda's Suvarna Haldi Chandan is a complexion-enhancing face pack. It is proven to give you youthful vibrance, smoothness, and luminosity. With purifying, antibacterial Turmeric, and soothing, anti-aging Sandalwood, this formula helps treat acne and blemishes. With the natural astringent qualities of Rose, this pack tightens open pores and tones the skin. The extracts of Orange Peel which are rich in antioxidant properties, fight against premature skin aging.

3. Kama Ayurveda Nalpamaradi Thailam

Kama Ayurveda's Nalpamaradi Thailam is a natural skin illuminator and de-tanning oil for both face and body. It is prescribed in Ayurveda to lighten complexion as well as repair and soften skin. Potent Turmeric, with its antioxidant action present in this classic formula, is best known to treat pigmentation, uneven skin tone, and marks. Other botanicals like moisturizing Sesame Oil, cooling Vetiver, repairing Indian Gooseberry, and antibacterial Madder extracts in this magical oil help heal and relieve skin damage.

Nalpamaradi Thailam is highly recommended as a bridal beauty treatment for its repairing, healing, and brightening properties.

4. Kama Ayurveda Kumkumadi Brightening Face Scrub

Kama Ayurveda’s Kumkumadi Brightening Face Scrub is a luxuriant face exfoliator that combines a host of skin-repairing ingredients with the potent Ayurvedic Kumkumadi Thailam to smoothen, brighten, and firm skin.

face scrub to uneven skin tone

This Ayurveda formula contains the finest saffron to brighten and moisturize the skin naturally. The ground Walnut powder acts as a gentle exfoliator and removes dead skin cells as well as excess oil. Rich in Vitamins E and D, the finely grounded almonds help nourish and nurture the skin while lifting away impurities and pollutants.

5. Kumkumadi Rejuvenating & Brightening Ayurvedic Night Cream

Kama Ayurveda's Kumkumadi Rejuvenating And Brightening Ayurvedic Night Cream is a perfect leave-in night treatment for naturally radiant and youthful-looking skin. This rich formula is a mixture of potent and rare ingredients proven to brighten skin, reduce dark circles and pigmentation.

night cream for uneven skin tone

Rich in antiseptic properties, the Indian Madder and Aloe Vera present in this formula helps prevent fine lines and reduce the signs of aging. Lotus and Vetiver help in cooling and cleansing the skin while clearing blemishes. Licorice which is an excellent source of antiseptic properties, protects against fungal and bacterial infections.

FAQ Section on Uneven Skin Tone

What is an uneven skin tone?

Uneven skin tone, often referred to as hyperpigmentation, refers to the irregular darkening of patches of the skin, especially on the face. This can be caused by a variety of factors including sun damage, aging, and inflammation of the skin.

What causes uneven skin tone on the face?

Common causes include sun exposure, skin damage from injury, skin inflammation, and certain skin conditions. Other factors, like aging, can also lead to age spots and uneven complexion.

How do different skin types affect uneven skin tone?

Every skin type - dry, oily, combination, and sensitive skin - reacts differently to external factors. For example, oily skin may be more prone to dark spots from sun damage, while dry skin might experience flakiness along with unevenness.

How can I get rid of uneven skin?

Removing dead skin cells through exfoliation and protecting your skin from UV rays are crucial steps. It's also essential to use products tailored for your skin type to ensure the best results.

Is uneven skin tone a common skin condition?

Yes, uneven skin tone is a common skin concern faced by many. Factors like sun exposure, skin damage, and even genetics can contribute to an uneven complexion.

How does sun exposure affect uneven skin tone?

Sun exposure can exacerbate hyperpigmentation and uneven skin tone. Prolonged sun exposure without protection can lead to sun spots, age spots, and worsen the existing uneven tone.

How often should I exfoliate to manage uneven skin?

Exfoliating helps remove dead skin cells, improving skin texture. It's generally recommended to exfoliate 1-2 times a week, but always ensure you're not over-exfoliating as it can disrupt the skin's natural balance.

What role does moisturizing play in maintaining an even skin tone?

Keeping your skin hydrated can help manage uneven skin. Moisturizing ensures your skin barrier remains intact, preventing further damage and promoting healthier skin.

Are there specific products for oily or dry skin to combat uneven skin tone?

Yes, products are tailored based on skin type. For oily skin, non-comedogenic products can help reduce unevenness without causing breakouts. Dry skin types might benefit from hydrating products that lock in moisture.

What are expert-approved tips for evening skin tone?

Experts often recommend regular exfoliation, using sunscreen, staying hydrated, and following a balanced skin care routine tailored to your specific skin needs.

How does hyperpigmentation differ from an uneven skin tone? 

While both relate to skin discoloration, hyperpigmentation specifically refers to the darkening of an area of skin due to an increase in melanin. An uneven skin tone can include hyperpigmentation, but it also encompasses redness, dullness, and other discolorations.

Remember, while managing an uneven skin tone, it's essential to understand the underlying cause and treat your skin with care. Always consult with a dermatologist for persistent skin concerns.

References -

  1. Hyperpigmentation Therapy: A Review - https://www.ncbi.nlm.nih.gov/pmc/articles/PMC4142815/
  2. Latest Insights into Skin Hyperpigmentation - https://www.sciencedirect.com/science/article/pii/S0022202X15526651
  3. Facial hyperpigmentation: causes and treatment - https://onlinelibrary.wiley.com/doi/full/10.1111/bjd.12536
  4. Hyperpigmentation and the sun – What causes dark spots and how can I protect my skin? - https://int.eucerin.com/skin-concerns/sun-protection/hyperpigmentation-and-the-sun
  5. Postinflammatory Hyperpigmentation - https://www.ncbi.nlm.nih.gov/pmc/articles/PMC2921758/#:~:text=PIH%20within%20the%20dermis%20results,at%20the%20site%20of%20injury.
  6. Hyperpigmentation in Aging Skin - https://link.springer.com/referenceworkentry/10.1007%2F978-3-642-27814-3_51-3
  7. Pollution as a risk factor for the development of melasma and other skin disorders of facial hyperpigmentation ‑ is there a case to be made? - https://pubmed.ncbi.nlm.nih.gov/25844605/
  8. The Role of Sunscreen in Melasma and Postinflammatory Hyperpigmentation - https://www.ncbi.nlm.nih.gov/pmc/articles/PMC6986132/
  9. Are Natural Ingredients Effective in the Management of Hyperpigmentation? A Systematic Review - https://www.ncbi.nlm.nih.gov/pmc/articles/PMC5843359/
  10. The Hunt for Natural Skin Whitening Agents - https://www.ncbi.nlm.nih.gov/pmc/articles/PMC2801997/
  11. Honey in dermatology and skincare: a review - https://pubmed.ncbi.nlm.nih.gov/24305429/
  12. Anti-inflammatory activities of colloidal oatmeal (Avena sativa) contribute to the effectiveness of oats in the treatment of itch associated with dry, irritated skin - https://pubmed.ncbi.nlm.nih.gov/25607907/
  13. Commercial Essential Oils as Potential Antimicrobials to Treat Skin Diseases - https://www.ncbi.nlm.nih.gov/pmc/articles/PMC5435909/

Top 6 Turmeric Benefits for Skin & How To Use It?

Who doesn't love turmeric, especially when it seems like it heals almost everything! In the practice of Ayurvedic medicine, Turmeric is considered a universal healer having properties that can strengthen many areas of the body, from respiration to digestion.

Having digestive issues? Take Turmeric. Bad hangover? Consume Turmeric tea. Have fever? Have Turmeric milk. For a lot of problems that we face in our daily lives and with our bodies, Turmeric always works as a go-to remedy. But, did you know that Turmeric is also extremely beneficial for your skin?

turmeric for skin

Associated with the sun due to its golden yellow color, Sacred Turmeric is steeped in the Indian culture. It also holds immense significance as it symbolizes purity, prosperity, and abundance!

In this article, we’ll explore the various ways in which you can use Turmeric for a naturally healthy, glowing skin.

What Is Tumeric?

Turmeric, also identified as Curcuma Longa, is an Ayurvedic skincare remedy used for over 4000 years now. It is considered as the holy powder for its medicinal value. The critical antioxidant Curcumin in Turmeric has many researched-backed and time-tested benefits. Curcumin is also the compound that gives Turmeric its signature yellow-orange tinge.

Ayurveda uses Turmeric to balance Vata, Pitta, and Kapha (though it can aggravate Vata and pitta when taken in excess). It is very beneficial for rasa and rakta dhatus - the blood and plasma of the circulatory system.

turmeric benefits

Turmeric kindles Agni (digestive fire), which helps in reducing Kapha and ama (toxins). The removal of toxins will help in managing a host of skin diseases too. This is why turmeric is used in both natural and conventional alternative skincare products. 

6 Top Benefits of Turmeric for Skin

Turmeric powder, coined as the most potent spice of all, is made from the roots of Curcuma Zedoaria - native to Southeast Asia. Its list of healing properties includes antiviral, anti-fungal, antioxidant, antibacterial, anti-carcinogenic, anti-inflammatory, anti-mutagenic, and much more.

Read on to know more about homemade turmeric masks and products. Let us also examine some benefits so that you can see if turmeric ought to be a staple in your own skincare routine

1. Turmeric For Skin Whitening

Turmeric is considered one of the most crucial skin whitening ingredients in Ayurveda. It is known to reduce dark patches and even out the skin tone. This is why Hindu weddings follow the tradition of applying Haldi all over the bride’s skin.


These results are because of the powerful antioxidants and anti-inflammatory compounds in Turmeric blending to bring out the skin’s natural health. A recently conducted study showed that using turmeric based lotion can brighten the skin within just three weeks. (2)

2. Turmeric For Glowing Skin

Who doesn’t like to have a naturally glowing skin? However, the environmental pollution and day-to-day stressors can leave your skin feeling dull. Does your skin lack glow and luster? Turmeric to the rescue. The anti-inflammatory and antioxidants present in it will help in reviving your skin by bringing out its natural glow. (3)
Read - How To Get Glowing Skin Naturally?

3. Turmeric To Treat Acne

Acne is one of the most common issues every individual faces at least once in their lifetime. Over-the-counter medicines, skin treatments, or skincare products might cause inflammation or irritation to your skin. So, your safest bet can be natural or ayurvedic ingredients.

Turmeric is one of the miracle spices that fight acne. The antiseptic and anti-inflammatory properties of turmeric help in keeping the bacteria from spreading further. It reduces the redness and swelling of the blemish. (4)

4. Turmeric To Banish Dark Circles

The primary reasons behind dark circles are hereditary, lack of sleep, pigmentation, over-exposure to the sun, or even rubbing or scratching the eyes. I know waking up with tired-looking, pesky under-eye bags can be a big put-off. Luckily, you have turmeric.

Turmeric, being a lightning and anti-inflammatory agent, helps in reducing the appearance of dark circles. It also stimulates blood circulation, which in turn helps in reducing puffiness.(5)

turmeric for skin

5. Turmeric Moisturizes Dry Skin

Dryness makes your skin look dehydrated and dull. This dryness could be even worse during the winter months. Apart from using rich body lotion throughout the day, it is also very important to give your skin extra care. 

Did you know turmeric can alleviate symptoms of dryness? This magic ingredient nourishes the skin, deeply hydrates, and speeds up the process of removing dead cells from the skin. Treat yourself with a turmeric-infused mask to soften and hydrate your skin.

6. Turmeric For Preventing Early Signs Of Aging

Turmeric protects the skin from the harsh UV rays, the number one cause of premature aging. When the natural oils are depleted from the skin, they tend to lose their elasticity and start showing wrinkles and fine lines. Premature aging first begins on the neck, forehead, and the area around the eye. 


The potent antioxidant properties of curcumin prevent free radical production, which in turn helps in controlling aging. These antioxidants also protect the skin cells from damage. (6)

7. Turmeric For Reducing The Appearance Of Stretch Marks

Stretch marks on your stomach, arms, or legs can be very difficult to treat, but turmeric will help lighten them. The antioxidants in Turmeric penetrate into skin and improve the function of the membrane cells. This process helps in lightening the appearance of stretch marks. (7)

turmeric tea for skin

One of the best ways to get the benefits of Turmeric for skin is to include it in your diet in the form of Turmeric milk or Tumeric tea. Also, consider adding Turmeric powder to your curries and other food preparations to aid digestion. A healthy gut, free of toxins is one of the best ways to maintain a clear, healthy complexion.

Since turmeric offers many benefits for the skin, you can incorporate its healing properties into your beauty routine in two simple ways -

  1. Applying Natural turmeric face masks and
  2. Using Natural skincare products that contain Turmeric

Let’s discuss both of them in detail -

8- Natural Turmeric Face Masks

The do-it-yourself turmeric face masks are gaining popularity as they address many skin concerns without potentially harmful chemicals. (1)

The following are the different ways to include the wonderful spice into your skincare regimen to get the desired radiant and blemish-free skin.

1. Turmeric Milk For Face - For healthy, youthful skin

Turmeric and Milk work as a great combination to fight the free radicals that are responsible for damaging your skin. The Alpha Hydroxy Acids (AHAs) present in milk exfoliate the dead cells in the skin and make the skin moisturized and healthy-looking. (8)

What We Need -

  • One teaspoon of Turmeric powder and
  • Two teaspoons of milk

How To Apply - 

Step 1: Mix turmeric powder and milk to make a fine paste. 

Step 2: Apply the paste all over the face and neck. Leave it on until it dries.

Step 3: Wash off with cool water for glowing and younger-looking skin.

2. Turmeric And Mustard Oil - For pigmentation

Vitiligo is a skin condition in which the pigment is lost from areas of the skin, causing whitish patches, often with no clear cause. This might cause your skin to appear pigmented and patchy. Turmeric is an effective home remedy for vitiligo. Turmeric along with mustard oil and stimulate the pigmentation of the skin

What We Need:

  • ½ teaspoon of turmeric powder
  • Few drops of mustard oil

How To Apply:

Apply a mixture of turmeric powder and mustard oil for 20 minutes to the affected area. Do this twice a day for positive results.

3. Turmeric And Lemon - For Skin Lightening

Turmeric imparts glow, and lemon juice has bleaching properties. When used together, these ingredients help in lightening pigmentation and skin discoloration. The citric acid in lemon also deep cleanses the pores with excess sebum (secretion of the sebaceous gland, which makes the skin look oily), bacteria, and dirt. With regular use of this mask, you will observe your skin becoming more even, clean and glowy. (9)

What We Need:

  • One tablespoon of turmeric powder.
  • A few drops of lemon juice.

How To Apply:

Step 1: Mix together the ingredients in a bowl to make a smooth paste.

Step 2: Now apply this paste all over the face and neck with a cosmetic brush.

Step 3: Let the paste sit for about 5 to 10 minutes.Step 4: Rinse off with warm water and pat dry your skin with a clean towel.

Step 4: Rinse off with warm water and pat dry your skin with a clean towel.

turmeric for skin

4. Curd And Turmeric - For Glowing Skin

Curd is known to have good bacteria that help in making your skin glow. Curd nourishes your skin from within and is suitable for both dry and oily skin types. Fuller’s earth possesses cleansing, antiseptic and oil-absorbing properties. It will help in enhancing skin elasticity. (10)

What We Need:

  1. One teaspoon Turmeric powder
  2. One tablespoon of Curd
  3. One teaspoon of Fuller’s earth
  4. One teaspoon of Sandalwood
  5. One tablespoon of Rose Water

How To Apply:

Step 1: Mix all the ingredients in a bowl and make a smooth paste.

Step 2: Now, apply the paste all over the face and neck. Leave it on for 15 minutes.

Step 3: Later, wash off with cold water. You can apply this mask once a week.


Alternatively, you can also use Kama Ayurveda’s Haldi Chandan Face Pack to prepare for the same benefits.

5. Turmeric And Honey - For Well-Nourished Skin

This Turmeric and Honey mask will help you in getting glowing skin while moisturizing it from the inside. As Honey is considered a natural moisturizer, it soothes and hydrates the skin. It also helps in removing acne marks and inhibiting free radicals from causing wrinkles and fine lines. Turmeric, as we know, brightens up the skin. (11)

What We Need:

  • ½ tablespoon of turmeric powder
  • ½ tablespoon of milk and
  • ½ tablespoon of honey

How To Apply:

Step 1: mix all the ingredients to make a fine paste.

Step 2: Apply the prepared pack all over the face and neck. Let it sit for about 10 to 15 minutes.

Step 3: Wash off with lukewarm water and pat dry the face with a clean towel.

6. Turmeric And Coconut Oil - For Hydrated Skin

Coconut oil is known for skin calming, antimicrobial and anti-fungal properties. It is also an excellent natural skin hydrator that helps in preventing excess sebum production. (12)

What we need:

  • 1 tablespoon of turmeric powder
  • Few drops of coconut oil.

How To Apply:

Step 1: Take a bowl and mix the mentioned ingredients into a smooth paste.

Step 2: Apply all over the face and neck after cleansing.

Step 3: Now massage it well in circular motions for a minute.

Step 4: Wipe off after letting it sit for 5 extra minutes.Step 5: Later, rinse off using a mild cleanser.

7. Oats, Turmeric, and Lemon Juice - For Bright and Smooth Skin

This invigorating Haldi face pack capitalizes on the anti-inflammatory properties of oats, making it an excellent moisturizer. Combined with the antioxidant-rich turmeric and the high vitamin C content of lemon juice, this blend promises radiant skin. Both lemon juice and oats serve as natural exfoliants, ensuring a smoother skin texture.

What We Need:

  1. 3 tablespoons of ground oats
  2. Half teaspoon of turmeric powder
  3. Freshly squeezed lemon juice


How To Apply: 

Step 1: Using a food processor, grind the oats into a fine powder.
Step 2: In a bowl, combine the ground oats with turmeric powder.
Step 3: Add the freshly squeezed lemon juice to the mix and stir until you achieve a consistent paste.
Step 4: Spread the mixture evenly across your face and neck.
Step 5: Allow the mask to sit until it dries, then rinse with lukewarm water. Follow up with a gentle cleanser if necessary.

8. Turmeric And Banana Face Mask - For Clear Skin

Banana is an excellent source of many phytochemicals, antioxidants, and moisture that are very important for the skin. While Lectin in bananas kills the acne-causing bacteria, Amino acids nourish the skin and enhance its elasticity. The antioxidants in honey help in shielding the skin from environmental and oxidative damages. It also helps in blackhead removal. You can apply this mask three times a week to keep blackheads and pimples at bay.

What We Need:

  • One teaspoon of turmeric powder
  • ⅓ ripped banana
  • ½ teaspoon of honey

How To Apply:

Step 1: Smash the banana and then add turmeric and honey to it. Mix well into a smooth paste.

Step 2: Apply the paste all over the face and neck and let it sit for about 20 minutes.

Step 3: Later, wipe it out using cotton and wash it off with lukewarm water.

No matter which homemade mask you choose, don’t forget to rinse thoroughly with water and follow up with your regular toner, serum, moisturizer, and sunscreen. 

Also, don’t leave the mask overnight, as turmeric can stain your skin (especially if you have lighter skin). If there is some staining due to this yellow spice, try washing your face with milk.Read - 18 Effective Ayurvedic Face Packs To Treat Your Skin


Natural Skin Care Products with Turmeric

Too lazy for a homemade mask? Don’t worry; we have numerous skincare products that have turmeric as the main ingredient. The following are the four luxurious turmeric beauty products that Kama Ayurveda offers to give you the best skin of your life.

1. Kama Ayurveda Suvarna Haldi Chandan Face Pack

Suvarna Haldi Face Pack is a 100% natural complexion-enhancing Ayurvedic face pack. With Turmeric and Sandalwood as the main ingredients; this face pack improves skin brightness and textural smoothness. It also contains Rose that helps in tightening open pores and tone the skin.

All you have to do is blend two to three spoons of Suvarna Haldi Chandan Face Pack powder with either Kama Ayurveda’s rose water or Mogra water (for dry skin). For sensitive, oily, or acne-prone skin, you can use pure lavender or vetiver water. Apply the mixture to moist skin, leave it on until dry, and rinse clean. Repeat the process once or twice a week.

2. Kama Ayurveda Turmeric and Myrrh Skin Brightening Soap

Kama Ayurveda’s Turmeric and Myrrh skin brightening soap is just what you need to wash away all of your tiredness. Along with the golden spice, turmeric, this soap also contains Banyan, cold-pressed natural crude oil, beeswax, and Sacred Fig.

These ingredients help nourish and purify the skin. But, what we appreciate truly is the exotic blend of the pure essential oils of Myrrh, Frankincense, and Neroli. These oils are best known to rejuvenate our senses. This brightening soap heals acne, blemishes, and pimples, lightens marks and scars, repairs sun damage.

3. Kama Ayurveda Nalpamaradi Thailam

Nalpamaradi Thailam is well known as a natural skin illuminator and de-tanning face and body oil. With Turmeric as the main ingredient, this oil lightens and softens skin, repairs pigmentation, uneven skin tone, and marks. The other components, sesame oil, Indian gooseberry, madder, and vetiver, help hydrate, nourish, and heal the skin.

All you have to do is massage the oil on the affected area, let it sit for about 30 minutes and then rinse clean with a mild cleanser. 
Read - How To Use Nalpamaradi Thailam to Remove Tan

4. Kama Ayurveda Ubtan Soap Free Body Cleanser

Kama Ayurveda’s Ubtan Soap Free Body Cleanser is a refreshing body cleanser. It is packed with essential herbs, cereals, pulses, and nuts like - Turmeric, Almonds, Neem, Oats, Green Gram, Fennel, etc.

These herbs and minerals soften and smoothen the skin while effectively cleansing and exfoliating. On regular use, you can balance and retexturize the skin by reducing the appearance of cellulite.

All you do is mix the powder with water to make a paste, apply it to the face, and massage in circular motions. Then, wash off with regular water.

How To Use Turmeric For Skin?

As discussed before, the most effective ways to use Turmeric for skin is to incorporate it into DIY face packs or use skin products with Turmeric as the key ingredients. Here are some other ways you use Turmeric can benefit you -

1. Turmeric Cleanser for Acne-Prone Skin:

  • Ingredients: Milk, 1 tablespoon turmeric powder, 1 tablespoon chickpea powder.
  • In a bowl, combine turmeric and chickpea powder.
  • Add a few drops of milk to form a thick, smooth paste.
  • Apply evenly on your face, letting it rest for 15 minutes.
  • Rinse with fresh water to get rid of acne-causing bacteria.

2. Turmeric Oil for Radiant Skin:

  • Ingredients: Turmeric essential oil, Olive oil.
  • Combine two drops of turmeric essential oil with 3 tablespoons of olive oil.
  • Transfer to a small container for storage.
  • Apply a few drops nightly before bed, massaging gently. Let it work its magic overnight.

3. Turmeric Scrub for Exfoliation:

  • Combine equal parts turmeric powder, gram flour, and rose water.
  • Gently massage the mixture onto your skin in circular motions.
  • Rinse with warm water.

4. Turmeric for Dark Circles:

  • Prepare a paste with turmeric powder and buttermilk.
  • Apply beneath your eyes for 10-12 minutes.
  • Gently rinse with cool water.

5. Turmeric for Sunburn Relief:

  • For a soothing effect on sunburnt areas, mix turmeric powder with aloe vera gel and apply.


References - 

  1. Effects of Turmeric (Curcuma longa) on Skin Health: A Systematic Review of the Clinical Evidence - https://pubmed.ncbi.nlm.nih.gov/27213821/
  2. Curcuma aeruginosa Roxb. essential oil slows hair-growth and lightens skin in axillae; a randomised, double blinded trial - https://www.sciencedirect.com/science/article/abs/pii/S0944711316302549?via%3Dihub
  3. Effects of Turmeric ( Curcuma longa ) on Skin Health: A Systematic Review of the Clinical Evidence: Effects of Curcuma longa on Skin Health - https://www.researchgate.net/publication/303503087_Effects_of_Turmeric_Curcuma_longa_on_Skin_Health_A_Systematic_Review_of_the_Clinical_Evidence_Effects_of_Curcuma_longa_on_Skin_Health
  4. The beneficial role of curcumin in skin diseases - https://pubmed.ncbi.nlm.nih.gov/17569219/
  5. Infraorbital Dark Circles: A Review of the Pathogenesis, Evaluation, and Treatment - https://www.ncbi.nlm.nih.gov/pmc/articles/PMC4924417/
  6. The Role of Curcumin in the Modulation of Ageing - https://www.ncbi.nlm.nih.gov/pmc/articles/PMC6429134/#:~:text=Curcumin%20applied%20in%20the%20diet,%2Drelated%20diseases%2C%20including%20frailty.
  7. Potential of Curcumin in Skin Disorders - https://www.ncbi.nlm.nih.gov/pmc/articles/PMC6770633/
  8. Dual Effects of Alpha-Hydroxy Acids on the Skin - https://www.ncbi.nlm.nih.gov/pmc/articles/PMC6017965/
  9. Citrus limon (Lemon) Phenomenon—A Review of the Chemistry, Pharmacological Properties, Applications in the Modern Pharmaceutical, Food, and Cosmetics Industries, and Biotechnological Studies - https://www.ncbi.nlm.nih.gov/pmc/articles/PMC7020168/
  10. Effects of Fermented Dairy Products on Skin: A Systematic Review - https://pubmed.ncbi.nlm.nih.gov/26061422/
  11. Honey in dermatology and skincare: a review - https://pubmed.ncbi.nlm.nih.gov/24305429/

In vitro anti-inflammatory and skin protective properties of Virgin coconut oil - https://www.ncbi.nlm.nih.gov/pmc/articles/PMC6335493/

How To Repair Damaged Hair Naturally Without A Salon Visit

Has damaged hair become your reality? Do the words “split ends,” “dry hair,” “frizz,” or “breakage” strike a chord with you? If your hair looks dull and lackluster, has split ends, or feels dry and rough to touch, then your hair is damaged and requires special care. 

Damaged hair tends to become incredibly fragile and breaks more easily. It is essential to learn how to repair it with the right hair care routine. If you are game for restoring your strands, you have come to the right place. Here are some of the most effective ways to take you towards getting a healthy mane.

Top Signs Of Damaged Hair

Treating damaged hair at the right time can save you from many scalp complications like dandruff, psoriasis, and even pattern baldness (Alopecia). 

The first and foremost step to cure any problem is recognizing the signs of damage, agree? So, here are the top signs of damaged hair that you should not ignore.

1. Bumpy Strands Of Hair

Notice how your hair feels when you run your fingers along a single strand. If there are noticeable bumps or an uneven texture, then it indicates that your hair is suffering from damage and has gaps in the protein cells. Bumpy strands and protein deficiency can be treated with natural remedies, salon-based hair treatments options or with a consistent healthy diet.

How To Repair

Rinse your hair with Apple Cider Vinegar or Aloe Vera juice after cleansing. These ingredients are slightly acidic in nature which encourages the cuticle scales to flatten. Thus, removing the bumpy feeling. Also, include green vegetables, proteins and healthy and rich Omega-3 fatty acids in your diet.

eat green vegetables to repair damaged hair

2. Split Ends

Split ends are a common phenomenon for everyone. Your hair starts to develop split ends usually 6 to 8 weeks after a haircut. If the ends of your hair appear brittle and split in less than a month after each trim, then it is a noticeable sign of damaged hair as damaged hair develops split ends very soon. Frizzy hair is more prone to split ends. 

How To Repair

In the case of split ends, trimming your hair is the best advice. Professionals recommend having a haircut once every six to eight weeks.

trim hair to repair damaged hair

3. Hair Loss

In general, we lose 50 to 100 strands of hair every day. Moreover, if you wash your hair, it is very common to find a few strands in your bathroom drainage. But if you find hair on your pillow, shirt, or on the floor randomly even when you haven’t combed it, then it is a clear indication of damaged hair. 

How To Repair

Use natural shampoo and conditioner that are suitable for your hair type. Don’t over-wash your hair as it may remove natural oils leaving your hair dry and dull. Include plenty of protein and iron into your diet and exercise regularly. Make sure you massage your scalp with a nourishing organic oil at least once a week as this helps in improving blood circulation and nourishing the roots. We recommend Kama Ayurveda’s Bringadi Intensive Hair Treatment to prevent hair fall.

repair damaged hair with brigandi oil

4. Dull And Dry Appearance

Does your hair look dull and lifeless all the time? If yes, then your hair and scalp are overexposed to either pollution or too many chemicals. Women who have had too many hair straightening procedures often experience limp or dull hair. The best treatment for this is regular hot oil head and scalp massages. It also helps to avoid chemical products and treatments.  

How To Repair

Wash your hair less to prevent further damage. Most shampoos are designed to remove buildup oils and products from hair. Excessive shampooing can strip off the oils from your hair. It is advisable to wash every other day or even less if you can, to prevent over-stripping the moisture.

To repair existing damage, use shampoos and conditioners that are formulated for dry hair or use natural hair cleansers that are free from all chemicals. SLES & Paraben free Hair Cleansers and Conditioners along with Organic oils can help reverse the damage. 

Read - 12 Best Essential Oils For Hair That Work Wonders

5. Sudden Breakage Of Strands

Do your strands break when you try to style, comb or simply run your fingers through your hair? If yes, then it is a red alert for severely damaged hair. Observe the hair when it falls out. If it includes the bulb (the hair follicle base), this indicates your hair follicle is damaged as normal shedding does not include the bulb of the hair.

How To Repair

Eating a balanced diet, protecting hair from the sun, skipping products that boast of a long-lasting hold, and avoiding drying, bleaching, and styling treatments can limit further damage.

To ease the exciting damage, try the soak and smear method. In the soak and smear method, we shampoo and condition hair like normal. Then, blot hair dry with a towel before applying a leave-in conditioner. Then, immediately apply your coconut oil, sesame oil, olive oil, or jojoba oil and let hair dry.

6. Unresponsive To Hair Styling And Treatment

Damaged hair generally does not respond to any efforts of styling. For example, when you iron your hair and apply serum, your hair might get unruly within an hour or two. When you blow-dry, it will leave your hair messy and frizzy instead of well set. Also, excess use of styling gels and sprays will simply damage your hair further. It is recommended to keep the styling products away until your hair restores its strength.
To repair damaged hair and restore healthy hair, we recommend Kama’s 3-Step Regimen for Hair Care. Start with massaging your scalp with Bringadi Intensive Hair Treatment and leave the oil for at least 30 mins. Next, cleanse your hair with Rose and Jasmine Hair Cleanser and condition it with Rose and Jasmine Hair Conditioner.

3 step hair care regimen for healthy hair

What Causes Hair Damage - 7 Things To Avoid

Healthy hair depends on healthy hair follicles that help in keeping your strands together. When the hair cuticle opens up, your hair can get dry and damaged. Let us get to know some of the most common causes of hair breakage.

1. Inadequate Diet

Ever heard the saying “you are what you eat”? It is true, especially when it comes to hair and skin health. Some nutrients promote hair growth and avoid damage caused to it. So, make sure you include enough iron, folic acid, and zinc in your diet. Adequate amounts of antioxidants and protein can also help you in keeping your hair damage-free. 

2. Too Much Stress

Stress and hair loss are directly linked to each other. Stress can also lead to hair breakage. Telogen effluvium is the name given to temporary hair loss that happens right after a stressful experience. It makes your follicles go dormant and makes the hair break off. Your old hair may fall out too. So, manage your stress levels through regular deep breathing, yoga and meditation to maintain healthy hair.

3. Hair Styling Tools

To get the best results from a flat iron or curling iron, or your hairdryer, you might need high heat. However, when used too much or incorrectly, these tools can damage your cuticles. So, it is recommended to give your strands a break from all the styling tools at least once a week to prevent heat damage.

Also, when styling your hair, use a ceramic version of tools. These tools heat up evenly so that you don’t have to use them on the same sections of hair repeatedly. Never forget to use hair protection serums before styling, these can minimize the damage to some extent.

4. Over Washing And Improper Towel Drying

If you have oily skin, your scalp is also likely to produce excess oil (sebum). This might tempt you to wash your hair more often than you need to. While washing hair every second day is fine, you shouldn’t wash it every day. On the other side, dehydrated hair may only need weekly shampooing. 

Gently massage your scalp while shampooing and apply conditioner smoothly working from ends. After a shower, do not rub your hair vigorously with a towel. Rubbing motion damages your hair as hair is most vulnerable when it is wet. Instead of rubbing off your hair, blot it with a cotton T-shirt. A hot oil massage just before washing your hair also prevents it from excessive dryness.

5. Elastic Hair Ties

Elastic hair ties are a must-have to secure your hair from falling out on the face. These elastic hair ties are also very handy on bad hair days or when you are in a hurry. Using elastic hair ties can cause hair breakage. You can fix this by tying your hair a bit looser or by wearing your hair down once in a while, or opt for a breakage-preventing hair style. Also, make sure you use good quality hair ties, and not the rubber bands that damage your hair.

6. Improper Brushing And Combing

You might have heard that brushing or combing your hair 100 strokes a day makes your hair look good. But, this is just a myth. It is recommended to brush or comb the hair only when you are styling it. Also, make sure to use wide wooden tooth combs as it helps prevent breakage. You need to use a brush only when the hair is dry, and always opt for a brush with natural bristles.

7. Lack Of Hair Trims

Sometimes we avoid getting our hair trimmed to help them grow longer. But that’s not helpful. In fact, regular hair trims help in keeping your hair healthy and free of split ends. Hair trimming is similar to skin exfoliation in that regard. Just like exfoliation removes old cells to help new ones to develop, hair trimming gets rid of damaged, lifeless hair and promotes hair growth. So, see your stylist at least every eight weeks. This helps even when you want to grow your hair as trimming damaged ends prevents hair breakage.

Five Types Of Damaged Hair (And How To Heal Them)

The following are the five types of damaged hair and tips to heal them.

1. Colour Damage

In order to deposit color into your hair or bleach it, the dye should get into your hair shaft. In this process, the color has to move beyond the hair cuticle. The cuticle acts as tree bark and protects the hair from damage. To penetrate into the cuticle, the hair dye uses ammonia. Ammonia elevates the pH of the hair, relaxes the cuticle, and lifts it. When this happens, automatically, your hair gets damaged as the cuticle isn’t meant to be lifted. The longer the cuticle is lifted, the more the hair gets weakened.

Once the cuticle is lifted, hair dye then uses peroxide to break down the natural hair pigment. Peroxide is the reason why colored hair takes on a straw-like structure. It also makes hair extremely dry. Once the hair is rinsed, the cuticle closes. But the hair is already damaged.

How To Heal

Coloring your hair is not recommended, especially when it is already damaged. How to find if the hair is damaged or not? There is a simple technique for it. Stretch a small section of hair and pull it tight. Now pour a few drops of water and notice how long the water takes to absorb into the hair. If it takes less than 10 seconds, note that your hair is damaged, and it has to be repaired before you color it. If it takes more time, then your hair is healthy. This simple test for hair porosity can give insights about your hair quality.
Anyways to lessen the amount of damage, you can use moisture-rich natural hair dyes. Natural hair dyes contain conditioning ingredients that help protect and repair your hair during the coloring process. Natural hair dyes are also completely free from chemicals and hence do not cause hair damage. We recommend Kama Ayurveda’s Organic Hair Colour Kit to dye your hair naturally.

organic and natural hair dye for damaged hair

Read - 2 Best Natural Hair Dyes To Colour Your Hair Beautifully

2. Heat Damage

We all know how bad heat styling is for our hair’s health, yet, we can’t resist doing it. Whether it is a blow dryer, curling iron, or a hair straightener, these tools make styling a lot easier. While these tools give you bouncy luscious hair, unfortunately, there are also many disadvantages for the hair’s overall health. 

These tools dry out the cuticles and change the structure of hair proteins. These also cause split ends and breakage of the ends. You may also find difficulty in brushing and styling the hair as heat styling tools can cause tangles, knots, and breakage.

How To Repair

If you have curly hair and the heat damage has affected your natural curls, sealing back the moisture into your follicles using a deep-conditioning treatment can help regain your natural bounce. Moisture-rich natural conditioners like Moringa oil, Coconut oil, Sesame oil avocado, aloe vera are your best bets.

For straight hairs, you will have to focus on restoring its natural proteins. Leave in treatments that include honey, olive oil, and yogurt help in restoring your glossy appearance. To smoothen broken hair, you can try conditioning spray that has keratin.

3. Mechanical Damage

Do your strands have thin edges, are tangled, or have mid-shaft splits? Then your hair is most-likely mechanically damaged. Mechanical is directly linked to the way you are handling your hair. If you are someone who creates tension by ripping through tangles and rocks braids, weaves, or tight ponytails often, then you should reconsider your hair care. You need to go easy on the combing and styling.

How To Heal

As mentioned above, you need to opt for breakage-free hairstyles and wear your hair down more often. Never comb your dry hair or brush your wet hair. Also, comb your hair only when you style it. 

4. Chemical Treatment Damage

Chemical treatments like perms and relaxers can strip off your hair, which leads to breakage. Once your hair fiber is compromised, we cannot fix it or heal it. So the best thing we can do is to prevent taking chemical treatments. 

How To Heal

To prevent further damage caused by chemical treatments, you need to adjust the hairstyling habits that have created the problem and implement practices that promote hair health. You also need to establish a weekly deep treatment routine for four to six weeks consistently.

5. Sun Damage

Summer means having long days out in the sun, whether you are hitting your local park or lying on the beach. Did you know like your skin, your hair can also get damaged by the harmful rays coming from the sun? Your hair ends up feeling dry and brittle when it is directly exposed to the sun for significant long hours. The sun wreaks havoc on the hair and causes frizziness, split ends, brittleness, and even discoloration. 

How To Heal

The best tips for repairing sun-damaged hair are -

  • Wash with cool water
  • Use sulfate-free shampoos
  • Have regular trims
  • Wash hair properly after swimming
  • Use Organic Sesame Oil for regular hot oil head massage

Natural hair masks for damaged hair 

1. Organic Henna Hair Mask

Henna, popularly known as Mehendi is one of the most beneficial medicinal plants for hair. It is popular as a deeply replenishing herbal conditioner and colorant. It nourishes the hair leaving them shiny, soft and silky. It heals the hair shafts and prevents hair breakage.

Step 1: Mix Organic Henna Powder with Banana, Egg, Fenugreek powder and water to make a paste.

Step 2: Apply from root to tip wearing hand gloves and leave for 30 minutes.

Step 3: Cleanse off the hair using mild shampoo. 

Step 4: Repeat this once in a week for better results.

2. Repair Damage With Avocado

Avocado has now become a common fruit that is available in every supermarket. The fruit is rich in vitamins, minerals, and essential fatty acids. These help in restoring luster to your dry hair. (1)

Step 1: Mash a ripe avocado and add an egg to it. Mix it well to make a paste.

Step 2: Apply this paste to wet hair. Leave it on for at least 20 minutes. Rinse off with cold water.

Step 3: Repeat this once a week if you have damaged hair and once a month for healthy hair.

3. Protein Mask - Egg Yolk + Strawberries + Olive oil

Strawberries are rich in antioxidants, and these add moisture and shine to your hair. Since egg yolk is rich in proteins, it strengthens the strands. Wear this mask when you have time for a long relaxing shower, as the puree might be difficult to wash out with just one rinse. (2) (3) (4) (5)

Step 1: Blend one cup of strawberries in a blender. Then add one egg yolk and three tablespoons of olive oil to the puree.

Step 2: Work the puree into the hair and cover it with a plastic shower cap.

Step 3: Leave it on for about 20 to 30 minutes and rinse it out with cool water.

Step 4: After washing, apply your regular conditioner and rinse off.

4. Deep Cleaning Apple Cider Vinegar Hair Mask

This mask is excellent for deep cleansing your hair. Lemon and apple cider vinegar act as an astringent to wash away excess oil. The zinc and lactic acids in yogurt moisturize your hair. If you have colored your hair, it is advisable to dilute the lemon as there are chances to lighten your hair color. (6)

Step 1: Take half a cup of plain yogurt, one teaspoon of apple cider vinegar, and one table of lemon juice in a bowl. Mix it well and dilute it with two tablespoons of water.

Step 2: If you have dry hair, you can add a tablespoon of honey too.

Step 3: Apply all over the head, mainly focusing on the scalp. Massage gently in circular motions.

Step 4: Leave on for one minute. Then, rinse away.

5. Softening Mask - Egg + Whole milk + Coconut oil

As the egg is rich in proteins, it helps in nourishing your hair. The fatty acids help in making your hair look smooth and shiny. Just like how coconut oil and milk smoothes your skin, the same way they smoothen your hair too. They make your hair more shiny and vibrant. (7)

Step 1: Take one egg-whipped, ¼ cup whole milk, and two tablespoons of melted coconut oil in a bowl. Mix the ingredients well. 

Step 2: Since this a watery mask, you might need a brush to apply to your hair. Take one section of hair, paint the mask on to the entire length of your hair. 

Step 3: Cover the head with a shower cap. Warm the hair using a blow dryer on medium heat.

Step 4: Leave on the mask for about 10 to 20 minutes until it cools off completely. Then, rinse it off with cool water.

6. Hydrating Mask - Banana + Olive oil + Honey

The extra virgin olive oil we use in this mask acts as a natural conditioner for your hair. It helps in nourishing dry and brittle hair. Bananas, which are a source of potassium, help in healing damaged hair. And the vitamin A in bananas helps strengthen hair follicles. Additionally, this mask contains honey that has therapeutic properties. (8)

Step 1: Blend one over ripened banana, one and a half tablespoons of olive oil, and one tablespoon of honey together. 

Step 2: Apply this paste to the length of your hair from the roots to the ends.

Step 3: Leave it on for 10 to 15 minutes and rinse off well.

Hair Care Tips To Avoid Hair Damage

To prevent hair from being damaged, brittle and lackluster, you can try the following additional tips too.(9)

  • Lower the temperature on the styling tools - One of the biggest mistakes most of us make is setting the temperature on to tools to the highest degree. Unless your hair is super thick or coarse, you can get the job done with medium or low temperatures. It is best to avoid the heat most of the time.

  • Handle wet hair with care - Hair is at its most vulnerable state when it is wet. So, handle your hair with care. Never try to brush through your wet hair unless the tool is specially designed for wet hairs. Professionals recommend using a wide-tooth wooden comb to detangle your hair. Also, blot the hair with a cotton T-shirt instead of rubbing it harshly with a towel.

  • Embrace leave-ins - Did you know leave-in conditioners and treatments are like 24-hr bodyguards for your hair? Yes, they guard your hair between washes as you don’t rinse them out. There are different leave-ins for different hair types. For example, leave-in treatment for vividly colored hair contains UV protection, which helps prevent your hair color from fading. A leave-in designed for frizzy and brittle hairs contains moisture, making your hair smoother and more manageable.

    For best results, it is advisable to apply leave-in conditioners to damp hair (not soaking wet) and with a wide-toothed comb, comb your hair for even distribution. (10)

  • Seal your bonds - As discussed above in the color damage pointer, the dyes used during coloring loosen your hair’s structural bonds. Once the structural bonds are compromised, your hair is prone to breakage, dryness, and damage. So, to protect your hair from damage, you need to seal your bonds. How? By massaging your hair with Coconut Oil or Sesame oil. Both the oils are known to reverse hair damage, seal in moisture and restore the structural bonds.

  • Don’t let your hair get thirsty - We all know we shouldn’t skip moisturizer as dry skin appears dull and cracked. Similarly, we should embrace a moisturizing regimen that includes oil massage, hydrating shampoo, conditioner, hair mask, and leave-in products if you are prone to dry hair. As dry hair leads to brittleness and fragileness, just like our skin.

  • Swim with care - Regular swimming is excellent for your body, but that is not the case with your hair. Saltwater, chlorine, and pool chemicals make your hair brittle, fragile, and decolor. So, if you are a regular swimmer, never skip wearing a swim cap. Also, immediately after swimming, gently cleanse and condition your hair with products that contain moisturizing formulas.

References - 

  1. Avocado Oil: Characteristics, Properties, and Applications - https://www.ncbi.nlm.nih.gov/pmc/articles/PMC6600360/
  2. Nutrition and hair health - https://www.hairscientists.org/hair-and-scalp-conditions/nutrition-and-hair-health
  3. Here is How Eggs Prevent Hair Loss And Stimulate New Hair Growth - https://www.india.com/lifestyle/here-is-how-eggs-prevent-hair-loss-and-stimulate-new-hair-growth-4070932/
  4. Hair Cosmetics: An Overview - https://www.ncbi.nlm.nih.gov/pmc/articles/PMC4387693/
  5. How to use olive oil for magical hair growth - https://timesofindia.indiatimes.com/life-style/beauty/how-to-use-olive-oil-for-magical-hair-growth/articleshow/64962522.cms
  6. Ethnopharmacological survey of home remedies used for the treatment of hair and scalp and their methods of preparation in the West Bank-Palestine - https://www.ncbi.nlm.nih.gov/pmc/articles/PMC5499037/
  7. Effect of mineral oil, sunflower oil, and coconut oil on prevention of hair damage - https://pubmed.ncbi.nlm.nih.gov/12715094/#:~:text=Among%20three%20oils%2C%20coconut%20oil,the%20protein%20loss%20from%20hair.
  8. Therapeutic and prophylactic effects of crude honey on chronic seborrheic dermatitis and dandruff - https://pubmed.ncbi.nlm.nih.gov/11485891/
  9. A Study on Scalp Hair Health and Hair Care Practices among Malaysian Medical Students - https://www.ncbi.nlm.nih.gov/pmc/articles/PMC5551307/

Shampoo and Conditioners: What a Dermatologist Should Know? - https://www.ncbi.nlm.nih.gov/pmc/articles/PMC4458934/

Your Complete 8-Step Winter Skin Care Guide

We love winters for how cozy and comfortable they make us feel inside our homes. Don’t you just enjoy sipping on warm drinks while sitting in your room with the heater on? As fun as winters can be, there’s one concern that comes with the season’s onset - skin dryness that calls for exceptional winter skincare.

Skin care during winters doesn’t have to be hard. We spoke to our Ayurvedic experts to understand how to take care of skin during winters. In this 8-step guide, we have incorporated their best advice for winter skincare for your face as well as your body. Let’s get started with the basics

1. Create The Right Environment For Your Skin

Dehydration is one of the most common concerns during winters. We don’t realize how our heating systems make the air around us very dry. This reflects on your skin as excessive skin dryness. While moisturizing your skin properly and frequently helps, the better way to approach this problem is to use a humidifier. A humidifier is a device that helps increase the moisture content in the air as well as in our natural skin barrier. It also helps to keep your heating systems at a low or moderate temperature. 

Even during winters, wear light breathable fabrics next to your skin and layer the warm clothes on the top. This will help you avoid skin itchiness caused by synthetic fabrics. 

2. Keep Your Warm Showers Short And Sweet

Do you know that exposure to water is another reason why skin becomes dry during winters? To avoid this, we recommend that you layer your skin with a bath oil before stepping into your shower. 

We recommend using Kama Ayurveda Rose and Jasmine Bath and Body Oil. With pure essential oils of Rose & Jasmine along with Organic Almond Oil, it acts as a perfect pre-shower body oil. Gently massage it into your skin and shower after 10-15 mins with mild soap or natural cleanser. 

Rich in minerals, Vitamins A, D & E, the antioxidant and regenerative properties of this bath oil helps in restoring the natural glow of the skin.

bath oil for winter skin care

Take a quick shower so that you don’t expose your skin to water for a long time. Also, keep the temperature of your water lukewarm. Hot water dries out the skin excessively. Immediately after stepping out, moisturize your skin. Apply moisturizer on the damp skin to retain moisture and keep it soft and supple. 

3. Do Not Forget To Drink Plenty Of Water

When it’s cold, most of us tend to forget to drink enough water. However, the drier and colder climate is known to strip our skin of its natural moisture content. No amount of moisturization can make up for dehydration if you don’t drink water regularly. It’s recommended that you keep sipping on water throughout the day instead of drinking lots of it at once.

You can always warm the water a little and store it in a flask so that you can sip on it throughout the day. Winters are also a great time to indulge in warm teas. One of the best options is lemon ginger tea. You can have it multiple times during the day as both lemon and ginger are great for your health and even aid digestion. 

4. Choose The Right Cleansers and Soaps

Choosing the right cleansers and soaps can switch up your entire winter skincare game. Sometimes, the biggest culprit for your winter skin dryness is a particular ingredient in your daily face cleanser or body cleanser. Notice how your skin feels right after washing your face or taking a shower? If it feels tight or rough, you might be using the wrong product. Toss any face washes with drying ingredients, like fragrances or additives.

Read - Which Is The Best Face Wash For Dry Skin?

We highly recommend that you switch to natural cleansers both for your face and your body. If you like to shower with a bar of soap, then only use natural soaps made with Ayurvedic methods and use cold-pressed pure oils, essential oils, floral extracts, and distillations.

handmade natural soap for winters

5. Gently Scrub Away The Dry Skin

Most of us are aware of how moisturizing your skin is an absolute essential during winters. But no matter how much we moisturize our skin, we can’t get rid of dry skin without some gentle exfoliation. In winters, you might be worried about scrubbing your skin as it could result in bruising of the skin. But with the right choice of scrub, you can exfoliate your skin without any side-effects.

We highly recommend using natural scrubs for the body as well as the face. Unlike the chemical scrubs that have plastic microbeads, Kama Ayurveda’s herbal face scrubs are made with natural substances that give a gentle exfoliating effect on the skin. 

Exfoliation is a must not just to keep our skin clean and free from dirt, impurities, and germs but also to aid in the natural renewal process. Not only will it take off the dry, dead skin cells, but will also help you regenerate new ones. Here are our top recommendations -

  1. Face Scrub For Women - Kumkumadi Brightening Ayurvedic Face Scrub
  2. Face Scrub For Men - Himalayan Almond Deep Cleansing Face Scrub
  3. Natural Body Scrub - Neem Tulsi Tea Tree Body Scrub
body scrub for winter skin care

Read - Which Natural Scrub Is Best Suited For Your Skin?

6. Moisturize Day and Night

We’ve said it before and we’ll say it again - during winters you need to swear by your daily moisturization for that soft, supple, and naturally radiant skin. You must definitely invest in a heavy day cream that takes care of skin nourishment throughout the day and in a night cream that helps your skin renew and rejuvenate overnight.

And that’s just for your face. Apart from that, you need to take care of your body skin’s nourishment as well. Natural body butters are excellent for winters. Dry skin needs a heavier, oil-based moisturizer to rehydrate and body butter is perfect for that. Here are our top recommendations for creams and body butters for winters. 

  1. Day Cream For Women - Eladi Hydrating Ayurvedic Face Cream
  2. Night Cream For Women - Rejuvenating and Brightening Ayurvedic Cream
  3. Day Cream For Men - Hydrating Ayurvedic Face Cream
  4. Night Cream For Men - Skin Brightening Night Cream
  5. Body Butters - Kokum Almond Body Butter or Shea Lotus Body Butter
body butter for winters

Read - How To Choose The Best Night Cream For Dry Skin?

7. Sunscreens Are Not Just For Winters

Who doesn’t love to bask in the winter sun? Well, there’s absolutely nothing as soothing as sitting under the sun (when it does show up) during winter days. But sadly, as much as we love the winter sun, it still damages our skin the way it does during summers.

Sun exposure is another reason why our skin tends to become dry. The radiations of the sun can damage the natural skin barrier. Once damaged, the skin barrier isn’t able to hold much moisture within the layers of the skin. As a result, the skin becomes dull and dry.

Now, we’re not saying stop stepping out altogether. But every time you do, layer a sufficient quantity of sunscreen on top of your day cream.

We recommend Kama Ayurveda Natural Sun Protection as it a broad-spectrum natural sunscreen that provides protection from both UVA and UVB rays. It’s formulated with skin-nourishing and hydrating ingredients such as Olive oil and essential oils of Nutmeg, Ginger, and Lime. The natural minerals Titanium Dioxide & Zinc Oxide present in the sunscreen reflects the sun rays back from exposed skin and boosts hydration.

sunscreen for winter skin care

8. Do Not Forget Those Lips

Last but not the least, our final skin care tip is about your lips. Did you know that your lips have the thinnest skin among all your body parts? This is the reason your lips tend to become chapped during the winters.

For healthy-looking, soft, supple, and nourished lips, one should follow the ancient principles of Ayurveda that suggests the use of natural herbs and flowers to cure dry, chapped, and dark lips. Kama Ayurveda's natural lip balms impart moisture, gloss, and locks the natural oils in for beautiful and healthy lips.

For winters, we recommend Almond and Coconut Lip Balm. With a blend of Coconut Oil, Castor Oil, and Organic Almonds, this hydrating lip balm combines a rich blend of butters and oils to rescue parched and dehydrated lips. 

This 100% Natural lip balm for dry lips is a non-sticky and ultra-moisturizing balm that sinks into the lips and leaves them hydrated and nourished. This delicately scented lip balm relieves roughness and heals chapping as well.

natural lip balm for winter skin care

That’s it! With that, we end our guide to skincare during winters. These are some of the tips that work well for everyone. However, it’s also important to understand your skin’s unique needs during winters. For instance, if you tend to get dryness in your hands, you should use a hand cream frequently. 

Another great tip for skin care during winters is treating yourself to Abhyanga - an Ayurvedic self-massage. You can use rich natural oils such as Organic Coconut Oil or Organic Sweet Almond Oil for nourishing self-massage. You can even use these oils as pre-bath oils. Leave the oil on for about 15 minutes before heading for the shower.

Read - Which Body Massage Oils Are Recommended by Ayurveda

Do not forget that your diet also plays a huge role in determining the health of your skin. During wintertime, avoid too much alcohol and caffeine as both of them lead to dehydration. Include walnuts, almonds, and olive oil in your diet so that your intake of healthy fats is maintained. These rich food items will nourish your skin from within. 
For further help with choosing the best products for winter skin care, you can book a free consultation with our Ayurvedic beauty experts.

How To Hydrate Your Skin Naturally – 7 Quick Tips

Skin dullness is often the first sign of dehydrated skin. We all want that wonderful natural glow that comes from within. If you’re wondering why your skin doesn’t look nourished and healthy, it might be time to start taking your daily skin hydration seriously. 

Before we jump to answering the most common winter skincare question - ‘How to hydrate skin properly?’, let’s understand what is hydration and why your skin needs it?

What Does Hydrated Skin Look Like? 

What comes to your mind when you read about hydrating your skin? Do you instantly think about moisturizing your skin? If yes, then you’re partially right.


Essentially, there are two parts of nourishing the skin - hydration and moisturization. The hydration step is all about increasing the water content in your skin. Dehydrated skin looks dull, dry, and flaky. On the other hand, properly hydrated skin looks smooth, nourished, and radiant.

But that’s not all. Without sealing that moisture into your skin, it’ll quickly dry up and leave your skin thirsty for more. That’s where moisturizers play their role. A good moisturizer doesn’t let the water content escape from your skin, leaving it soft and supple for a long time.

How To Hydrate Your Skin Naturally

However, both skin hydration and moisturization have to become a part of your daily skincare routine to get the best results.

Factors like age, climate, and environmental stress can sometimes make our skin thirstier. Think of your daily hydration as a way to quench your skin’s thirst.

How To Tell If Your Skin Is Dry or Dehydrated?

We know that the two important steps of skin nourishment are hydration and moisturization. If your skin lacks hydration, it becomes dehydrated. While on the other hand, if it produces less sebum and needs more moisturization in general, your skin is dry.

It’s important to note that ‘dry skin’ is a skin type while ‘dehydrated skin’ is a skin condition.

It can be confusing to understand whether your skin is dry or dehydrated as both of them can feel similar. Here’s how you can differentiate between the two.

Sign of dry skin - 

  1. Feels uncomfortable, flaky, and itchy.
  2. The worst areas are usually near the eyebrows and around the corners of the nose and mouth.
  3. Rubbing skin together might sound like sandpaper grinding
  4. Might be accompanied by skin redness and inflammation

Sign of dehydrated skin -

  1. Skin lacks water content
  2. Often caused by external factors such as weather, environment, diet, and caffeine consumption.
  3. Feels tight and looks dull
  4. Shows more exaggerated wrinkles
  5. Shows more exaggerated dark circles
  6. Might be accompanied by skin redness and inflammation

How To Hydrate Your Skin? - 7 Simple Steps

Keeping your skin hydrated isn’t just about using hydrating products. Your lifestyle plays a role as well. 

For instance, the amount of water you drink, the water content in the fruits and vegetables you eat, the temperature of the water that you use for your daily shower, determine your skin’s water content level. Here are a few simple ways to keep your skin hydrated all year long.

1. Drink water like it’s your job


We know how important it’s to drink an adequate amount of water. Yet, so many of us fail to take it seriously and treat it like a choice. Make drinking water as important as your ‘work’. Reach out for an extra glass of water instead of coffee. You can prepare a pitcher of water and add some cucumbers/orange to it. This way, you will provide your skin with a healthy dose of anti-oxidants along with hydration.

https://www.instagram.com/p/CAo3I_alxXs

Both caffeine, as well as alcohol, are known to dehydrate your skin. You can help your skin remain hydrated by avoiding them. Herbal teas are a great alternative to coffee/tea as they help in keeping your skin and your body hydrated.

2. Eat water-rich foods

What you eat determines the water content in your body and your skin. Make sure that you consume some water-rich foods throughout the day. If it’s summertime, you can load up on fruits and vegetables like watermelons and cucumbers. In winters, you can go for strawberries and oranges. 

3. Use only gentle and natural face/body cleansers

Do you check the ingredients of your skin-care products? If not, then you should start looking for skin-harming chemicals like parabens and sulfates. Sometimes, when we wash our face with a cleanser, our skin gets stripped of its natural moisture content.

Only gentle face cleansers made from natural ingredients are recommended to keep your skin hydrated. 
Kama Ayurveda’s Rose Jasmine Cleanser is a perfect hydrating face wash filled with natural ingredients like Aloe Vera, Jojoba Oil, and Vetiver. Along with the essential oils, of Rose and Jasmine, this cleanser is perfect for cleansing the skin without stripping it of essential moisture barrier. For men, we recommend Himalayan Deodar Face Cleanser for daily cleansing. For cleansing your body, you can choose natural body cleansers.

face cleanser to hydrate your skin

Avoid using hot water while washing your face or taking a shower. Lukewarm water is recommended as hot water can lead to skin dehydration.

Read - Which Is The Best Face Wash For Dry Skin?

3. Add a natural serum or facial

Applying facial oils and serums just before moisturization is the most important step for hydration. Serums and face oils are loaded with hydrating ingredients and can provide your skin with sufficient water content before the moisturizer can lock it in.

We recommend natural facial oils like Moringa Oil or Organic Cold-Pressed Virgin Coconut Oil for this step. Both the oils have a high content of oleic acid which makes them deeply hydrating oils. Choose Moringa oil if you’ve normal or oily skin type and Coconut oil if you’ve dry skin type. 

Read - 10 Ways Moringa Oil Helps Your Maintain Healthy Skin

4. Refresh your skin with facial sprays

Facial mists can be super handy when it comes to daily skin hydration. We all know the amazing feeling that comes with spraying Rose Water on our faces. Not only it’s immensely soothing and refreshing, but also hydrating. 

Of course, this step is best suited for the summer days. However, if you are a fan of facial mists, you can spray it on your face right after cleansing your skin so that your skin recovers any loss of hydration from cleansing. 

We recommend Kama Ayurveda’s range of facial mists, which are 100 percent pure steam distillations of various flowers and roots. You can choose from Pure Rose Water, Pure Mogra Water, Pure Vetiver Water, and Pure Lavender Water.

These facial mists also work as toners and prep the skin to absorb moisture. Did you know that applying moisture on damp skin helps in absorbing the moisture better? 

4. Moisturise properly to seal in the water content

Earlier in the article, we talked about how moisturization helps in sealing the water content in the skin. Hence, moisturization is a very important step without which you’ll have to keep hydrating your skin multiple times during the day.

It’s recommended to use a separate moisturizer for day and night. A heavier moisturizer is recommended at night, especially if you use air conditioning. We might not realize this but our skin constantly loses moisture even when we sleep. 

We recommend Kama Ayurveda Eladi Hydrating Ayurvedic Face Cream for the day and Kama Ayurveda Rejuvenating and Brightening Night Cream for night. 

night cream to hydrate skin

Read - How To Choose The Best Night Cream For Dry Skin?

5. Apply Sun Screen every day

We all love the winter sun. But did you know that sun exposure dehydrates your skin? Now, this doesn’t mean you need to stop stepping out and soaking in the sun altogether. It just means that you shouldn’t ever step out without sun protection. 

Prolonged skin exposure without sunscreen also causes aging of the skin as it rapidly breaks the skin’s natural moisture barrier and depletes collagen level.

Using a broad-spectrum sunscreen will prevent UVA and UVB skin damage every time you step out in the day. We recommend Kama Ayurveda’s Natural Sun Protection for daily use. It is a non-chemical daily-use sunscreen that provides full-spectrum sun protection and a boost of hydration to keep skin healthy and even-toned.

natural sun protection to hydrate and protect skin

Read - Which Sunscreen Lotion Is The Best For You?

That’s it. With that, we conclude our 7-step guide to keep your skin hydrated. Please note that dehydrated skin usually isn’t a serious skin condition. Most people can hydrate their skin by consuming adequate water and using hydrating skincare products. 
However, if your condition doesn’t improve after these practices, you can consult a dermatologist. Also, if you need further help in choosing the best hydrating products for your skin, you can book a free consultation with our Ayurvedic beauty experts.

How To Do A Natural Facial At Home – 6 Simple Steps

Giving yourself a good facial at home can be a wonderful way to de-stress and to show yourself some love and compassion. Have you ever thought about bringing the salon facial experience to your home? Beyond relaxing your senses, a facial at home will help smoothen your skin and enhance your complexion.

Your at-home facial doesn’t need to be complex or involve too many tools or devices. Just follow these 6 steps recommended by our Ayurvedic beauty experts.

Step 1. Create a Relaxing Atmosphere

Even if you can’t go to a salon or a spa, you can re-create the best elements of the experience at home. A facial isn’t just about taking care of your face. When you take some time to unwind and relax completely, it brings out a different glow.

Here are some suggestions that you can take inspiration from while creating the environment for your facial.

  1. Start by drinking your favorite herbal or detox tea.  
  2. You can add Epsom salt in your bath or simply soak your feet in warm water prior to the facial.
  3. Set up some scented candles or use a diffuser with your favorite essential oil.
  4. Create a relaxing playlist beforehand and let it play as ambient background music. 
scented candles for facial at home.

We are surrounded by so much noise of all sorts, so it is important to create an ambiance for oneself. When you’ve created the right environment for yourself you can move on to the next step.

Step 2. Cleanse Your Skin Thoroughly

Before you set out to do anything on your face, you must ensure that it’s completely clean and free from all dirt and impurities. If there’s any makeup or any residue left on the skin, it will result in a less effective facial.

We recommend that you use natural cleansers as they are gentle on the skin and do not dry out the skin excessively. 

Some people prefer double cleansing - in which the skin is first treated to oil and then to a cleanser. Such a process leads to a more thorough cleansing. For oil cleansing, Coconut oil, Cleansing Milk, Olive Oil, Micellar Water, or Natural Make-Up Remover can be used.

The second step is cleansing with water-based cleansers. You can use them directly as well (without oil cleansing). Here are our top recommendations for natural cleansers.

Skin TypeRecommended Cleanser by Kama AyurvedaWhat it doesKey Ingredients
Oily and Acne-ProneAnti-Acne Cleansing FoamIt dries out active acne, unclogs and tightens skin pores, and reduces the frequency of breakouts.Neem, Tulsi and Tea Tree Oil
Dry and Sensitive SkinSensitive Skin Cleansing Foam Calms distressed skin, removes impurities and excess oils without stripping away skin’s essential moisture.Sandalwood, Aloe Vera, and Calendula
Any Skin TypeRose Jasmine Face CleanserA gentle foaming cleanser with a rich blend of Ayurvedic ingredients to effectively cleanse and lift away makeup and impurities.Aloe Vera, Jojoba Oil, Essential Oils of Rose and Jasmine
natural face cleanser for facial at home

Step 3. Steam Your Skin

The next step of your facial is to steam your face. Steaming your face will open up your pores and soften the top layer of your skin to prime it for exfoliation. 

While steaming your face at home, make sure that you do not go overboard with it as it will result in dryness. If you don’t have a steamer at home, there are two alternatives to choose from. You can either lower your face near-boiling hot water and cover your head with a towel to trap the steam. 

Alternatively, you can soak a towel in hot water and place it on your face for some time. Just make sure that the water isn’t too hot as it may burn your skin.

You can make your facial steaming experience even better by adding certain elements to your water. Some people like to put slices of orange in it. You can even choose to put in relaxing herbs like Chamomile or Rosemary. The essential oil of your choice will also work equally well.

Step 4. Exfoliate for a Smoother Skin

After steaming, it’s time to use a gentle scrub to slough off the top layer of skin cells and excess oils. Exfoliation will instantly brighten your face and reveal the younger, healthier layers of your skin.

However, it’s important that you choose homemade or natural scrubs and not the harsh chemical scrubs. If the exfoliating beads are harsh, they cause micro-tears on the skin which can result in irritation or breakouts. Chemical exfoliation can also damage the skin’s natural moisture barrier.

Our top recommendations for natural face scrub for gentle exfoliation is Kumkumadi Brightening Ayurvedic Face Scrub for women and Himalayan Cleansing Deep Cleansing Face Scrub for Men. 

Unlike the chemical scrubs that have plastic microbeads, Kama Ayurveda’s herbal face scrubs are made with natural substances that give an exfoliating effect to the skin.

natural exfoliation for facial at home

Read - How To Exfoliate Your Skin The Right Way?

5. Apply A Mask

After the above-mentioned step, the skin is clean and prepped to absorb nutrients. This is the perfect time to apply a suitable face mask for glowing skin

We recommend using natural face masks. For better absorption of nutrients, you can massage the mask into your skin for a few minutes before leaving it on for about 15 to 20 mins.

Here are our top recommendations for natural face masks.

Skin TypeRecommended Mask by Kama AyurvedaWhat it doesKey Ingredients
All Skin TypesSuvarna Haldi Chandan Face MaskIt is a complexion-enhancing Ayurvedic Face Pack, for youthful vibrancies, smoothness, and luminosity.Turmeric, Sandalwood, Orange, Multani Mitti
Acne-Prone SkinNimrah Anti Acne Face PackIt is an anti-acne treatment that heals pimples and blackheads, reduces scars, improves skin tone and repairs inflammation.Ashwagandha, Coriander, Sandalwood, Vetiver, Lodhra
Sensitive SkinLavanya Natural Plant MaskIt is a detoxifying and deep cleansing face mask that leaves the skin smooth, refreshed, and refined.Mulaithi, Lodhra, Sweet Flag

Please note that these masks are in herbal powder form. They need to be mixed with Pure Rose Water (for normal skin) or Pure Mogra Water or Yogurt/Milk/Buttermilk (for dry skin) to form a paste prior to the application.

natural face pack for facial at home

Step 6 - Moisturize The Skin

With this, we arrive at the final and one of the most crucial steps of a facial at home - a good massage with a suitable moisturizer. The facial massage helps in boosting blood circulation and promotes lymphatic drainage. 

Not only this, deeply nourishing your skin with a rich moisturizer is important for locking in the nutrients and the moisture. 

After all the steps mentioned above, your freshly revealed and nourished skin will need hydration for lasting radiance. Moisturizing will hydrate your skin and lock moisture in so that your skin is less prone to damage. 

You can even use natural oils like Almond Oil, Coconut Oil, and Jojoba oil for facial massage. 

Here are our top recommendations.

Skin TypeMoisturizer Recommended by Kama AyurvedaWhat it doesKey Ingredients
All Skin TypesEladi Hydrating Ayurvedic Face CreamIt is a nourishing Ayurvedic cream that moisturizes, softens, and protects. Results in soft, smooth and clear skin.Green Cardamom, Sesame seeds, Coconut Oil, Costus
Dry SkinExtra Virgin Coconut OilIt helps keep the dry skin soft and smooth, prevents premature ageing and wrinkling of the skin.Organic Coconut Oil
natural face cream for facial at home

It is important to use nourishing, rich ingredients to massage your skin. To give yourself a good facial massage, begin at the chin and gently stroke outwards. You can use your fingers, a face roller or even a gua sha to further enhance your experience. Do not neglect the areas behind the ear lobes, around your nostrils, and the center of your forehead.

Read - How To Give Yourself A Face Massage – 10 Simple Steps

With this last and final step of a facial at home, you’ll now have the soft, supple and naturally radiant skin. You might be tempted to use extractions to get rid of blackheads and whiteheads. However, we strongly recommend that you only get it done by professionals to avoid injury or scarring. 

Pampering yourself with a relaxing facial at home isn’t hard. Follow the steps mentioned in this article to achieve naturally glowing, flawless skin. A little self-care is all it takes to release the stress from your skin and your body.

After Facial Care

Proper after facial care is crucial for maintaining the benefits of your treatment and ensuring the health and beauty of your skin. Here are some key steps to follow:

Hydration: 

Post-facial, your skin can be a bit more sensitive than usual. It's essential to keep it hydrated. Use a gentle, non-comedogenic moisturizer to nourish and soothe your skin. Avoid heavy or oil-based products that might clog your pores.

Sun Protection: 

Your skin is more susceptible to sun damage immediately after a facial. Apply a broad-spectrum sunscreen with at least SPF 30 to protect against UV rays. This step is vital, regardless of the weather, to prevent premature aging and hyperpigmentation.

Gentle Cleansing: 

For the next few days, use a mild, fragrance-free cleanser. Avoid exfoliating cleansers or tools that could irritate your freshly treated skin.

Avoid Makeup: 

If possible, give your skin a break from makeup for at least 24 hours post-facial. This will allow your skin to breathe and maximize the benefits of the facial.

Skip Harsh Treatments: 

Avoid using harsh products or treatments like retinoids, acid peels, or exfoliants for a few days. Your skin needs time to recover and stabilize after a facial.

Stay Hydrated and Eat Healthy: 

Drinking plenty of water and eating a balanced diet rich in antioxidants will support your skin's health from the inside out.

Touching Your Face: 

Try to avoid touching your face unnecessarily to prevent the transfer of bacteria and oils from your hands.

Monitor Your Skin: 

Pay attention to how your skin responds in the days following your facial. If you notice any adverse reactions, consult with your skincare professional.

Frequently Asked Questions (FAQs) for Facial at Home

Q1: How often should I do a facial at home?

A: The frequency of at-home facials depends on your skin type and concerns. Generally, a facial every 2-4 weeks is beneficial. However, if you have sensitive skin, you might want to space them out more.

Q2: What basic steps are involved in an at-home facial?

A: A basic at-home facial typically involves cleansing, exfoliating, steaming, applying a mask, and moisturizing. You can also include a gentle massage to boost circulation.

Q3: Can I do a facial at home if I have acne-prone skin?

A: Yes, but be gentle and choose products formulated for acne-prone skin. Avoid harsh scrubs and overly rich creams. It’s best to consult with a dermatologist if you have severe acne.

Q4: Are DIY facial masks as effective as store-bought ones?

A: DIY masks can be effective, especially for hydration and mild exfoliation. However, store-bought masks might offer more targeted treatments with active ingredients for specific concerns.

Q5: How can I steam my face at home?

A: Boil water and pour it into a bowl. Lean over the bowl with a towel over your head to trap the steam. Stay at a comfortable distance to avoid burns and steam for about 5-10 minutes.

Q6: Is it safe to extract pimples during an at-home facial?

A: It’s generally not recommended to perform extractions at home as it can lead to scarring and infection. Leave extractions to the professionals.

Q7: What should I do if my skin reacts negatively after an at-home facial?

A: If you experience a negative reaction, discontinue the use of any new products. Apply a soothing, hypoallergenic moisturizer and avoid makeup. If the reaction is severe, consult a dermatologist.

Q8: How can I ensure the products I use are suitable for my skin type?

A: Research products and look for those specifically labeled for your skin type (e.g., oily, dry, sensitive, etc.). Patch test new products before applying them to your face.

Q9: Can men also do facials at home?

A: Absolutely! Men can benefit greatly from at-home facials. They should follow the same basic steps, keeping in mind any specific skin concerns like shaving-related issues.

Q10: How do I maintain the results of my at-home facial?

A: Maintain results by following a consistent skincare routine, staying hydrated, eating a balanced diet, and protecting your skin from the sun. Regular facials contribute to prolonged benefits.

Best Hair Oil For Your Hair Type – How To Find The Right One?

Natural hair oils of Almond, Sesame, Olive, Grapeseed, Jojoba, Coconut, Argan are considered supreme oils, best suitable for healthy hair growth. They can be applied directly on the hair as well as the skin. Even essential oils consisting of Lavender and Lemongrass have numerous qualities that help nourish and strengthen the hair. These are the best hair oils that not only bestow an amazing fragrance but also contain enriching properties that benefit your hair to a great extent.

With the increase in the number of people opting for healthier lifestyles, including adopting organic and GMO-free food products, a similar shift in trend is visible even in the beauty market. Did you know a survey suggested that many women are now keen on using natural cosmetics and green beauty products are rapidly gaining popularity? Because of the raging increase in the available options, people are confused about choosing the best hair oil to suit their needs.

best hair oil for your hair type

So, the following is a guide that would help you in your pursuit of choosing the right type of hair oil to nourish and encourage healthy hair growth. 

`1. Coconut Hair Oil

As the name suggests, Coconut oil is derived from coconuts. It is an extremely versatile oil with numerous applications that include benefits for one’s skin and hair.

Coconut oil contains lauric acid, which is a medium-chain triglyceride (Saturated fat). It can assimilate into the body quickly and completely. Hence, this oil penetrates the hair deeply and does not evaporate. There are many varieties of coconut oil that include refined, unrefined, and extra-virgin.

Read - Why Is Virgin Coconut Oil So Good For Your Hair and Skin?

Ideal for- Coconut oil is suitable for every hair type, but it is particularly recommended for those with damaged, dry, and lifeless hair. It works by repairing brittle hair and prevents split-ends. Also, those with slower hair growth can use it to enhance the rate of hair growth.

Benefits - Coconut oil contains a high amount of moisturizing and water-retaining properties. It provides suppleness and softness to the hair making it easily manageable. It is even stated to protect the hair against heat damage, and regular application of this oil would promote nourished hair growth and a healthy scalp.

How to use it - Using Organic coconut oil is recommended whenever possible. Coconut oil could solidify at lower room temperatures; therefore, heating it before using would allow easier application. In the case of oily scalp, coconut oil should be applied to the hair alone and not on the hair strand's roots. And those with dry scalp can massage the oil to the hair thoroughly, including the roots. Treating your hair with coconut hair oil once a week is sufficient to derive its benefits. After application, allow the oil to remain for at least 30 minutes and then rinse it with a shampoo free of alcohol.

best hair oil coconut oil

Shop Kama Ayurveda Extra Virgin Coconut Oil 

2. Brigandi Hair Oil

Brigandi hair oil is made by extracting the herbs into pure sesame oil and milk. The oil also has a combination of few other ingredients, which include Indigo, Gooseberry and Eclipta Alba, sesame seeds, Bhringraj and Balloon Vine.

Did you know each of the ingredients has its benefits? They include properties that enhance thicker and fuller hair growth, reduce itchiness, and clear the buildup of impurities on the scalp.

Ideal for- Brigandi hair oil could be used by anyone who faces excess hair loss. Even dandruff and dry hair could be prevented from the usage of this oil. It also prevents premature graying of hair. This oil works as a remedy for most hair problems and is suitable for everyone.

Benefits - The oil gives relief to hair loss by strengthening the roots of the hair. Brigandi hair oil possesses antifungal and antibacterial properties that prevent scalp infections. It also has a calming earthy smell that soothes the nerve and uplifts the mood, reducing hair fall caused by stress factors.

How to use it- Pour the Brigandi oil onto your palm and rub it well. Next, gently massage your scalp and hair to ensure that the whole scalp is covered with oil for the best results. It would work as a natural conditioner when left for 20 minutes and then rinsed away with Mild hair shampoo and lukewarm water. You could also leave it overnight if not suffering from hair fall or sinusitis.

Shop Kama Ayurveda Bringadi Intensive Hair Treatment

3. Sweet Almond Hair Oil

Almond oil is derived from the kernels inside almonds. The sweet oil is specifically made from edible almonds that are grown to contain a sweet flavor.

Sweet almond oil is wonderful for your hair. It is rich in vitamin E, fatty acids, antioxidants, and magnesium. These ingredients lessen the breakage of hair and aids in hair growth. Those who suffer from mineral deficiencies often have slower hair growth. For such individuals, eating almonds is recommended as a part of the diet as well. Using natural and organic sweet almond oil is recommended as it does not contain added chemicals or preservatives.

Read - 10 Amazing Benefits Of Almond Oil For Hair, Body and Skin?

Ideal for - Sweet almond oil is suitable for those with dry, damaged, and dandruff prone hair. It is also suggested for those with hair loss and slow hair growth-related issues.

Benefits - Sweet almond oil can moisturize and protect the hair from environmental pollutants. It would even prevent hair loss and breakage of hair strands. The regular application would aid in longer and thicker hair growth.

How to use it - To use sweet almond oil, warm a tablespoon of the oil and massage it into your scalp. It could be left through the night and washed in the morning. It could also be used after shampooing your hair to prevent split ends and dry hair.  

best hair oil almond oil


Shop Kama Ayurveda Organic Sweet Almond Oil 

4. Olive Hair Oil

Olive oil is again extremely versatile with varied applications. It is derived from pressing olives and contains moisturizing as well as protective functions. 

On topical application on the hair, this oil is known to coat the hair strands and shield the keratin, which is an essential component of the hair. Hence, it is known for its protective ability. The combination of olive oil and lemon juice is a boost for those seeking ways to eliminate dandruff. On regular application, olive oil is stated to replace the need for conditioner and hair smoothing products. The best variety of Olive oil is the organic, extra virgin Olive oil as it contains natural antioxidants and lacks additive chemical ingredients.


Ideal for - Those who are dandruff prone or have dull and damaged hair would benefit from using Olive oil.

Benefits- As Olive oil coats the hair shaft, it protects the hair from environmental pollutants. Did you know that Olive oil could repair the damage caused by heat and dyes? If you are looking for a hair oil that could boost hair growth and, at the same time, protect your hair, olive oil would be a very suitable option. Olive oil application leaves the hair feeling smoother, sleeker, and healthier.

How to use it - Olive oil could be used every week on damp hair or dry hair. Apply a generous quantity of this oil to your hair and cover your hair with a shower cap. Now, allow it to penetrate your hair shafts by leaving it for around 30 minutes before rinsing it thoroughly with a shampoo. You could skip the use of conditioner after treating your hair with Olive oil. 

5. Grapeseed Hair Oil

Grapeseed oil, also commonly known as grape oil, is manufactured from cold-pressed grape seeds.

Did you know that grapeseed oil is rich in nutrients, antioxidants, and contains components like stearic acid and Vitamin E essential for the healthy growth of hair and skin?

Ideal for - Those facing massive hair loss and stunted hair growth would find relief using the Grapeseed hair oil. It conditions the hair; hence would work wonders with those having dry hair as well.

Benefits - Grapeseed oil conditions and moisturizes the hair. It encourages a healthy and robust growth of hair. It could even work against the split-ends formation and reduce the frizziness. You would be pleased to know that grapeseed oil stops DHT production, which is a hormone that yields hair loss.

How to Use it - Grapeseed oil is relatively light in weight compared to the other oils present in the list. Hence it could be applied to the hair and scalp regularly. Also, it is suitable for those who dislike strong scents as this oil is odorless. For deep conditioning, use this oil and leave it for 10 minutes. Next, rinse it with cold water. You would find yourself with shiny, moisturized hair. It would even work as a great carrier oil for the upcoming essential oils.

6. Sesame Hair Oil

Did you know Sesame oil is an ingredient used in various cosmetic products ranging from moisturizers to shampoos? The oil is extracted from the sesame seeds and was used for hair since ancient times.

Sesame oil is high in Vitamin E, which is also a natural source of antioxidants. It includes other beneficial ingredients such as Zinc, Magnesium, Vitamin B6 as well.

Read - How To Use Sesame Oil For Hair?

Ideal for- This oil benefits those who face premature graying. It is beneficial for individuals facing hair fall and hair lice related issues as well. 

Benefits - Sesame oil prevents the onset of premature graying. It contains properties that can darken your hair and resist free radicals' buildup as it is packed with antioxidants. The oil also works like a protective coat against UV rays by using it as a sun-blocking agent.

How to use it - Pour sesame oil into a bowl & warm it indirectly (through double boiling method) before treating your hair and scalp with a thorough massage. You could leave it on for 20 minutes or more and later rinse it off with a Mild hair cleanser. One could apply this oil once or twice a week.

best oil for hair sesame oil

Shop Kama Ayurveda Sesame Oil

7. Argan Hair Oil

Argan oil is native to Morocco, and its tree is famously known as the ‘Tree of Life’. It contains a high amount of fatty acids, antioxidants, and vitamin E. 

These properties contribute to the appearance of healthy hair, skin, and even nails. Did you know that Argan oil is often called ‘Liquid Gold’ as the oil possesses a rich golden hue? The minimally processed natural and organic Argan oil is best for usage as it won’t contain any additive or unwanted harmful chemicals.

Ideal for - Those with frizzy hair, dry and brittle hair would find optimum benefits while utilizing Argan hair oil, especially if your hair is prone to frequent heat-based styling. It is also suitable for those with greasy hair.

Benefits - Argan oil application softens the hair without leaving any greasy or sticky residue. It diminishes dandruff and dry scalp. It protects the hair from UV rays and heat as well. Argan oil contains moisturizing properties making it manageable along with imparting a lustrous shine.

How to use it - Argan oil is quite viscous and could be poured easily at room temperature. This oil isn't greasy and could be applied more than once or twice a week. To use this oil, take a few drops in your palm and rub them together. Next, apply the oil to your hair, and avoid the hair's roots. It could be used on dry or damp hair and would work best as a quick anti-frizz treatment.
           

8. Jojoba Hair Oil

Jojoba oil is pronounced as ho-ho-ba oil, which is not an oil but is more of a liquid wax ester derived from the jojoba plant. 

You would be surprised to know that Jojoba oil is well known for its chemical characteristics. It is known to contain properties that resemble those of sebum, which is naturally produced by the human skin and scalp. Jojoba oil penetrates the hair shaft and follicle, deeply conditioning it inside and out. Jojoba oil contains antibacterial qualities.

Ideal for - Those with dry hair, damaged hair strands would benefit from using Jojoba oil, making the hair knot-free and more manageable. It even prevents dandruff formation and eliminates dry scalp related issues. It stimulates thicker, stronger, and longer hair growth.

Benefits - Jojoba oil conditions the hair, protects it from damage, and enhances the luster. It does this without making the hair feel heavy or greasy. It contains a vitamin B complex that allows it to maintain the hair's texture, color, and even strength.

How to use it - Jojoba oil could be used in various ways. Even this oil is viscous and could be easily poured at room temperature. You could use it as a leave-in treatment as well by applying it 30 minutes before shampooing your hair. You could even leave Jojoba oil applied on your hair throughout the night. One could even use it to condition the hair by adding and mixing a few oil drops to the conditioner.

9. Lavender Essential Oil For Hair

Did you know that lavender has been the most used essential oil globally for over 2500 years? Just like all other essential oils, Lavender essential oil should be used along with a carrier oil. It is derived from the lavender flowers.

Many studies state that the topical application of lavender oil encourages healthy hair growth. It has components that could increase the number of hair follicles, allowing fuller and dense hair growth. It contains anti-microbial properties. Therefore it is ideal for those with dermatitis.

Ideal for - The lavender essential oil is suitable for every other hair type. It is explicitly useful for those with oily hair in the front and back regions but dry scalp in other areas. 

Benefits- Lavender oil promotes hair growth and possesses no side-effects caused by topical hair growth products. It is known to moisturize the hair and can even balance the sebum production. Also, the oil aroma can relieve one from stress, which is often a hidden factor of hair loss.

How to use - Lavender oil needs to be mixed with a carrier oil. Add 2-3 drops of lavender oil to one tablespoon of any carrier oil and massage into the scalp. You could leave it covered overnight and wash it the next morning.   

best hair oil lavender oil

Shop Kama Ayurveda Lavender Essential Oil

10. Lemongrass Essential Oil For Hair

Lemongrass has many ingredients rich in vitamins and minerals that are incredibly beneficial for the hair. Even lemongrass oil is an essential oil and is derived from an herb of the Poaceae family.

Did you know that lemongrass oil contains healing qualities and could treat various scalp and hair based issues?

Ideal for - Lemongrass oil is suitable for all hair types. It would specifically suit those facing hair loss and dandruff related issues. Alternatively, you can also use Tea Tree Oil to get rid of dandruff

Benefits - Lemongrass oil possesses anti-fungal properties that alleviate dandruff and dry scalp. It could even inhibit dandruff caused by yeast. It prevents loss of hair and gives it a healthy shine. 

How to use it - Add about 2-3 drops of the lemongrass essential oil to the bottle of shampoo or conditioner to utilize it. If you want to use it as a hair oil, dilute 2-3 drops of essential oil with one tablespoon of carrier oil. Do not apply it on your scalp directly.

best hair oil lemongrass oil

Shop Kama Ayurveda Lemongrass Essential Oil For Hair

Now, as we know the oils best suitable for your hair let’s know the things needed to consider while using this oil.

Things to consider when using natural oil in your hair

Being aware of your hair needs and the types of oil that would be best suitable for you is always beneficial. The following are the points you should be mindful of when using natural oils.

  • Use Organic natural oils that are minimally processed and are of higher quality. 
  • Remember to read the list of ingredients and check the label to avoid purchasing any oil containing hidden chemicals or artificial ingredients. 
  • Every individual is different and so are their hair types. It may take a while to know your hair type. Once you figure that out, stick to the oil that would best cater to your hair needs. 
  • If using an essential oil, as stated before, never apply it onto your scalp directly. Always use a carrier oil that would once again best suit your hair needs. You could perform a patch test to prevent the experience of any adverse reaction.

All Kama Ayurveda Hair Oils are 100 percent pure, natural and organic. They are prepared from the best quality ingredients and are free from all chemicals and preservatives.

best organic and natural hair oils

Explore Kama Ayurveda’s Range of Hair Oils

Next, let us read about the advantages of using natural oils for your hair and why one should use them.

Benefits of using the best natural hair oils

Natural oils benefit your hair in numerous ways, from adding luster to the hair to eradicating hair fall and dandruff related issues. They possess varied advantages. The following are the benefits of using natural oil in your hair care routine.

  • Promotes hair growth
  • Aids in preventing damage caused by heat and styling
  • Adds luster
  • Diminishes dandruff and dry hair
  • Prevents excess oiliness of the scalp
  • Limits the exposure to chemicals

Now, as we have seen the benefits natural oils provide, lastly, let us have a look at the hair oil that would best suit a person based on the hair type they possess.

Hair types and best oil for each

Many people have a combination of dry and oily hair, while some have either dry or just oily hair. It is essential to know which is your hair type to cater to the needs your hair demands. So, you could experiment with the following list based on your hair category.

  • Dry scalp and dandruff issues: Jojoba oil, Lavender oil, Lemongrass oil, Sweet almond oil, Olive oil, Grapeseed oil, Brigandi oil
  • Damaged hair: Coconut oil, Sweet almond oil, Olive oil
  • Hair loss: Sesame oil, Brigandi oil, Grapeseed oil, Lemongrass oil
  • Dull and dry hair: Coconut oil, Argan oil, Jojoba oil, Sweet almond oil, Olive oil
  • Stunted hair growth: Coconut oil, Brigandi oil, and Sweet almond oil
  • Premature graying: Brigandi oil

In this way, you could include natural oil in your hair care routine and derive the benefits they provide. It is advisable to consult with your medical practitioner before bringing changes in your routine to avoid any untoward experiences.

Sameera Reddy Loved Kama Ayurveda’s Organic Hair Color Kit

When it comes to hair color, we want a product that covers our greys, doesn’t damage hair and looks natural too. At Kama Ayurveda, we make the most of authentic, time-tested formulations and to get you the best natural hair color, we recommend our Organic Hair Color Kit. Recently, actor Sameera Reddy, whose a busy mom of two, tried Kama Ayurveda’s Organic Hair Color Kit, and loved the results.

Want natural hair color in the comfort of your home? Here’s everything you need to know about our Organic Hair Color Kit

The kit comes with 

  • 100% organic henna powder: natural colorant and conditioner
  • 100% organic indigo powder: impart a dark tint after applying henna
  • Shower cap 
  • Disposable gloves
Sameera Reddy Loved Kama Ayurveda’s Organic Hair Color Kit

How To Use Organic Hair Color Kit

To make the most of this Organic Hair Color Kit, we advise you to apply it to clean hair. Also, do a patch test if you’re trying this for the first time.

  1. Start by prepping the night before. Soak henna powder with coffee water overnight, preferably in an iron skillet. (You can soak 100 gms for short hair, 200 gms for shoulder-length hair, 300 gms for long hair)
  2. Come morning time, and you can apply henna paste to your roots with the help of a hairbrush. It’s best to wear an old t-shirt when applying henna.
  3. Keep the henna paste on your hair for 60-120 minutes. Henna is a natural hair color that will cover your greys but is widely used as a hair mask for its conditioning properties.
  4. Rinse henna off with water.
  5. Now mix organic indigo powder with water and apply it to dry hair. Keep it on for 60-120 minutes. The indigo powder is 100% natural and is what neutralises the orangish tint of henna, imparting a dark tint. Remember, you can customise your hair color by choosing how long you keep it. 
  6. Rinse off Indigo paste, and voila, you have successfully colored your hair, naturally!
  7. You can wash your hair the next day.

Pro Tip: If you have previously used a chemical color, keep both henna and indigo powder for up to 2 hours.

So there you have it, an easy-to-follow natural hair color routine in the comfort of your home. 

Still not convinced? Let us put all your worries at rest. Here are some of the most common concerns when using natural hair color…

Sameera Reddy Loved Kama Ayurveda’s Organic Hair Color Kit

How Can I Avoid Or Tone Down The Orange Color After Using Henna? 

Well, henna’s natural color is a natural red tinge which sometimes looks orange after application. Indigo is a natural bluish-black color and helps tone down the orange-red tint left by henna, giving you natural brown hair color. 

  1. To make henna darker, soak henna powder in water, with coffee the night before. 
  2. Make sure you invest in organic henna powder, free of additives. 
  3. And lastly, apply Indigo powder immediately after using henna. 
Sameera Reddy Loved Kama Ayurveda’s Organic Hair Color Kit

Will Henna Cover Grey Hair After I’ve Used Chemical Hair Color?

For colored hair, it can take a few applications to get the shade you want, but don’t worry...your greys will be covered. However, it is suggested to wait 5-6 weeks between chemical treatment and hair coloring.

If you have any questions, or want to customise your hair color routine, feel free to schedule a complimentary online beauty consultation with one of our experts.

How To Use Ylang Ylang Essential Oil For Better Health?

“Ee-lang Ee-lang” is the pronunciation of Ylang-Ylang which is also the amazing ingredient for this article. Have you come across the story behind the ylang-ylang flower? Well, even though it is just a story it is fascinating to know that the essence of this flower is so powerful that it was given the credit of being the goddess of scent in the narration.

It is said that when the God of beauty was assigning each flower the fragrance it should carry; the ylang-ylang flower was questioned what it would do if blessed with a beautiful scent. The flower meekly but hesitatingly replied, she would surely be thankful for it but suggested to bestow the gift to the grass, stating the reason that the flowers of the grass would be stepped upon and that she already had the advantage of growing to the height equal to other flowers. 

Listening to this the God of beauty was mightily pleased and gifted her a beautiful and magical scent to spread love among all living creatures on earth.

ylang ylang essential oil

With the flower being described so authentic and sensational, it would be worth knowing about the oil derived from it and the benefits one could procure by utilizing it. Hence, this article describes in length about the Ylang-ylang essential oil.

Also called the ‘The perfume tree’ or ‘The Macassar oil paint’ in colloquial terminology, the Ylang-ylang tree is native to Java, Sumatra, Philippines, Polynesia, Indonesia. Usually found in the tropical rainforests of this region, the scientific name of this tree is Cananga odorata. 

The plant and the oil found different uses in different regions. 

In the Philippines, the Ylang-Ylang was used by healers to treat minor cuts, wounds, or burns. It was even considered to have the property of healing snake bites and insect bites. In Indonesia, the aroma of the flower was used for its aphrodisiac components. The medicinal ingredients of this oil were first used by a French Chemist. Later, the oil became known for its powers to address infections of the intestine, typhus, and even malaria. Today, it’s popular around the globe for its soothing effects that eliminate stress and anxiety.

Kama Ayurveda’s Pure Ylang Ylang Essential Oil is derived from tropical Ylang Ylang. It is a pure floral essential oil with a sensual and exotic fragrance that promotes inner peace, confidence, and relaxation.

ylang ylang essential oil

Through this, the uses of the ylang-ylang, in general, are understood. Next, let us understand more in detail about this essential oil

What Is Ylang-Ylang Essential Oil?

The essential oil of the Ylang-Ylang is extracted through steam distillation of the plant’s flowers. These flowers are star-shaped and have a yellow pigment. The oil extracted varies in the intensity of the scent. The sequential activity of the extraction divides them into various grades. It is stated that the oil could be extracted from its flower up to four times.

In total there are 5 diversifications present in the Ylang-ylang oil. The oil derived from the first 1-2 hours of the distillation process is called ‘Extra’. The next I, II, III grades are obtained in the subsequent hours by fragments of time specifically determined. The Ylang-ylang ‘Complete’ belongs to the fifth category grading. The final one is rolled-out after undergoing almost 6-20 hours of the distillation process. 

The oil of this plant would be described as fruity and sweet with a subtle floral and pungent essence. Even the Ylang-ylang ‘Complete’ version retains most of the essence of the original flower and is known to be more herbaceous than the previous distillation products. Because of which the scent would be slightly lighter as compared to the ‘Extra” counterparts.

The major component present in this oil is stated to be linalool. Even the lavender, basil, and coriander oil are known to have this ingredient. The Ylang-ylang is named to be one of the higher complex essential oils. There are close to 100 different components present in substantial amounts. Some other prominent components present in this oil are geranyl acetate, germacrene-D, Benzyl acetate, methyl benzoate, farnesene. 

It is stated that the Ylang-Ylang flowers should be hand-picked during the nocturnal hours to prevent the diminishing of its highly aromatic compounds.

14 Astounding Benefits of Ylang-ylang Essential Oil

Now that we have understood in general about what Ylang-ylang essential oil is, next, let’s understand the benefits that this oil provides. 

  • Reduces anxiety

The linalool present in the Ylang-ylang essential oil is known to have properties that reduce anxiety and promote a feeling of wellness and serenity. It even consists of antidepressant components and aids in reducing insomnia and tension among people who face apprehensions. The scent of this flower when utilized in aromatherapy has been stated to reduce the stress and anxiety level among nurses, based on a study conducted in 2006.

  • Reduces blood pressure

According to a study performed in 2013, the systolic and diastolic blood pressure as well as the heart rate could be reduced considerably in an experiment conducted on healthy men. It could even alleviate palpitations and is known to reduce the level of cortisol present in the human body. The cortisol is also known as the stress hormone. By doing so the blood pressure levels of the body could also be brought under control effectively. The circulation is also enhanced because of its hypotensive quality and consequently reduces blood pressure.

  • Combats fungal infection

The linalool, germacrene-D as well as geranyl acetate are known to have antifungal properties that work against any attack of fungal infection on the skin. Some studies state the use of this oil could eliminate conditions caused by Candida Albicans, which is a kind of yeast. They usually cause rashes and severe itching at the affected site.

  • May treat Asthma

It has been reported that the fresh and unprocessed paste of the flowers could treat asthma. However, this use has been stated to originate from traditional customs and a fresh study on this claim is indispensable.

  • Reduce Malarial symptoms

The dried flower of this plant is stated to alleviate malaria and malaria based symptoms in Java. Even in Vietnam, it is known for its medicinal properties to fight against malaria. There have been recent studies that ascertain these claims as well. However, extensive research on the Ylang-ylang essential oil on this subject is still needed.

  • Increases sexual desire

The essence of this oil is well-known from traditional times to augment the libido and elevate the sensuality between couples and is known as the flower of love. There are even claims that in Indonesia the ylang-ylang flower is scattered over the bed of newly-wed couples which is a folk remedy. Even though there is no scientific evidence for this claim the oil is known to calm the senses and improve mental health and as the mood is known to link sexual experiences it could enhance the sensuality. Further studies are needed to confirm the same.   

  • Diminishes Acne

Studies have stated its dermatological use could balance the sebum production of the skin and in turn control acne-breakouts. It even possesses anti-inflammatory properties which could reduce the redness as well as swelling caused by acne. It could soothe out the affected skin and diminish the acne formation considerably. It is strongly discouraged to apply any essential oil directly on the skin, hence the use of a carrier oil also possessing properties that work against acne would be recommendable. 

  • Clears head lice

A combination of the Ylang-ylang essential oil along with anise and coconut oil have credentials of eliminating head lice among children and are stated to have 92% effectiveness. Also, because of its antimicrobial and antibacterial properties, it could aid in eradicating any scalp related infections. Due to the presence of insecticide properties, the Ylang-Ylang oil is included in many recipes claiming to battle head lice.

  • Boosts self-esteem

There has been a pilot study that claims the use of Ylang-ylang essential oil along with the rose essential oil boosts self-esteem among a group of workers in sterilization and hygiene-related service. The aroma of this oil could address the negative feeling, fatigue, or shock and elevate as well as enliven an individual’s mood gradually. It kind-off sedates the mind, relaxes the body, and punches in an optimistic environment around the atmosphere.

  • Used in cosmetic products

Ylang-ylang essential oil can control as well as balance the oil production in the skin and can work as an effective cleanser. Any kind of inflammation or irritation could also be alleviated by its topical application. With its ability to boost circulation and retain hydration it is quite commonly used in cosmetic products. It has antioxidant properties which makes it an effective ingredient that works against aging as well. Also, the aroma of this oil is known to please the senses by emitting a gratifying fragrance.  

  • Promotes hair growth

This oil encourages the growth of hair and conditions the hair shafts. It is even known to detangle and soothe out dandruff formation and consecutive itchiness. This in entirety reduces hair fall effectively and promotes hair growth. It is also considered as a natural remedy dating back to the Victorian era where the Ylang-ylang oil was also included along with their Macassar hair oil. When massaged into the scalp generously it strengthens the hair follicles and attenuates hair loss.  

  • Used in perfumes

This oil is known to possess a floral-sweet oriental scent. Because of these properties, it finds favor as a preferred perfume across the globe. Also, its exotic components of reducing anxiety and enhancing calmness qualify it as a common ingredient to be considered by perfume manufacturing companies. The fragrance of this flower is also considered to closely resemble the scent of jasmine. It is stated to have a quality associated with cinnamon yet quite feminine.

  • Insect repellant 

Owning insecticidal elements, the Ylang-ylang essential oil is stated to be one of the ingredients used in the invention of insect repellant that could drive away insects, arachnids, and other arthropods. Also, in one of the studies published in the ‘Journal of young pharmacists’, it has been reported that cornstarch along with the combination of Ylang-ylang essential oil and citronella oil has results of working as an efficacious insect-repellent which is supposedly safe for humans as well as animals.

  • Nourishes dry skin

Ylang-ylang essential oil has hydrating properties that aid in maintaining the skin’s oil production and keeps it well-nourished. Its natural antiseptic properties could even heal any kind of cuts or cracks caused by excessively dry skin. It can moisturize, replenish the skin as well keep it healthy.

These were the benefits one could derive from this oil, no wonder the Ylang-ylang flower is called the goddess of flowers!

Next, let’s dive into understanding the uses of the Ylang-ylang essential oil.

Uses of Ylang-ylang essential oil

After knowing the benefits broadly based on the ingredients this essential oil contains, you might be interested in understanding how you can use Ylang Ylang oil to imporve your health and well-being. In this section, we’ll summarise the use of this oil for skin care, hair care and aromatherapy.

  • For skincare

The utilization of this oil for skin benefits are plenty. To begin with, a huge population, globally, ends up dealing with acne some or the other time in their life. This oil can put that worry to rest. It is known to treat acne as it reduces the breakouts as well as diminish the blemishes with its anti-bacterial and anti-inflammatory components. 

Also, the Ylang-ylang essential oil is stated to boost the regeneration of skin cells, relaxing tight muscles, and at the same time attenuating the wrinkles. Because of which it is highly acclaimed for possessing anti-aging properties. Also, it stimulates the natural radiance and glow of the skin. 

When used topically or cosmetically this oil banks the credit of being able to balance and maintain the oil production and of providing firmness to the skin by toning it. Whether the skin is oily or dry it rectifies the amount of oil produced by the sebaceous glands and keeps it in check by feeding the right amount of moisture to the skin. Perfect hydration and prevention of any bacterial or fungal attack are possible with the usage of this essential oil. 

Since this oil contains antiseptic ingredients it is even known to facilitate the healing of wounds and keeps infections at bay.

ylang ylang essential oil

Shop Kama Ayurveda Ylang Ylang Essential Oil

  • For hair care

On applying and massaging the ylang-ylang essential oil onto the scalp and hair it allows the hair to look healthy, strong as well as nourished. It possesses components that encourage the growth and appearance of healthy hair. 

This oil even works as an effective conditioning agent. If you are looking for a solution to condition the hair without the indulgence of harmful and toxic chemicals the ylang-ylang essential oil could do the work. 

It can even regulate the oil production of the scalp leaving your hair with the right amount of shine and bounce and also lessening the complications caused by dry hair. As it contains anti-fungal properties it could even ward off dandruff. Its mild insecticidal property gives it the potential to combat lice infestation when used with specific other essential oils.

  • For wellness and aroma

The fragrance of this oil is known to soothe and calm the person inhaling it. The ylang-ylang essential oil is renowned to reduce stress, anxiety, sadness, tension and promote a pacifying and serene atmosphere. The aroma of this oil can instantaneously showcase a positive edge and uplift a person’s thoughts.

Its floral and pleasant essence makes it a powerful and ideal ingredient to be utilized in perfumes for both men as well as women. The anti-depressing properties of this oil can eliminate negative emotions or any feeling of fatigue, shock, or nervousness.   

The well-known aphrodisiac properties of this oil address and eliminates issues that would reduce the sensuality between a couple. It is even reputed to augment the libido level.

Studies state that the aroma of this oil even reduces the blood pressure levels, pulse rate, and the stress level of a person, thereby it claims to reduce the autonomic nervous system’s reactions. This lightens the mood as well as promotes a relaxation that could put one to sleep easily. Hence, it is also known to work wonders for those having insomnia. 

These were the note-worthy uses of the ylang-ylang essential oil. Lastly, let's understand how to utilize this marvelous essential oil in a normal routine to reap its benefits. 

How To Use Ylang-Ylang Essential Oil?

The Ylang-Ylang Essential oil could be used for different means. Following is a detailed understanding of how one could implement this in their regimen based on the needs.

  • Skin Usage

To apply this oil on the skin for cosmetic purposes always remember to dilute the ylang-ylang essential oil with a carrier oil as directly applying the essential oil could harm the skin as it is very concentrated. So one could mix 1-2 drops of the ylang-ylang essential oil to 1 teaspoon of any carrier oil, preferably Jojoba oil or Coconut oil, and massage it gently over the skin.

While using this oil to moisturize and hydrate the skin, just add 1-2 drops of the Ylang-ylang essential oil to your regular face cream.

  • Hair Usage

While using this oil for conditioning purposes all one has to do is add 2-3 drops of the ylang-ylang essential to a coconut carrier oil and blend it well. Next, massage the scalp effectively and apply it through the strands of the hair to detangle and add luster to the hair. Do this 20 minutes before showering then wash it away with a mild shampoo. 

One could even create their conditioning hair oil and refrain from chemical-based products by adding 15 drops of this essential oil to half a cup of sweet almond carrier oil.

  • Aroma Usage

To use this oil as a perfume one could directly apply a few drops of the oil around a small area of clothing that would not brush against the skin directly.

One could diffuse the ylang-ylang essential oil with the help of a burner or essential oil diffuser. Adding just 2-3 drops of the oil would induce relaxation and stabilize tranquility.

To create a hair or skin-based perfume that allows the fragrance to linger around for a longer duration follow the next steps. Take 40 ml of distilled water in a spray bottle. After this add about up to 7-10 drops of the ylang-ylang essential oil along with 2 teaspoons of Aloe Vera gel and blend it well. Shake the mixture in the spray bottle thoroughly and allow the ingredients to mix well. Next, spray it on the hair or skin, wherever you wish to, similar to any regular perfume.

Before using this oil topically on a large area of skin, remember to perform a patch test for a few hours to eliminate any possibilities of a skin allergy or unsuitability of this oil for your skin.

pure essential oils for aromatherapy

Shop Kama Ayurveda Essential Oils

Read - Essential Oils 101 - How To Find The Best Ones For You

Now that we’ve covered everything you need to know about Ylang Ylang oil, let’s look at some frequently asked questions about the oil.

Frequently Asked Questions

·   Can Ylang-Ylang oil be used to reduce blood pressure?

Yes, studies have proven that ylang-ylang oil can reduce blood pressure considerably.

·   What does Ylang-Ylang oil smell like?

Ylang-Ylang oil has an earthy-fruity combined with a floral essence. One would even perceive a slight pungent fragrance to this oil.

·   Does Ylang-Ylang oil benefit the hair?

Yes, it does benefit the hair in a couple of ways. Read the ‘uses of Ylang-Ylang essential oil for hair’ section in this article.

·   Ylang-Ylang essential oil blends well with which oil?

The Ylang-Ylang essential oil could be blended with a wide range of essential oils like Lemon, Sandalwood, Bergamot, Grapefruit to name a few. In case you want to blend it with a suitable carrier oil, Coconut oil, Jojoba oil or even avocado oil would be suitable

Finally, to end the article just like every other ingredient even the ylang-ylang essential oil could be harmful to the usage of certain individuals hence, it is strongly advised to seek the opinion of your general physician or dermatologist before incorporating this oil in your routine. Individuals suffering from low blood pressure are advised to avoid using this oil as inhaling the fragrance of this oil is known to reduce blood pressure and heart rate levels.

References -

  1. Aromatherapy with Ylang Ylang for anxiety and self-esteem: a pilot study
  2. Commercial Essential Oils as Potential Antimicrobials to Treat Skin Diseases
  3. Effects of Ylang-Ylang aroma on blood pressure and heart rate in healthy men
  4. Ylang Ylang Oil For Acne
  5. Effects of Ylang-Ylang aroma on blood pressure and heart rate in healthy men

12 Amazing Benefits & Uses Of Eucalyptus Oil

Have you ever heard about the Stringy Bark Tree, or the Bluegum or Fever tree?

Well, these are the several other nicknames given to the tree that provides the super ingredient for a potent Ayurvedic healing oil - Eucalyptus Essential oil.

There are many varieties of Eucalyptus. As many as 700 types of Eucalyptus grow as trees, and few of them even grow as shrubs. Despite this, the distinctive characteristics are quite similar across the diversification. The shared conventional trait is the medicinal and healing property possessed by the leaf of this plant. 

Eucalyptus leaves are well-known for their camphoraceous, pungent, crisp fragrance.

eucalyptus leaves

Based on the narration of an English folklore, it is said that once when an English settler accidentally hurt his finger with an ax, his father had instructed him to keep some of the Eucalyptus leaves wrapped against the wound. Later, when a surgeon checked the injury, he was entirely galvanized by the healing done, especially without the lurking of any infection.

Tales like these spread like wildfire, which initiated the emergence of extracting oil from the Eucalyptus plant, now known as Eucalyptus Essential Oil. 

What Is Eucalyptus Essential Oil?

Eucalyptus Essential Oil comes from the Eucalyptus tree, mainly found in Australia. This tree has oval leaves and blue-grey bark. Sometimes, the bark has resins on it, which is why it's also called the blue gum tree. The oil is now produced in many places like Europe, Brazil, India, China, and Greece.

The oil is mostly derived from a type of the tree called Eucalyptus globulus. Its leaves are steam distilled to extract the oil. The leaves can be fresh or partially dried.

The quality of the oil depends on where the tree grows – factors like the soil, sunlight, the type of the tree, and how much water it gets matter a lot.

When you buy Eucalyptus Essential Oil, check where it comes from and if it's pure to make sure it's good quality.

We recommend Kama Ayurveda Pure Eucalyptus Essential oil as it is cold-pressed from trees grown on the verdant slopes of the Nilgiri Hills in Southern India. Its woody and sweet aroma builds immunity and relieves muscle tension, among many other benefits. 

eucalyptus essential oil

Components like α-Terpineol, Limonene, Aromadendrene, Piperitone, Citronellal, and Camphor present in Eucalyptus Essential oil provide immense benefits for skin, hair, and overall health. Let's look at these benefits of Eucalyptus oil in the next section.

What Are The Top Eucalyptus Oil Benefits?

In Ayurveda, Eucalyptus is known for its Vata pacifying properties as it has heating energy. It strengthens the overall metabolism, circulation, and immune system. It’s also a powerful antiseptic and analgesic that can be used to treat wounds, infections, and painful inflammation of the muscles that lead to muscle soreness.

In this section, we’ll be talking about the top benefits of Eucalyptus oil in detail.

  • Relief from the symptoms of Cold, Sinus and Cough

Eucalyptus is a common ingredient found in cold and cough medications. It is majorly because researches are stating that Eucalyptus can attenuate mucus and dilate the bronchi and bronchioles present in the lungs. This is possible as it contains pinene, known to be a bronchi-dilator and also cineole, which aids in reducing inflammation and mucus build-up. Eucalyptus is also known to give relief to asthma-related symptoms. 

  • Improving Bad Breath

Bad breath considerably reduces a person's ability to speak confidently, it would continuously bother an individual, and it would be quite a task to have general conversations. However, as this plant contains antibacterial properties, they would work against mouth odor by fighting germs. The presence of mouth odor could indicate an underlying cavity as well; hence it is always advisable to visit a dentist.

  • Reduction In Pain

When the Eucalyptus essential oil is inhaled, its unique properties help in decreasing pain. The cineole and limonene present in the extracts of this oil are known pain-relievers. In the Aa study, people who underwent knee replacement surgery were advised to inhale this invigorating oil for about 30 minutes regularly. Following this, a reduction in the perception of pain was reported. However, more research is required to confirm this benefit.

  • Healing Of Insect Bites

Eucalyptus oil produces a cooling effect when topically applied. It is known to diminish pain as well as inflammation. However, one should note that essential oils should not be applied without diluting as they are potent and can cause adverse skin reactions.

  • Removal of Dandruff

The antifungal and antiseptic properties present in Eucalyptus oil works against the formation of dandruff. The yeast-like fungus called Malassezia is the usual cause of dandruff. This oil, along with a suitable carrier oil, could efficiently keep dandruff formation and related issues like itchiness at bay.

 kama ayurveda eucalyptus oil

Shop Kama Ayurveda Eucalyptus Pure Essential Oil

  • Relieves Sore Muscles

The citronellol present in this Eucalyptus essential oil is known to have antispasmodic and anti-inflammatory properties that work against any muscle cramps or sore muscles by slackening and relaxing them.

  • Promotes Hair Growth

As Eucalyptus has properties that aid in fighting against dandruff, promoting blood circulation, and eliminating any inflammation or fungal invasion on the scalp, it banks the credibility of promoting significant hair growth. Its soothing and calming effects even reduce stress, which is often stated as one of the common causes of hair loss. It provides the nourishment and constituents needed for healthy hair growth. 

  • Relieves Sunburns

Sunburns could be quite painful. However, as previously mentioned, the pain-relieving properties, coupled with the soothing composition of this oil, could tremendously bring relief to sunburns and even redness. Also, the antibacterial components would prevent the onset of any infection.

  • Repels Insects

The insect repellents available in the market are often filled with harmful chemicals that may keep insects away but at the cost of our health. The scent of this oil keeps away bugs, mosquitoes, cockroaches, and even rodents. Studies that state the dermal application of this oil have been useful in preventing mosquito bites for almost 2hours, with 97% claimed success. It is said that this oil is capable of masking the natural mosquito-alluring scent with the help of the compound called PMD.

  • Natural Stress Buster

Many essential oils are stated to be a wonderful stress reliever. Eucalyptus oil has the fresh aroma of menthol that invigorates the senses and eliminates sluggishness and mental fatigue. It also has calming effects.

Due to these properties, it is also seen as a common ingredient used in aromatherapy and even in spas. There are studies even claiming its ability to reduce pre-surgery anxiety visible in patients, validating the use of this oil as a stress buster. 

eucalyptus oil for aromatherapy
  • Disinfection of Wounds

As stated in the short English folklore illustrated at the beginning of the article, this ingredient has the credibility of disinfecting and initiating the healing process of wounds for ages. When using the oil, it is essential to dilute it well before disinfecting. Minor injuries, scrapes, or bruises would benefit from this oil and even keep any attack of infections away as it contains antibacterial and anti-microbial components.

  • Dental care

The eucalyptol present in the Eucalyptus is known to improve dental health considerably. The enhanced contents of ethanol and marcocarpal C-kind of polyphenol are known to reduce the bacteria production that could give rise to cavities and diseases of the gingiva/gums.

Some studies have been conducted that confirm these claims as the participants found a substantial decrease in the build-up of plaque, gingival inflammation, and bleeding on chewing gum having eucalyptus based extracts.

Also, eucalyptol is a common ingredient found in mouth-washes. It is, however, recommended to check with your dentist before utilizing this ingredient.

How to Use Eucalyptus Oil For Skin, Hair And Aromatherapy?

First and foremost, it is of utmost importance to note that Eucalyptus oil should not be used directly for a dermal application unless mentioned in the product's usage instruction. Also, oral consumption of this product is not at all safe and discouraged. It could be lethal for the body as it could result in dizziness, ataxia, nausea, and diarrhea.

The Eucalyptus essential oil should always be used in the diluted form irrespective of its use. One could use a carrier oil or any other means to dilute it; to understand more about it, keep reading ahead.

For Sunburns

Mix 2-4 drops of eucalyptus oil to one teaspoon of clear, pure aloe-vera gel. Next, transfer it into a two-ounce spray bottle that is filled with purified water. One could spray it on the area of concern or also use it to cool oneself after a hot summer day.

For Insect bites and as Insect Repellent

Soothing insect bites with the help of Eucalyptus oil is quite simple. Simply dilute 1-2 drops of the Eucalyptus oil to 1 tsp of any carrier oil of your choice & apply it topically.

One could even drop a few drops of this mixture of 1-2 drops of Eucalyptus oil with 1 tsp of any carrier oil onto a cotton ball and then dab it around your clothes like under the collar or sleeves of the shirt, or around the edges of your trousers to repel insects.


For Bruises or Wounds

Ever cut your finger and skipped the disinfecting part only to find yourself staring at an infection a few days later? Well, next time, even for a minor bruise or a deep wound, use your home-made antiseptic wash.

All one needs to do to prepare it is - Add a few drops (around 8 to 10) of Eucalyptus Oil to two water cups. Mix it well and store it in a spray bottle. On getting a cut to disinfect the wound with this solution and a clean damp cloth, or one could even use fresh cotton balls.

For Joint Pain

Mix one or two drops of the Eucalyptus oil along with a carrier oil like Coconut oil or Argan oil. Rub this solution thoroughly on the painful areas in a circular motion. Its anti-inflammatory properties will aid in eliminating the pain.

For Moisturizing and Protecting Skin:

Enhance your moisturizer by adding a few drops of Eucalyptus oil. This can help increase the skin's moisture retention and strengthen the skin barrier, especially beneficial for dry skin conditions.


To Reduce Inflammation and Acne:

Dilute Eucalyptus oil with a carrier oil and apply to areas with redness or acne. Its anti-inflammatory properties help soothe the skin and reduce acne-related symptoms.

eucalyptus for lung congestion

What Are Eucalyptus Oil Benefits For Skin?

Purifying and Cleansing Properties:

Eucalyptus oil is known for its ability to purify and cleanse the skin, helping to remove impurities and improve overall skin health.

Anti-Inflammatory Benefits:

The oil contains anti-inflammatory properties that help reduce redness and symptoms related to acne, soothing skin irritations.

Enhancing Skin's Ceramide Content:

Ceramides are crucial for skin health, acting as a barrier to retain moisture and protect against environmental damage. They are essential for preventing dryness and irritation. Eucalyptus oil can boost the skin's ceramide levels, which are vital fatty acids responsible for maintaining the skin's barrier and preserving moisture.

Addressing Dry Skin Conditions:

Low levels of ceramides can lead to dry skin, dermatitis, psoriasis, and other related issues. Eucalyptus oil helps to maintain ceramide levels, alleviating these conditions.

Moisture Retention:

The oil is effective in retaining the skin's moisture, preventing dryness and keeping the skin hydrated.

Protection Against UV Damage:

Eucalyptus oil can mitigate the harmful effects of UV rays, which cause the breakdown of elastin and collagen, leading to premature aging.

Treatment for Sunburns: 

Due to its protective properties against UV damage, Eucalyptus oil is also beneficial in treating and soothing sunburns.

Shop Kama Ayurveda Eucalyptus Pure Essential Oil

  • Eucalyptus Oil As A Disinfectant

When utilized as a disinfectant air spray, Eucalyptus oil is a powerful natural air cleanser. It contains anti-microbial properties which play a vital role in abolishing viruses and bacteria present in the atmosphere and while at the same time freshening the air.

Quite commonly, body odors are confined in the shoes and sports equipment; this oil can be used as an effective spray to eliminate them when diluted with water. Along with a few other essential oils and water, the end combination is stated to work out as an effective surface cleaner.

What Are Eucalyptus Oil Benefits For Hair?

Ceramide's Role in Hair Health:

Ceramide in Eucalyptus Oil plays a significant role in improving scalp and hair conditions, as evidenced by studies. A study involving 34 individuals using products with Eucalyptus extracts and synthetic ceramide showed notable improvements in scalp health.

Reduction of Scalp Issues:

Participants in the study on Eucalyptus oil experienced a considerable decrease in scalp itchiness, dryness, redness, and dandruff after using Eucalyptus oil-based products.

Enhancing Hair Luster:

Eucalyptus oil increases the moisture content in hair, enhancing its natural shine and making it appear glossier.

Herbicidal and Antifungal Properties:

Eucalyptus oil's herbicidal and antifungal qualities are beneficial for hair growth and scalp nourishment.

Multiple Benefits for Hair and Scalp:

The oil is effective in stimulating hair growth, eliminating lice, and reducing scalp itchiness.

Menthol Component for Cooling Relief:

Menthol, a component of Eucalyptus oil, provides a cooling sensation and relief from scalp itchiness.

Stimulating Blood Circulation:

Massaging Eucalyptus oil into the scalp can enhance blood circulation, promoting significant hair growth.

What Are Medicinal Properties of Eucalyptus Oil?

Previously, Eucalyptus oil was widely used at hospitals in England to clean urinary catheters. Presently, the Siberian research conducted in 2016 gives back-up to this use due to the confirmatory presence of anti-microbial properties. 

A positive correlation was also concluded in the ability to procure new treatment by the combination of Eucalyptus oil with prevailing antibiotics. This finding suggests a potential reduction in the reliance on antibiotics.

Here are top medicinal benefits and uses of this oil - 

Antibacterial and Respiratory Benefits:

The oil's antibacterial properties are believed to be effective against respiratory tract disorders, though further research is needed to fully substantiate these claims.

Relief for Cold and Flu Symptoms:

Eucalyptus oil, especially its leaves, is a well-known ingredient in remedies for flu symptoms. Inhalation of its vapors, containing compounds like piperitone and camphor, can significantly alleviate congestion in cold and bronchitis cases.

Potential in Lowering Blood Pressure and Blood Sugar:

The oil has been linked to treatments aimed at reducing blood pressure and blood sugar levels, although the extent of its effectiveness requires more research.

Pain Relief and Wound Healing: 

Eucalyptus oil is also recognized for its ability to relieve muscle and joint pain and aid in the healing of minor wounds.

Combats Mental Fatigue: 

The distinctive aroma of Eucalyptus oil is effective in reducing mental fatigue and sluggishness. It enhances blood flow to the brain, providing instant relaxation and a sense of rejuvenation. 

Stress Relief and Anti-Anxiety Benefits:

Eucalyptus oil, particularly due to its eucalyptol content, is believed to have anti-anxiety and calming properties. This makes it beneficial for alleviating symptoms caused by a stressful lifestyle, promoting relaxation and mental well-being.

Can Eucalyptus Oil Be Used As A Disinfectant?

Eucalyptus oil is a powerful natural air cleanser. It contains anti-microbial properties which play a vital role in abolishing viruses and bacteria present in the atmosphere and while at the same time freshening the air.

Quite commonly, body odors are confined in the shoes and sports equipment; this oil can be used as an effective spray to eliminate them when diluted with water. Along with a few other essential oils and water, the end combination is stated to work out as an effective surface cleaner.


Frequently Asked Questions 

Now, as we have understood the benefits of this excellent essential oil, let us address some of the most common questions that people have about Eucalyptus oil.

Also read - Essential Oils 101 - How To Find The Best Ones For You?

Should I use Eucalyptus Oil For Acne?

Eucalyptus oil has the property of reducing excess sebum formation, which could work against acne formation. However, further research is required to state its use against acne affirmatively.

Is Eucalyptus Oil Safe For Dogs?

Eucalyptus oil application is strongly discouraged for dogs. It is not safe and could harm the pet adversely.

Does Eucalyptus Oil Help With Sinus?

Yes, it contains a compound known as cineole that aids in reducing inflammation and mucus build-up.

Is Eucalyptus Oil Safe During Pregnancy?

No, it is not recommended to use this essential oil during pregnancy. Even though mixed results state its safety during pregnancy, it is advisable not to undertake any risks for the health of the mother and the baby.

Is Eucalyptus oil safe for babies to breathe?

It is not advisable for infants under two to use this oil in any form. Kindly check with your pediatrician if the need arises to utilize this oil for children of any age group.

Should I add Eucalyptus oil in a bath?

One can use this oil in the bath by spraying its diluted form around in the air but not directly in the water. As essential oils are not water-soluble they form a film and lie floating on the water surface. While splashing that, along with water, your skin is getting exposed directly to the oil, and the sensation could be quite stingy and would negatively affect your skin.

Is Eucalyptus oil suitable for beards?

Yes, it could be used in grooming beard hair as well. But be cautious about following the correct steps and methods. Always dilute the oil before its use.

Is Eucalyptus oil suitable for  sauna?

Yes, this oil could be used for a sauna as it is lauded for its woodsy fragrance.

Lastly, we recommend medical and professional advice before implementing Eucalyptus essential oil for your needs. It is better to be aware and safe rather than facing untoward results.

References

  1. Antibacterial effects of Eucalyptus Oil
  2. New Perspectives On Anti-Acne Plant Drugs
  3. Essential Oils Used In Aromatherapy - A systematic review
  4. Chemical composition and antibacterial activities of seven Eucalyptus species

Essential Oils 101 – How To Find The Best Ones For You?

Whether it is about being struck by a nasty cold or a throbbing headache, we all have our gloomy days. But the instant relaxation that comes along just with the inhalation of Eucalyptus oil or Peppermint oil is astounding. It takes away most of the uneasiness, allowing us to heave a sigh of relief, setting us ready once again to get back on our feet to move along the hustle and bustle of life. 

Ever wondered what exactly are these essential oils, and why are they so effective? This article will guide you through everything you need to know about essential oils, their benefits, and uses. It’ll also help you identify the right essential oil for your needs.

What Are Essential Oils?

Plants have been of use to mankind since ages unknown. Over the years, many of the beneficial plants have been experimented with to derive useful compounds. The essential oils are the volatile aromatic derivatives of the extracts of these beneficial plants. They are manufactured in the concentrated format from the source plant’s roots, leaves, bark, stem, resins, flowers, etc.

They are called ‘essential’ because the oil encapsulates the plant’s essence, flavor, and scent. Further, the plant from which the oil has been derived gives the essential oil its complete name.

The scent of the essential oil is much stronger than the plant used to derive it as the number of active ingredients in the oil is much higher. The amount of substance needed to make the oil requires multiple plants of the same kind causing the extract to be very concentrated. The different aromatic components in every plant give each essential oil its characteristic essence.

essential oils

The two widely known techniques to derive the oil from these incredible plants are the cold-press and distillation methods. The process through which essential oils are extracted and manufactured is crucial as it determines the overall quality and efficacy. In case the method used is chemical-based, the benefits of the essential oil reduce considerably.

Organic Essential Oils by Kama Ayurveda are made by distilling hydrophobic liquid, sourced from different parts of the plants like the flowers, roots, barks, fruits, and leaves. They contain volatile aroma compounds that emit a mesmerizing fragrance and are ideal for massages, aromatherapy, and wax candles. 

The Complete List of Essential Oils

As of today, there are over 100 Essential Oils across the world with their unique aroma and healing properties. In this section, we’ll talk about some of the most-well known Essential Oils and highlight their top benefits and features.

Want an all-purpose essential oil with a sensual and exotic floral fragrance? Ylang Ylang is the perfect essential oil to promote inner peace, confidence, and relaxation.

This oil contains properties that work against skin irritation and aging of the skin and help retain a youthful glow. It can be applied on the hair to keep the hair shiny, bouncy, and tangle-free. The fragrance of this oil works as an antidepressant, and its mild sedative effect relieves those suffering from insomnia and stress. It is even beneficial in controlling the blood pressure levels and stabilizing the heart rate.

 ylang ylang essential oil for aromatherapy

Suffering from skin problems and want to heal them naturally? Tea Tree Essential oil derived by the steam distillation of twigs and leaves of tea trees is well known for its beauty applications. It is considered one of the effective methods for spot treatment of acne, pimples, and blemishes. It even relieves from dry skin-related issues like eczema and psoriasis.

Tree oil also works against dandruff formation and also aids in getting rid of lice infestation on the scalp. However, this oil should not be applied before heading out in the sun as the UV rays could sensitize the skin adversely.

Basil's benefits are already quite well-known for many years as it aids in warding off many ailments of the respiratory system. The traditional Ayurvedic medicine considers Sweet Basil as an incredible immunity booster.

When used topically, it helps to keep bringing back the luster of dull skin. It also works against acne symptoms. While applying on hair, it adds to the shine while stripping away the greasiness or previous product build-up.

Don't we all need an energizing aroma to uplift the mood from time to time? The exhilarating scent of Orange essential oil works as an instant stress reliever. Its citrus scent appeals to the senses and promotes a feeling of warmth and joy.

This oil is high in antioxidant properties and acts as an immunity booster as well. It contains a significant amount of limonene, which promotes collagen production and, at the same time, reduces aging-related complications like wrinkles and dark

This oil has banked the name of ‘liquid sunshine’ because of its yellow color. Cold-pressed from the peel of fresh limes, this essential oil is a highly refreshing and energizing ingredient with a variety of positive effects. It has powerful anti-microbial and immunity-boosting properties.

This essential oil is particularly useful for alleviating mental tension, lifting negative energy, and fatigue, and PMS. Its aroma instantly lifts the mood and induces positive energy.

If you’re looking for an essential that works as a natural air freshener and makes you feel closer to nature, then Lemongrass essential oil is perfect for you. It uplifts, exhilarates, and deodorizes naturally. The light lemony relaxing and hypnotic fragrance relieves anxiety, irritability, and insomnia.

This oil is filled with anti-inflammatory and analgesic properties providing relief from muscle and joint pains. It also has anti-microbial properties hence reduces the formation of unwanted bacteria. 

With a uniquely fresh aroma, this gorgeous woodsy oil is cold-pressed from Pine trees grown in regions like the cold climes of Himachal in India. A crispy, woody scent is known for evoking feelings of stability, energy, harmony and comfort.


The oil is extracted from the leafy needles of the pine tree. It is majorly used to treat skin related ailments like acne, psoriasis, athlete's foot, itching, and eczema. It even keeps any kind of redness, swelling, and inflammation away. When applied on the scalp, it counters dryness and dandruff formation.

pine essential oil

Peppermint essential oil has an instantaneously recognizable minty fragrance that invigorates the mind and body. The calm, soothing effect of this oil helps it work against muscle cramps, owing to its antispasmodic properties. It even fights against inflammation and gives relief from pain. Considering all these properties, it is highly beneficial as a post-workout massaging oil. It also eases PMS and soothes headaches.

Cherished for its unmistakable aroma and myriad benefits for beauty and wellness, Lavender has contributed to the most used essential oil consumption globally. It has a myriad of benefits. This oil has soothing and cooling properties, because of which it reduces the irritation and redness on the skin. When applied on the scalp, it works as a toner and provides relief to itchy scalp. The fragrance of this oil helps in reducing the cortisol levels, therefore, acting as a stress reliever. Adding this oil to bath water helps soak away stress and promote restful sleep at night.

lavender essential oil

Cypress oil has the superpower of controlling the sebum production when applied over the skin. It, therefore, is a must-oil to combat issues faced by the oily skin type. It aids in cleansing the skin and tightening the pores. The aroma of this oil is known to enhance the mood and evoke a feeling of wellness.

Bergamot is a light citrus oil that has properties that aid in reducing the scars and pigmentation. It also works in balancing the production of melanin and tones the skin. When used with a carrier oil and applied topically, this oil diminishes muscle ache and is also useful in relieving arthritis-related discomforts. It even works as a natural perfume and is widely used in the production of scented candles and soaps.

bergamot essential oil

Filled with purifying properties, Eucalyptus oil aids in clarifying and cleansing the skin. Its aroma works as an effective immunity booster and also relieves muscle tension.

It has antiseptic properties and works to relieve pain or itching caused by insect bites. It has medicinal properties that help ease breathing and clear nasal passage specifically for conditions like asthma. It is advised to use a carrier oil and not apply eucalyptus oil directly over the skin as it could give rise to an allergic reaction.

This oil has the potential to work as a detoxifier that aids in clarifying the skin complexion. It is also known for its medicinal properties as it is antiseptic and prevents wounds or injuries from getting infected. It relieves menstrual cramps and also soothes inflammation occurring in the digestive system. It works as an insect repellent and deodorant.

citronella pure essential oil as mosquito repellant

This spicy warm oil has antioxidant properties which replenish the skin and works as an anti-aging product. It also fixes the skin condition that gives rise to inflammation, redness, and rashes. On application on the scalp, it boosts the hair growth and fosters shine along the lengths of the hair. Its fragrance works against nausea and adds a sense of harmony and comfort in the surroundings.

  • Geranium Essential oil

Germanium oil is known for its ability to eliminate dead skin cells and promote restoration of the skin. It has astringent plus anti-aging properties that aid in providing firmness to the skin and lessening sagging and wrinkles formation. This oil allows muscles to contract, thereby providing it a tightened appearance and fostering a toned body look. The fragrance of this oil is known to provide relief from insomnia and stress.

Next, let’s understand more about categorized use of these essential oils.

Are Essential Oils Effective?

Now that you are aware of a variety of Essential Oils and their role in promoting our general health and wellbeing, you might be curious to know how effective they are in offering all of the benefits discussed above?


The answer is - yes. But, you must only the purest and the best quality essential oils for the best results. In this section, we’ll talk about the many effective uses of Essential oil for health, cosmetic and relaxation purposes.

kama ayurveda essential oils

Shop Kama Ayurveda Pure Essential Oils 

  • Essential Oils Uses For Health

Since ancient times, the essential oils have been used to combat cold and flu-related symptoms. They help in inhibiting the harmful bacteria and enhancing the immunity of the individual. Few of them even help in preventing diseases due to their antibacterial properties.

Being invisible to the naked eye, the spread of germs in the air is the main reason behind most air-borne diseases. Using the diluted version of the oils rich in anti-microbial properties as an air freshener helps eliminate these microbes. Adding essential oil like Eucalyptus to boiling water and inhaling the vapors have proven benefits of sinus decongestion. Some essential oils like Peppermint and Lemongrass work wonders for those suffering from muscle ache and joint pain. They also help in easing out menstrual cramps and PMS.

essential oil uses
  • Cosmetic Use Of Essential Oils

Essential oils are also used in cosmetic products to enhance the result provided by the end-product. For example, adding these oils to moisturizers enhances the capability of just moisturizing to include other benefits like clearing the skin, diminishing blemishes, and reduction in aging-related symptoms like wrinkles and fine lines. 

Essential oils also possess cell-regenerative potentialities. Many skin conditions like acne, Eczema, Psoriasis are reduced with the application of these oils, due to their healing benefits.

When applied on the scalp, the oils work efficiently to promote hair growth, increase the volume, and add to the shine. Also, dandruff and lice treatment are possible with the use of these oils. 

The essential oils are commonly found in natural beauty products. Ditch the commercially manufactured chemical products for natural ones to experience the cosmetic benefits of these essential oils visibly.

  • Essential Oil Uses To Promote Well Being

When using these oils as air fresheners or diffusers, their stimulating effects are known to improve the mood of the person and effectively instill a sense of peace, gratitude, and relaxation. They are used as an effective stress buster to declutter the mind.

The subtle aroma of these oils described as woody, earthy, spicy, and clean is used in religious environments to enhance the mystical experience one embraces. The use of these oils could be inculcated in a person’s routine by topical application or inhalation. However, it is advisable to ask and confirm with your general practitioner before using them to avoid irritation.

Essential Oils and Ayurveda

We have seen how the essence of these oils can enhance your physical health and the surrounding space. Now, let's talk about the significance of essential oils, according to Ayurveda.

Ayurveda is one of the oldest known health systems. Even with the onset of modern medications, Ayurveda is in the limelight. It is known for its holistic treatment approach, which often contradicts the present rage of instant cure of outward symptoms.

To begin with, Ayurveda classifies every individual into a specific dosha type. Our body reacts to the surroundings on the physiological or psychological forefront based on the dosha a person possesses.

All people based on their energy could be categorized into the following three types of dosha: Vata, Pitta, and Kapha. According to Ayurveda, every essential oil has a unique characteristic that can be used to balance the doshas.

  • Vata

Stress and anxiety are significant elements faced when Vata is aggravated. It leads to coldness and dryness related imbalances in the body. To counter these, warming essential oils like Rosewood, Cinnamon, Sandalwood, Basil, Clove, Ginger, Camphor, Bergamot, or Oregano could be utilized.

ayurvedic aromatherapy with essential oils for vata
  • Pitta

Pitta has the characteristic of inducing heat in the body when irked. As a result, problems like skin irritations, odorous sweating, and inflammation appear. They can be treated with cooling based essential oils like Peppermint, Lavender, Lemongrass, Ylang-Ylang, Rose, Gardenia, and Jasmine to induce a feeling of calmness and dispel heat.

ayurvedic aromatherapy with essential oils for pitta

  • Kapha

Kapha is known for a soft, slow, lethargic, and cold-based nature. The most commonly face issues leading to accumulation of fluids like mucus causing illness such as running nose, bronchitis, cold sweat, itching. These can be treated with warm and spicy overtones of essential oils such as eucalyptus, clove, basil, cedar, black pepper, and orange.

ayurvedic aromatherapy with essential oils for kapha

Many ayurvedic practitioners recommend balancing the doshas with aromatherapy over the topical application or internal consumption of these oils.

How to Use Essential Oils

Since we have understood the benefits and effectiveness of the essential oils, let's dive into the next section that directs one on how these essential oils should be used.

Essential oils can be inhaled by vaporization, ingested, or applied on the skin or scalp. However, there are specific instructions and methods that one needs to know before use.

The Importance Of Carrier Oils 

As mentioned at the beginning of the article, essential oils are derived and stored in a highly concentrated format. Direct use could do more harm than good, like skin irritation, redness, and burning in many cases. It is recommended to use carrier oils along with the desired essential oil.

You need a carrier oil to dilute the concentration of the essential oil. The carrier oil does not impede the therapeutic properties of the essential oil nor dilute the effectiveness. It merely performs the duty of carrying the properties of the essential oil along with their own. There are many carrier oils available in the market, few of the beneficially well-known ones are as mentioned ahead.

Coconut oil is rich in fatty acids and polyphenols, making it an ideal carrier oil for massages and skincare. They can easily penetrate the skin as their molecules are small in size. The oil molecules of the essential oil are also considerably small; these oils, when combined, provide wholesome nourishment to the skin as they are readily absorbed.

Coconut oil itself has moisturizing and soothing properties that help to lubricate the skin, prevent dryness, and keeps it replenished.

Read - Why Is Virgin Coconut Oil Good For Your Skin

  • Jojoba oil

Jojoba oil is not considered to be oil but is classified more as a liquid wax ester. The specialty of this oil is that its chemical composition closely replicates that of the human sebum that is secreted by the sebaceous gland of the human body. Because of this property, our skin readily accepts this oil, which works as an excellent carrier oil as the essential oil when diluted with jojoba oil allows it to be penetrated deep into the skin. 

Jojoba oil is rich in antibacterial and antifungal properties, preventing the growth of harmful bacteria while retaining moisture and promoting suppleness.


Read - 10 Benefits Of Using Jojoba Oil For Your Skin

  • Olive Oil

Olive oil has immense therapeutic properties. It is used as a carrier oil majorly for exfoliation and cleansing purposes. This oil is also known for its collagen-boosting properties allowing the skin to regenerate, revive the radiance, and benefit as an anti-aging product.

Essential oils can be inhaled by vaporization, ingested, or applied on the skin or scalp. However, there are specific instructions and methods that one needs to know before use. These needs vary depending on the essential oil and the requirements. We’ll discuss them in detail in the next section.

1. How To Use Essential Oils for Skin 

Essential oil can be applied to the skin through topical applications. Before the application,  dilute 2-3 drops of essential oil with 1 tsp of carrier oil. After dilution, the oil can be massaged on the skin or be used as a spot treatment.

The essential oil can also be added to your bathing water. However, one needs to note that directly adding essential oil in the bathing water is not recommended as the oil does not dissolve in water and would remain afloat over the water in the form of a film. When the skin comes in contact with the oil, the whole strength of the essential oil will strike and expose the skin surface, causing adverse skin irritations.

To counter this, it is thus advised to use essential oil with the help of a dispersant, for example, adding the oil to few tablespoons of full cream milk would also work. Another formula that could be used is adding six drops of essential oil like Lavender to two tablespoons of the following mixture: Epsom salt, one part baking soda, and three parts of sea salt.

lavender essential oil for skin

2. How To Use Essential Oils for Hair

A plethora of hair benefits is known for various essential oils. Right from boosting hair growth, preventing hair loss from maintaining shine, different essential oils have their specific advantage.

An essential oil can be applied to the hair along with a carrier oil. Simply take 2 or 3 drops of essential oil to 1 teaspoon of carrier oil and mix it well. Next, apply it on the scalp and massage it thoroughly. Leave this mixture overnight or rinse it away after a couple of hours.

You even make their hair spray with the help of purified or distilled water and coconut sugar. To begin with, heat the water for a few minutes, after turning off the heat source, add one tablespoon of coconut sugar and keep mixing until it dissolves. Next, after the mixture cools down, add about 25 drops of the essential oil you desire based on your needs and store it in a glass spray bottle.

The bottle should be shaken thoroughly before every application. Also, the shelf life of such hair spray is around 3-4 weeks.

3. How to Use Essential Oils For Aromatherapy 

It is widely recommended to use the essential oil through inhalation. Each oil provides unique benefits through aromatherapy. They help in relaxation and in uplifting the entire aura of the surroundings. To use these oils for their aromatic properties, you will need a diffuser.

The diffuser is an electric or battery-run device that aids in diffusing the essential oil in the surrounding atmosphere. Essential oils cannot be burnt directly as there would be a drastic change in the chemical composition of the oils rendering it harmful or useless. Diffusers generally use water or cool air with the help of inbuilt fans or reeds to disperse the essential oil molecules into the atmosphere.

Massages are also a fantastic means to reap the therapeutic benefits of the essential oil as it combines aromatherapy and reflexology or plain rubbing. About 20 to 30 drops of essential oil can be mixed with 2 ounces of advanced quality vegetable carrier oil and massaged all over the body. Those with sensitive skin could use ten drops of the essential oil for 2 ounces of the carrier oil.

Massages allow relaxation, improve circulation as well as tone the body considerably.

Best Essential Oils for Skin

Next, let’s find out which essential oil aids in combating which specific skin issues. 

1.    Essential oils for skin tightening

French Cypress essential oil is specifically known for its cleansing and toning effects. This oil aids in tightening the pores as well as controlling the sebum level of the skin

2.    Essential oils for oily skin

Ylang Ylang essential is known to balance and regulate oil production when applied topically. It prevents excessive oil production and, at the same time, soothes any irritation caused by oily skin.

3. Essential oils for dry skin

Lavender essential oil works wonders by moisturizing and retaining the hydration for those affected with chapped and dry skin. It can even be used to treat dry skin conditions like Eczema as it has antifungal properties and reduces inflammation. 

4. Essential oils for acne scars


Tea Tree Oil is rich in antibacterial properties that aid in soothing acne breakouts and diminish the scars left behind by past acne.

best essential oils for skin

Best Essential Oils for Hair

Next is the list of essential oil to treat various hair related complications.

  1. Essential oils for dandruff


Tea tree essential oil is a fungicidal oil which can eliminate dandruff and reduce the flaking considerably. It boosts the circulation and thereby aids in hair growth as well.

 2. Essential oils for hair loss     


Cedarwood essential oil has regenerating properties due to which it’s beneficial for stimulating hair growth. It allows new hair growth and naturally reduces hair loss. It also tightens the hair follicles and reduces the thinning of hair. 

3. Essential oils for hair growth


Citronella essential oil protects and nourishes the hair extensively. It cleanses the scalp removing dead skin, dirt, residues, and stimulates hair growth.

citronella pure essential oil

 4. Essential oils for dry hair

Rosemary essential oil moisturizes the scalp and reduces the dryness of the scalp. It even reduces dandruff and itching caused by dryness. We also recommend Eucalyptus essential oil and Ylang Ylang essential oil for nourishing dry hair.

Best Essential Oils For Sleep and Relaxation

Many of the essential oils have proven benefits of inducing sleep and providing relaxation; the following are three of such essential oils.

1. Bergamot essential oil

Bergamot oil has soothing properties and works against sleep disorders like insomnia. It collectively reduces lethargy and makes a person more energetic and lively.

2. Lemongrass essential oil

The aroma of this oil uplifts one’s mood instantaneously, relieving stress and anxiety. It induces a refreshed and relaxed atmosphere. 

lemongrass pure essential oil

3. Eucalyptus essential oil

Eucalyptus oil is known to soothe physical as well as mental discomfort. It eases a person’s mental exhaustion and boosts circulation to the brain. 

Apart from these oils, Lavender essential oil and Ylang Ylang oil are also well known for their sleep-inducing and relaxing effects.

Conclusion

We hope that our complete guide to the essential oils helped you understand all that you needed to know about them. It is also recommended to consult your health practitioner before inculcating any essential oil in your routine. You can book a free consultation with our Ayurvedic Beauty Consultant by following this link.

book ayurveda consultation

References -

  1. Ayurveda and Aromatherapy
  2. Do Essential Oils Really Work?
  3. Essential Oils in Aromatherapy

Your 7 Step Guide To A Perfect Pedicure At Home

What takes you to places? Your ‘will’, of course. But, what part of your body carries out the movement that your will mind commands? Yes, your wonderful feet. They make you mobile and agile. Just how gracefully they carry the weight of your entire body, is truly marvellous!

Despite the huge role that our feet play in our day to day lives, they get limited care and attention. Your feet are exposed to dirt, pollution and sun, all of which take a heavy toll on it along with the physical stress from daily activities. For this reason, your feet need special therapy, known as a pedicure.

The benefits of a good pedicure are not limited to the feet alone. 

Have you ever experienced a good feet massage that made you drift you into a peaceful slumber? Many ancient texts and stories, throw light on how steering different points on the feet can actually heal as well as alleviate pain from various regions of the body, promoting health and well-being as a whole. 

pedicure at home

The Importance Of Pedicure

Some people consider pedicure to be a waste of time or a luxury indulgence. However, this mindset needs to evolve. It is essential to look after every part of the human body and our feet are no different.

Enhanced blood circulation, relaxation of the mind, relief from pain, release of endorphins (the happy hormones) are some of the benefits one gets through a pedicure. Also, many detrimental diseases associated with high blood pressure and mental fatigue can be avoided through regular pedicures.  

According to the Vedic scriptures, feet are ‘organs of action’. They make the initial assembly of foundation to support the bodily structures.

What Does Ayurveda Say About Pedicures?

Ayurveda, an ancient yet one of the most vastly acknowledged medical sciences also states diverse benefits of a pedicure. An Ayurvedic pedicure not only improves a person’s physical well-being but also improves the psycho-social aspect of one’s life.

You would be surprised to discover how intricate your feet are! They house 7000 nerve networks, 33 intricate joints, and 26 strong bones. Ayurveda states that the various points on our feet are connected to different organs and parts of our body. By applying pressure to those specific points on the feet and massaging it with oil, many Ayurvedic physicians can relieve patients from the corresponding ailments of those body parts.

ayurvedic feet massage

To understand the correlation of the body parts to the feet you can go through the following analogy. Brain - big toe, Tip of your Big toe – pineal gland, the body of big toe – pituitary gland, the base of the big toe – thyroid. The neck of second and third toes – eyes, neck of third and fourth toes – ears. Cushion like padding at the base of all your toes – lungs, mid-section of sole – pancreas, heel- sciatic nerves (branching from the lower back to each of your hips and buttocks). 

Therefore, indirectly many health problems can be healed and prevented by triggering these corresponding reflex points. 

Ayurveda also claims a major role of pedicure in one's immune system. On applying oil on the soles of the feet, it travels into the skin through the superficial fascia and deep fascia and finally towards the end of the nerves and stimulates specific neuropeptides secretion. These have significant importance in the immunological responses of the human body.

Foot massage is an effortless yet efficient method of setting out the natural relaxation points on our body that too without ingestion of any kind of harmful drugs.

What Is A Pedicure?

We have understood the benefits pedicure could give us but what exactly is a pedicure and what does it include?

Pedicure is a kind of pleasure-based treatment that you could embrace yourself with. It basically includes soaking your feet in a warm tub for a couple of minutes followed by a foot-scrub to reveal the fresh skin beneath the dead skin cells and a holistic massage of the feet that would finally leave your skin feeling supple and fresh. 

Looking after the sole alone isn’t what pedicure is about, it also incorporates toenail and cuticle caring. Exfoliating the dried, dead skin, and conditioning your feet with a suitable moisturizer and crowning it with a marvelous nail polish of your choice is what pedicure is all about in a nutshell.

Ayurvedic Pedicure or Padabhyanga

In Ayurvedic terms, there is a slight variation with regards to a regular pedicure. Pedicure in Ayurveda doesn’t consider any inclusion of petrochemical-based products, acetone nor nail-polish. It is much more than looking after the cosmetic point of view. The Ayurvedic pedicure includes a feet massage that benefits the internal nervous system and the body as a whole.

It is more inclined towards natural, non-chemical-oriented products, as a result, there are a lot of takers for ayurvedic massages of the feet which include therapeutic aromatherapy as well as reflexology. 

After determining the dosha-type of the individual an essential oil is incorporated. In the end, it doesn’t work on the regular belief of one oil or one cream suits for all concepts. It is more customer-oriented and the whole procedure is fabricated based on the person or the client's requirements or suitability. 

3 Best Ayurvedic Products For A Relaxing Pedicure At Home

You can transform your entire Pedicure experience by choosing the right products. Using natural products with Ayurvedic ingredients will help you get the benefits.

Ayurvedic Pedicure At Home
  1. Foot Scrub - The dirt and the dead skin accumulated on your feet needs to be scrubbed away during the pedicure. We recommend Kama Ayurveda Foot Scrub for this. It has Ground Apricots that work as fine granules for scrubbing. Not only this, the scrub also has ingredients like Chamomile that calm and soothe the damaged skin and purifying Basil that provides relief from foot soreness.

  2. Body Oil - As discussed above, the foot massage is one the most important steps of an Ayurvedic pedicure. This step requires the use of a relaxing body oil to massage the pressure points. We recommend Kama Ayurveda Sugandhi Rejuvenating Body Treatment Oil for this.

    The ancient Ayurvedic text of Sahastrayogam recommends this oil for promoting a sense of well-being and relaxation through massage. It has relaxing ingredients like Jelly leaf that removes fatigue and alleviates muscle ache and Winter Cherry that eases stress, builds muscle and tones skin.

  3. Foot Cream - The skin of our feet becomes dry and requires deep nourishing treatment during the pedicure. We recommend Kama Ayurveda Foot Cream for this. With 100% Organic Cold Pressed Sweet Almond and Coconut Oils, it helps relieve dryness, heal cracks and chapped skin. It is also blended with Shea Butter, Cocoa Butter and Kokum Butter that penetrate deep and help soften dry, rough heels and callous skin.

The following video shows how you can use these three products as a part of your foot care regime.

This is an easy 3 Step Foot Care routine that you can follow once a week. However, if you want to give yourself a complete salon-type pedicure experience, you will need some tools. Let’s talk about these pedicure tools in the next section.

7 Essential Pedicure Tools For A Pedicure At Home

When one goes through the whole pedicure process, it is required to know what exactly are the tools that need to be employed and how each tool functions. 

Also, do take efforts to clean your tools and wash them thoroughly before and after every use. The skin and nails are a breeding ground for many bacteria therefore it is of prime importance to keep the tools that groom them in a sanitized condition. Be careful to store them in a dry place so as to prevent rusting.

1. Nail Cutter

It is a tool that is a must in every individual’s personal grooming list. Its function is as simple as the name suggests- to cut or trim your nails. Extremely long nails could hurt you and also house a lot of dirt. But at the same time, cutting them extremely short and exposing the delicate nail bed is also not advisable as it could lead to infections. 

2. Cuticle Pusher

Cuticles can become dry or flaky quite easily hence they markedly need exceptional care. A wooden pusher is suitable for soft cuticles and a steel one for comparatively harder cuticles. The cuticle pusher has a very subtle role and needs not to be used aggressively. A gentle yet firm push is all that’s needed. Using the spoon end generally and the sharpened end just for the corners would work.

3. Cuticle Nipper

This tool is used after you are done working with the cuticle pusher. Its function is just to trim in case you have those uneven pieces of rebellious skin mostly present around your nail bed. Working in an upward shift you can raise the dead skin off the nail.


It is not recommended to cut off the entire cuticle as the cuticle protects the nail from any attack of bacteria. Use it only to trim the loose skin. After the pushing and nipping part of the cuticle is executed, make it a point to moisturize it thoroughly.

4. Nail Buffer

Need a little bit of gloss and shine on your dull nails? Rest your worries, the nail buffer does exactly that. It helps to smoothen and remove any dry ridges present on the nail, giving you a polished and shiny finish. Buff in one direction only and not in a haphazard manner. 

It could be backward or forward, stick to any one direction. Be cautious to not go overboard with the buffer as there is a tendency that its over-use could thin out the nails. Using it once a month in a gentle manner is advisable to prevent any untoward outcome and keeping your nails shiny.

Make it a point to use the finer side of the tip as it would work more efficiently in smoothening the nails. On completing do not skip the application of cuticle oil or even applying beeswax could work.

5. Nail File

A nail file is basically used to provide a subtle shape to your nails, giving it the natural ovular shape could be good or else you could even experiment giving it a shape that could be pointier or arch-like and less rounded according to your need and desire. 

Nail filer aids by fragmenting the nail very minutely and at the same time giving it the preferable shape. Many kinds of nail fliers could be found which include emery boards, metal files, ceramic, or also glass-coated ones. It is a widely preferred choice to use emery boards as they are comparatively gentler than the other options. 

To begin with, nail filing, hold the filer at a 45-degrees angle, and keep it parallel to the nail you want to file. First, begin with the sides of your nail and then graduate towards the center. Do not be very harsh and aggressive, be light, and apply less pressure. File it in one direction to get a polished finish.

6. Pumice Stone or Foot File

Our feet are so used to not getting regular exfoliation, care, or moisturization that many would find the skin, especially around the heels and toes to be thicker. That thick skin is none other than the build-up of dry and dead skin cells and callus over time.  

Pumice stone is basically used to get rid of those dead skin cells present on whichever part of your feet. Its benefit is best visible when the foot filing is done after your feet are soaked in soapy lathery warm water for a few minutes. Maybe up to ten would be better. After the skin gets softened, wet the stone and rub generously against the area that needs to be exfoliated. Doing this at least twice a week could keep cracked skin, especially around the heel at bay.

7. Toe Separator

Jumping right to its function, the toe separator helps to keep the toes apart from each other for easier and more comfortable application of nail polish or for grooming each of them. In this manner, they do not even come in each other’s way when either of them is being pampered with your care.

Apart from these tools, you also need a good foot scrub and a foot moisturizer. We’ll discuss them in detail in the next section.

How To Do A Pedicure At Home

Now as we know the most needed tools for a pedicure including its functions, performing your own pedicure at the comfort and luxury of your home itself would be quite possible and could say is even the need of the hour with the current on-going pandemic situation. 

To begin with, nothing beats the traditional natural methods of having a pedicure. With a nil disadvantage, it is most advisable to use natural products in your foot care journey. The following seven steps process could wind you up with the perfect pedicure you require.

1. Get Rid Of The Old Nail Paint

It is high time to let go of the dry chipped paint those nails have been carrying maybe even for months. For this dip a cotton ball or cotton pad into the nail paint remover. Place it over your nail for a couple of seconds and gently dislodge and wipe away the nail paint. Using chemical-free and harsh acetone-free remover would be the best shot for a smoother and healthier finish.

2. Soak And Relax

Nothing beats the relaxation felt while soaking your feet in that tub of warm fragrant water.

To make that perfect tub of water, firstly take a medium-sized tub or basin. Fill it with warm water, be careful to not burn yourself with overly hot water. Next, add a half cup of Epsom salt to the tub, juice of one whole lemon, a few drops of your shampoo followed by a few drops of your favorite essential oil for the perfect scent, and a few rose petals if available. You could even play soothing music of your choice and allow the ingredients to do their work by keeping your feet soaked in the water for about 20 minutes or so. 

These elements collectively help to get rid of any kind of inflammations, pain, and roughness and leaves you with softer skin.

pedicure with rose petals

3. Scrub It Away

Now comes the time to use the pumice stone and get rid of all the dead skin cells present at the bottom of your feet. Wet the pumice stone and rub around your feet, especially at the places where you feel the skin is thickened and calloused. Scrub and exfoliate it gently, do not be overly harsh. Stop when you feel the skin is becoming even, smooth and supple all around.

Next, take a generous amount of Kama Ayurveda Foot Scrub and rub it all over your feet to create lather. Scrub gently for about 5 minutes. concentrating on the toes, ankle and heels.

4. Massage and Moisturize

After completing these steps, pamper yourself with a gentle massage. For massaging your feet you can use a relaxing oil like Sugandhi Rejuvenating Body Treatment Oil. After that, we recommend using the Kama Ayurveda Foot Cream as it’s an effective feet moisturizer. It will not only enhance the complete process of moisturizing but also at the same time aid in healing any dry or cracked skin.

Take a generous amount, rub it within your palms and gently massage it all along your feet and between the toes, apply slight pressure, and continue massaging for about 5 minutes.

ayurvedic pedicure

5. Trim and Shape Your Toenails

Now, It is time to put on the toe separator from your tool collection for all the further steps. 

To begin with, trim your nails according to your need with the help of a nail cutter. Always trim your nails on a timely basis, keeping the nails overly long would not only collect dirt and bacteria but also the pain encountered by an accidental chip-off is quite intolerable.

Next, use the nail buffer to scrub and grind the nail in order to bring back its lost shine and lustre. Finally, utilize the nail filer and give your nails the shape you desire.

6. Cuticle Care

Do not overlook this step, this one would help your nail to grow healthily and remain stronger. It would also keep your cuticles clean preventing the growth of any bacteria or infection on the nail. For that apply a moisturizer or cuticle softener like Vitamin E oil, Almond oil, or Jojoba oil over the cuticles and softly rub and massage each of them. You could use a cuticle pusher and gently push the cuticle. Also, use a cuticle nipper only to get rid of the dead loose skin in case present. 

(It is not suggested to mess around with the cuticles much as it serves an important role in the protection of your nails, stopping right after moisturizing the cuticle is also sufficient.)

7. Painting your toenails

Finally, to end the procedure, apply a base followed by your favorite nail paint color. Apply it evenly over the nails in a single stroke. You could put in a double layer just in case you want it darker and the coat to be present for a longer time. To finish it off seal the paint with a topcoat.

It is advisable to use chemical-free products as it would be beneficial in the long run by preventing drying and chipping-off of the nails.

Pedicure - Other Tips and Remedies

Here, let’s address some other common pedicure options that one needs to know to keep their feet healthy and soft throughout.

How To Relax Very Tired Feet?

After spending hours standing or the night followed after an on-the-feet throughout the day, anyone would long to relax and give their feet the attention and care it deserves.

For this, you could fill a tub with warm water, add a handful of Pine leaves and Rose petals followed by two teaspoons of Peppermint Essential Oil. Next, massage your feet gently with castor oil. You could gently press the pressure point that is present three finger space below at a hollow just above the bone where the first and second toe intersects. Do this for about four to five seconds. This pressure point would aid in your relaxation and also eliminate or reduce any kind of stress or anxiety. Next, soak your feet in the tub of water and relax.

In case you have small smooth pebbles or marbles, go ahead and add them in the water tub as well and roll your feet over them. They too would assist in comforting the aching feet. 

How To Take Care Of Cracked Feet?

Cracked feet particularly at the heels is a very common issue faced especially during the dry winters. To beat this problem, do the following procedure preferably before bed-time. First, soak your feet in warm water for a few minutes and scrub it with a pumice stone and pat it dry. Next, massage your feet gently with either Sesame or Sandalwood oil. We also recommend regular application of Kama Ayurveda Foot Cream to take care of cracked heels.

Then, use a double boiler to melt a candle, after it cools down, gently apply it on your heels and wait until it solidifies. Go to bed wearing a pair of cotton socks. After waking up, peel the layer of the wax. Stick to this remedy daily and you are bound to find results by the end of a week.

How To Take Care Of Chipped Nails?

Mostly, nails get chipped either when they have become brittle or too long. To avoid your nails from turning too long, use a nail cutter at regular intervals. Cutting them off not only strengthens the base but also avoids the pain that follows after a long nail gets chipped off. At times it even pulls the entire nail out and that excruciating pain can be felt even at the very imagination of such agony. 

To cure brittle nails, one could take half a glass of water, mix it with one teaspoon of gelatine and drink it regularly for two weeks. Or you could also apply warm coconut oil and massage the nail in order to strengthen and improve blood circulation.

Most importantly it is essential to maintain a healthy well-balanced diet that includes sufficient macro and micronutrient and most importantly Folic Acid, Zinc, Calcium, and Biotin as these are indispensable for the healthy growth of your nails.

To end it all, after knowing these facts and information it is important to note that the role that our feet’s play in daily life doesn’t vary greatly with gender, because of which there is no reason why a man should not or cannot be taking care of their feet or have a pedicure. A pedicure stands equally beneficial and essential for anyone and everyone irrespective of the gender or works one does, hence, it is time to bid adieu to that misleading notion.

So, go ahead whole-heartedly and provide the special care that your feet and nails rightfully deserve.

References:

  1. Manicure and pedicure procedures
  2. Pedicure Tools
  3. Ayurvedic Pedicure

How To Get Rid Of Pimples Naturally – A Complete Guide

Pop, pop… pop them all. Is that your first instinct the moment you see those pimple bumps upon the face? Maybe your Mom’s instruction of ‘Do not squish them ever’ when you had the first one helps you resist the temptation of popping them away. Or perhaps, it’s the fear of marks or scars that makes you wonder if there was a way to get rid of pimples naturally.

Facial pimples are one of the most common skin problems. In India, there are at least 10 million people who suffer from pimples everywhere. So be assured, you’re not alone with your struggles. 

Despite pimples being such an ordinary appearance that almost everyone has it at least once in their lifetime, people tend to suffer from low self-esteem related issues due to these eruptions. Studies have stated that acne and pimples create dismissive self-esteem among patients of every age group. This is seen more among women and girls who are prone to severe acne.

how to get rid of pimples

However, losing hope and self-esteem should be the last thing on your plate because there are multiple ways through which these eruptions can be combated. Staying hydrated, resisting the temptation of touching your face, keeping your skin moisturized, washing your face are few of the simple yet effective ways to limit the number of break-outs that one gets. 

In this article, we’ll cover everything that you need to know about pimples and how to get rid of them naturally. Let’s get started with understanding this skin problem a little better. 

What Are Pimples?

Pimples are small blisters, pustules, or papule-like eruptions most commonly seen on the face, back, chest or shoulders. They are majorly characterized by inflammation, redness, and even pain at times. They could be pus-filled or water-filled. Some people tend to refer to them as zits or spots as well. Numerous pimples are known to be a symptom of a skin condition or disease called Acne Vulgaris or Acne in common terms.

It is stated that Acne Vulgaris is very common among adolescence and affects over 80% of teenagers. Also, 3% and 12% of men and women respectively are prone to developing pimples even after the age of 25 years.

Some of the most common causes of pimples are hormonal changes, genetic susceptibility, water intake, smoking, alcohol consumption, clogging of pores, comedogenic products, and dandruff. If you're curious which of these is a significant concern for you, refer to the section later in the article. 

But before, let’s answer the more important question -

How To Get Rid Of Pimples Naturally?

Having understood the different types of pimples and the triggers/causes associated with them must have got you wondering - Is there a way to get rid of them naturally? The answer isn’t a simple yes or no. There are some severe acne issues that require medical treatment. However, you can still count on Ayurvedic remedies, clean diet, optimum water intake and a good lifestyle to aid you in the process of getting rid of pimples. For those who suffer from mild pimples or acne, these remedies work perfectly.

  • Amla (Gooseberry) Juice and Amla Powder

Amla is known to be a natural blood purifier and is rich in vitamin C. It is considered to be a powerhouse of antioxidants and fights inflammation. 

Amla juice could be consumed as a detoxifying drink owing to its much-acclaimed remarkable properties of clearing the skin. To prepare Amla juice, cut around three to four amlas, add half a cup of water along with a pinch of salt, and blend it well with the help of a mixer or blender. This juice could be had once or twice a week.  

Amla powder along with water would make an amazing face pack. It could be left on the face for 20 minutes following which it needs to be washed well with plain water. It would reduce the pimples as well as lighten blemishes at the same time boost the collagen production.

  • Neem

Neem has been used extensively for herbal preparations since ancient times. They possess antibacterial, antiseptic, antifungal properties. Mix neem powder with water and make a thick paste then apply it on the affected area or the places where the pimple or acne is present. Allow it to dry. After 20 minutes rinse it off with luke-warm water. This will help to even out your skin tone and reduce the size of the break-out.

Alternatively, you can also use Organic Cold-Pressed Neem Oil as a spot treatment for pimples. Studies have proven that applying Neem oil regularly on the face is an excellent long-term acne treatment. Neem Oil prevents future breakouts by eliminating acne-causing bacteria, tightening the pores, and evening out skin tone.

neem oil for pimples and acne
  • Basil or Tulsi

Tulsi has been used as a medicinal herb for centuries. It is tremendously famous for its skin-nourishing as well as immunity-boosting benefits. Tulsi has antifungal properties, therefore, keeps acne formation at bay. To utilize this leaf in your skincare routine, grind a few tulsi leaves along with a couple of neem leaves, add 1 teaspoon of freshly squeezed lemon juice and mix them all into a paste. Apply this on to the affected area. As soon as it dries off, rinse with plain water and pat dry. This pack will remove the dirt, impurities, unclog the pores as well as prevent and heal the acne breakouts.

tulsi for pimples and acne

To get the benefits of Neem and Tulsi for Acne, you can use Natural Face Cleansers that have both Neem and Tulsi along with Tea Tree Oil as its key ingredients. Kama Ayurveda’s Anti Acne Cleansing Foam is one such cleanser. 

neem and tulsi for acne and pimples
  • Watermelons

Watermelons are a great source of antioxidants. They aid in skin regeneration and help to repair damaged cells. It boosts the production of nitric oxide in the body and thereby cleanses the skin. So, go ahead and consume them, they are not only great in taste but also help in reducing the oil production thereby lessening acne breakouts. They could also be applied directly over the affected area and be left overnight for healing.

  • Aloe Vera

Aloe vera is rich in antimicrobial, anti-inflammatory, and antiviral properties. Aloe vera gel could be extracted and applied directly to the affected area or on the face over-all for around 10 minutes, after doing so wash your face thoroughly with plain water. Aloe vera helps to clean pore as well as diminishes the bacteria formation as it can rupture the bacterial cell wall. This also helps in the reduction of spot formation. 

  • Cumin Coriander-Fennel tea

Cumin Coriander Fennel tea helps in cooling down the system and reducing the production of toxins. The three-ingredient tea is prepared by soaking 1/3rd teaspoon of each of the seeds in hot water. The concoction is then strained to obtain this detoxifying drink. You can consume it three times a day to reap the maximum benefits.

  • Papaya

Did you know that Papaya has rejuvenating properties? This fruit is not only good for your stomach but is also well known to nourish the skin. Applying Papaya pulp on the face helps in removing dead skin cells, and keeps the skin hydrated and moisturized. It also contains anti-inflammatory enzymes that help in soothing acne. The protein diffusing papain helps in exfoliating the skin. All of these characteristics of the papaya works against pimple formation. 

A fine paste of raw papaya could be applied on the face for about half an hour, following which you can rinse it off with mildly warm water and pat the face dry. This pack will also help in reducing the blemishes caused by acne or pimples.

  • The Ultimate Ayurvedic Herbal Mixture

Grind Fennel, Basil, Turmeric, Coriander seeds, Amla, and Coriander seeds thoroughly and make a powdered mixture. The Ayurvedic ingredients have powerful anti-inflammatory properties and are rich in antioxidants. You can mix half a teaspoon of these ingredients in luke-warm water to create the ultimate Ayurvedic drink to get rid of pimples and consume it 15 minutes before lunch and dinner.

For an external application of herbal mixture, you can add sandalwood paste along with rose water and turmeric to these ingredients. This could be applied for 30 minutes in the affected area. Later, rinse it away with cold water.

We also recommend Kama Ayurveda’s Nimrah Anti-Acne Face Pack to heal pimples, blackheads, pimple scars and skin inflammation. With powerful Ayurvedic ingredients like Vetiver, Ashwagandha, Red Sandalwood, Coriander, Lodhra and Liquorice, this face pack works as a treatment for acne and pimples.

face pack to get rid of pimples
  • Honey

Honey is rich in antioxidants and also contains anti-microbial properties. Applying pure honey directly on the pimple or scars for about 15-20 minutes and washing it off is also sufficient for clearing the acne. This could be utilized regularly. Honey enhances the healing properties of the skin and at the same time reduces and keeps away bacterial formation. It also moisturizes the skin and keeps it looking replenished.

  • Turmeric With Rose Water

Turmeric has the ability to cleanse toxins from the pore. It contains antifungal and antibacterial properties because of which it prevents bacterial breakouts. Turmeric along with Rose Water could be applied evenly on the face or just on the affected area. After it dries out completely, rinse the face with water and pat dry. Instead of Rosewater, honey could also be used if one faces dry skin-related issues.

 turmeric and rose water for acne


What Causes Pimples? - Common Triggers and Risk Factors

Some people are more prone to pimples than others. Understanding what causes pimples is useful in managing them as some of these triggers are easy to avoid. With an awareness of these triggers and risk factors, we can modify our lifestyle and adopt some healthy habits to combat pimples. 

  • Hormonal Changes

You might have heard many times about the correlation of hormones with these unwanted eruptions. But, to understand this better you need to know what is sebum. 

Sebum is an oily, sticky, fatty substance that is secreted by the sebaceous glands. Sebum helps in sealing moisture and prevents dryness; however excess sebum production makes the skin oily and clogs the pores. These glands are usually associated with hair follicles and found in every part of the human body except on the palms, soles of feet, and lips.

The secretion of sebum is controlled by the androgen hormone, specifically the male sex hormones such as testosterone. With the onset of puberty, androgens inundate the human body causing a rise in the level of hormones secreting sebum. Because of which many individuals have acne as soon as they hit puberty. These hormones get regulated and steadied post-puberty in males, however, in females it doesn’t since the monthly menstrual cycles, pregnancy and even menopause causes variation in the secretion of these hormones leading many to face pimple-related issues through and through.

what causes pimples
  • Genetic Susceptibility

Many studies claim that the genes you carry and your family line do play a role in acne issues. In case it runs in your family and you have been unlucky since your genes did not mutate then there are high chances for you to face acne as well. 

On the other hand, certain gene mutations also could be a trigger for frequent pimple eruptions, despite not having a familial history. Acne is also a customary symptom for those having PCOS (Polycystic ovarian syndrome) and this disease is known to cluster in families. Also, the risk of having acne is even more intense in case both your parents had it as compared to one of them having it.

  • Water Intake

Hydrating your body at all times has miscellaneous advantages, reduction in the number of pimples is one of them. When a person suffers from excessively dry skin as a consequence of dehydration, there could be a spurt in the secretion of oil production, causing pimples to formulate. 

Drinking an adequate quantity of water prevents this as well as flushes out toxins and harmful bacteria out of the body and skin. It allows the skin to remain moisturized and effectuates a radiant glow. So, do not take this simple yet mighty liquid for granted go ahead, and have at least 8 glasses or two liters of water daily. If you struggle to maintain your water intake when the temperature drops, here’s a tip that will help you. 

drink water to prevent pimples
  • Smoking and Alcohol Consumption

A specific kind of ‘non-inflammatory acne’ (also known as blocked pores and blackheads) is a result of smoking. Did you know that the skin cell turnover (regeneration of skin cells) increases with exposure to nicotine and other chemicals? This in turn constricts the blood vessels, reduces the supply of oxygen to the skin and kindles oxidation reaction, thereby altering the quantity of sebum production of the skin. 

Alcohol, on the other hand, does not directly cause acne or pimple break-outs. However, alcohol causes a spike in the blood sugar level which sets forth hormonal domino effect causing a spurt in the level of androgens which in turn projects the acne. 

The effect that alcohol has on the liver is quite known, if the function of the liver is hampered, its ability to flush out toxins from the body will diminish. The only way for those toxins to vent out would be through other channels, one of them being the skin and this in turn would wreck the skin causing pimple eruptions.

  • Clogged Pores

Just like we keep rejuvenating ourselves through various means, even our skin has to shed those dead skin cells. However, many times these dead skin cells render trapped, thereby causing a build-up and blockage of the pores (hair follicles) on the skin. These pores have paramount importance as it releases oil and sweat. With clogged pores, this function gets obstructed causing the formation of blackheads, pimples, zits, etc . Steaming your face can help in clearing these clogged pores.

 steaming for clogged pores
  • Comedogenic Products

Comedogenic products are those products that contain ingredients that could pilot a closure or blockage of your pores. The implications of blocked pores have been mentioned in detail above. Vast variety of make-up products, moisturizers are comedogenic which could cause acne formation, blackheads, whiteheads, etc.

  • Dandruff

Dandruff could lead to pimples on the scalp and forehead as well. Dandruff is caused by a skin fungal called Malassezia globosa. These fungi disrupt the functioning and breaking down of the sebum. They also leave back oleic acid and people who are sensitive to this acid suffer from acne breakouts on their forehead.

Other than these few other factors that could provoke acne breakouts and pimples are stress, climatic changes, poor dietary habits, not maintaining appropriate facial hygiene.

It is possible to overcome frequent pimple eruptions by following a healthy lifestyle and a nutritive diet. In case they still appear the best way to fight them off and prevent them is using natural remedies as they would not have any adverse side-effects either.

What Are The Different Types Of Pimples?

Not all pimples are the same. We’ve discussed the various causes of pimples in the previous section. The type of pimple you get mostly varies with the trigger. Here are some of the most common types of pimples.

types of pimples and acne
  • Whiteheads

As the name suggests, the tiny bumps or comedones that one would find on the face with a whitish color surface are called whiteheads. Usually, the skin layer above the whiteheads remains closed. Clogged pores and excess oil secretion are the main reasons for their appearance. They are majorly visible on the T-zone area that is the nose, forehead, and chin.

  • Blackheads

Again, the name gives away its identity. These are similar to whiteheads in a way, except that the skin surface above it is opened. They are unhidden comedones. It is a common belief that the black hue is due to the dirt being trapped, on the contrary, the dark color is caused by the oxidation of oil and melanin. Melanin is the pigment that gives skin its color. Blackheads are also caused by an increase in the production of sebum and clogged pores.

  • Papules

When an area of the skin’s tissue seems to be elevated (less than 1cm) it is said to be a papule. It could have a shape that could be flat or dome-like. They are slightly painful and appear swollen as well as reddish in color. Papules could appear singly or crowded in one area, forming a rash type of appearance. These may or may not have distinctive boundaries.

  • Pustules

Pustules are what many of us consider as a typical pimple with a whitish cap. They aren’t to be confused with whiteheads. The white bump is caused by the body’s innate reaction to fighting infection with the help of white blood cells. Pustules are pus-filled; it could be whitish or yellow which contains the white blood cells and bacteria. They would also appear as swollen with a reddish boundary. They would seem tender to touch.

  • Cysts

These could arise anywhere on the body. They are pocket filled or sac-like in appearance and feel more like a hard bump. Clogged pores, oily skin combined with an infection gives rise to a cyst. Cysts are majorly benign but they could be malignant as well depending on its location. There are also various types of cysts like a sebaceous cyst, epidermoid cyst to name a few. They are formed deep within your skin and would be filled with pus. These take time to heal and, in most cases, leave a scar behind. 

  • Nodules

These are mostly skin-toned but could also be reddish when the skin turns inflamed. They are very painful to touch. It needs in-depth, concentrated medications as it’s severe and difficult to heal. Nodules are even harder to touch than cysts and are not pus-filled. They prolong for weeks together or maybe even months because of which the contents within begin to harden and also get deeper over time.

Whenever the pimple isn’t of the severe form, they can be treated easily by natural remedies but in case of painful, prolonged occurrence it is advisable to seek professional and medical help from a medical practitioner or dermatologist.

Pimple Acne Face Map

We’ve talked a lot about pimples and by now you must be feeling equipped with some useful tips to get rid of pimples naturally. 

In this section, we’ll further enhance your knowledge about pimples by talking about what pimples in the different areas of your face mean. Yes, you heard that right! The spot at which a pimple appears also speaks a lot about what caused it in the first place. Let’s start uncovering the mystery behind these pimples. 

  • Hairline Pimples

Pimples along the hairline could be caused by various reasons. The major one could be due to the possibility of product build-up near the hairline area. The product could be shampoos, hair sprays, mousse, oils, gels. Also, pomades which are thick and mineral oil-based hair products could be a reason for the same. This ingredient holds the sebum in the hair follicles from exiting thereby giving rise to pimple formation.


We recommend natural shampoos that are free from chemicals that trigger pimples. 

  • Cheek Pimples


It is not surprising to know that our mobile screens could conceal various bacteria for example the E Coli bacteria. And the moment we hold the mobile screen close to our face we are unintendedly spreading the bacteria onto our skin. The facial skin is more delicate and easily allows the bacteria to spread, thereby giving rise to pimple formations. It's recommended to regularly disinfect your mobile phones. 

Any article or item pressed against your cheek which has an inhouse of bacteria could give rise to pimple breakouts. Yes, there’s your reason to change your bedsheets and pillow covers frequently. 

We also recommend washing your face regularly with a natural cleanser meant for acne-prone skin.

face cleanser to get rid of pimples
  • Jawline Pimples

Usage of comedogenic cosmetic products, sports equipment like a chin strap, or anything of a similar kind which encloses and traps heat as well as sweat could be a reason for jawline pimple breakouts. Even musical instruments like a violin that frequently come in contact with the jawline could also be considered as a reason.

The presence of pimples on the cheek as well as the jawline could indicate an imbalanced hormonal level, this could also be a result of poor dietary habits.

  • Nose Pimples

Usually, the acne found on the nose isn’t inflamed and is majorly small in size also. It's common for people to find blackheads in the nasal area. The main reason for it could be excessively oily skin. The sebaceous gland is higher in number on the nose as compared to the other parts of the body. The pores on the nose are more prone to dilate in case you keep fidgeting with those small bumps, it would thereby accumulate more dirt and oil.

  • Chin Pimples

A very common cause of pimple on the chin area is ingrown hair. This usually crops up when the hair grows back into the skin. It gives rise to redness as well as inflammation. This is more common in males as compared to females; however, it could occur to anyone. These kinds of pimples would be itchy and may also develop into a pustule.

  • Pimples Between the eyebrows

Going to the parlor to get rid of that unibrow could be a major reason for getting pimples between the eyebrows. In order to get rid of the hair, by threading or waxing, the hair is pulled right out of the root. Later-on when the hair regrows there are chances that the hair doesn’t come out at the surface and remains ingrown. This ingrowth results in pimples.

How to Get Rid of Pimples Overnight?

Before we address the ‘how’, the important question is - Can you get rid of pimples overnight? Well, as much as we wish for this, there is no way to remove pimples overnight for sure. However, we’ve talked about the two ways that are effective for some people. 

  • Toothpaste

Toothpaste contains ingredients that help the pimple to dry out, heal and fall away. Hydrogen peroxide, baking soda, and alcohol help to dry out the little bumps, because of which applying a tiny amount of it on the pimple before you go to sleep could help you to get rid of it. Also, the menthol present in the toothpaste allows the redness and inflammation to subside. 

However, at the same time, it is important to beware that applying toothpaste on the skin would also cause irritation to the skin surface. After all, the real function of the toothpaste is to cleanse your oral cavity and it would be better if we allowed it to remain restricted to that utility only.

  • Tea Tree oil

It is stated that tea-tree oil contains anti-microbial as well as anti-inflammatory properties. Aloe vera gel along with a few drops of tea tree oil could be applied to the pimple or acne before going to bed. In the morning rinse it out with warm water. 

tea tree oil for acne and pimples

Read - How To Use Tea Tree Oil For Acne?

Research states that it could help in diminishing the acne but it is not a cure-all. Therefore, neither this method nor any other method could help in diminishing the pimple overnight even if anyone claims the same. There are no supporting research pieces of evidence up-to-date to give proof to such claims.

How to Get Rid of Pimples Fast?

Lastly, we’ll mention a few other hacks to get rid of pimples fast. Note that we only recommend natural and safe methods to get rid of pimples. These quick hacks might work once or twice in the time of crisis. However, they are not good for the skin. We recommend that you remain patient with your body and your skin. Embrace yourself, with or without pimples. 

But if you need to get rid of pimples for an important event, you can try these methods.

  • Aspirin


Aspirin is commonly known as a pain reliever, and it contains acetylsalicylic acid. Salicylic acid is known to have the property of drying the skin which could help get rid of excess oil formation as well as dead skin cells. This acid also helps in diminishing the blemishes. It isn’t recommended to use aspirin to treat and deal with acne or pimples, but in case you still choose to use it; crush a few of the aspirin tablets with one tablespoon of warm water. Mix it into a thick paste and apply it on the affected area. Leave it on for 10 minutes to 15 minutes and rinse it thoroughly.

  • Ice or Heat

First, apply warm water or warm compress over the zit; this would aid in cleaning the pores and removing the debris trapped within. Afterward, apply the heat for 5 to 10 minutes and follow it with the application of ice for a minute or so. This could be repeated daily until the breakout clears away. It is important to remain cautious and not use excessively hot compression as it could burn the skin and extensively cold application could cause frost-bites. Again, this method is also not suggested as there are chances that you could damage your skin in the process of getting a quick fix.

FAQ about pimples

1. How to get rid of pimples for men?

Even men could use the same methods to get rid of pimples as stated in the “How to get rid of pimples naturally” section mentioned above. 

2. How to get rid of small pimples on the face?

Finding a pimple on the face would surely be dreadful, however using natural remedies consistently as stated before it is possible to get rid of pimples even from the face.

3. How to get rid of pimples in 5 minutes?

To put it down bluntly, no research to date states such a remedy. So, it is impossible to get rid of pimples in 5 minutes. There are ways to reduce the redness or inflammation quickly but getting rid of the whole pimple so swiftly is impractical.

4. How to get rid of pus-filled pimples?

No matter how much you may feel tempted, always resist the urge to break those pus-filled pimples. It’s better to use natural remedies and allow it to heal on its own.

5. How To Get Rid Of Pimples On The Nose?

Applying warm compression could be utilized to get rid of the pimples found on the nose. This could be done 3 times per day for almost 15-20 minutes. If not any other remedy stated in this article could also be beneficial.

References:

  1. How Acne Bumps Cause The Blues - Acne and Self Esteem 
  2. Are Smoker Mores Likely To Suffer From Acne
  3. Acne and Hormones
  4. Is Acne Genetic?