Best Home Remedies To Get Rid Of Dandruff Naturally

As the wonderful spring and summer months pass, some of us genuinely begin to fear the arrival of the winter season because of the horror it brings along, the dreaded D-word - dandruff! Not just winters, but for some people, dandruff is a serious problem all year round. Are you one of them? Then, don’t let your struggle with dandruff make you feel down about your appearance.

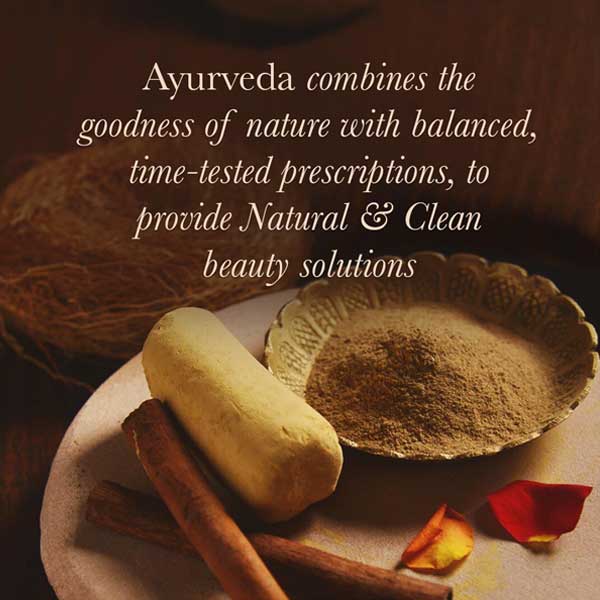
Ayurveda has a cure for everything and dandruff is no exception.

Ayurvedic medicine or Ayurveda, a holistic healing system that originated from the Indian subcontinent around 3000 years ago, has many successful home remedies and practices for managing dandruff. In this article, we present our best advice and tips on getting rid of dandruff.

Ayurveda and dandruff

How To Get Rid Of Dandruff Naturally - The Ayurvedic Practice of Hair Oiling

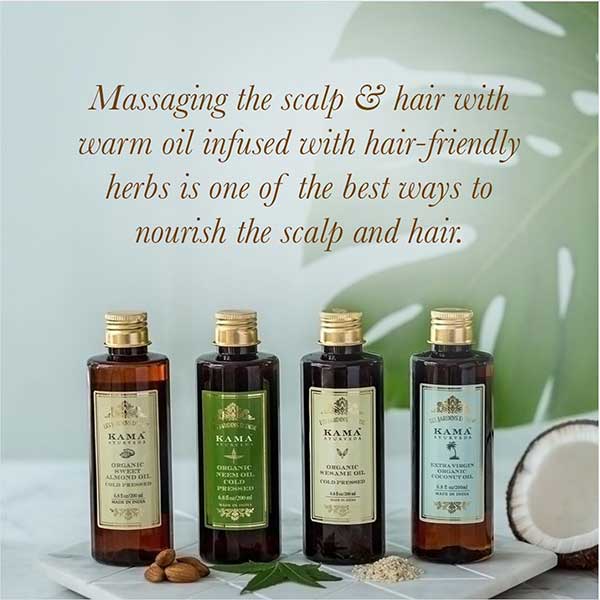
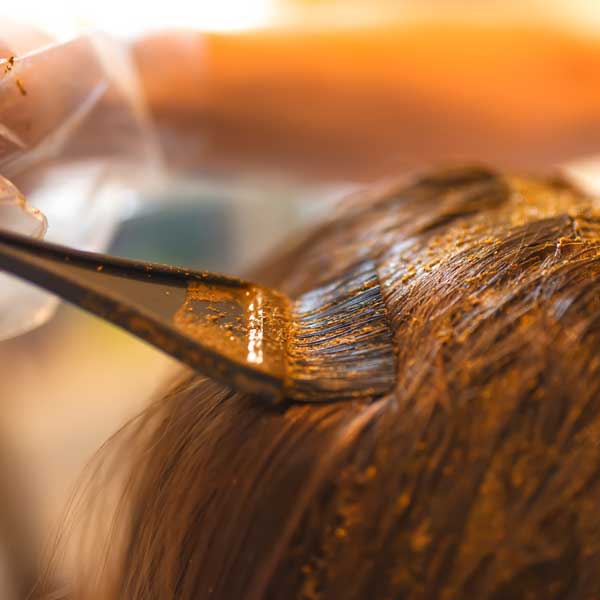
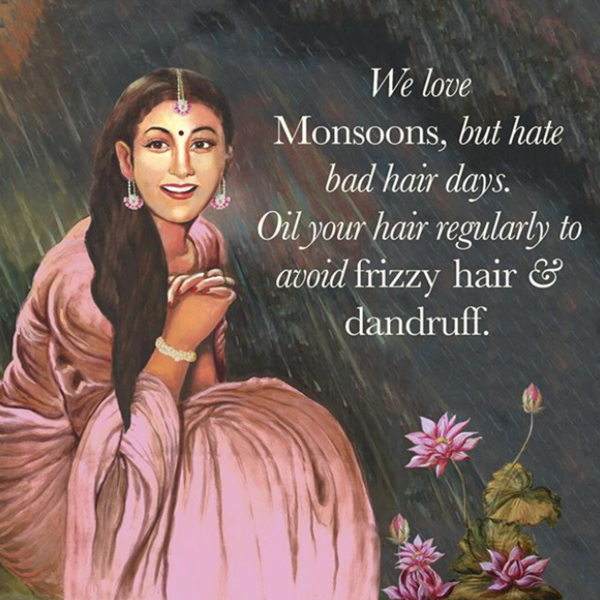
Well, now we all know our grandmothers were not playing around when they scolded us for not oiling our hair! Ayurveda reminds us that everything is linked to the larger universe, and hence nature is where all solutions lie. When done properly, oiling the hair with natural oils has excellent benefits for those who suffer from dandruff.

how to get rid of dandruff naturally

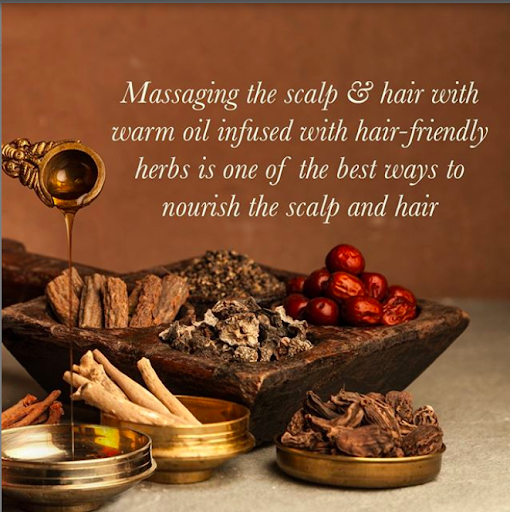
Whether you have an oily or a dry, flaky scalp, there are plenty of hair oil options to help you remove dandruff naturally and give you smooth, bouncy hair that can rival the best. We have studied various oils that are available in nature that can treat every possible hair problem. Here are our best picks for managing dandruff.  

1. Neem Oil For Anti-Fungal Treatment of Dandruff

Ancient Ayurvedic texts describe the Neem tree as ‘Sarva Roga Nivarini’, which means Universal Healer or curer of all Ailments. Neem oil derived from this tree is very potent with antiseptic, antiviral, antibacterial, and antifungal properties.

The primary cause of dandruff is fungi known as Candida and Malassezia. The anti-fungal properties of Neem oil make it effective against these fungi. You can also use Neem oil to relieve inflammation, itchiness, and irritation that results from dandruff. 

For those who are prone to dandruff, Neem oil should be used regularly. It also helps in maintaining the pH balance of the scalp, which further prevents dandruff formation.

To use Neem oil to get rid of dandruff naturally, dilute equal parts (50/50) of Neem Oil with Sweet Almond/Sesame Oil and gently massage the oil directly into the roots of the hair and scalp. After allowing it to work for 30 minutes, cleanse your hair with a natural cleanser.

Read - Top Benefits Of Neem Oil For Hair and Skin

Shop For Kama Ayurveda’s Pure, Natural and Organic Neem Oil

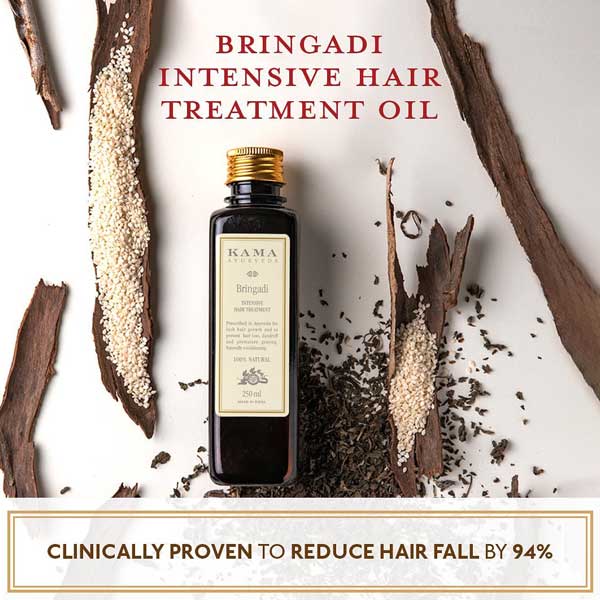
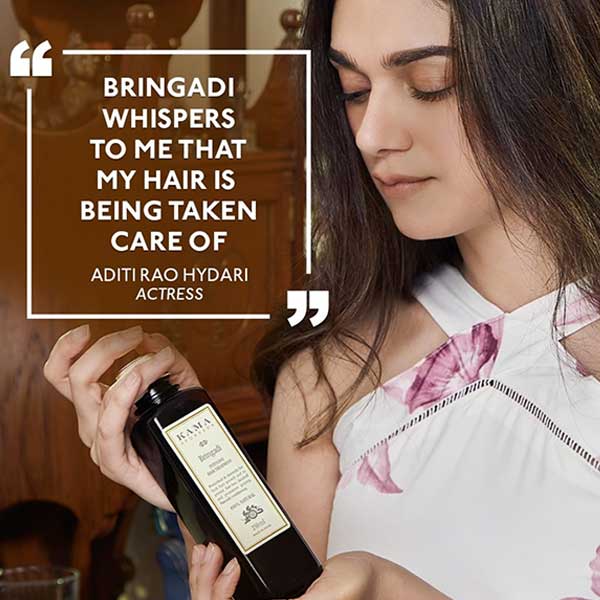
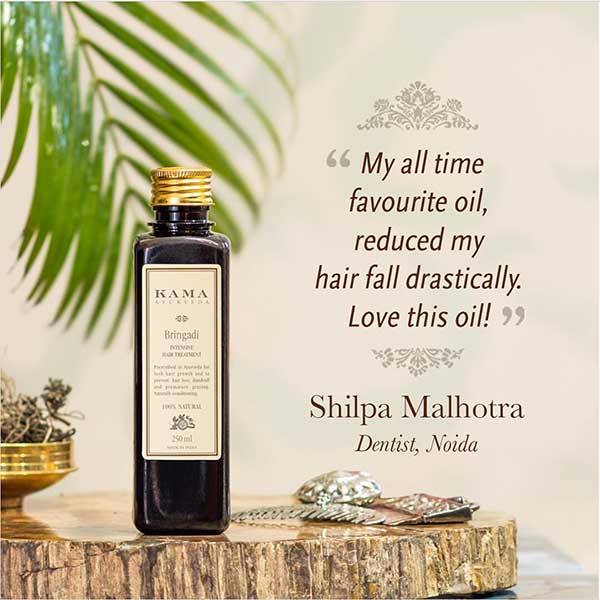
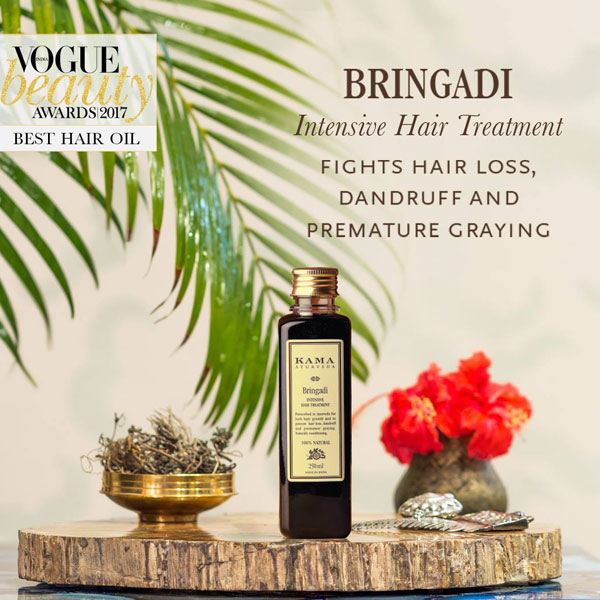
2. Bringadi Oil To Fight Dandruff and Hair Loss

Brigandi oil is a combination of Bhringraj oil (extracted from the leaves of the Bhringraj tree) and a few hair-friendly herbs like Amla, Indigo, Sesame. and Balloon Vines. This Ayurvedic oil is an intensive hair treatment that helps prevent hair loss, scalp irritation, dandruff, and premature greying.

With its soothing earthy scent, the oil helps in cooling and soothing the scalp. It also provides relief from the itchiness and greasiness caused by dandruff.
To use Brigandi oil to remove dandruff, gently massage Brigandi oil into hair, ensuring that the entire scalp is covered. You can do this once or twice a week. Warm the oil to enhance its benefits further.

brigandi oil for dandruff

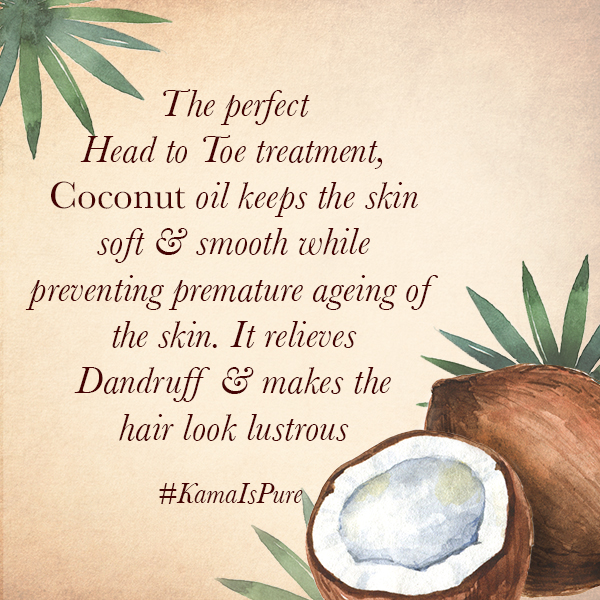
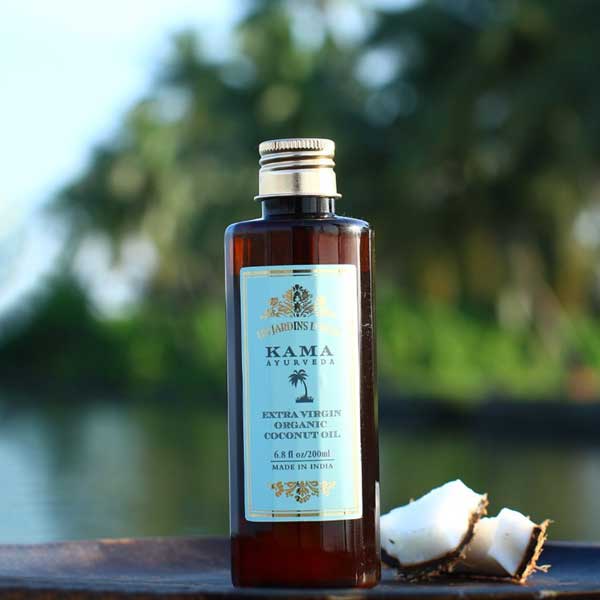
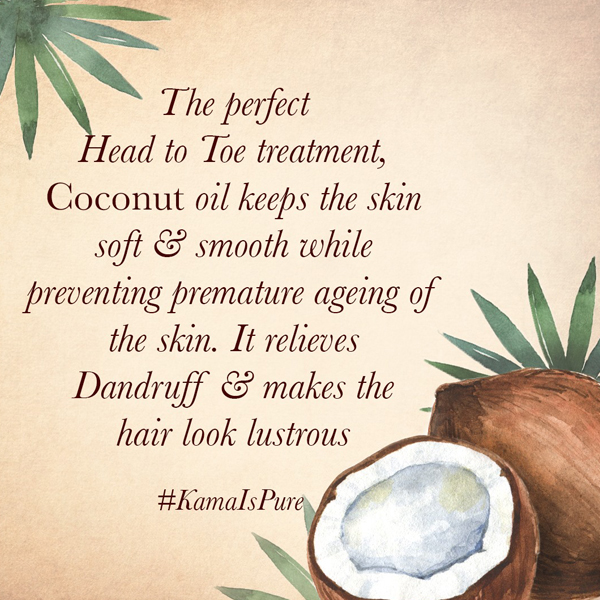
3. Coconut Oil To Remove Dandruff Caused By Dryness

Coconut oil is effective in hydrating the skin and thus, preventing dandruff which is caused due to dryness. Research has found that coconut oil, in particular, can aid in protecting from eczema and relief from the symptoms it brings along - inflammation and itching of the skin. 

Some studies also indicate that coconut oil and its compounds have antimicrobial properties. The application of coconut oil to the scalp and hair for eight weeks helped ease the symptoms of dandruff by as much as 68%! 

So treat it like a self-care hour before showering, and massage a few tablespoons of coconut oil into your scalp and hair, let it sit for at least 30 minutes, and then hop into the shower!

coconut oil for dandruff

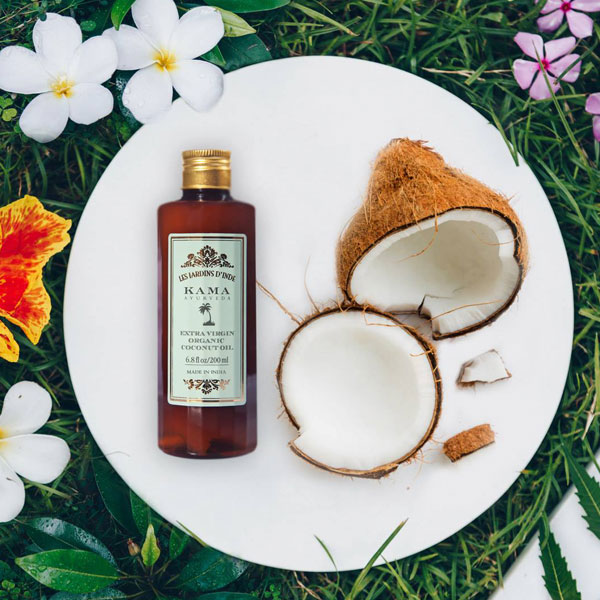
Shop Kama Ayurveda’s pure, natural, and organic Extra Virgin Coconut Oil

Read - Why Is Virgin Coconut Oil So Good For Your Hair?

We have talked about how essential oiling is to maintain good scalp health and get rid of dandruff. Now, let us walk through some other natural remedies and tips that will help you manage dandruff.

How To Get Rid Of Dandruff - 6 Home Remedies And Tips

It is essential to understand that some people are more prone to dandruff, which tends to be a chronic or recurrent disorder with periods of flare-ups. While it may not be permanently curable, it is possible to control and manage it with good hygiene. Here are the home remedies for dandruff treatment  -

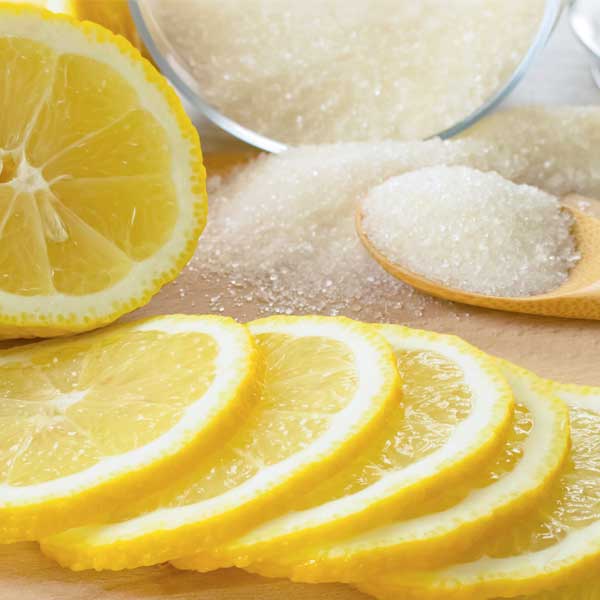
1. Use Lemon To Manage Dandruff

Yes, lemon, one of the most widely available fruit, can remove dandruff naturally. Lemon juice is incredible for dandruff as it is acidic. Therefore, it breaks down the fungus responsible for causing dandruff. It also helps reduce the oil production of your scalp. 

Massage your scalp with two spoon-fulls of fresh lemon juice, and let it sit for a minute, then mix a teaspoon of lemon juice with a cup of water and rinse your hair with it - do this at least twice a week before washing your hair, and you should begin to see good results after the first few washes!

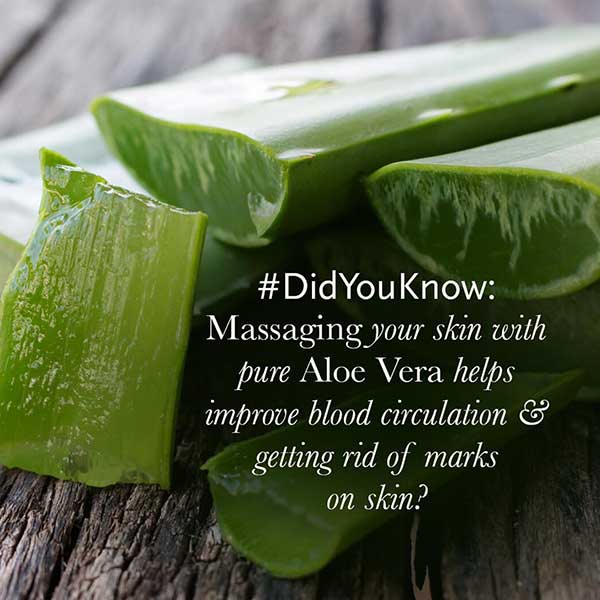
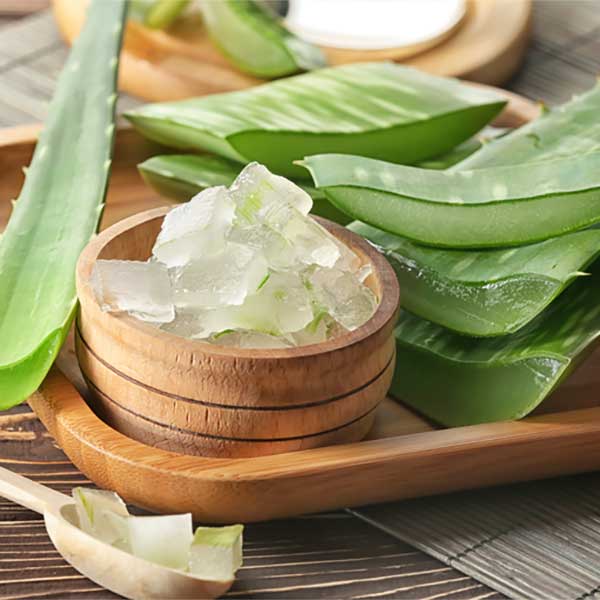
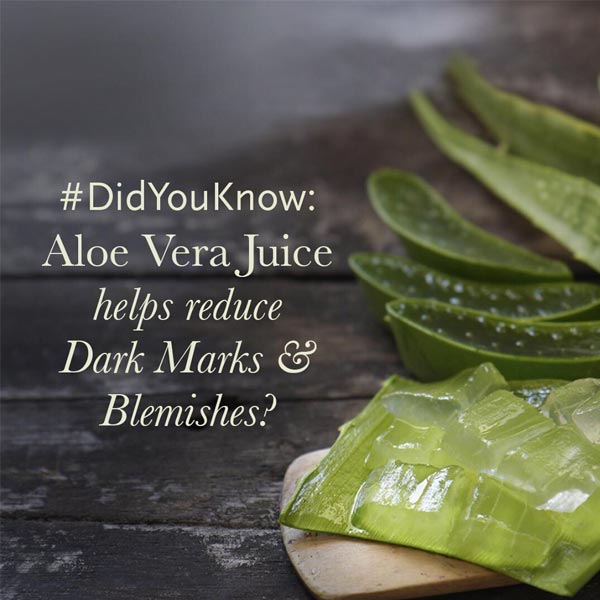
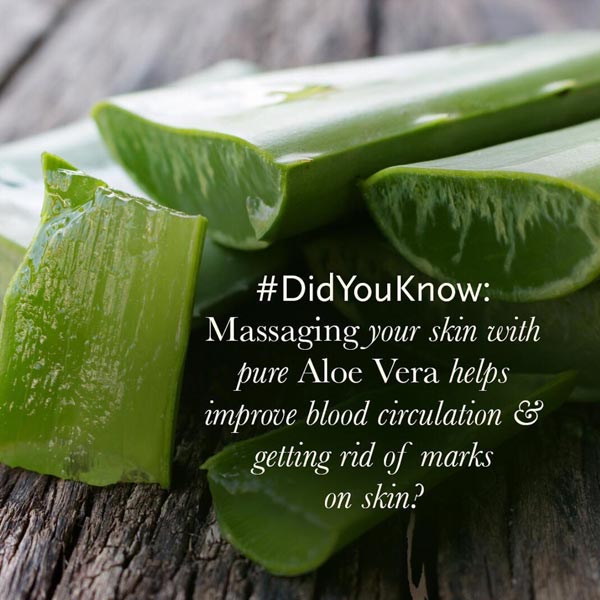
2. Aloe Vera To Get Rid Of Dandruff Naturally

Aloe vera is a succulent that is known to help treat conditions like burns, psoriasis, and cold sores when applied topically. It is widely popular for its medicinal properties and benefits. 

Aloe vera contains anti-bacterial and anti-fungal properties. It also helps in soothing the scalp against the inflammation which comes with dandruff. Hence, it is a strong candidate for selecting a remedy for dandruff issues.
You can apply freshly squeezed Aloe Vera gel directly on your scalp, or you can use natural shampoos that contain Aloe Vera.

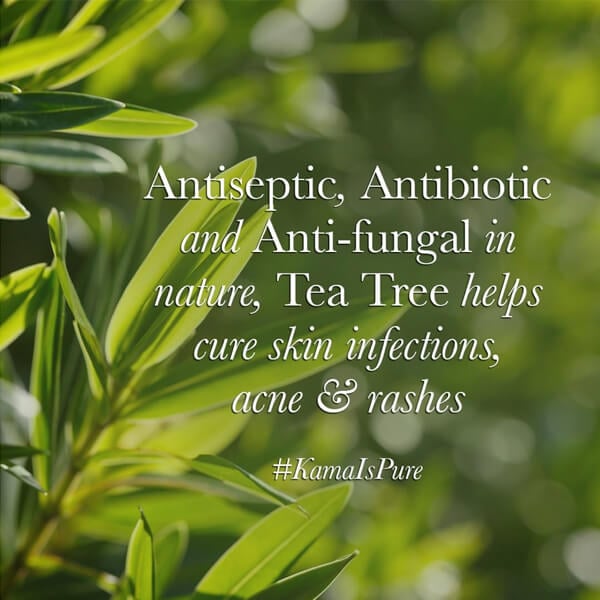
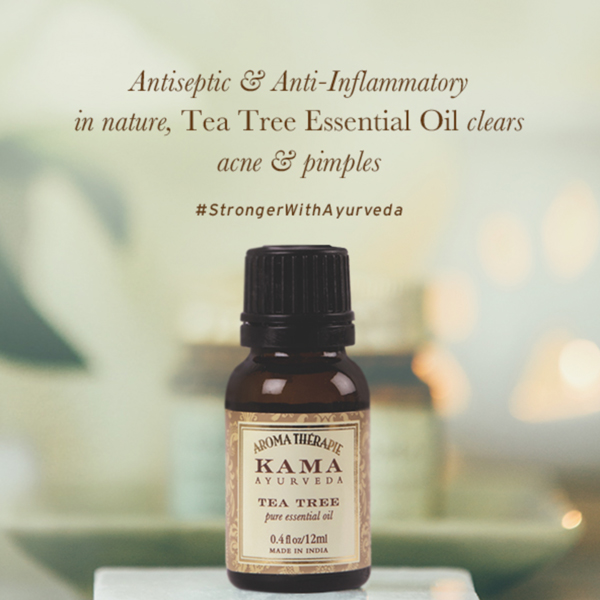
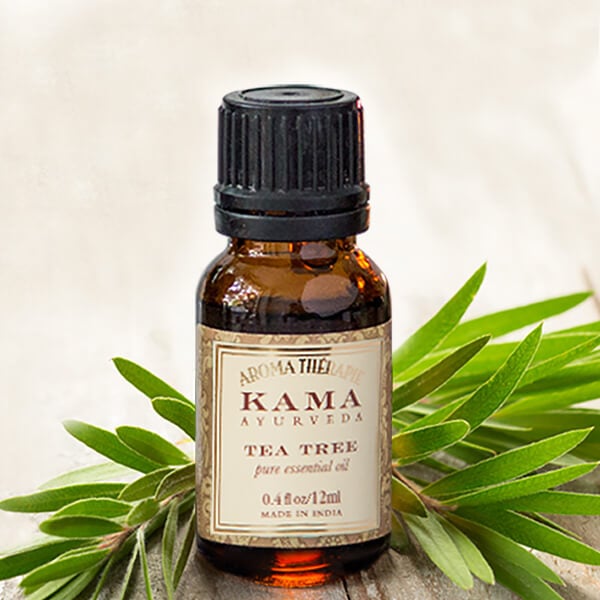
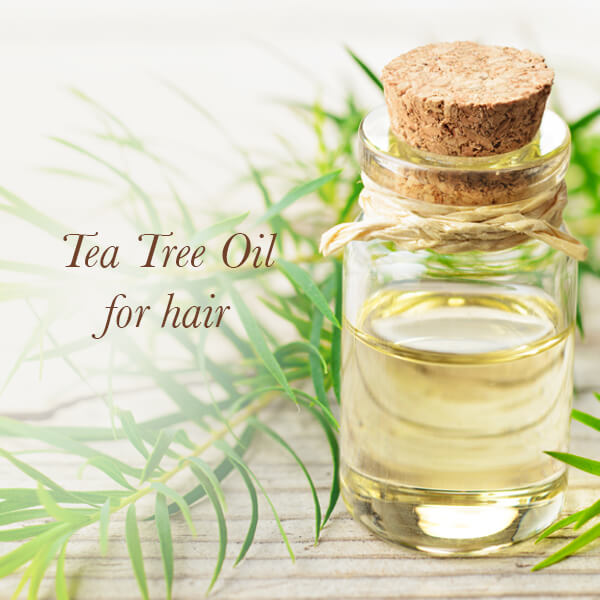
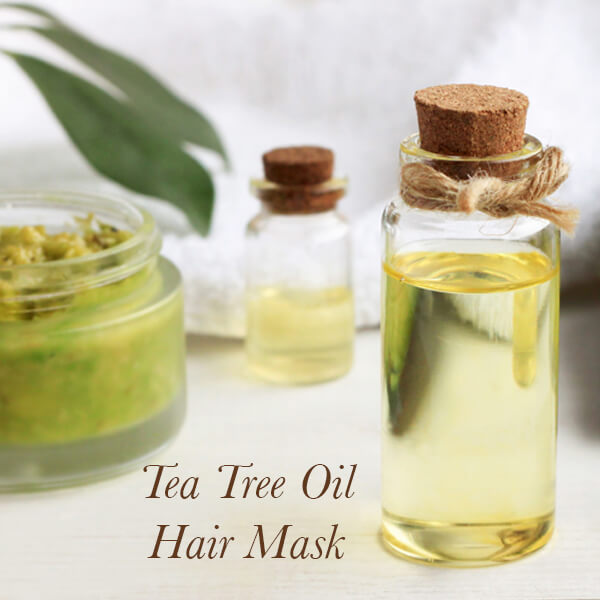
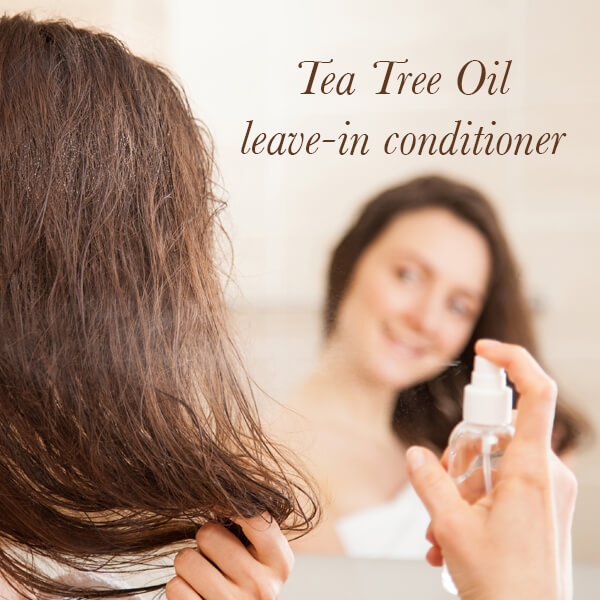
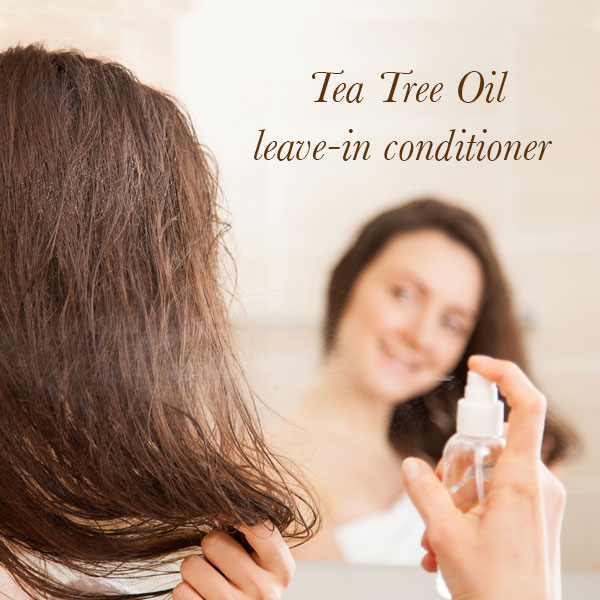
3. Tea Tree Oil For Dandruff And Dermatitis

Tea tree oil is beneficial for a lot of ailments, and dandruff is one of them. Tea tree oil has antimicrobial and anti-inflammatory properties that may help reduce the severity and symptoms of dandruff. 

It is also very effective in fighting the strains of fungus, which cause both dandruff and seborrheic dermatitis.

It is crucial to dilute tea tree oil properly with either water or carrier oil before using it. Otherwise, it can cause irritation, especially for those of us who happen to have sensitive skin! 

One way to use Tea Tree Oil for hair is to prepare a hair spray by diluting 5 percent Tea Tree Oil with water or Chamomile Tea. This will condition the hair and also prevent dandruff.

tea tree oil for dandruff

Read - 8 Simple Ways To Use Tea Tree Oil For Healthy Hair

4. Baking Soda To Get Rid Of Itching And Dandruff

Baking Soda is another ingredient that is found in our kitchens. It can be used as an extremely gentle exfoliant to remove dead skin cells and reduce the scaling and itchiness of the scalp.

To use baking soda to remove dandruff, try applying baking soda directly to wet hair and massaging it into your scalp. Let it sit for a minute or two, then continue shampooing your hair as usual.

5. Apple Cider Vinegar Dandruff Treatment At Home

Apple cider vinegar is said to help remove the dead skin cells and balance the scalp's pH. There have been test-tube studies that show that it may prevent the growth of certain types of fungus.

To use it, combine two to three tablespoons of apple cider vinegar with the same amount of water, then put it on your scalp and let it sit for a few minutes before rinsing your hair with clear water or washing your hair with shampoo. You can also add a few drops of Apple Cider Vinegar to your bathtub to restore the pH balance of your body and hair. This may help get rid of dandruff in one wash.

apple cider vinegar for dandruff

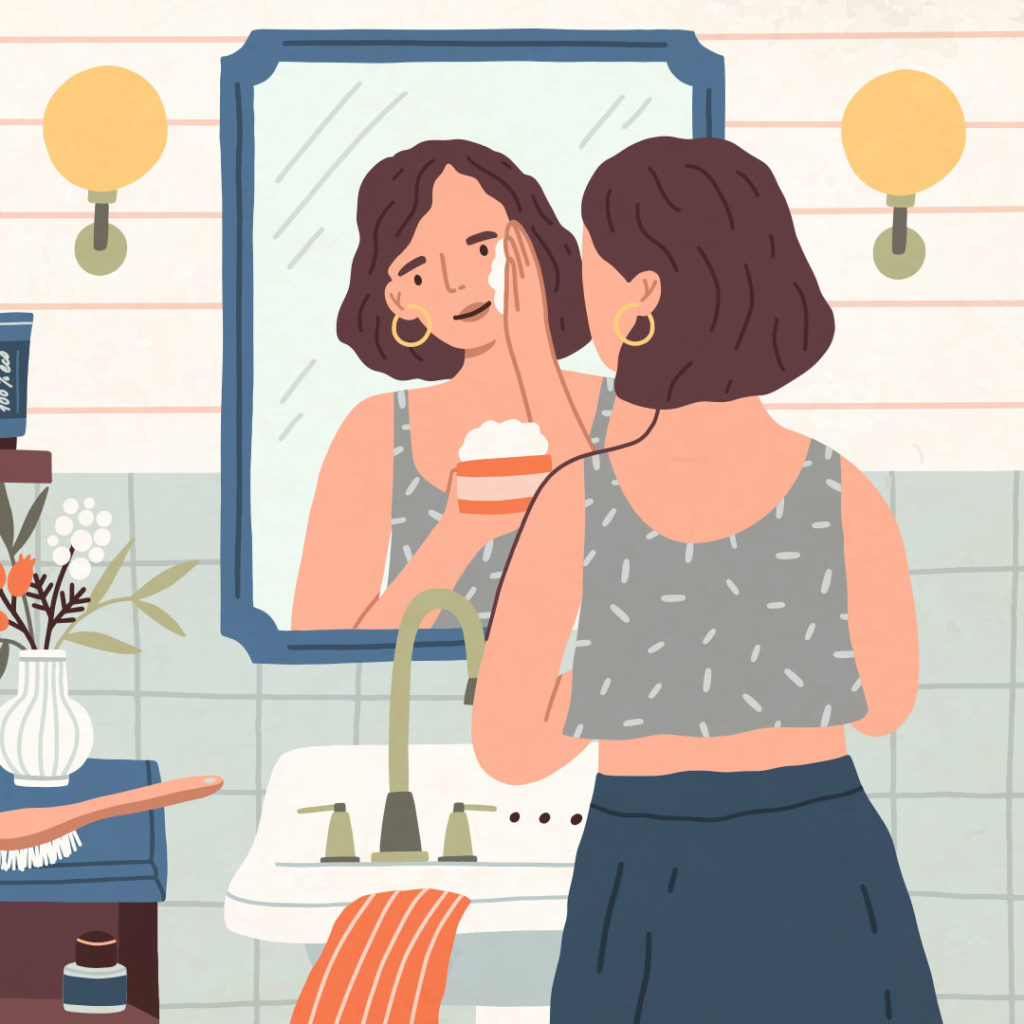
6. Shampoo Your Hair Frequently To Remove Dandruff

Having a regular hair care regime with oiling and washing hair frequently can help immensely get rid of dandruff. As we have explained previously in this article, regularly cleansing the hair and the scalp with a natural shampoo can be life-changing for those who struggle with excessively oily scalp and buildup due to all that oil being produced.

7. Maintain A Healthy Diet For A Healthy Scalp

A balanced diet, especially one rich in fatty acids and probiotics, can be incredibly helpful in reducing dandruff, in addition to maintaining good hygiene and using any necessary products. Also, include plenty of green vegetables in your diet to provide your hair with essential nutrients.

Omega-3 fatty acids are essential to skin health and can help reduce inflammation. A deficiency of Omega-3 fatty acids can cause dry skin, dry hair, and even dandruff. Some fantastic sources of Omega-3 fatty acids are fatty fish like salmon, trout, and mackerel.

If you follow a more plant-based diet, you can also take a fish oil supplement or increase your intake of other omega-3-rich foods like flaxseed, chia seeds, and walnuts.

Additionally, probiotics (beneficial bacteria that are good for your health) can help enhance immune function. They have shown to reduce dandruff severity, along with symptoms of skin conditions like eczema and dermatitis.

While probiotics are widely available in supplement form for convenient consumption, plenty of delicious and healthy foods are rich in probiotics, such as yogurt, kombucha, pickles, sauerkraut, kimchi, and many more - so take your pick!

Now that you’ve browsed through all home remedies for dandruff, you might be curious to know what dandruff is. In the coming section, we’ll answer some of your most common questions about this hair problem, starting with the most basic one -

What Is Dandruff?

‘Dandruff’ - also known as ‘Dermatitis’ or ‘Seborrhea’ - is a highly prevalent skin condition experienced by most people at some point in their lives, regardless of ethnicity, age, or gender.

Dandruff usually appears as fine, dry, and flaky skin on the scalp. It can sometimes have areas with red or pink skin, signaling inflammation. For some people, it may also simply show up as white flakes without any scratching or irritation. For others with more advanced cases, the symptoms may include burning and itching along with white, flaky skin.

Dandruff condition isn't limited to the scalp. Eyebrows, ears, beard (for men), and the hairy part of the chest (for both men and women) can also get dandruff. You might not know this, but dandruff also affects babies in infancy. Dandruff on the scalp of babies is known as a ‘cradle cap’. 

Certain kinds of weather can make dandruff worse for you. For some people, it’s the humidity, while for others, it’s the dry winter season that triggers the appearance of dandruff.

how to get rid of dandruff in rainy and monsoon season

What Are The Causes Of Dandruff?

At some point, you must have thrown your hands up in exasperation at some point and wondered - ‘WHAT did I ever do to deserve all this dandruff? Why me?!’ - we’re going to stop you right there, the thing is, the exact cause of dandruff remains unknown.

Probable causes and associations of dandruff include increased oil production and secretion, dry skin, sensitivity to hair products, and the growth of a yeast-like fungus called ‘Malassezia’, which feeds on oils the scalps of most adults.

Dandruff may also be triggered or worsened by poor hygiene and infrequent hair washing. It has been determined that dandruff tends to affect way more men than it does women, this could have something to do with men’s skin producing more oil than that of women. 

Dandruff is also common in people with chronic illnesses such as Parkinson’s disease or a compromised immune system (as in the case of advanced HIV/AIDS), however, it is not contagious.

How Does Dandruff Affect Your Health?


Additional problems can come along with the usual white flaky skin shedding all over your sweaters for people who struggle with dandruff for extended periods. Here are some of the effects dandruff can have on your body -

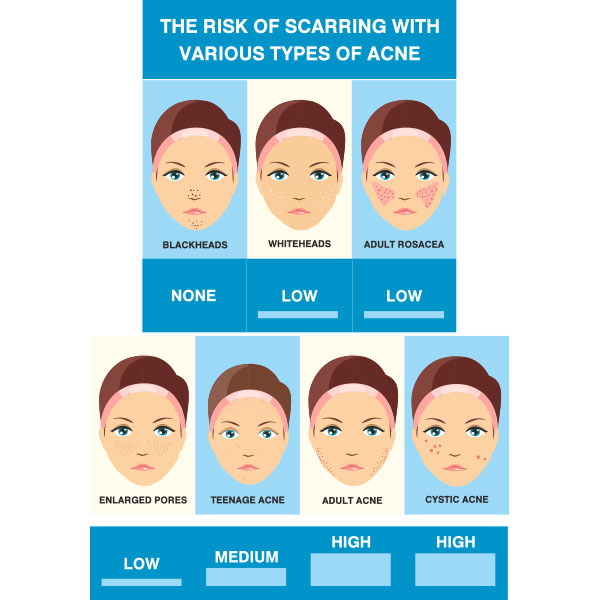
Acne: Dandruff could be responsible for that sudden outbreak of pimples. When you deal with dandruff and your hair strands come in contact with your face, it can induce pimples. We advise you to avoid haircuts or hairdos that require your hair to be in constant touch with your forehead or cheeks while you work on getting rid of dandruff from the scalp.

In addition to hairstyle changes, washing your face with a facial wash containing Salicylic Acid - at least once a day - can help clear up the acne caused due to dandruff and its fallout on the skin on the face.

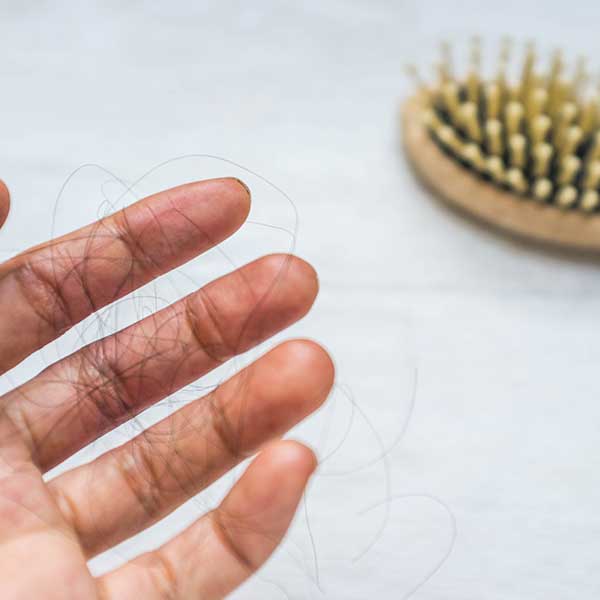
Hair Loss: Loss of the hair on the scalp can sometimes happen to people with severe cases of dandruff. It is often connected to the fervent scratching brought on by the itchiness caused by dandruff and extreme dryness. The hair strands and their follicles become damaged with the prolonged traction (the scratching), resulting in the hair strands breaking and falling off.

So, what can be done? Well, first of all, avoid scratching! Secondly, follow a hair care regime of oiling your hair and use an anti-dandruff shampoo to reduce dandruff gradually.

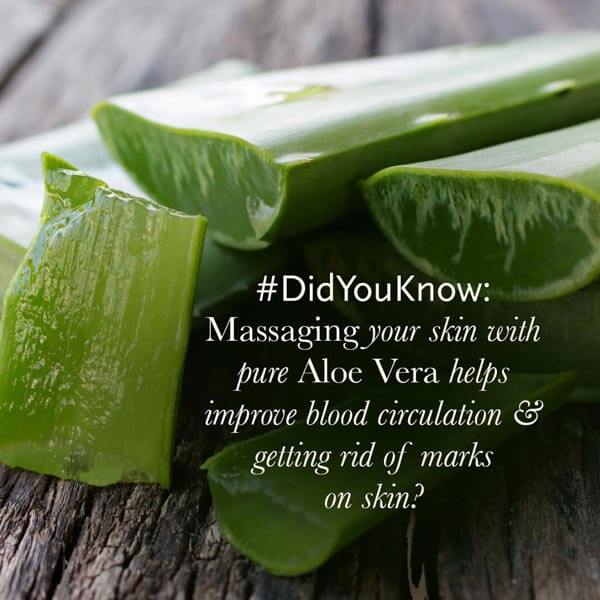
To relieve the itching and dryness, you can also massage some aloe vera gel or some coconut oil (or mix them up together, even better!) onto your scalp and hair.

Both the aloe vera gel and coconut oil contain antifungal and antibacterial properties and are effective against dandruff themselves, so along with hydrating the scalp, this scenario would be the best of both worlds for the scalp!

coconut oil for dandruff

 Read - How to Stop Hair Fall - 36 Best Tips And Home Remedies

In a case like such, using tea tree oil along with your shampoo can work wonders for the scalp! Tea tree oil is well-known for its ability to reduce greasiness and itchiness quite significantly in people who suffer from these symptoms due to their dandruff.

As mentioned before, it is crucial to dilute tea tree oil with equal amounts of water or another carrier oil. Applying undiluted tea tree oil can lead to problems, especially if you have sensitive skin.

Itchy and Greasy Scalp: Sometimes, the onset of dandruff can result from the buildup caused by too much oil production by the scalp. This can lead to a dandruff problem along with the itchy and extremely greasy scalp and hair.

In a case like such, using tea tree oil along with your shampoo can work wonders for the scalp! Tea tree oil is well-known for its ability to reduce greasiness and itchiness quite significantly in people who suffer from these symptoms due to their dandruff.

As mentioned before, it is crucial to dilute tea tree oil with equal amounts of water or another carrier oil. Applying undiluted tea tree oil can lead to problems, especially if you have sensitive skin.

Psoriasis: Psoriasis is caused by the body’s immune system and presents similarly to dandruff - it causes flake-off as dandruff does. However, Psoriasis patches can spread past your hairline to your forehead, down your neck, and to the skin on and around your ears. Psoriasis can be identified by its scaly and pink or reddish appearance, often covered by grey, scaly skin.

Eye Problems: Severe cases of dandruff can cause issues for the forehead and the eyes. For instance, Seborrheic Blepharitis is an infection of the eyes caused by dandruff of the scalp and eyebrows. It presents as greasy flakes or scaly patches around the base of the eyelashes and mild to moderate redness of the skin around the eyes.

Along with treating dandruff on the scalp, you can try applying warm compresses to the eyes to loosen up the crusty skin. You can also mix some fragrance-free baby shampoo along with some water and gently scrub the eye area with a gentle cloth or cotton swab dipped into the shampoo solution, then rinsing away with clear water.

If your infection persists, seek professional help as soon as possible. The eye and its surrounding area are highly delicate and may become severely damaged if left untreated.

Other Frequently Asked Questions About Dandruff 

1. How to cure dandruff permanently?

Dandruff can’t be cured permanently. However, most people are able to reduce dandruff in the long term with the right hair care. Usually, the flakes come and go. Home remedies and natural hair products are helpful in managing dandruff and related symptoms like itchiness.

2. Is there an Ayurvedic treatment for dandruff?

Ayurveda recommends regular hair oiling to control dandruff. You can use a suitable hair oil depending on your hair type. Neem Oil, Coconut Oil, Brigandi Oil, and Tea Tree Oil help with natural dandruff removal.

3. Which hair mask for dandruff is the best?

Add a few drops of Tea Tree Oil to Aloe Vera gel to prepare a natural hair mask that works as an effective dandruff solution. 

Conclusion

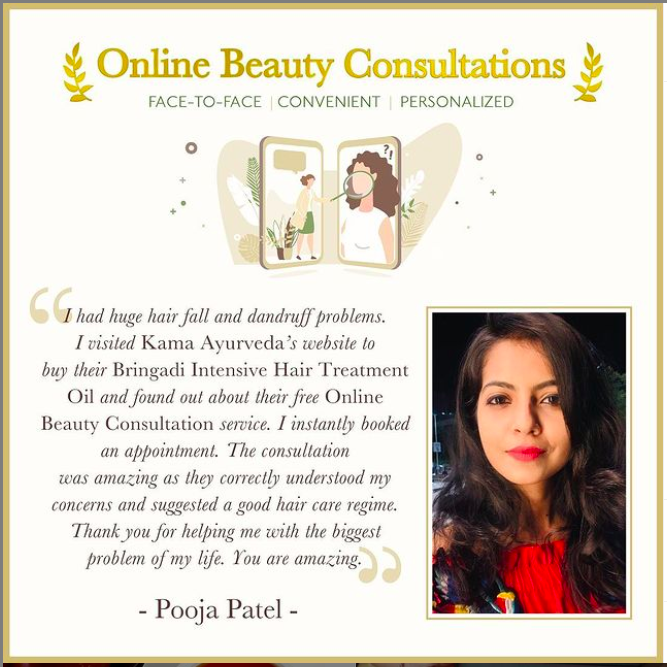
We have finally reached the end of this article covering all types of dandruff treatments at home. We’ve also covered all the hair problems associated with dandruff and some ways to manage the sane. Choose the remedies that seem right for your hair type. If you need further help with your dandruff, you can book a free consultation with our Ayurvedic beauty experts

The advice mentioned above in the article is successful for most people if followed correctly and consistently. However, if your case of dandruff is severe and is not getting better even after using these methods to get rid of it, we strongly urge you to consult a dermatologist. 

References:

  1. 1. Study depicting Antifungal Activity of Aloe Vera Leaves - https://pubmed.ncbi.nlm.nih.gov/17336466/
  2. 2. Melaleuca Alternifolia (Tea Tree) Oil: A Review of Antimicrobial and Other Medicinal Properties - https://pubmed.ncbi.nlm.nih.gov/16418522/
  3. 3. Role of Antifungal Agents in the Treatment of Seborrheic Dermatitis - https://pubmed.ncbi.nlm.nih.gov/15663338/
  4. 4. Antifungal Activity of Sodium Bicarbonate Against Fungal Agents Causing Superficial Infections - https://pubmed.ncbi.nlm.nih.gov/22991095/
  5. 5. Study on Omega-3 Fatty Acids and Inflammatory Processes - https://www.ncbi.nlm.nih.gov/pmc/articles/PMC3257651/
  6. 6. Study observing the Positive Benefit of Lactobacillus Paracasei NCC2461 ST11 in Healthy Volunteers With Moderate to Severe Dandruff - https://pubmed.ncbi.nlm.nih.gov/28789559/
  7. 7. Study observing the effect of Topical Virgin Coconut Oil on SCORAD Index, Transepidermal Water Loss, and Skin Capacitance in Mild to Moderate Pediatric Atopic Dermatitis - https://pubmed.ncbi.nlm.nih.gov/24320105/

How To Remove Tan Naturally Using Home Remedies?

Summer brings with it the promise of fun-filled beach days and sun-kissed memories. But as we soak up the sun, the unwelcome souvenir of a tan often lingers. Don't worry, we've done the hard work for you, uncovering the best-kept sun tan removal secrets to help you.

From natural home remedies to DIY masks, we have all the tips you need to remove tan from face and hands. Get ready to discover the art of tan removal and step into the sun with confidence!

What Causes Tanning?

Tanning is caused by exposure to ultraviolet (UV) radiation, which triggers the production of melanin in the skin. Melanin darkens the skin as a protective response to UV rays, resulting in a tan. (1)

Melanin shields by absorbing and scattering UV rays, lessening their harm to deeper skin layers. However, tanning offers only minimal protection against UV radiation.Long exposure to the sun can lead to sun burns. (2)

What experts say -

“Excessive sun exposure can lead to skin damage and increase the risk of skin cancer. That's why it's essential to practice responsible sun exposure, always wear sunscreen, protective clothing, and seek shade when the sun is at its strongest.” - Dr Aruna Purohit

How To Remove Tan From Face?

Some people may consider opting for chemical treatments like bleaching and peels to get rid of tan instantly. But while these treatments may promise quick tan removal, they often come with long-term risks and harm to the skin. So instead, we recommend the safer and more effective path of natural home remedies. 

In this section, let’s explore gentle and nourishing solutions for face tan removal.

Lemon Juice and Honey

Lemon juice is a powerful tan removal agent, thanks to its ascorbic, glycolic, and alpha-hydroxy acids that have a natural bleaching effect. Abundant in Vitamin C, it quickly helps in removing tan.

To make a tan removal mixture, squeeze fresh lemon juice and add some honey (a natural humectant) to it. Apply the mixture on your skin and let it stay for 15-30 minutes before washing off with a mild cleanser. If you have oily skin, avoid leaving the honey on your skin for too long.

Aloe Vera Gel

Aloe vera gel is a fantastic natural remedy for face tan removal. Renowned for its soothing properties, it reduces inflammation and redness caused by sun exposure while promoting skin healing. (5)

To use aloevera gel for tan removal, apply a generous amount to the tanned areas on your face, leaving it on for 20-30 minutes. Afterward, rinse it off with cool water. Regular application will lighten tan and keep your skin hydrated and nourished.

Tomato

Tomatoes are excellent for tackling face tanning, thanks to their antioxidant content, particularly lycopene, which neutralizes UV-induced free radicals. Additionally, tomatoes provide skin-repairing vitamin C and natural acids that exfoliate, reducing tan lines and promoting an even skin tone.

After a day under the sun, grab a ripe tomato and cut it into slices or blend it into a pulp. Apply the slices or pulp directly to the tanned areas on your face, leaving it on for 15-20 minutes. Then, rinse with water and gently pat dry.

Multani Mitti For Tan Removal

Multani Mitti, also known as Fuller's Earth, is a time-tested and natural solution to remove tan from your face. This magical clay gently exfoliates, removing dead skin cells and dirt while cooling and soothing sun-exposed skin. 

Add Rose Water to Multani Mitti and make a smooth paste. You can use chilled rose water for a more soothing effect. Apply a layer of the paste on the affected areas and let it dry. Wash off with water or a mild cleanser.
You can also use Kama Ayurveda’s Suvarna Haldi Chandan Brightening Face Pack has Multani Mitti combined with other skin brightening Ayurvedic ingredients such as Sandalwood and Turmeric.

Also read - 20 Best Tan Removal Face Packs To Remove Sun Tan

Papaya

Papaya is a skin superhero when it comes to tanning! Packed with natural enzymes like papain and AHAs, it gently exfoliates, removing tan and leaving your complexion brighter. 

Its antioxidants combat UV damage, while its hydrating properties nourish the skin. Simply apply papaya pulp directly to tanned areas for 15-20 minutes, and watch the magic unfold as it effectively removes tan and revitalizes your skin.

Coconut Milk

Coconut milk is a treasure trove of skincare benefits, enriched with cytokinins – potent plant hormones with anti-aging properties. These miraculous compounds aid in repairing sun-damaged skin and fading tan lines. Moreover, Coconut milk's anti-inflammatory prowess comes to the rescue, soothing sunburned and irritated skin after prolonged sun exposure.

To harness the wonders of coconut milk for tan removal, simply apply fresh coconut milk directly to the tanned areas of your skin, allowing it to work its magic for 20-30 minutes. Rinse off with water afterward.

You can also use de-tanning treatments with coconut milk as the base. Kama Ayurveda’s Jwalini Retexturising Skin Treatment Oil is one such treatment suitable for face and body.

How To Remove Tan From Hands?

Here are some of the most effective ways to remove tan from hands - the potent combination of yogurt and turmeric, the exfoliating benefits of gram flour and turmeric, the soothing properties of potatoes, the nourishing effects of almonds, or the glow-enhancing milk and saffron remedy.

Let’s discuss these remedies in detail - 

Yogurt and Turmeric

Yogurt and turmeric form a powerful combination for tan removal and skin brightening. Yogurt contains lactic acid, which gently exfoliates the skin, removing dead cells and tan. On the other hand, Turmeric is known for its anti-inflammatory and antioxidant properties, which can help repair sun damage and promote a more even skin tone. (4)

Create a paste by mixing a tablespoon of Yogurt with a pinch of Turmeric powder. Apply the paste on the tanned areas of your skin and let it sit for 15-20 minutes. Then, rinse it off with water, gently massaging the skin to exfoliate.

Gram Flour and Turmeric

Gram flour (also known as chickpea flour) and Turmeric are a potent combination for tan removal from the hands. Gram flour acts as a gentle exfoliant, while turmeric has anti-inflammatory and skin-brightening properties.

Create a thin paste by mixing 1 tsp of Turmeric with a cup of Gram Flour and some water or Milk. Apply the paste to your hands, targeting the tanned areas. Allow it to dry for 15-20 minutes before gently scrubbing it off with water, using circular motions to exfoliate the skin. Finally, rinse your face with cool water and pat it dry.

What experts say - 

“Home remedies for tan removal offer a safe and cost-effective approach. Ingredients like Yogurt, Turmeric, and Cucumber have skin-brightening properties that gently fade tan." - Dr Gopan G

Potato

Potatoes help with tan removal due to their enzymes, including catecholase, which has mild bleaching effects, and vitamin C, which combats sun damage. Their high water content moisturizes the skin, and their cooling effect soothes sun-exposed skin, reducing redness and inflammation. 

Start by washing a fresh potato thoroughly. Slice it or grate it to extract the juice. Rub the potato slices or apply the juice directly to the tanned areas on your hands. Let it sit for 15-20 minutes. Afterward, rinse it off with water and gently pat your hands dry.

Almonds

Almonds are a rich source of Vitamin E which nourish the skin and heal it from any damage from the sun. Almonds also have bleaching properties that help in removing tan.

Create a paste of Almond by grinding it with Rose Water. Use it as a tan removal scrub on the affected areas. You may squeeze some Lemon into the paste prepared by grinding almonds with rose water to increase its effectiveness in removing tan. 

Milk and Saffron

Saffron (Kesar) is a traditional beauty ingredient found in Indian households. Using Saffron is a natural way to get glowing skin. It is also known to improve skin texture, treat ailments like pigmentation, dark circles, pimples, and acne, and lighten darkened skin.

Simply soak a few strands of saffron in milk for some time. Apply the milk on affected areas. To provide better moisturization to the skin, Saffron can be soaked in cream instead of milk.

Ayurvedic De Tanning Oil

Described as a natural skin illuminator in Ayurveda, Nalpamaradi Thailam is a miracle oil that lightens the complexion and removes tan without causing any harm to the skin. It has the power of potent turmeric to remove pigmentation, even out skin tone, and erase stubborn tan marks. 

Post cleaning your face and body, pour some oil on your palm. Start with gently massaging your face in a circular motion until fully absorbed. Then, gently massage the oil all over your body in brisk upward and downward strokes until fully absorbed.

How To Remove Tan From Feet?

From the soothing combination of Oatmeal and Buttermilk to the zesty exfoliating scrub of Lemon and Sugar, and the gentle yet powerful effect of Masoor dal, these remedies will leave your feet bright and beautiful.

Oatmeal and Buttermilk

Indulge your feet in the soothing combination of oatmeal and buttermilk to bid farewell to unwanted tan. Oatmeal acts as a gentle exfoliant, sloughing off dead skin cells and tan, while buttermilk's lactic acid content helps lighten the skin, reducing the appearance of tan. 

Soak 2 teaspoons of Oats in half a cup of water for about five minutes. Add 2-3 teaspoons of fresh, plain Buttermilk to it and mix well. You can add Honey as well to make the pack more moisturizing. Mix these ingredients well to form a paste and then apply it to the areas affected by tanning. 

Oatmeal is also a key ingredient of the traditional Ayurvedic recipe for Ubtan. You can also use Kama Ayurveda’s Ubtan (a powdered mix of Ayurvedic herbs and natural ingredients) as a soap-free natural cleanser to remove tan from feet and other parts of body.

Cucumber and Lemon

When blended together, Cucumber and Lemon form a potent tan removal remedy that calms and rejuvenates sun-exposed skin. Cucumber's hydrating properties soothe the skin, while Lemon's natural bleaching abilities work to fade tan and restore an even skin tone. (3)

Apply the mixture all over your feet, including the tanned areas, and let it sit for 15-20 minutes. Afterward, rinse off with water and gently pat your feet dry to reveal tan-free and revitalized skin.

What experts say - 

“Lemon's citric acid not only acts as a natural bleaching agent but also helps in breaking down melanin pigments, making it an effective remedy for tan removal.” - Dr Kanchan Kachroo

Lemon And Sugar

The zesty exfoliating scrub of Lemon and Sugar serves as a powerful tan removal treatment. Lemon's citric acid acts as a natural bleaching agent, breaking down stubborn tan lines, while Sugar's fine granules gently slough off dead skin cells, revealing radiant and tan-free feet.

Prepare a grainy paste by mixing lemon juice and sugar, massage it onto your feet, especially the tan lines, and leave it on for 10-15 minutes. Gently scrub off the mixture using circular motions, rinse your feet with water, and pat dry to unveil tan-free and radiant feet.

Masoor Dal

Unveil the secret tan eraser hidden in masoor dal. Ground to a powder, this ancient remedy becomes an excellent tan removal pack for your feet. The granular texture of masoor dal exfoliates the skin, buffing away tan and dullness.

Grind masoor dal into a fine powder and mix it with water or milk to create a paste. You can also add honey for better moisturisation. Apply the paste to your feet, focusing on the tanned areas, and let it dry for 20-25 minutes. Gently scrub off the paste with water, massaging in circular motions to exfoliate the skin. Rinse off to reveal brighter skin.

Apple Cider Vinegar

Say hello to apple cider vinegar (ACV), your secret weapon against tanning! ACV's acetic acid works wonders by gently exfoliating away tan lines and dead skin cells, while also balancing your skin's pH and reducing redness. Plus, it's a pro at promoting skin rejuvenation and brightening your complexion. 

Mix equal parts of Apple Cider Vinegar and water, and gently apply it to the tanned areas on your feet using a soft cotton ball. Let it sit for 10-15 minutes before rinsing off with water and patting your feet dry to achieve tan-free and revitalized feet.

FAQs on Sun Tan Removal At Home

How to remove tan from the body? 

To remove tan from your body, you can try natural remedies like yogurt and turmeric, lemon and sugar scrub, or aloe vera gel. These home remedies can gently exfoliate and brighten the skin, reducing tan lines over time. You may also consider using Ayurvedic de-tanning oil.

How to remove forehead tan? 

To tackle forehead tan, apply Aloe vera gel or a mixture of  Cucumber and Lemon juice to the affected area. These remedies soothe the skin, lighten pigmentation, and promote an even skin tone. Sunscreen application is crucial to prevent further tanning on the forehead.

What is a tan? 

A tan is a darkening of the skin caused by exposure to the sun's ultraviolet (UV) rays. When the skin is exposed to UV rays, it produces more melanin to protect itself, resulting in a darker skin tone. Tans are often seen as a sign of sun exposure, but it's essential to protect your skin from excessive sun damage to prevent health risks.

Why do I tan so easily? 

Some people tan more easily due to their skin's melanin levels. Melanin, the pigment responsible for skin color, protects the skin from UV damage. Higher melanin levels lead to darker skin and an easier tanning response to sun exposure.

Is tanning permanent? 

No, tanning is not permanent. As the top layer of tanned skin naturally sheds, the tan will gradually fade over time. With proper care and protection from the sun, you can encourage quicker tan fading.

How to protect skin from sun tan? 

To protect your skin from sun tan, follow these tips:

  1. Wear sunscreen with SPF 21 or higher, and reapply every two hours.
  2. Seek shade during peak sun hours (10 am to 4 pm).
  3. Wear protective clothing, sunglasses, and a wide-brimmed hat.
  4. Avoid tanning beds, as they can cause skin damage.

How to remove tan from face immediately? 

For an immediate tan removal solution, try a Lemon and Sugar scrub. Mix Lemon juice and Sugar to create a grainy paste, and gently massage it on your face. This will exfoliate and brighten your skin, giving an instant glow.

How to remove tan instantly? 

While tanning removal takes time, applying Aloe Vera gel or Cucumber slices can provide instant relief by soothing sunburned skin and reducing redness.

How to remove tan overnight? 

Tan removal typically requires consistent efforts, but you can try applying a face mask of yogurt and turmeric before bedtime. Leave it on for 15-20 minutes and rinse off gently. Although you may not achieve complete tan removal overnight, your skin will feel refreshed and rejuvenated.

How to remove tan naturally?

Ancient Ayurveda texts claim Turmeric, Saffron, Sugar, and nut-based oils to be excellent healers of skin tanning. In this article, we’ve talked about simple tan removal home remedies that you can use to remove tan from your body.

How long does it take to remove tan?

The time it takes to remove tan varies based on the tan's intensity, skin type, and the methods used. It can take a few weeks to several months with consistent use of tan removal remedies and proper sun protection. Patience and a dedicated skincare routine are essential for achieving a tan-free complexion over time.

References -

1. https://www.fda.gov/radiation-emitting-products/tanning/risks-tanning

2. https://medlineplus.gov/tanning.html

3. https://www.ncbi.nlm.nih.gov/pubmed/23098877

4. https://www.ncbi.nlm.nih.gov/pubmed/17569219

5. https://www.ncbi.nlm.nih.gov/pmc/articles/PMC2763764/


Kumkumadi Tailam : Ultimate Guide To The Miracle Beauty Oil

Since times immemorial, people have experimented with the potent herbs and natural ingredients around them and tried to infuse their goodness into one powerful potion. 

Ayurveda too, has one such recipe that’s passed over generations as a beauty secret. 

Described as ‘Miraculous Elixir’; it’s said that massaging your face with it at night will make your face ‘glow like gold.

This beauty potion is none other than Kumkumadi Tailam

It is considered Ayurveda’s invaluable gift to mankind for its uncanny ability to eradicate skin-related issues and bring out the skin’s natural glow. The name Kumkumadi comes from one of its key ingredients - red-gold Saffron, which is known as Kumkuma in Sanskrit.

In this article, we’ll look at the major benefits of Kumkumadi Facial Oil, its ingredients, how to apply it, and answer the major questions around its uses. First, let’s get down to the basics.

What is Kumkumadi Oil? (And Its Top Benefits)

Made entirely from natural herbs and oils, Kumkumadi Oil (also called Kumkumadi Tailam) is an Ayurvedic facial oil. 

It provides cosmetic as well as therapeutic benefits for the skin without causing any damage. Besides nourishing the skin, it also works as a cleanser, toner, and moisturizer.

The most valuable Kumkumadi Oil benefits are:

  1. Working as a natural skin illuminator by lightening the skin tone and improving skin texture,
  2. Repairing hyperpigmentation as well as signs of aging,
  3. Getting rid of skin discoloration,
  4. Treating blemishes and scars,
  5. Revitalises​ skin’s youthful brightness
  6. Rejuvenates skin dullness
  7. Suitable for all skin types
  8. Corrects dark spots
  9. Evens skin tone
  10. Enhances skin defenses against aging stressors

But how is this oil capable of offering so many benefits?

Well, the secret lies in the ingredients used to prepare it. There are many powerful, natural and Ayurvedic Kumkumadi oil ingredients that provide unique benefits for our skin. 

Most of the plants in the formula are classified under the {varnya gana}, a category of herbs in the Ayurvedic pharmacopeia praised to illuminate and rejuvenate skin.​ 

  • Lotus: Calms skin by soothing inflammation. 
  • Saffron: Evens skin tone and natural skin illuminator
  • Indian Madder: Defends the skin from oxidative stressors.

We’ll look at those ingredients in the later section of the article. 

One effective Kumkumadi Tailam Facial Oil is Kama Ayurveda’s Kumkumadi Miraculous Beauty Fluid Night Serum. It is prescribed in Ayurveda for glowing complexion and even skin tone, among many other Kumkumadi Tailam uses and benefits. 

How to Use Kumkumadi Oil: Three Simple Steps

Below are three steps to use Kumkumadi oil in the form of our Kumkumadi Oil-based night serum. Follow this regime to brighten and treat dull, pigmented, damaged and aging skin.

1.Pre-Oiling

Begin with cleansing your face as usual at night. After cleansing, dampen your skin with Pure Rose/Mogra/Lavender/Vetiver water. 

2.Facial Oiling

Take (2-3 drops) of Kumkumadi Night Serum on your palm, apply over the face with fingertips and gently massage onto the skin until fully absorbed.

3.Post-Oiling

Allow the Kumkumadi Night Serum to work overnight for the best results. Wash it next morning with a mild natural cleanser.

Here are 3 some other ways to use Kumkumadi Oil in your skincare ritual:

  1. LAYER: Unveil targeted beauty by applying 2-3 drops before moisturizing at night. 
  2. BLEND: Mix 1-2 drops with your moisturizer for nourishment and a radiant glow in your palms. 
  3. CURE: Indulge in a mask twice a week by taking 4-5 drops drops for your face and then washing it off.

How is Kumkumadi Tailam Made? - Top Ingredients

Kumkumadi Tailam is prepared from a herbal paste of over 21 herbs. Almost all the Ayurvedic herbs useful for skin are used as Kumkumadi oil ingredients. These ingredients are first made into a decoction. Then, Sesame oil is added as the base oil to absorb the potent energy of the herbs.

Here, let’s have a look at the Kumkumadi Tailam benefits provided by each of these ingredients.

1. Kumkumadi Oil For Skin Brightening

The most well-known ingredient of Kumkumadi Tailam is Saffron (Kukum), which is fabled for its ability to transform your skin tone. By rejuvenating the skin cells and promoting blood circulation, it brightens the complexion.

saffron in kumkumadi oil

Another ingredient with the same function is Sandalwood (Chandana) derived from fragrant wood of the Sandalwood tree. It contains skin lightening agents with soothing properties that make the oil suitable for application even in summers. [2]

If you want to use Kumkumadi Tailam for skin brightening, you can rely on these ingredients to naturally bring out a glowing complexion.

2. Kumkumadi Oil For Healing from Skin Infections

Kumkumadi Tailam uses are not limited to skin brightening. If you’ve any skin conditions like blemishes, or certain kinds of bacterial or fungal infections, you can heal them naturally by using Kumkumadi Oil.

The oil gets its antifungal properties from Lac (Laksha). It’s derived from the resinous secretion of lac insects and proves extremely useful in treating skin infections. 

Note - Kama Ayurveda’s preparation of Kumkumadi Miraculous Night Serum is 100 percent Ayurvedic, and cruelty-free and no animals/insects are harmed in the process of sourcing Lac. 

Along with Lac, many other Ayurvedic ingredients present in the oil help in skin healing. 

Derived from a perennial climber growing in the Himalayas, Indian Madder (Manjistha) provides antibacterial and anti-inflammatory properties. Extracts from Sappan Wood or Indian Redwood (Pattanga) and Pollen of Lotus flower (Kamala Keshara) give Kumkumadi Tailam healing properties and treat conditions like skin inflammation.

3. Kumkumadi Oil or Pigmentation and Discolouration

One of the most critical functions of Kumkumadi Oil is in treating discolouration and pigmentation of the skin. 

A natural skin brightening Ayurvedic ingredient, Licorice root extract (Madhuyashtika) in Kumkumadi Oil inhibits the enzyme that causes pigmentation in response to sun exposure. It also helps in diminishing the dark pigmentation resulting from scars.

Wild Himalayan Cherry (Padma), Leaves of the Banyan tree (Nyarodhna) and Vetiver roots (Usheera) present in Kumkumadi Tailam are other Ayurvedic herbs that are effective in brightening the complexion and treating skin discoloration revealing a smoother, younger-looking complexion. 

These ingredients make Kumkumadi Oil a popular Ayurvedic medicine for hyperpigmentation.

Dark spots, a common condition associated with skin pigmentation, can also be treated naturally by using Kumkumadi Thailam. 

However, if you’re looking to get rid of tan from all over your body, then Nalpamaradi Thailam is recommended. 

4. Kumkumadi Oil for Oily Skin

Do you have oily skin? Are you worried that using Kumkumadi Tailam as a facial oil will make your skin even more oily? While many facial oils are not suitable for oily skin, Kumkumadi oil has unique ingredients that are appropriate and also beneficial for oily skin!

Take, for instance, Indian Barberry (Kaliyaka) present in Kumkumadi oil. The herb is known for its ability to reduce the production of skin lipids (or sebum). This ingredient makes the oil perfect for unclogging pores, taming oily skin and preventing acne. [2]


The extract from the seed of Blue Lotus (Neelotpala) is also present in the oil. This extract is a natural moisturizer that results in glowing skin by balancing oiliness and preventing breakouts. Not only this, the musky scented Mahua (Madhuka) flowers used to prepare the oil provides it with cooling properties and the functionality as a skin toner. [4]

However, note that just using just one or two drops of the oil is enough when you’re using it for oily skin type.

5. Kumkumadi Oil for Hydration and Moisturization

Kumkumadi Tailam is perhaps the most hydrating and nourishing facial serum that you can choose for your skin. 

Do you know why? It’s because a concoction prepared from 10 powerful Ayurvedic roots from plants like Bael and Indian Trumpet Flower, known as Dashamool, is present in Kumkumadi Oil. Due to this, the oil is effective in treating excessive dryness of the skin. 

kumkumadi oil uses

Next, let’s clear a few of the most common questions around the oil. 

FAQ About Kumkumadi Facial Oil

Can it be used for oily skin? What about sensitive skin? Are there no side effects? Even while using the best Kumkumadi Tailam, you can have some doubts in mind. We’ve covered all of them below. Let’s start by checking the suitability of the oil for dry skin types. 

(Note: These answers are specific to Kumkumadi Thailam in the form of Kama Ayurveda’s Kumkumadi Oil Miraculous Beauty Night Serum.)

Is Kumkumadi Oil suitable for dry skin?

Kumkumadi Oil is a natural moisturizer that uses Sesame oil as the base oil. It balances dry and rough skin by virtue of its Vata pacifying nature. Hence, it is useful for dry skin. You can increase the number of drops to 4-5 if your skin is dry.

Is Kumkumadi Facial Oil suitable for oily skin?

Yes, Kumkumadi Tailam is suitable for oily skin. However, the most common disclaimer attached to the oil is don’t over-use Kumkumadi Tailam if you have oily skin. It is inadvisable to keep a thick layer of this oil at night. Reduce the number of drops to 1-2. Leave it on for one or two hours and then wash off with a mild cleanser.

Is Kumkumadi Oil suitable for acne-prone skin?

Kumkumadi Oil is not suitable for acne-prone skin. You can check our Anti-Acne Skin Care range for acne-related issues.

Is Kumkumadi Facial Oil suitable for sensitive skin?

For sensitive skin, patch testing is recommended. Start with less quantity for a shorter duration and gradually increase it. Hydrate and tone with Rose Water in case you have oily and sensitive skin and with Mogra Water in case of dry and sensitive skin.

Can I apply Kumkumadi Oil after my night cream?

Try using Kumkumadi oil and your night cream on alternate nights. If you experience any skin issues, then it’s best not to mix the two.

Can I apply Kumkumadi Oil during day time?

Due to the presence of real Saffron, Kumkumadi oil is not suitable for use in the daytime. If used during the day, there is a high chance of getting a tan.

How long does it take for Kumkumadi Oil to start showing results

You need to apply the oil regularly for at least three weeks to see results.

Are there any side effects of using Kumkumadi Tailam?

While generally safe, some individuals might experience skin irritation or allergies. It's advisable to perform a patch test before regular use.

How to make Kumkumadi Tailam at home?

To prepare Kumkumadi Tailam at home, take a coarse powder (48 gm each) of all the herbs mentioned under the key ingredients (Kwath Dravya) except Manjistha, Mulethi, Mahua, Lac and Pattanga. Soak these herbs in 9.126L of water. After soaking for a few hours, boil this herb water mixture and let it simmer till the quantity reduces to 1/4th. Filter out the concoction (Kwath) and keep it aside. 

Now, take 12g each of Manjistha, Mulethi, Mahua, Lac and Pattanga and add a little water to prepare a smooth paste (Kalka). Add both Kwath and Kalka to 192 ml Sesame Oil and boil till only oil remains.

Finally, prepare a paste of Saffron and add it to the oil. With this final step, your Kumkumadi Oil will be ready.

Should I make my own Kumkumadi Tailam at home?

As the process of preparing Kumkumadi Oil at home is complex and requires many ingredients to be used in the exact proportions, it’s recommended to buy Kumkumadi Facial Oil from Ayurvedic beauty brands.

Should you apply anything before or after Kumkumadi Oil?

You should cleanse and tone your skin with a natural cleanser and toners before applying Kumkumadi Oil. Leave the oil to work on your skin and do not use anything else after its application.

Where can I buy the best Kumkumadi Tailam?

Kama Ayurveda’s Kumkumadi Facial Oil Miraculous Beauty Night Serum offers all the benefits of Kumkumadi Oil and is one the best in the market.

Can Kumkumadi Oil be used on babies?

No, we do not recommend our Kumkumadi Oil for babies. For babies, you can check our Baby Care range.

Can I use Kumkumadi Tailam overnight? 

Yes, leaving Kumkumadi Tailam on your face overnight allows your skin to absorb its beneficial properties while you sleep.

What is the difference between Nalpamaradi Thailam and Kumkumadi Tailam?

Kumkumadi Tailam is prescribed to treat dull, pigmented, damaged and aging skin. It’s recommended for the face. While Nalpamaradi Thailam is a powerful skin brightening and detanning treatment that can be used on both the face and body. The key ingredient in Kumkumadi Tailam is Saffron while the key ingredient in Nalpamaradi Thailam is Turmeric. In both the oils, Sesame oil provides the nourishing and hydrating base.

Conclusion

Kumkumadi oil (Kumkumadi Tailam) is based on Ayurvedic concepts and heals the skin in a slow, sustained manner. By penetrating into the tissues during the facial massage, it clears the impurities from within.

Due to lack of time and proper knowledge, we turn to cosmetics that promise quick results but are often left disappointed. Our facial skin has unique needs, which, if appropriately attended, can result in a naturally glowing skin. Here’s how you can build your customized skincare routine using natural products and include Kumkumadi facial oil as a part of your daily skincare regimen.

Lovers of traditional Indian rituals and Ayurveda find the ingredients used in Kumkumadi Facial Oil fascinating for its role in treating common skin issues like dark circles, tanned skin, hyperpigmentation, and blemishes. 

Kama Ayurveda recommends Kumkumadi Oil Miraculous Beauty Night Serum to treat your facial skin with the numerous benefits of Kumkumadi Tailam.

Have you used Kumkumadi Oil to treat your skin issues? Do share your experience and drop any questions that you may have in the comments below.

References -

  1. Kaviraj Govind Das sen Bhaisajya Ratnavali (with Hindi translations), Chaukhamba Surbharati Prakashan, Varanasi (2016), pp 942, 943
  2. https://www.ncbi.nlm.nih.gov/pmc/articles/PMC4623628/
  3. Batubara, I., Mitsunaga, T., & Ohashi, H. (2010). Brazilin from Caesalpinia sappan wood as an anti-acne agent. Journal of wood science, 56(1), 77-81.
  4. http://www.foodandnutritionjournal.org/volume6number2/mahua-a-boon-for-pharmacy-and-food-industry/


6 Amazing Ways To Use Rose Water For Your Face

There has been quite an upsurge in people trying to find natural and less processed ingredients for their skincare and make-up products, one of such ingredients is - yes, you guessed it - Rose Water! Rose Water is not something we are new to, sure, the youngins might be new to it, or the western beauty world might be just discovering rosewater, but it has been around in the east for a long, long time.

Rose Water is not only a beauty ingredient but also plays a key role in maintaining our mental health. According to ayurvedic texts, rose balances ‘Sadhaka Pitta’, the subdosha of Pitta, which governs emotions and their effect on the heart and thoughts. Isn’t it wonderful how Rose Water can do wonders for your body as well the mind?

rose water emotional health

Rose Water, produced by distilling rose petals with steam is thought to have originated in Iran. It has been used for thousands of years in beauty products, food and drinks! This magic ingredient contains a ton of benefits, especially for skin health! Would you like to know how to use rosewater properly? We have a guide waiting right here, read on!  

Benefits Of Rose Water For Face

We mentioned earlier how rose water is used in beauty products because of the number of benefits it offers, especially for the skin! Would you like to know what it does? Take a look -

Rose water is one of the go-to skincare products if you need to calm irritated and blotchy skin! It has strong anti-inflammatory properties which can help soothe eczema and rosacea! Moreover, rosewater contains antibacterial properties which can help in evening out your complexion by reducing the redness which is caused by acne and allergies.


Ever wondered why so many natural treatments used in healing various ailments contain rosewater? Well, the answer is, simply, because it helps! Rosewater has got powerful antiseptic and analgesic properties, and can prevent and treat infections!

rose water benefits
  • Helps in wound healing:

Got a cut or a burn? Got a scar that has now healed but gone dark and just won’t vanish? Rosewater can help! Remember how we mentioned it has antibacterial and antiseptic properties? Apply some rosewater to your cut or gently dab it using some cotton on your burn, it can help in speeding up the healing process. Additionally, if you have some scarring left-over from a zit, try using rosewater as toner at least 3 times a week while doing your skincare routine, you should be able to see a positive change swiftly!

  • Contains anti-ageing properties:


Rose oil and rose petals (and consequently, rosewater) contain a number of powerful antioxidants, which can help protect cells from damage. It has been found that these antioxidants had potential lipid peroxidation inhibitory effects. This provides powerful cell protection as a result. Combine the knowledge of these facts and the fact that rosewater already has antibacterial properties, and we have established that rosewater is an excellent help against ageing! Rosewater helps your skin retain its firmness and bounciness for significantly longer with long-term use!

How To Use Rose Water For The Face?

In the section above, we led you through the scientifically proven health benefits that rosewater can offer to you for your skin, and now you may want to try it for yourself! Are we correct? Can we offer you some interesting and prudent ways in which you can utilize rosewater in your day-to-day lives? Here you go -

  • Rosewater as a Toner: 


Now, most people who do not know any better tend to skip the toning part while doing their regular skincare routines, but there is a reason why it exists in the first place! A toner removes leftover oils and dirt from the skin that the cleanser may have missed. Hence, a toner aids in cleansing the skin thoroughly while maintaining the skin’s delicate pH balance. While most toners in the market as of now are all filled to the brim with alcohol and dry out the skin as a consequence, pure rose water is incredibly gentle in nature and also possesses astringent properties which help clean the pores of oil and grime.

Use it regularly (at least 3 times a week) and Rose Water will keep the skin free of extra oil and help prevent problems like blackheads, whiteheads, acne and pimple.


This following video shows how you can incorporate Rose Water in your daily skincare routine. 

  • Rosewater as a Facial Mist: 

Everything we just mentioned about rose water being an excellent toner stands along with the impeccable hydrating capabilities of rose water! Are you someone who is out and about a lot, especially in the summers? You can use rosewater as a facial mist, carry some around in one of those travel-sized bottles, and boom - you have a refreshing but natural and calming facial mist to spritz on your face for your summer escapades! Oh, bonus, it smells heavenly!

  • Rosewater as a Makeup Remover:

Some people can simply never find a suitable makeup remover for their skin - yes, that is, in fact, a big problem since a lot of people with sensitive skin breakout because of their makeup removers! There is no reason to tolerate irritating makeup removers anymore - rosewater contains astringent properties and when applied liberally on the face with a cotton pad or ball, it can help in gently dissolving your makeup by mixing in with the oils present on your skin and breaking it all down, just as a regular makeup remover product.  

  • Rosewater as a Cleanser:
rose water

As mentioned, Rose Water can take off the leftover dirt and grime which the cleanser fails to take off, but can it be used as a substitute for an actual cleanser? Yes, yes it can be! Mix 2-3 teaspoons of Rosewater with 1 teaspoon of Fuller’s Earth (also known as Multani Mitti), mix it in till it is smooth and apply it by spreading it on to your face evenly. Once applied, you can massage the exceptionally oily areas of your (the nose, the T-zone, the chin) gently and briefly, let the mix stay on your face for 2 minutes and then wipe off gently (do not tug or rub!) with a soft cloth dipped in lukewarm water, then rinse your face.

The Fuller’s Earth in this Rose water cleanser helps in extracting the excess sebum and grime from your pores as it is very absorbent, and the rosewater, of course, works like a charm in every situation by calming any inflammation and acting on the breakouts on the surface of the skin.

  • Rosewater as a Moisturizer:

Yet another fantastic use for rosewater if you have some leftover from all the uses we just informed you about! Mix in 4 teaspoons of rosewater with 2 teaspoons of raw honey, mix it well and apply it on to your face, leave it on for about 5-10 minutes, then rinse it off with considerably cold water, and voila! The raw honey is an impeccable moisturizer, it has hydrating benefits along with antioxidants, mixed with rosewater as a solid base for honey to hold on to, these two make a great moisturizing team!

  • DIY Face Packs using Rosewater:

Perhaps you are somebody who already has their skincare routine down pat, and aren’t even really looking for a new addition - can we show you some DIY face masks? Everyone gets bored with their skincare once in a while, and wants to switch things up, the next time you want to try something new, try one of these face masks! We present to you face packs that you can make yourself, according to your skin type - Dry, Normal, and Oily.

Let us start with dry skin - Mix in 1 tablespoon of aloe vera gel and raw honey each, into 2 tablespoons of rosewater, mix them all well, then apply liberally onto your cleansed but wet face. The raw honey and seals in the hydration, while aloe vera gel and rosewater work on the inflammation and irritation which can occur due to extreme dryness of the skin. Keep the mask on for 10 minutes at the very least, then rinse it off with considerably cold water.

For normal skin - Mix 2 teaspoons of gram flour, along with 1 tablespoon of plain Greek yogurt, into 4 tablespoons of rosewater, mix them well and apply liberally to your face and neck. We would encourage you to gently massage your face immediately after applying the mask to your face, this will help the gram flour to exfoliate your skin while the yogurt moisturizes and the rosewater takes off the grime and provides hydration. Leave the mask on for 10 minutes at least, then rinse off with lukewarm water.  

For oily skin - Mix 1 tablespoon of Bentonite Clay and 2 tablespoons of fresh cucumber juice to 2 tablespoons of rosewater, mix them well and spread evenly on the face. The Bentonite Clay, similar to Fuller’s Earth, is very absorbent and will extract the excess sebum and grime out of your pores, and so does the rosewater along with hydrating the skin, while the cucumber juice soothes and moisturizes the skin lightly. Leave the mask on for 8-10 minutes, depending on when the mask looks like it is still wet but feels dry to the touch, gently take out the mask with a soft cloth dipped in lukewarm water.  

how to use rose water for face

How To Make Rose Water

Is all this talk about rose water finally breaking your resolve to not buy another skincare product until your current ones are running low? If not, we have a solution for you. If you are not ready to commit to rosewater enough to buy it just yet, perhaps we can teach you to make your own, so you can try and see for yourself, all the goodness that rosewater contains!

- Put fresh rose petals into a cooking pot, and pour distilled water all over them, enough to just cover all the petals with the water, we would like to emphasize that adding too much water can dilute the quality of your rosewater a bit too much, and do not forget to put the lid on the pot;

- Time to set the cooking pot on to the stove, the fire on but keep it on the ‘low’ setting, so the contents of the pot will come to a boil, but slowly;

- Once the contents have come to a boil, turn off the heat but let the lid remain on the pot, wait for the contents to cool down to room temperature;

- As soon as they come down to room temperature, you can strain out the rose petals and pour the fresh rosewater that you have just prepared, into a sanitized bottle, preferable one with a spray cap, and there you go, your very own rosewater!  

If you found the process of making your own Rose Water more complex than what you thought it to be, don’t worry! In the next section, we’ve the perfect alternative for you - buying the purest Rose Water prepared from the best roses - the Bulgarian roses.

Best Rose Water For The Face

Looking at the previous section of this article, some of you might be wondering - ‘Huh? But why would I make all this effort just to make some rosewater when I can just buy a bottle?’ - and to you, we say: we’ve got you, too! If you would much rather we just recommend a good brand for buying rosewater from, then your wish has been granted. Here is our recommendation for you:

best rose water for face

It is Kama Ayurveda’s ‘Pure Rose Water’ - it has been described as ‘…a decadent floral distillation that refreshes, hydrates, and tones, leaving the skin scented with the luxuriant scent of pure Roses.’

The Pure Rose Water is made from the roses of Kannauj (Uttar Pradesh) - a region in North India, which is rich in white soil, which is conducive to the roses’ growth. The Kannauj rose is considered special because of its similarity to the Bulgarian rose. The steam distillation process of production of the Pure Rose Water is hygienic and uncontaminated to an extreme length. Plus it comes in a bottle already equipped with a spray cap - it eliminates your hassle of trying to find and sanitize properly, a bottle with a good spray cap!

What you get as your end product is a light, clear, and cooling water that can be sprayed directly to your skin, and leaves your skin revived and hydrated without any residue or stickiness - so you can spritz away happily!

Side Effects Of Rose Water

Rosewater happens to be extremely safe to use unless you are allergic to roses or fragrance in general. We would recommend doing thorough research before buying your rosewater to make sure it is, in fact, pure rosewater with no added substances for aesthetics. Once you have made sure the product you have is pure rosewater, we emphasize the importance of doing a patch test before using any new skincare product, in case you turn out to be allergic to any of the ingredients in the product.

If you are not familiar with doing a patch test, this how it is done - simply apply the new product on the inside of your arm, or behind your ear, and leave it applied for 24-72 hours, if there is no redness, itching, burning, or dryness after this period of time, the product is safe for you to use!  

Frequently Asked Questions About Rose Water

  • How can I use rose water for the face?

You can use it in many different ways, as we mention in the article above - you can use rosewater as a cleanser, toner, moisturizer, or simply as a facial mist!

  • Can I use rose water daily?

Yes, you can! It is extremely gentle and can be used daily - you can use rosewater as a facial mist, allowing you to spray it on your face for some hydration during the day, or you can just use it as your toner as part of your regular skincare routine.

  • Can I sleep with rose water on the face?

Yes, you can! If your skin is not reacting to the use of rosewater, prolonged use of it on your face should not be a problem! We suggest mixing some rosewater with some fresh aloe vera gel and leaving it on your face overnight!

  • Should I wash my face after applying rose water?


It is not necessary, considering how many people tend to apply rosewater as a toner and then put on some moisturizer, no rinsing needed - however, it is up to your preferences!

  • Does rose water have side effects?

Unless you have an allergy to roses or your skin is too sensitive to the mild fragrance of pure rosewater as well, no, rosewater is extremely safe and gentle on the skin.

  • What happens if I use rose water on the face daily?

Nothing bad, if that’s what your concern is! As mentioned throughout the article, unless you are allergic to roses or sensitive to any fragrance, in general, rosewater is incredibly mild and safe. Incorporating rosewater regularly into your skincare routine will help your skin by reducing your acne and calming the inflammation, all while hydrating your skin and reducing the appearance of your pore size.

References:

How To Remove Stretch Marks Naturally

Most of us associate stretch marks with pregnancy, but did you know that’s not the only cause of stretch marks? Stretch marks are simply lines or stripes that appear on the skin when someone goes through a rapid weight gain or loss. It is most common among women post-pregnancy or rapid weight gain, although it may happen to men and teenagers as well. 

The thing with stretch marks is that even though they’re harmless, they might pose to trigger self-esteem issues in some people because of the beauty standards these days. 

how to remove stretch marks

If you are here looking for solutions to get rid of your stretch marks, you have come to the right place. But, before we get into that, I want to tell a little story that will help you change your view about stretch marks.

While growing up, I was always fascinated by the stretch marks on my father's upper arm. He used to tell me all sorts of tales made up around it. Once, he said that those were scars he got when he was caught up in a fistfight with a tiger. He said that he killed the tiger, but it left him with these scars that he wore with pride. I never believed him, of course, but I would be lying if I were to tell you that I was never fascinated by those stretch marks of his.

We’ll be talking in detail about stretch marks and even discuss some natural remedies to help you with stretch marks, but the point of this story is to remind you that your scars make you human and tell a story. It's your choice to let those scars affect your esteem or to wear them with pride.

Why do we get stretch marks?

Stretch marks are long and narrow stripes or lines that appear on the skin when the skin is suddenly stretched or stretched too quickly. They usually occur on the stomach, thighs, hips, upper arms, back, etc. Stretch marks are a type of scarring that occurs when the skin is not able to resume normal form after a spurt of intense growth like in the case of pregnancy, weight gain or loss or puberty. 

In short, extreme skin shrinkage or growth is the main cause of stretch marks. Some people are more prone to having stretch marks based on conditions such as family history, chronic conditions or BMI. 

Popular causes of stretch marks include:

  • Puberty: As mentioned earlier, rapid growth is the primary cause of stretch marks, and a lot of people experience rapid growth like sudden gain in height during the time of puberty. Hence, it is no surprise that puberty causes stretch marks.
  • Pregnancy: More than sixty percent of pregnant women experience stretch marks during or after pregnancy.
  • Rapid weight gain: Gaining a lot of weight all of a sudden can cause stretch marks
  • Rapid weight loss: Just like gaining a lot of weight in a short period is dangerous; rapid weight loss can also lead to the appearance of stretch marks and cause scarring.
  • Corticosteroid creams and lotions: Continued use of corticosteroid creams and lotions (used to reduce skin inflammation caused by conditions such as psoriasis and eczema) can reduce the collagen level in the skin. Collagen plays a significant role by strengthening the dermis; hence a reduction in collagen can increase the risk of stretch marks.
  • Medical conditions: Certain medical conditions can cause stretch marks too. Marfan syndrome is one such example where the elasticity of the skin tissue reduces, causing the skin to scar. In the case of Cushing's syndrome, the body produces too much hormone that leads to rapid weight gain or loss.
how do we get stretch marks

If you have stretch marks on your skin, by now, you might have been able to identify the cause for your stretch marks. With an understanding of the different types of stretch marks, you might have questions like - Are all these stretch marks the same? Are these stretch marks permanent, or can they be treated? We’ll answer all these questions in the upcoming section.

Types of Stretch Marks

Stretch marks can be classified into two broad categories, namely Striae rubrae and Striae albae. Don't get scared by the complicated names. We'll try to explain them to you in brief.

Striae rubrae stretch marks are usually pink or reddish in appearance and are an acute stage of stretch marks. It is the earliest indication of an over-expanded dermis. These stretch marks are generally flattened and form a perpendicular or parallel pattern. If you develop these stretch marks, then you might experience some itching as well.

Striae albae stretch marks are more chronic as compared to striae rubrae, and in this case, the stretch marks are more scar-like, irregularly shaped, and pigmented. They are usually white and faded and may develop a fine, wrinkly texture to it. 


So, how long does it take for a striae rubrae stretch mark to turn into a striae albae stretch mark? Well, it can take anywhere from a month to even years for the skin to go from acute to chronic stage of stretch marks. 

These stretch marks can further be classified into striae gravidarum which are pregnancy stretch marks, striae atrophicans appear on people suffering from Cushing's syndrome and striae caerulea stretch marks that develop on darker skin.

Now that we know about the different types of stretch marks, let’s address the next important question.

How to remove stretch marks at home?

There are various ways to fade stretch marks from your body, but nothing beats the classic old home remedies. However, it's important to note that some stretch marks are harder to fade than others. The good thing about trying out natural solutions is that they are entirely harmless. Even if they don't fade away from your stretch marks completely, you'll be left with nourished skin.

So, here are some of the home remedies to help you get rid of stretch marks:

1. Aloe Vera

Aloe Vera has been used in skin and beauty products since the very beginning. It has many miraculous healing properties and is known to help regenerate the skin. Extract fresh Aloe Vera gel from the leaf and massage it over the stretch marks, leaving it on for 20 to 30 minutes. Wash it off and pat dry. Repeat it daily, and you will notice the results within a few weeks.

2. Castor Oil

Castor oil, when massaged into the dry, shriveled up stretch marks, provide it with nourishment and moisture, and helps to heal the skin slowly. You can massage your skin with castor oil during the day and night to get noticeable results. Keeping the scars moisturized will even eventually make them less visible.

3. Almond oil and coconut oil

Both Almond oil and Coconut oil have excellent healing properties, so what’s better than a combination of the two? You can mix almond oil and coconut oil in equal proportions and massage it onto the stretch marks regularly, and the stretch marks will disappear in no time.

4. Lemon Juice and Cucumber paste

Lemon is known for its lightning and healing properties, and cucumber acts as a cooling agent. Mix lemon juice and cucumber paste in equal quantities and apply it to the skin. Leave it on for 15 minutes and wait for it to get soaked into the skin. Then wash off and pat dry.

5. Egg Whites

Egg whites are high in proteins and amino acids. When applied to the skin, egg whites not only lighten the stretch marks but also tightens the skin. To use egg whites for fading stretch marks, simply take egg white from to eggs and apply a thick layer on the stretch marks with the help of a makeup brush. Allow the egg whites to dry completely then rinse this area with water. You might need to repeat the process daily for at least about two weeks to get results.

6. Potato Juice

Potato juice contains a variety of enzymes and starch that lighten the skin, which is the reason why it is used to treat dark spots, blemishes, and pigmentation of the skin. Apply potato juice on the skin regularly to lighten and reduce stretch marks.

7. Body butter

Rich body butter such as Cocoa butter and Shea butter help in reducing stretch marks, especially pregnancy stretch marks. Massage cocoa butter over pregnancy stretch marks at night before sleeping religiously and watch your stretch marks fade away in a few weeks.

8. Sugar scrub

Exfoliating the skin will remove dead skin cells and help in fading out the stretch marks. It also makes way for other skin treatments to penetrate the skin faster and work more effectively. Mix lemon juice, olive oil, and sugar to form a scrub. Apply it on the stretch mark and rub it for a good 10 minutes. Rinse it with lukewarm water.

9. Apricots

Apricots are high in vitamins A, B, and C. Take two fresh apricots and grind them to form a smooth paste. Apply the paste directly on the affected area and leave it on for half an hour before washing it off with lukewarm water. Repeat it regularly to see the desired results.

10. Gotu Kola

Gotu kola is a herb that has been used in traditional Indonesian, Chinese, and Ayurvedic medicine. It is known to cure a variety of skin conditions like scars, pigmentation, and rashes. A study found that this herb increases collagen production, which increases the elasticity of the skin. This can heal stretch marks and prevent new ones from forming. Just make a smooth paste out of this herb and apply it daily on the affected area.

11. Black Tea

Black tea is rich in vitamins and minerals that can treat skin pigmentation. Boil a few tablespoons of black tea with a pinch of salt added to it. Let it cool down and then apply the mixture on the stretch marks. Repeat the process for a few weeks until the stretch marks disappear entirely.

12. Dietary home remedies

Drinking 8 to 10 glasses of water daily improves the elasticity of the skin and helps reduce stretch marks.
Vitamin C contains antioxidants that cause skin scars to heal faster. Hence, adequate intake of vitamin C will ensure that your stretch marks heal faster. Citrus fruits, peas, pineapples, spinach, tomatoes, are all excellent sources of vitamin C.

Vitamin E is also a rich source of antioxidants that fight free radicals and provides nourishment to the skin. Foods like avocado, papaya, pumpkin, hazelnuts, parsley, olives are excellent sources of vitamin E. Bone broth of chicken, lamb, or beef is a natural source of gelatin. Gelatin contains collagen, which improves skin elasticity.

Foods like chia seeds, cod liver oil, tofu, sardines, shrimps, cauliflower are rich in Omega 3 fatty acids that also help to improve the elasticity of the skin, thereby reducing the appearance of stretch marks.

How to remove stretch marks caused by pregnancy?

The science of Ayurveda recommends that women use special Ayurvedic oils for massage during pregnancy to get rid of stretch marks, to get relief from stress, to regulate hormones, and facilitate childbirth.


One such oil is Dhanwantharam Thailam. The unique composition of the oil with Ayurvedic ingredients such as Ashwagandha, Sesame seeds, Manjishtha, and Geranium makes it an effective traditional concoction with many benefits for expecting mothers. 

Do you know that the name of this oil comes from the God of Ayurveda, Dhanvantri? The oil has special significance for mothers. Not only it provides relief from pain and fatigue, but it also boosts overall energy and immunity. Massage during pregnancy with Dhanwantharam Thailam helps to strengthen the muscles and makes them strong enough to hold the fetus, which later helps in facilitating childbirth.

It works effectively to remove stretch marks because it has a high rich Vitamin E content. It keeps skin dehydration and flakiness at bay, improves skin elasticity, and prevents stretch marks. Massage the oil for at least 10-15 minutes to allow it to penetrate deeper into the skin and remove deposits close to the muscle. Leave on for at least 30 minutes and wash off with a mild body cleanser.

Here’s a video that shows how to use Dhanwantharam Thailam for massage.


Kama Ayurveda also recommends Muscle Tone Firming Treatment Oil to fade stretch marks caused by pregnancy. Apart from fading stretch marks, this oil also works towards treating sagging skin. Hence, it’s also used to tone breasts and abdominal muscles. With potent Ayurvedic ingredients like Sesame Oil, Clarified Butter, Sweet Flag, Turmeric, and Lavender, it helps in reducing the appearance of stretch marks on the abdominal and lower back regions. Massage warmed Muscle Tone Firming Treatment for 10-15 minutes daily for best results.

How long does it take for the stretch marks to fade?

The time taken for stretch marks to fade varies depending on whether these stretch marks are acute or chronic. Acute stretch marks that are pinkish-red in colour fade away faster than chronic stretch marks that are deep and white. It also depends on the type of treatment used and the dietary supplements consumed. Each one’s skin is different, and the time taken will also differ depending on the elasticity of the skin and various other factors.

While we cannot permanently remove stretch marks, stretch marks usually fade away within 6 to 12 months, provided you are taking good care of your skin. Following your skin's dietary requirements and religiously practicing the home remedies listed above can improve the skin's elasticity and heal the scars faster. Drinking lots of water will make the skin more supple and nourished, thus fastening the healing process. 

how to remove stretch marks naturally

Also read- Dhanwantharam Thailam for massage during pregnancy

How to avoid getting stretch marks in the first place?

Prevention is always better than cure. It is better to avoid getting stretch marks in the first place rather than worrying about getting rid of them. Here are some tips and tricks to avoid or prevent the appearance of stretch marks on your skin:

  • Moisturize your skin regularly - keeping the skin moisturized and supple can prevent stretch marks. Moisturizing the skin regularly can also reduce the itching of the skin that happens when the skin loses its elasticity.
  • Gain healthy food during pregnancy - women should ensure that they gain a healthy amount of weight during pregnancy. Gynecologists recommend that women who are in a healthy BMI should gain 25-35 pounds during pregnancy, while overweight women should gain 15-25 pounds. Underweight women, on the other hand, should gain up to 40 pounds. Gaining just the right amount of weight during pregnancy is the key to prevent pregnancy stretch marks.
  • Eat food rich in Omega 3 - Omega 3 fatty acids help keep the skin supple and youthful. Salmon, cod liver oil, sardines, chia seeds, soybeans are excellent sources of Omega 3.
  • Avoid using steroid creams - Steroid creams- or corticosteroids contain cortisone which may weaken the skin structure and may result in stretch marks and scars. However, people already using such lotions must speak to their doctor before discontinuing it.
  • Exercise - Exercising regularly can help you to lose weight at a healthy pace and attain the required healthy BMI. Exercising can also increase blood and oxygen flow in the skin, which acts as a catalyst in the skin regeneration process.
  • Stay hydrated- One must drink at least 8-10 glasses of water every day to keep the skin hydrated and supple and reduce the appearance of stretch marks.

Other ways to improve stretch marks 

To conclude, we’ve also summarised some of the clinical treatments and procedures that help in removing stretch marks. These are not natural treatments or remedies and hence, they can have side effects. It's essential to consult a dermatologist and seek medical advice before going forward with them.

  • Topical treatments- Topical creams and lotions are affordable and available over the counter. When applied regularly, although they cannot erase the stretch marks, they can lighten them to some extent. But always consult a doctor before using any such creams.
  • Microdermabrasion- Microdermabrasion is a painless clinical procedure to fade away stretch marks. In this process, tiny crystals are sprayed into the affected area, and once they are removed, they take with them dead cells as well. Microdermabrasion needs to be performed multiple times over a while to see the results.
  • Microneedling- Microneedling is a process in which tiny needles are poked into the skin which triggers the production of collagen. An increase in the production of collagen will improve the elasticity of the skin, thereby reducing the appearance of stretch marks.
  • Laser therapy- In this treatment, laser light is directed at the scar, which causes tissues around the stretch marks to regenerate and heal faster. Laser therapy stimulates melanin production in the skin which causes scars to blend in with the normal skin.
  • Cosmetic surgery- Cosmetic surgery is an expensive yet effective method to remove stretch marks permanently. Consult a doctor before opting for cosmetic surgery.

Home remedies are the ideal type of treatment, but you ought to be patient and persistent in seeing the results. Stretch marks are usually harmless and not a cause of concern. It may pose to be a self-esteem issue, but again, it's as I already mentioned at the beginning of the article, it's your choice whether to wear your scars with pride or to be ashamed of them. 

References -

  • Topical management of striae distensae (stretch marks): 

https://www.ncbi.nlm.nih.gov/pmc/articles/PMC5057295/

  • Striae Distensae (Stretch Marks) and Different Modalities of Therapy:

https://www.researchgate.net/publication/24375828_Striae_Distensae_Stretch_Marks_and_Different_Modalities_of_Therapy_An_Update

  • Management of stretch marks (with a focus on striae rubrae)

https://www.ncbi.nlm.nih.gov/pmc/articles/PMC5782435/

  • Stretch marks: Why they appear and how to get rid of them

https://www.aad.org/public/cosmetic/scars-stretch-marks/stretch-marks-why-appear

  • The use of anti-stretch marks' products by women in pregnancy

https://bmcpregnancychildbirth.biomedcentral.com/articles/10.1186/s12884-016-1075-9

15 Ways To Make Time For Self-Care During Self Quarantine

During this time of home quarantines and social distancing, it is crucial to keep your mind and body healthy. Even when you feel stressed and overwhelmed, remember that oodles of self-compassion and self-care is the way to get through this difficult time. 

From watching the news channel every hour to scrolling down the social media feed a little too much in exasperation, it is easy to feel emotionally exhausted. But don’t worry, you are not alone in this. Here are some tips to take care of yourself if you are in an extended state of self-quarantine.

work from home self quarantine

We begin with the most important one.

Taking Care Of Your Mind

1. Stay informed, but limit your news intake

It is always important to stay informed about what’s going on around you. But, at the same time, getting lost in that noise can lead to many psychological problems like depression, confusion, and anger.

So, try to seek reliable information from trusted sources; in that way, you can be well informed and less anxious. Consider taking breaks from the news and social media and distancing yourself from what’s going on in the world. We recommend not consuming any piece of news for hours at a stretch, but if that seems hard, even taking short breaks can prevent you from getting overwhelmed. It’ll be helpful to engage yourself in activities that remove you from the barrage of news and social media.

2. Try to stick to your routine even at home

Always stick to your daily routine; it can be your skincare routine, your diet routine, or your work routine. In that way, you will have a feeling of control even in a time of crisis. 

work from home routine

When you get up, do not open your laptop and start replying to emails right away. 

Take time to get ready. Just because you’re not going to the office doesn’t mean you shouldn’t dress up. Wearing your best clothes will put you in a better mood and help you feel energetic. 

Try to set a schedule for your work, meals, and bedtimes. Even though you don't have to be rigid, setting a goal will help you in finishing important tasks sooner, leaving you with plenty of time to have fun later.

3. Stay in touch with your loved ones 

Speaking to someone you love and sharing a good laugh is the human connection you need right now. In today’s hectic world, keeping in touch with everyone, especially when you live far away, is very hard. 

Why not use this spare time to put in an extra effort? Grab your phone and call your parents, friends, or coworkers.

4. Practice kindness and compassion

It’s important to remember that everyone you know is struggling in some way or the other. Some people are worried about their elderly parents or sick loved ones, some are worried about losing jobs, and almost everyone is overwhelmed or anxious with the ongoing events. 


We’re facing something we’ve never encountered in the past. So, how can you make it better for yourself and everyone else? 

Simply be kind and compassionate. When you follow up with your coworker about a pending task, ask them how they are doing. If you’re living with family, try to adjust and create an environment that helps everyone work better. We can make it through this together.

5. Create your comfort playlist 

Creating your comfort playlist will help you keep your mind calm. Your comfort playlist can be the songs you would dance to while in the shower. Or it can be meditative music to help yourself fall asleep.

When you want to unwind after a tough day, turn on the music, reduce the lights in your room, prepare a cup of chamomile tea, and enjoy!

6. Clean and organize to help yourself feel in control

Don't you think this is a great time to clean and organize your home? Well, for me, it's a YES! Clean and organize your closet, cupboards, and the pantry.

Even your kids can do way more than you think. Keep them engaged by making them sort their toys, clean their room, or play areas. 

7. Make time to unwind and enjoy

What’s a quarantine for without a fun way to pass the time? List out all the things that make you happy and start with them. 

Use bath oil to give yourself a full body oil massage after a long relaxing bath, apply a face pack, write in your journal, read a book you always wanted to read, learn new skills like knitting or painting, meditate, do Yoga, or cook. Along with fighting boredom, preparing your daily fun to-do list will also challenge your creativity. 

work from home routine

8. Use Essential Oils To Dissipate Anxiety And Stress

Aromatherapy at home is a great way to keep your mind calm and poised during times like these. Take help of suitable essential oils to create a soothing environment at home, regulate your nervous system and improve focus and concentration. 

Here, we've talked about four different types of Kama Ayurveda’s essential oils that can benefit you at this time.

work from home routine
  • Ylang Ylang Essential Oil For Calming

If you are looking for promoting your inner-peace, confidence, and relaxation, which is essential for not feeling overwhelmed, this Ylang Ylang oil is perfect for you. Inhaling the floral and intensely sweet aroma of Ylang Ylang, you can easily uplift your mood by bringing on stronger feelings of awareness, confidence, peace, and self-love.

  • Tea Tree Essential Oil For Energising

Tea Tree essential oil, which is steam distilled from the leaves and twigs of tea tree, is well known for natural healing and general well being. The warm, fresh, spicy, and herbal aroma of the tea tree essential oil helps in strengthening the vital energy within the body, energizing the heart and mind and uplifting the spirit.

  • Orange Essential Oil To Fight Depression And Anxiety

If you are feeling depressed and having anxiety attacks due to the social distancing, then orange essential oil can be your best friend in action. The cheerful and exhilarating scent of this essential oil can boost focus and mental activity while fighting anxiety and depression.

  • Peppermint Essential Oil For Relief From Congestion

If you have fallen sick and have the symptoms of cold and cough, this peppermint essential oil can be your knight in shining armor. The minty and robust aroma of the peppermint essential oil can help in relieving any respiratory issues like nasal congestion, sinusitis, asthma, bronchitis, and even the common cold and cough. Peppermint also helps in soothing headaches, PMS, and nausea while improving mental clarity and raising energy levels.

Taking care of your health

We are all experiencing solitude in solidarity right now! It is a perfect time to get into some serious self-care and establish healthy routines by changing our diet and incorporating better nutrients into it. It's a great time to catch up on your sleep and let the body figure out its circadian rhythm. 

Keeping yourself healthy is quite a challenge! Let us give you some tips on how to take care of your health.

9. Make time to work out and meditate

Exercising can make you feel comfortable by keeping your body moving to process anxiety and to stay healthy. Are you missing your gym or yoga classes? Don't worry; they are plenty of at-home exercise Youtube tutorials and applications that can spruce up your fitness routine. You can download Nike Training App, which is completely free on iOS as well as Android devices. It has Yoga as well as other fitness modules that you can follow easily. 

Meditation, on the other hand, will help you in slowing down your heart rate and clearing your mind. When practiced regularly, meditation can help you in buffering the effects of stress, which in turn will significantly support your immune system. Headspace App has released free mediation sessions for all to help people get through this time.

10. Cook yourself some easy healthy meals

If you are a fan of cooking, plan out some healthy meals using what you have on hand and cook them for yourself and everyone in your house. Preparing food can be a fun way to challenge your creativity and fight boredom. 

Now that you've to work from home and eat at home, it's an excellent opportunity to include healthy nuts, fruits, and vegetables in your diet.

work from home routine

11. Give yourself a relaxing head massage 

An Indian head massage with Ayurvedic hair oils is a holistic treatment that helps you in relaxing by releasing stress that has accumulated in the tissues, joints and muscles of the head, face, neck and shoulders. It helps in rebalancing your body’s energies which is a must right now.

Kama Ayurved's Bringadi Intensive Hair Treatment Oil gives you the relaxation you want by soothing frayed nerves. It also helps in uplifting mood and aiding in a good night's rest. If you suffer from hair problems like dandruff and hair fall, then massaging your hair regularly with Bringadi oil will help you. Take a few drops of the oil, and gently massage your scalp in circular motions.

12. Stay hydrated with Ayurvedic health drinks

Another best way to keep you healthy during your Quarantine is by drinking some natural ayurvedic health drinks made from the ingredients readily available in your kitchen. These Ayurvedic drinks help you in boosting your immunity and staying fit. Drinking them is another way to increase your water intake, which is beneficial in maintaining overall physical and mental health.

Some of the best ayurvedic healthy drinks are listed below.

work from home routine
  • Fenugreek Water:

Fenugreek Seeds, commonly found in every Indian household, is a storehouse of many medicinal properties. They are slightly bitter but can cure any health problem. Fenugreek seeds are excellent sources for antioxidants and anti-inflammatory properties. Drinking fenugreek water not only boosts your immunity but also helps in promoting better digestion and controlling blood sugar levels.

Soak one tablespoon of fenugreek or methi seeds in two glasses of water and leave it overnight. You can drink this mixture as soon as you wake up the next morning on an empty stomach.

  • Tulsi Water

Tulsi has long been used in Ayurveda for its medicinal properties. It is loaded with tons of antibiotics, antifungal, and antibacterial properties. Tulsi helps in preventing fever, cold and is also very good for your skin and hair. Many people simply chew Tulsi leaves to get rid of the headache and sore throat. 

All you need to do is take a cup of water in a pan and add 5 to 6 Tulsi, or Holy Basil leaves to it. Bring this water to boil. You can drink it as it is and can also make tea by adding one teaspoon of honey and half a teaspoon of lemon juice.

  • Cinnamon Water

Cinnamon has also been used for medicinal purposes for centuries by Ayurveda. Loaded with antioxidants, Cinnamon helps in protecting our body from oxidative damage that is caused by free radicals. Cinnamon’s inflammatory properties help in protecting our body from any kind of infection.

Just boil a cinnamon stick in a glass of water and have this water for the entire day. You can also add cinnamon powder instead of the stick.

13. Ensure that you have a good sleep at night

Your energy and mood greatly depend on the quality of your sleep. Daily stress and a change in routine can make it difficult to fall asleep. So, we have a few tips to help you sleep better.

  • Try to get up at the same time as it sets your body clock
  • Even though times are hard, avoid too much alcohol as it can make you get up in the middle of your sleep and cause disturbed sleep. 
  • Stop using screens at least 30 minutes before bed. 
  • Get relaxed before bed. You can take a hot bath or read for a while to unwind.
  • Avoid consuming caffeine after midday.
  • Keep a notebook to jot down all your worries and your plans for the next day.
  • Put lavender essential oil in your bath or in your oil diffuser as it promotes sleep.
  • Go early to bed so that you have at least 6 to 8 hours of relaxing sleep.
work from home routine

Take care of your skin

Even though your priorities are taking care of your emotional and physical health, never leave out taking care of your skin. Remember how you’ve been trying to make skincare a priority for a long time but couldn’t because you never had the time for it. 

Well, you’ve all the time now. Here are some best tips to take care of your skin during the time of Quarantine.

14. Wash your hands regularly, but do not forget to moisturize them. 

If you are following the news up to date, you will already know how important washing your hands is. It is the first and foremost thing you have to do to protect yourself and your family from Coronavirus as it is your hands that carry all your germs to your respiratory tract. Keeping them as clean as possible is essential. 

How to wash your hands and which cleanser to use? Read on to know.

Wet your hands with water and apply enough soap that contains natural oils and actives for gentle cleansing. Spend at least 20 seconds washing your hands.

You can use Kama Ayurveda’s Rose Jasmine Hand Cleanser to cleanse your hands and soften them with the luxurious blend of floral and plant ingredients. The Aloe Vera juice in the cleanser helps in nourishing and conditioning the skin. Rose Jasmine Hand Cleanser is best for frequent hand washes as it does not dry out your skin.

work from home routine

Here are the steps to follow to wash your hands -

  • Rub your hands together and thoroughly wash them. Rub one hand on the back of the other hand. Don’t forget to clean in between the fingers.
  • Wash your hands with water and dry them out with a disposable towel.
  • Now, moisturize your hands with a moisturizer that can hydrate your hands and leave your skin soft and silky.

Kama Ayurveda’s Rose Jasmine Hand Lotion is enriched with Olive oil, Aloe Vera juice, Tea Tree Oil, Rosemary Oil, and Basil Oil to help you in calming and conditioning dry and sensitive skin. The pure rose and jasmine essential oils leave your hands feeling soft and hydrated.

15. Your daily skincare routine 

Since you are at home, it's a great time to practice being regular with your skincare routine. You finally have enough time at your hand to focus on your skin. Following a skincare ritual is also a fantastic way to relax and become mindful.

If you don’t have any skin care routine yet, then we have Kama Ayurveda’s Skin Care Regime Kits to help you get started. (And you can get them delivered at your place by simply placing an order online or giving us a call.)

Your basic skin care is a combination of CTM (Cleanse, Tone and Moisturize), and our Daily Face Care Regime For Women simplifies this for you.

1. Cleanse - Use Rose Jasmine Face Cleanser that contains soothing and antibacterial properties that help in cleansing and keeping skin soft and clear without drying.

2. Tone - Use Pure Rose Water to balance and restore the skin’s pH levels and tighten pores.

3. Moisturize - Eladi Hydrating Ayurvedic Face Cream enhances skin texture and repairs acne, blemishes and signs of early ageing.

work from home routine


To make this skin care routine even more effective, you can start by applying Moringa Oil which repairs the skin from pollution and provides your daily dose of hydration. Now that you’re staying indoors, it’s a great opportunity to reverse the damage caused by the pollution and renew the skin cells.

To get even better results, we recommend that you repeat the CTM routine at night as well. However, you should replace your day cream with Kama Rejuvenating And Brightening Ayurvedic Night Cream or Kumkumadi Miraculous Beauty Fluid and Ayurvedic Night Serum. Your night skincare routine gives your skin an opportunity to heal and rejuvenate. It also serves as a great night time ritual that prepares your body to sleep.


Daily Face Care Regime For Men is the perfect skin care routine for men. The following simple steps will improve your skin texture resulting in smooth, soft and clear skin.


1. Cleanse - Using Himalayan Deodar Face Cleanser will leave your skin perfectly cleansed and hydrated. It also helps in preparing the skin for a comfortable shave.

2. Tone - Spray refreshing Pure Vetiver Water on your face and enjoy the soothing fragrance. This toner balances the pH levels of the skin and adds essential moisture to it while tightening and clarifying the pores.

3. Moisturize - Hydrating Ayurvedic Face Cream For Men is a nourishing day cream that helps in moisturizing, softens and protects the skin.

work from home routine

A night time skin ritual is also essential for men. This video illustrates how you can take care of your skin at night. Replace your day cream with Skin Brightening Night Cream For Men.

What to do if you’re feeling sick (and avoid getting sick)

Coronavirus has shaken the entire world and kept everyone under constant fear and suspicion. Over the spike in the past six days, India has crossed over 200 COVID-19 positive cases. In view of this rising treat, the government is requesting everybody to follow the World Health Organisation’s (WHO) prevention measures very strictly. So, let us discuss those measures and make sure we impose them on ourselves.

1. Wash Your Hands Frequently

Regularly wash your hands with soap and water or with an alcohol based hand rub. In that way you can kill the viruses that may be on your hands.

2. Maintain Social Distancing

Keep distant from anyone who is coughing and sneezing (at least 1 meter). Because maintaining distance can help you in preventing the liquid droplets that come from infected persons nose and mouth.

3. Avoiding Touching Eyes, Nose And Mouth

Your hands touch many things and many surfaces. So,  when you touch your nose, eyes or mouth with the same hands, there are high chances they can transfer the virus into your body. Therefore, make sure you avoid touching your eyes, nose and mouth.

4. Practise Respiratory Hygiene

Cover your mouth and nose with bent elbow or tissue when you cough or sneeze. Then immediately dispose of the used tissue. Make sure the people around you too practise respiratory hygiene.

5. If You Have Fever Cough And Difficulty Breathing, Immediately Seek Medical Care

Stay home most of the time to avoid the virus from spreading you. If you feel like having respiratory problems, then immediately seek medical care and follow their directions. 

Remember that even though the times seem hard, we can get through it together. Kama Ayurveda is available for your service 24X7.

How To Stop Hair Fall – 36 Best Tips and Home Remedies

For most of us, a good hair day instantly puts us in a good mood. Such is the importance associated with the appearance of our hair. When even an occasional bad hair day can seriously put a damper on our mood, imagine how dreadful it’s to deal with your precious hair locks beginning to fall off.

Hair loss and hair thinning have become increasingly common in a majority of people these days. While for some, it’s the genes that are to blame, for others, it’s the chemicals present in their hair styling and colouring products. 

how to stop hair fall

So, how do you deal with this problem and eliminate it from the root? Should you use medications? Or should you try out natural alternatives? If you are currently struggling with hair fall or hair thinning - regardless of your gender - you might find this article useful as we have compiled our best advice on managing hair loss at its early stages. 

Understanding Hair Fall

On average, our scalp has 100,000 hairs, cycling through their periods of growing, resting, falling out, and regenerating. Every hair follicle on your scalp goes through a phase where it rests before growing the next strand of hair. In this stage, the hair falls out. As a result of this, it’s normal to lose up to 100 strands of hair in a day.

The problem occurs when this cycle is disrupted, or when a hair follicle is damaged. In such cases, hair may begin to fall out more quickly than it regenerates, leading to hair loss problems such as a receding hairline, hair falling out in patches, or overall thinning.

Symptoms of Hair Loss


Common symptoms of hair loss can be - hair loss in the parting of the hair in the mid-frontal area of the scalp (especially for women), for men, hair thinning on the top of the head, along with noticeable bald spots in the front are clear indications of ‘male pattern hair loss.’. 

Additionally, if you find excessive hair than usual on the hairbrush after you brush your hair or more than the usual amount of hair in the drain after washing your hair, these are also signs of hair loss.

Think you’re suffering from hair loss and wondering how to stop hair fall immediately at home? Book a free online consultation with our Ayurvedic beauty experts.

how to prevent hair fall

Top Hair Fall Reasons

So, why does hair loss occur? A lot of things can affect the growth of our hair, from something like nutritional deficiencies (Iron, Zinc, Vitamin D, and Protein), dandruff, and an exceptionally oily scalp - which can be corrected relatively easily. 

There are some serious causes of hair loss as well, like thyroid issues, hormonal imbalances, damage caused by long term heat application and chemical treatment.

Even chronic stress can be a cause of hair fall in some individuals, and hair thinning due to the hormone fluctuations around and after pregnancy and during Menopause is a routine occurrence for women.

Hair loss can also occur as a result of how you handle your hair, though. Among women, regularly tying the hair too tightly with rubber bands, and using hair brushes which are not wide-toothed, can cause hair loss - this is also known as Traction Alopecia. 

Along with old age, genetics can also play a significant role in the loss of our hair - the gene for hair loss can be inherited from the father’s side of the family, or the mother’s side of the family, or both as well.

According to Ayurveda, hair fall occurs due to an imbalance of Pitta energy in the body. Regular hair oiling and head massage with a suitable Ayurvedic oil is one of the most effective hair loss remedies. We recommend adding regular oiling with hair growth oils to your hair care regime.

The most effective hair oiling treatment to prevent hair fall is Bringadi Intensive Hair Treatment Oil, enriched with the goodness of Sesame oil, Indian Gooseberry (Amla), Bhringraj, Indigo and Balloon Vine. It’s clinically proven to reduce hair fall by 94 percent, irrespective of the hair fall reason.

ayurvedic oil hair loss remedy

How To Control Hair Fall

We hope that reading about all these causes of hair fall has not put you in a gloomy mood! As stated previously, we bring you some of our best advice when it comes to controlling hair fall -

1. Cleansing and Conditioning Your Hair

Firstly, a lot of us - especially men - tend to use soaps for cleansing their scalp and hair, this can be very problematic for the hair and scalp health. Soaps are too harsh and stripping, as are a lot of shampoos. We must use a mild shampoo, one which will not strip our scalp of its natural oils entirely.

Also, simply washing the hair with shampoo will not do. A good conditioner should be applied on 3/4th of the hair (avoiding the scalp) every time you wash your hair. Most conditioners contain Amino acids, which help to nourish and repair the hair and reduce frizz and breakage of hair.

There is no set frequency of hair washing that we can recommend, since it depends on the individual’s hair type and how fast the scalp becomes oily after washing. However, we recommend that you do not wash your hair so frequently that it becomes dry to the point of breakage and frizz.

2. Healthy Diet and Regular Exercise To Prevent Hair Fall


We have mentioned before how nutritional deficiencies can cause hair loss, so you must eat a balanced diet! Make sure you include food items that are rich in Vitamins A, C, D and E, Zinc, B Vitamins, Iron, Biotin, Protein, and Essential Fatty Acids.

You can try adding an iron and multivitamin supplement to your diet if you feel like you are still lacking. When it comes to exercising, at least 20-30 minutes of cardio (running/ skipping rope/cycling) will help make a difference. Exercise helps in balancing out your hormones, helping those who suffer hair loss due to hormonal imbalances.

3. Avoid Harmful Treatments To Prevent Hair Fall

To keep your hair as healthy as possible, avoid any type of chemical treatments that damage the hair or scalp in form. Avoid coloring your hair with chemicals and only use natural dyes. For dying your hair chemically, bleaching is usually required, which is terrible for the health of your hair.

how to stop hair fall

You should also avoid straightening/curling or perming your hair and avoid blow-drying your hair with the ‘Heat - on’ setting. Applying heat to the hair (especially when it is wet) can cause the hair to essentially boil up - leaving it brittle and extremely prone to breakage.

4. Indulge in Nourishing Hair Treatments

When it comes to managing hair fall, there’s no better cure than the centuries-old wisdom for providing extra nourishment to your hair! Hair Oiling is a highly recommended practice in Ayurveda. 

Oiling helps lessen the amount of breakage that occurs while washing the hair. The same goes for deep conditioning hair masks or protein hair masks. Just apply them for a few hours and wash off - and voila, healthy scalp and hair! 

If you do not want the oil in your hair to get into your eyes or on your face, just tie it up in a loose bun and cover it with a shower cap, and you can go about your day just fine!

hair oils for hair fall

Best Hair Oils For Hair Fall

Your hair quality is the direct outcome of how you nourish it, agree? I know growing back your lost hair is not a piece of cake, but with the help of certain oils, you can stem your lost hair and give it volume and healthy sheen. Below are some of them.

1. Coconut Oil

You cannot escape knowing about the importance of coconut oil if you live in India. It is one of the most popular hair oils for growth. It is versatile as well as an excellent source for nourishing the skin. Rich in fatty acids, the oil deeply penetrates the hair follicles without evaporating. The carbohydrates, vitamins, and minerals in coconut oil also are essential for hair health. 

How is coconut oil useful for hair fall? Coconut oil helps in promoting overall hair growth, making the hair soft and lustrous. It also protects the hair against heat damage, and repairs the weak and brittle hair strands. Rich in vitamin E and antioxidants, we can also use this oil as a conditioner. Coconut oil is suitable for all hair types and best suited to the ones with dull, damaged and dry hair and the ones with slow hair growth. 

If you are aiming for soft hair, it is best to use it regularly over some time. You can also try mixing ingredients like curry leaves, Amla, or Brahmi to the warm oil for best results.

2. Sesame Oil

Sesame oil is one of the most popular oils used for hair growth in Ayurveda. Extracted from the sesame seeds, the oil is excellent for nourishing, conditioning, and promoting hair growth—the antimicrobial properties in sesame oil help in treating scalp infections. Sesame oil, also known as the “Symbol of Immortality” when applied regularly, provides relief from headaches, baldness, greying of hair, and hair fall. 

It suits all hair types and is highly recommended for those who are looking for regrowth of lost hair and want a sleek shine. For best results, heat the oil before applying it.

how to reduce hair fall

3. Neem Oil

You might have already heard that neem oil is the best for all your scalp and hair problems. Extracted from the seeds and fruits of the large evergreen Neem tree, this oil is full of antibacterial, antifungal, and anti-inflammatory properties as well as fatty acids and Vitamin E. 

Neem oil prevents dandruff and hair lice, conditions and repairs damaged cuticles, reduces redness and irritation caused by eczema, and promotes hair growth. It also helps in preventing hair loss and premature greying of the hair. 

You can mix neem oil with any carrier oil like Coconut oil, Jojoba oil, Almond oil, etc. And if you feel the smell is quite strong, you can also add 1 or 2 drops of any essential oil.

4. Almond Oil

Did you know almond oil has the highest content of natural Vitamin E? It is also rich in fatty acids, antioxidants, proteins and magnesium which helps in reducing hair breakage and promoting hair growth. Along with moisturizing, almond oil also seals in the moisture preventing hair loss and breakage. 

This oil is the best for those who are looking for fast hair growth or those who have dry, damaged, and dull hair. You can directly use almond oil straight from the bottle and can also warm it before use.

5. Brigandi Oil

Brigandi oil is a combination of Bhringraj oil (extracted from the leaves of Bhringraj tree) and a few hair-friendly herbs like Amla, Indigo, Sesame. and Balloon Vines. This oil is an intensive hair treatment that helps in preventing hair loss, scalp irritation, dandruff, and premature greying. Brigandi oil also helps in cooling and soothing the scalp, preventing scalp infections, and conditioning the hair. You can use this oil straight from the bottle or heat it for an enhanced feeling of a therapeutic head massage. This oil is clinically proven to reduce hair fall by 94 percent.

how to reduce hair fall


Home Remedies For Hair Fall

Some of us are willing to go that extra mile and put in the extra effort to stop hair fall. If you can make time for it, there are some effective home remedies recommended by Ayurveda that you can use to manage hair thinning and hair loss. 

  • Scalp Massage:

    Massaging your scalp for a few minutes regularly is said to stimulate the scalp and help in improving the hair thickness. Not to mention how massaging your scalp can aid in reducing stress (one of the biggest reasons for hair fall), the advantage is two-fold!
  • Oiling:

    We may risk beginning to sound like a broken record at this point, but OIL YOUR HAIR! We recommend Coconut oil and Bringadi Oil in particular - they contain fatty acids that penetrate the hair shaft and reduce protein loss from the hair. Massage it into your scalp and hair and leave it for at least 1-2 hours, then wash it off. You can also use coconut oil as a leave-in conditioner if your hair does not become oily quickly after wash day, it helps improve the luster of the hair.
reduce hair fall
  • Aloe Vera:

    Aloe Vera is famous for its soothing and healing properties! We recommend putting pure aloe vera gel on your scalp and hair at least twice a week - it helps calm down an inflamed scalp and reduces dandruff. For those of us who have exceptionally oily scalps, aloe vera helps unblock the hair follicles blocked by excess oil, thus improving the issue of hair loss due to excessively oily scalp!
  • Onion Juice:

    Some of us despise onions for their smell but keep on reading, and they might end up becoming a favourite of yours! Onion juice has been shown to successfully treat patchy Alopecia Areata by promoting hair growth and improving circulation! It is simple to apply as well - blend a few onions and squeeze out the juice, apply the juice to your scalp and hair, leave it in for 15-20 minutes, then rinse it off and shampoo your hair as usual.
  • Amla:

    In Ayurveda, Amla is the most preferred ingredient when it comes to maintaining hair health. It contains heaps of essential fatty acids that help in strengthening hair follicles and providing you with the luster you ever need. Rich in vitamin C, potent iron antioxidants, gallic acid, and carotene, Amla can help you in halting premature greying and providing blood circulation around the scalp, which indeed stimulates hair growth.

    All you have to do is make a paste by mixing lime juice and amla powder and apply it to your scalp and hair. You can keep it on for about an hour and then rinse it off with normal water.
  • Read - Using Amla For Hair - Top 10 Benefits and How To Use It?
  • Shikakai:

    Shikakai remembers our grandmothers as they always insist on using Shikaki for proper hair care, don’t they? It is often considered as a natural alternative to shampoo due to its fantastic hair cleansing properties.

    Rich in antioxidants and Vitamin A, C, K and D, Shikakai helps in keeping hair nourished and maintaining hair health. Dry out the Shikakai pods in the sun and then grind them to make powder. Take two tablespoons of this powder and mix it with coconut oil in a jar. Massage your hair with the mixture at least twice a week.

  • Reetha:

    Reetha, also known as soapnuts, is another ingredient that has been used in the hair care regime for centuries. It contains saponin, which is responsible for keeping your hair healthy and soft.

    You can prepare Reetha shampoo by taking several pieces of soap nuts and Shikakai points and boiling them in half a liter of water. Leave the mixture overnight, then strain it and use it as a shampoo.

  • Fenugreek:

    Fenugreek or methi seeds also help in promoting hair growth and repairing hair follicles. It is an excellent ingredient for hair loss and regrowth.

    All you have to do is soak methi seeds overnight in water and grind them to a fine paste. Apply the paste all over the scalp and hair. Rinse it off with normal water after about half an hour. For best results, do this thrice a week.

  • Yogurt:

    Of course, there is no end to the wonders yogurt can do to your overall health, especially to your hair. Rich in Vitamin B5 and Vitamin D, yogurt helps in promoting hair follicle health and preventing hair fall.

    Just mix two tablespoons of yogurt with one tablespoon of honey and lemon and apply it on the scalp and hair roots taking the help of a brush. Leave it on for about half an hour and rinse off with normal water. It is recommended to use this pack once a week.

Best Foods For Healthy Hair Growth


According to Ayurveda, hair fall occurs due to an imbalance of Pitta energy in the body. For balancing Pitta, it is advised to reduce the consumption of hot, spicy, salty, and sour food items. You should also avoid tea and coffee as they activate Pitta. In addition to this, replace oily and fried food items with cooling food items such as cucumbers, leafy vegetables, coriander, cherry, pineapple, yogurt, and potatoes. 

reduce hair fall

We have stated before that a balanced and nutrient-rich diet can be immensely beneficial when it comes to losing hair due to vitamin deficiencies, and that is why we are presenting to you, some of the best foods for improving hair growth :

  • Spinach: Spinach is a healthy green vegetable that’s loaded with beneficial nutrients like folate and vitamins A and C, all of which may promote hair growth. Moreover, spinach is also a great plant-based source of iron, which is essential for hair growth. Iron helps red blood cells carry oxygen throughout the body to fuel your metabolism and aid growth and repair. So eat your greens, seriously!
  • Eggs: Eggs are a great source of protein and biotin, which are essential for hair health and growth. Eating adequate protein is vital for hair growth because hair follicles are made mostly of protein. Biotin is necessary for the production of a hair protein called keratin, which is why biotin supplements are useful for hair growth.
  • Nuts and Seeds: Nuts are packed with nutrients like vitamin E, B vitamins, zinc and essential fatty acids, not to mention how they prove to be an impressive snack at almost any given time! Like nuts, seeds (like sunflower seeds) are rich in vitamin E and other nutrients that may promote hair growth. Some seeds (such as flax and chia seeds) also contain omega-3s, which have been linked to hair growth. 
  • Beans: Beans are a great source of protein, iron, zinc, and biotin, which are all essential for optimal hair health. Not just that, beans are highly versatile so there are multiple ways for them to be incorporated into our diets (this one is for all the picky eaters out there!), beans are also comparatively inexpensive to purchase, meaning you will never have to miss out on them!
  • Carrots: Carrots, along with other foods that contain beta-carotene (such as sweet potatoes), are something we will always recommend! The body converts beta-carotene into vitamin A, which is linked to good hair health. Vitamin A helps aid sebum production, additionally; it has other factors that may help speed up the rate of hair growth.

Tips For Hair Growth

Having laid down the basics of hair care and controlling hair loss with diet and exercise, we would like to present a few of our tips to ensure proper hair care and reduce hair loss: 

  • Cut Down Your Stress!
    Stress can disrupt the process of hair growth and lead to premature aging! Chronic stress is one of the causes of hair loss, so we urge you to try and reduce the amount of stress you are continually putting on yourself! Try regular meditation to help yourself calm down in the mornings and evenings; it will prove to be beneficial in the long run.
  • Avoid Hot Showers!
    It is surprising how many people shower with hot water regularly! We understand that it can be the only respite from the cold in the winters, but hot water dehydrates the hair strands and strips the scalp of its natural oils, leading to brittle hair, which is very much in danger of breaking off easily. Try to wash your hair with lukewarm water; if nothing else, it can help immensely.
  • Do Not Comb Wet Hair!

    Some of us find it easier to untangle our hair right after we have washed them. The problem with this is that our hair is highly prone to breakage when it is wet, so aggressive combing or any kind of heat styling is an absolute no-no! If you are worried that you will not be able to manage your hair once they have dried, try using a very wide-toothed comb to detangle your wet hair gently. You can even use a hair serum or hair oil to help you untangle your hair knots.
  • Let Your Hair Down!

    You heard us - do NOT put your hair up, especially not in a tight hairstyle! Constantly pulling your hair up into a tight bun or ponytail can cause traction alopecia towards the front of your hairline, where the impact of the pull is the most! We suggest either only wearing hairstyles which allow you to wear your hair down, or if you absolutely must tie up your hair, put it into a loose-low bun. When it comes to hair accessories, avoid using headbands because they push up at your hairline. Also, switch to satin or silk scrunchies instead of using thinner hair ties. Try doing this for some time, and you will notice an improvement in your hair fall problems.

How To Prevent Hair Loss In Men

When compared to women, hair loss in men is more common. According to a study, 85 percent of men have thin hair by the time they reach their 50s. It can be caused by genetic male pattern hair loss, aging, androgenetic Alopecia, or low testosterone levels. If you are concerned about your hair loss, then this section is just for you. Read on to some fantastic tips to protect your hair from baldness.

1. Regularly Wash Your Hair With Mild Shampoo


Cleaning your scalp and hair regularly will lower the risk of infections and dandruff that leads to hair breakage and loss. So, never fail to wash your hair, and using a mild shampoo will help in not going harsh on the scalp and hair.

2. Enrich Your Diet With Protein


Protein intake will help you in promoting hair health, which indeed helps in curbing hair loss. So, make sure you eat lean meats, fish, soy, or other protein-induced foods. 

3. Massage Your Scalp With Essential Oils


If you are experiencing hair loss for quite some time, then it is a must for you to massage your scalp with essential oils. Massaging your hair with a suitable essential oil helps your hair follicles in remaining active and promotes hair growth. Just add 1 or 2 drops of essential oil to any kind of carrier oil and massage your scalp for a couple of minutes every day.

Read - 12 Essential Oils For Hair That Work Wonders

4. Avoid Brushing Wet Hair

Did you know, hair is in its weakest state when it is wet? So, always avoid brushing your hair when it is wet to decrease the chances of hair loss. If you have to, then make sure you are using a wide-toothed comb. Also, avoid combing your hair too frequently as it can injure your hair and break it. 

5. Keep Yourself Hydrated

Drink at least four to eight glasses of water every day to stay hydrated and promote healthy hair growth as one-quarter of your hair shaft contains water. 

6. Reduce Alcoholic Beverages

Alcohol can reduce hair growth. So, if you are experiencing hair loss, then avoid or lessen your alcohol intake and see the results yourself.

7. Avoid Smoking

Smoking affects the blood circulation to the scalp, which in turn results in hair fall. So, quit smoking to maintain healthy hair.

8. Physical Activity and De-stress


Any kind of physical activity for 30 minutes every day helps in balancing your hormonal levels and reducing stress, which in turn promotes healthy hair. So make sure you either walk, run, swim, or hit the gym every day. You can even do meditation or yoga to de-stress yourself.

9. Keep Your Head Sweat Free


Men with oily hair always experience dandruff during summers as they tend to sweat a lot and increase the chances of hair fall. So, use shampoos that contain aloe vera and neem as they keep the head cool preventing dandruff.

Also, make sure you wear a scarf or bandanna over your hair while wearing a helmet because a helmet can make sweat accumulate in the pores and weaken the hair roots causing hair loss in men.

Conclusion -

With that, we arrive at the end of this article on controlling hair fall by yourself; we would like to emphasize that while these tips work well, if your hair fall issue is not solved or keeps coming back, please consult a Dermatologist or a Trichologist for treatment. Hair is an important feature to maintain in this society, and we are glad to be able to provide advice on what has worked for us and what has not when it comes to our hair. We are optimistic that this advice will provide results in your favor!

Also, if you are looking for safe and organic hair products to treat hair fall and promote hair growth, you can check out the complete hair care range by Kama Ayurveda.

reduce hair fall

 References: 

Face Pack For Glowing Skin At Home

Whether you’re camouflaging dark spots with a concealer or covering up wrinkles and fine lines with a primer, take heart. All of us have skin issues that we want to treat or hide, don’t we? 

As the body’s protective outer covering, our skin puts up with a lot. Pollution, chemicals, infections, cuts, scrapes, and sunlight keep the skin under constant assault. In addition to that, we have our sweaty gym sessions, late-night parties, stress, etc. further taking a toll on our skin.

What should we do? When it comes to skincare, going back to that nature is the best solution. Does your grandmother’s ever-glowing healthy skin make you aspire for a lasting natural beauty just like hers? We’ve uncovered their secret for you.

Whether it is to cure a suntan, fade dark spots, treat acne, dry skin, or oily skin, our old ladies always have the perfect recipes for all-natural homemade face packs to treat them. This ancient wisdom is passed over generations and has its roots in the oldest science, Ayurveda, that emphasizes the use of natural face packs for healthy glowing skin.

Why Is It Important To Use A Face Pack?

Why do you use a face pack? Well, to some extent, we are all aware that a face pack helps in reducing blemishes and maintaining healthy, youthful skin. But, have you ever tried to find out the exact reason why it’s recommended to use face packs on our face?

Read on to know some of the benefits of making face pack a part of your skincare routine.

  • It helps in deep cleansing the skin

No matter what your skin type is, a face pack can instantly brighten up our face by cleansing it from within. Using a face pack daily can help your skin in getting rid of the excess oil and dirt accumulated not only on the surface of the skin but also from the endodermis. 

Most importantly, a face pack helps in unclogging your pores. It penetrates deep inside the pores and pushes out the dirt to the surface, along with the dead skin cells.

  • It helps in relaxing the skin

A face pack can give you a spa-like treatment as it can relax the skin and keep it calm, just like a good hair oil massage relaxes your mind. Application of the face pack is a healing process that re-energizes and revitalizes the skin while making it look younger.

  • It hydrates the skin


We all are well aware that we need to stay hydrated throughout the day to maintain radiant and youthful-looking skin. But did you know a face pack that contains cucumber, potato, strawberry, banana, or the leaves of rosemary or mint can keep your skin hydrated throughout the entire day?

  • It slows down the ageing of the skin

Skin suffers the most damage among all the body organs as it comes in direct contact with the burning sun, pollution, and the harsh weather. These factors not only steal away the shine from your skin but also can deeply damage it. When left untreated, your skin will start to sag and develop wrinkles. A face pack that contains a lot of antioxidants helps in fighting the free radicals and dilating blood vessels. By promoting the oxygenated blood circulation, such a face pack enhances your skin health and makes it soft and supple.

  • It fights acne and fades blemishes

A face pack prepared from ingredients like Neem leaves or Turmeric can keep acne and blemishes at bay. It fades away acne scars, dark spots and can also even out the skin tone. It helps in treating hyperpigmentation and sunburns as well.


All face packs are effective in reducing the size of enlarged pores, thereby preventing acne caused by dirt, oil, and chemicals getting accumulated inside the enlarged pores.

  • It increases the effectiveness of other skincare products

Did you know that a face pack applied regularly can help you get the most of the other skincare products that you use? They help in washing away the dirt, excess oil, and grime, making it ready for the skincare products that follow. It reduces the size of enlarged pores and prevents makeup and other products from clogging the pores. 

Face Packs Based On The Skin Types

We all have different skin types. The product which works wonders on your friend’s skin may not give you the same results. Even Ayurveda recommends using products that are suitable for our skin type. 

Here are three different face packs based on the skin type - dry, oily and normal skin

1. Curd and Gram Flour Face Pack For Dry Skin


Using the Curd and Besan face pack is a fantastic way to nourish your dry skin. The Besan helps in removing all of your dead cells while the Curd deeply moisturizes the skin.

What You Will Need:

  • Two tablespoons of Besan
  • One tablespoon of Curd
  • One teaspoon of Honey
  • A dash of Turmeric

What You Have To Do?

Take a glass bowl and mix all the four ingredients to make a smooth paste. Apply evenly all over the face and neck and leave for about 10 minutes. Now rinse it off with cold water. 

Besan and Honey deeply cleanse your skin, Curd helps in moisturizing and turmeric works as an antiseptic which maintains the pH levels of your skin. Therefore, all the ingredients put together can do wonders on dry skin.

Our recommendation - You can also use Kama Ayurveda’s Haldi Chandan Face Pack for dry skin. You can use Pure Rose Water/Pure Mogra Water to prepare the pack. The pack already has turmeric and oatmeal (which works as well as besan for your skin). You can simply add Yogurt as well as Honey to make this pack more beneficial for dry skin. 

turmeric for skin brightening

2. Lemon And Honey Face Pack For Oily Skin

Lemon is a great ingredient to clean the skin, reduce oil secretion, and eliminate dead skin cells. Honey, with all of its antiseptic and antibacterial properties, helps you avoid pimples and acne by reducing oil secretion. Use this face pack to relieve your skin from excess oil secretion and make it look soft and supple.

What You Will Need:

  • Two tablespoons of Lemon juice
  • One tablespoon of Honey

What You Have To Do?

Mix Lemon juice and Honey in a bowl and apply the mixture all over the face. Let it dry and rinse it off with lukewarm water. 

Our recommendation - You can also use Kama Ayurveda’s Nimrah Anti-Acne Face Pack to treat excessive oiliness in skin. Use Pure Rose Water to prepare the pack. It is a 100% natural, Ayurvedic treatment for acne, inflammation, scarring, and excess oil. You can use it every day for the best results.

Turmeric And Besan For Normal Skin/Sensitive Skin

As we all know, Turmeric is a natural antiseptic and has anti-inflammatory and antibacterial properties; it helps in fighting the bacteria and sunburns for sensitive skin (1). Besan is an excellent exfoliant that helps in removing dead cells and deep cleansing the skin. It also helps in maintaining the pH balance of your skin.

What You Will Need:

  • One tablespoon Besan
  • Half a tablespoon Turmeric powder
  • One tablespoon Rose Water

What You Have To Do?

Mix all the three ingredients and make a thick paste. Next, apply it all over the face and neck and leave it for about 15 minutes. Now, rinse it off thoroughly.

turmeric for skin brightening

Face Packs Based On The Skin Conditions

The list of skin concerns is long! We need to protect our skin from problems ranging from dullness, aging, acne, dark spots, blemishes, etc. But, will you believe us if we tell you that there is a homemade face pack for almost every skin issue that you face? Read on to discover some of the most effective face packs made from natural ingredients.

1. Face Packs For Acne

  • Aloe Vera And Turmeric Or Green Tea Face Pack

Aloe vera is excellent for naturally calming the skin and works well to soothe the skin when the acne is very irritated and inflamed. The naturally occurring salicylic acid and sulfur in Aloe Vera is ideal for fighting back acne especially for the folks with oily skin. The Turmeric and Green Tea helps in controlling oily and sensitive skin.

What You Will Need:

  • Two spoons of Aloe Vera gel
  • One spoon of Turmeric or Green Tea

What You Have To Do?

Blend Aloe Vera and Turmeric or Green Tea to make a smooth paste. Apply it all over the face and rinse it off after 15 to 20 minutes.

  • Fenugreek Face Pack

Fenugreek seeds are a popular cooking ingredient with cooling and inflammatory properties. Its antiseptic and antibiotic properties help in healing pimples and skin infections. The fine granules of the seed get deeper into the pores and clear out the excess oil and dirt thus giving you a fresh and clean skin. Fenugreek also helps in getting rid of dark spots and blemishes caused by acne.

What You Will Need:

  • Few Fenugreek seeds

What Do You Need To Do?

Soak the seeds overnight and grind them to make a paste. Apply all over the face and rinse after dry.

Our recommended Face Pack For Acne - We recommend Kama Ayurveda’s Nimrah Anti Acne Face Pack. It’s a 100% natural face pack prepared from powerful ingredients like Vetiver, Ashwagandha, Red Sandalwood, Coriander, Lodhra and Liquorice. All these ingredients make this face pack a perfect anti-acne treatment that heals pimples and blackheads, reduces scars, improves skin tone, and repairs inflammation.

Face Packs For Blackheads

Do you find it very painful to remove the blackheads from your skin? We can remove them easily using some homemade DIY face packs. Here are the top two face pack recipes that can lift your blackheads instantly.

  • Honey And Milk Mask

Honey and Milk are great lubricants. They pull away dirt from the pores and cleanse the blackheads. The antiseptic, antibacterial, and antioxidant elements of Honey will peel out the blackhead naturally and soothe the affected area. The face pack also adds moisture and shine to the skin.

What You Will Need:

  • ¼  cup of Milk
  • Two tablespoons of Honey
  • Cotton balls

What You Have To Do?

Take a bowl and mix Milk and Honey to get a runny liquid. Apply all over the face using a cotton ball. Leave it on for 10 to 15 minutes and rinse it off with warm water.

honey benefits for skin
  • Coriander Leaves and Turmeric Powder Face Pack

Both Coriander Leaves and Turmeric are great for removing blackheads on the skin, especially on the nose. While Coriander is caustic to clean dirt, turmeric pulls out the excess oil in your skin pores. Therefore, this pack helps in shrinking large pores.

What You Will Need:

  • Few Coriander leaves
  • Two teaspoons of Turmeric Powder

What You Have To Do?

Blend coriander leaves and turmeric to make a smooth paste. Apply this on your face and leave it on for overnight. Rinse it off the next morning with cold water. You can repeat this twice a week for best results.

Our recommended face pack for blackheads - We suggest Nimrah Anti Acne Face Pack blended with Red Sandalwood, Vetiver & Coriander to treat pigmented skin & blackheads. Make a paste with Pure Rose Water and apply to cleansed skin for fifteen minutes. 

Ayurvedic face pack

Face Packs For Suntan

If you have tanned skin that has gone too far, don’t worry, here are the two best face packs that can remove the suntan.

  • Multani Mitti Face Pack

Multani Mitti, also known as Fuller's Earth, is a cosmetic clay that can absorb all the impurities from the pores and enhance the capillary circulation to the skin. It also is a great ingredient to remove all the dead skin cells and tan on the skin. Also, the Tomato juice that we add in this face pack helps in lightening the skin by interrupting the Melanin formation process.

What You Will Need:

  • Two tablespoons of Multani Mitti
  • Half the teaspoon of Sandalwood Powder
  • One tablespoon Tomato juice
  • Rosewater

What You Have To Do?

Mix all the above ingredients by adding a little bit of Rose Water to make a fine smooth paste with medium consistency. Now apply the paste all over the face and wash it off after drying. You can also replace tomato juice with Coconut Water. It is recommended to repeat this once or twice a week.

Our recommendation -  You can use Kama Ayurveda’s Suvarna Haldi Chandan Face Pack. It is a 100% natural face pack and is a combination of Multani Mitti with powerful Ayurvedic ingredients like Turmeric, Sandalwood, Orange Peel Powder, Oatmeal, and Rose. Combine it with Lavender Water/Vetiver Water or Aloe Vera for oily skin.

  • Orange Or Lemon Peel And Milk Face Pack

Orange Peel or Lemon Peel is rich in Vitamin C and Citric Acid that lighten the skin tone and reduce tanning Milk is best known for moisturizing the skin and making it supple and soft. The lactic acid in it helps in exfoliating the darkened layer of skin cells.

What You Will Need:

  • One tablespoon Orange or Lemon Peel Powder
  • One tablespoon of Raw Milk

What You Have To Do?

Take the powder of your choice and mix it with milk. Make a smooth paste and apply all over the face. Let it dry for about 10 to 15 minutes and then rinse it off with lukewarm water. We recommend a patch test on your hand and check if it reacts to any allergic conditions.Also, do not apply on irritated skin as it can aggravate the condition. You can use this face pack twice or thrice a week.

Face Packs For Scars and Black Spots

We all know treating acne is difficult, but what’s even harder is treating the scars and dark spots it leaves behind. Well, don’t fret! Here are the two best face pack recipes that help you in fading the dark spots and scars at home quickly.

  • Neem Face Pack

Neem is best known for its antiseptic properties. These properties are very effective in removing acne scars and dark spots Neem is a natural alternative to heal your skin from within and reduce hyperpigmentation and scars. Neem oil also helps in reducing acne and breakouts.

What You Will Need:

  • Two teaspoons of Neem Powder or Neem Oil
  • One tablespoon of Honey
  • One teaspoon of Apple Cider Vinegar

What You Have To Do?

Make a paste out of the ingredients and keep it in the refrigerator for a few minutes. Now, when the face pack is cold enough, apply it all over the face. Let it dry for 15 to 20 minutes and rinse it off with lukewarm water. For best results, use it twice a week.

  • Aloe Vera Face Pack

Aloe Vera is best known for its medicinal values and healing properties. The aloin, which inhibits the overproduction of melanin in Aloe Vera works wonders for removing dark spots and old scars

What You Will Need:

  • Fresh Aloe Vera Gel
  • Few drops of Rose Water

What You Have To Do?

Extract fresh Aloe Vera gel and add Rose Water to it. Mix well and apply all over the face. Let it dry and before washing massage for 2 to 3 minutes and then wash it off with water. You can use this every day or at least 3 to 4 times a week.

Face Packs For a Glowing Skin

Glowing skin that too without any makeup sounds a bit impossible, right? Though it seems far fetched, it is possible to have a naturally glowing skin. Try using the following homemade DIY face packs 

  • Papaya Face Pack

If you are looking for a face pack that gives you an instant glow, then you should try Papaya face pack. The Papain in Papaya helps in removing dullness, dryness, and removing the excess oil from the face. It also helps in lightening the skin.

What You Need:

  • 1/3rd bowl of Papaya
  • ½ teaspoon of Sandalwood Powder or Chandan powder
  • Rosewater
  • ½ teaspoon of Aloe Vera gel

What You Have To Do?

Mash Papaya into a bowl and then add all the other ingredients to it. Now, mix them well and apply the paste all over the face. Let it dry for 15 to 20 minutes and wash it off with normal water. For best results, use this face pack twice or thrice a week

  • Lavender Oil Face Pack

A study proved that the application of lavender oil promotes collagen synthesis and wound healing. Therefore, the Lavender oil face pack can help you in making your skin plump and healthy by boosting collagen production.

What You Will Need:

What You Have To Do?

Mix the two ingredients and massage the blend on your face. Leave it on for 20 to 30 minutes. Then, wash your face with lukewarm water. You can apply this three times a week. As oxidized essential oil can cause skin irritation in some people, it is better to do some patch test before using it.

Face Packs For Anti-Ageing

We are all paranoid about premature aging. Once we hit the later 20’s we start looking for products that are available in the market to diminish the signs of aging. But, have you ever tried using a simple homemade face mask? Here are the two best DIY face packs that can help in reducing those fine lines and wrinkles of yours.

  • Coconut Oil Face Mask

Coconut oil face masks help in making the skin firm by reducing the fine lines and wrinkles. It also helps in protecting the skin from sun tanning and revives it.

What You Will Need:

  • One tablespoon of Coconut oil
  • ½ tablespoon of Pomegranate seed oil

What To Have To Do?

Mix both the oils together in a bowl and apply it all over the face and neck. Leave it on for about an hour and wash it off with water. It is recommended to use this mask every day.

  • Moringa Oil Face Mask

We all know Moringa oil is known for treating almost every skin issue we have, especially premature aging. The nutrients in it help in sustaining the production of collagen and skin cells as well as elastin (the building blocks of youthful skin). Moringa oil can also treat acne and irritated skin.

What You Will Need:

  • A few drops of Moringa Oil

What You Have To Do?

After cleansing your face, take a few drops of Moringa oil and massage gently on the face and neck. You can also use it as a night application.

organic moringa oil
  • Pineapple Face Pack

Pineapple is rich in phytochemicals and micronutrients, which help you in diminishing the first signs of aging. Since it is also rich in Vitamin C, it promotes the optimum production of collagen in the skin, thus reducing the fine lines and wrinkles

What You Will Need:

  • A slice of ripe Pineapple

What You Have To Do?

Gently rub Pineapple on the face and leave it on until it dries. Then rinse it off with water. For better results, use it 2 to 3 times a week.

Face Packs for Summers

Summers can get irritating and annoying at times as the skin gets dull due to the scorching heatwaves around. Therefore it is essential to keep our skin hydrated and healthy during summers. Here are two quick, easy, and best summer face packs to try out.

  • Watermelon And Cucumber Face Mask

Watermelon face masks are one of the most popular face masks for summer as watermelons and cucumbers are best known for their cooling properties. Given the heavy intensity of heat all around, these ingredients help in bringing back the glow and freshness in your face. 

What You Will Need:

  • Two tablespoons of Watermelon juice
  • Two tablespoons of Cucumber juice
  • One teaspoon of Milk powder
  • One teaspoon of Yoghurt

What You Have To Do?

Blend all the ingredients into a smooth paste and apply on the face and neck. Leave it on for about 15 minutes and then wash it off with cold water.

  • Banana Face Mask

While most people complain about having oily skin during summers, some people may have dry patches. If you are one among them, then this face pack is just for you. Bananas make your skin look smoother and hydrated. Honey is best known for its moisturizing properties. 

What You Will Need:

  • ½ Banana
  • One tablespoon of Honey
  • 1 ½ tablespoon of Sour Cream

What You Have To Do?

Mash the banana and add the other two ingredients in a bowl. Mix them well to make a smooth paste. Now, apply the paste evenly on your skin and let it dry. Once dried, wash it off with lukewarm water.

Important Note - 

Even though all these recipes involve natural ingredients, it doesn’t mean they are entirely safe for you as you can be allergic to any ingredient. So, it is always best to do a patch test on your hand before actually using them. If at all any ingredient is showing any kind of allergic reactions, immediately stop using it and consult a doctor if it gets serious.

Conclusion -

Going for a facial every time you think your face needs treatment is not only costly but also unhealthy as most salons use chemical products. But now, you know that there’s a better alternative to treat your skin from time to time - using natural face packs.

Flawless skin of your dreams is possible, but it is not an overnight miracle. You will have to pamper yourself with proper skin care and healthy lifestyle choices. Speaking of which, let us conclude with some additional no-nonsense tips that will help you have clear, glowing skin.

  • Always wear sunscreen with a minimum of SPF 21 no matter what the climate conditions are. 
  • Don’t smoke. If you smoke, the best way to protect the skin is to quit. 
  • Eat healthily! Try eating lots and lots of fruits, raw vegetables by avoiding packaged, oily and fast foods.
  • Manage your stress levels. Always have a minimum of eight-hour sleep, scale back your to-do list, set reasonable limits and give time for the things you enjoy.
  • Treat your skin gently. Don’t forget the CTM (cleansing, toning, and moisturizing). Give yourself small beauty treatments like applying natural face packs.

References:

  1. In-House Preparation and Standardization of Herbal Face Pack - https://www.researchgate.net/publication/320900643_In-House_Preparation_and_Standardization_of_Herbal_Face_Pack
  2. In-House Preparation and Standardization of Herbal Face Pack - https://pdfs.semanticscholar.org/1ca2/5c17343fd28d0dfa868e2abd0919f8e986dd.pdf
  3. Clinical efficacy of facial masks containing yogurt - https://www.ncbi.nlm.nih.gov/pubmed/22152494
  4. Medicinal and cosmetic uses of Bee’s Honey – A review - https://www.ncbi.nlm.nih.gov/pmc/articles/PMC3611628/
  5. Lemon: A Versatile Fruit of Multiple Uses - https://www.researchgate.net/publication/318360553_Lemon_A_Versatile_Fruit_of_Multiple_Uses
  6. Effects of Turmeric ( Curcuma longa ) on Skin Health: A Systematic Review of the Clinical Evidence: Effects of Curcuma longa on Skin Health
  7. ALOE VERA: A short review - https://www.ncbi.nlm.nih.gov/pmc/articles/PMC2763764/
  8. Fuller's earth skin benefits - Aromatherapy for Holistic Therapists.
  9. Tomato pulp skin lightening - Advanced Materials and Structural Engineering
  10. Orange peel face scrub - 28-day Skin Plan: For Clear and Glowing Skin
  11. Lemon peel lightens skin - Pharmacognosy: An Indian perspective
  12. Milk skin benefits - Health Benefits: From Foods and Spices
  13. Milk cream for dry skin - Dinner with Friends
  14. Neem on the face - Face to Face with Shiva: Scientific Perspective of a Spiritual Experience
  15. Pineapple on the skin - Clear Skin Detox: A Revolutionary Diet to Heal Your Skin from the Inside Out

Aloe Vera For Face and Skin – Top 10 Benefits & Uses

When you have a monster sunburn, the first thing you think of is rubbing Aloe Vera gel to soothe your scorched skin. Aloe Vera is a popular medicinal and cosmetic plant. Not only does this gooey superhero give you relief from sunburns, but it also helps in treating many skin conditions like frostbite, psoriasis, and cold sores.

You might have this thorny triangular green plant sitting in your backyard without knowing the many ways in which you can use the precious Aloe Vera plant for your face and skin. Don’t worry; we will be covering that for you in this article.

Can You Put Aloe Vera On Your Face?

Aloe vera is a plant that provides natural gel with soothing and moisturizing properties, making it a safe and suitable ingredient to apply on the face. It's great for sunburn, dry skin, acne, and irritation.

The clear gel-like substance inside the leaves of the plant, popularly known as Aloe Vera gel, contains 75 potentially active constituents such as vitamins, enzymes, minerals, sugars, lignin, saponins, salicylic acids, and amino acids. (1)

Did you know?

Due to its health, beauty, medicinal, and skincare properties, Aloe Vera has been regarded as “the universal panacea” by the Greek scientists and “the plant of immortality” by the Egyptians. The miracle plant has anti-fungal, anti-viral, and cell regenerative properties.

Top 10 Aloe Vera Benefits For Face

With all this hype around the plant, should you make the application of Aloe Vera on face a permanent fixture in your skincare regime? Well, while the research suggests that Vitamin A and E present in Aloe Vera gel make it a great addition to your skincare products arsenal. (2

Although this magical ingredient was discovered just a few decades ago, it has always been recorded in beauty books for centuries for its umpteen benefits. Oily, dry, or sensitive, it works wonders on any skin type and can rid almost all of your skin woes. 

Read on to discover the many reasons to include Aloe Vera gel in your daily skincare regimen and get familiar with all the amazing benefits of Aloe Vera gel for face. 

1. It Soothes Sunburns

Did you know Aloe Vera is also referred to as a “burn plant” as it is so effective in soothing sunburns? Aloe Vera contains certain compounds called polysaccharides, which help in encouraging skin repair and new skin cells to set up shop. It also has a pain-relieving compound called carboxypeptidase, which gives us a soothing sensation every time we apply Aloe Vera.

Some peer-reviewed studies have shown that this thick gel filled in the Aloe Vera leaves can help in healing first to second-degree burns, which include mild to moderate sunburns. 

The most recent studies have shown that aloin, which is responsible for the plant’s anti-inflammatory properties, helps prevent the peeling that sometimes happens with sunburns. (3)

If your face has visible signs of sun damage like mild sunburns, freckles, or dark spots, apply Aloe Vera on your face to get relief and manage symptoms.

2. It Moisturizes the Skin

Because Aloe Vera mainly contains (95%) water, it hydrates the skin with no greasy feeling after application. Along with locking the moisture into the skin, Aloe Vera also acts as a glue, making the top layer of the skin cells stick together, resulting in smoother and softer skin. 

Even for sensitive and oily skin types, Aloe Vera has proved to be an excellent moisturizer. If you look for a light moisturizer for the dry winter months or summers, don’t forget to consider Aloe Vera. (4

One easy way to reap the benefits of moisturizing properties of Aloe Vera is to use a natural moisturizer with Aloe Vera as one of the key ingredients. Kama Ayurveda’s Eladi Hydrating Ayurvedic Cream is one such rich, natural day cream that blends into the skin, leaving it softly mattified yet well moisturized.

aloe vera for moisturising

3. It Treats Mouth Sores

Aloe Vera can not only soothe sunburns but also help treat common oral conditions, including fever blisters and cold sores outside the mouth and canker sores (usually caused due to stress) in the mouth. 
It helps in treating the herpes virus, the underlying cause of cold sores. All you have to do is apply a small amount of the gel on the cold sore two times a day until the wound goes away. (7)

4. It Slows Down The Signs Of Ageing

As your skin ages, it starts to look more saggy, wrinkled and loses its elasticity. But don’t worry, Aloe Vera can help you deal with this problem. It retains the skin’s lost moisture and restores its radiance. 


Along with reducing visible wrinkles and fine lines on the face, Aloe Vera gel also helps in improving the elasticity of the skin and repairing skin cells. Thus, preventing premature aging of the skin. (8)

5. It Fights Acne and Fades Blemishes

Thanks to the anti-inflammatory and anti-bacterial properties that Aloe Vera has, we can keep acne at bay. How? Aloe Vera prevents the bacteria which is responsible for the occurrence of acne. 
The salicylic acid in Aloe Vera helps in unclogging the pores, which is a great thing when you deal with pimples and blackheads. Aloe Vera also helps in removing the pesky scars and fading the blemishes. (5) (6)

aloe vera benefits for dark marks

6. It Helps In Relieving Skin Irritation

Aloe Vera is a super ingredient for sensitive skin. The cooling properties of the plant help in soothing redness, infection, rash, and itchiness. Acemannan compounds in Aloe Vera which contain anti-fungal properties, help treat inflammatory skin issues such as cysts and heat boils in summer.

However, note that proper studies are lacking to support its use over conventional treatments. Make sure you do a small patch test before treating the inflammatory skin, as Aloe Vera can cause allergic contact dermatitis in some people.

7. It Cleanses The Skin

Did you know Aloe Vera has the ability to repair and recover your skin from the day behind you? That means it can clear the build-up caused by exposure to pollution and dirt. Isn’t it amazing? By simply using a natural cleanser with Aloe Vera as one of the key ingredients, you can get all its cleansing benefits. 


One such natural face cleanser is Kama Ayurveda’s Sensitive Skin Cleansing Foam. It has cold-pressed Aloe Vera Leaf Juice that provides intense hydration, while also controlling flaking, redness and tightness.

aloe vera for sensitive skin

Read - How To Get Clear Skin - 13 Expert Tips That Work

8. It Slightly Exfoliates the Skin

The salicylic acid in Aloe Vera gel can act as an exfoliator by gently sloughing off the dead skin cells. Lignin in Aloe Vera enhances the penetrative effect of other ingredients into the skin.

9. It Reduces Inflammation

Aloe Vera's anti-inflammatory compounds help calm irritated skin, making it suitable for those with sensitive skin conditions like eczema or rosacea.

10. It Treats Insect Bites and Wounds

Aloe vera accelerates the healing process of minor cuts, burns, and wounds due to its ability to stimulate cell regeneration.

It is also a natural solution for soothing insect bites as its anti-inflammatory properties help reduce swelling and itching, while its cooling effect provides relief.

How To Use Aloe Vera For Face?

There are various ways to use Aloe Vera for face - from using fresh Aloe Vera gel on your face to homemade face packs for different skin types. You can also use it as as a face wash, toner, moisturizer, and remedy for dark circles, sunburns, and acne.

We’ll talk about each method in detail in this section.

1. Apply Fresh Aloe Vera Gel On Face

Using Aloe Vera for your face is an uncomplicated and rewarding skincare practice. Begin by cleaning your face to remove any impurities. Apply a thin layer of freshly extracted Aloe Vera gel to your face and gently massage it using upward motions. Allow the gel to sit for around 15-20 minutes, letting its soothing properties work their magic.

2. Aloe Vera Face Pack For Dry Skin

This DIY face pack helps in turning your dry and dull skin to a plump and supple one. All you have to do is mix Aloe Vera gel, honey, and cucumber. These three ingredients help in hydrating your skin, thus leaving it soft and smooth.

What You Need:

  • One tablespoon of Aloe Vera gel
  • One sliced Cucumber
  • One tablespoon of Honey

What you have to do:

Blend the sliced cucumber. Add Aloe Vera gel and honey to the paste. Apply the mixture all over the face and neck and leave it on for 20 minutes. Later, rinse it off with lukewarm water.

3. Aloe Vera Face Pack For Oily Skin

This Aloe Vera face pack helps you in zapping excess oil from the skin. It also helps in preventing acne.

What You Need:

What You Have To Do:

Add tea tree oil to fresh Aloe Vera gel and whisk it into a smooth paste. Apply the mixture all over the face and leave it overnight. Rinse it off in the morning with lukewarm water. You can repeat this twice a week.

aloe vera for oily skin

4. Aloe Vera Face Pack For Normal Or Sensitive Skin

This face mask helps in moisturizing and brightening your skin. It works for all skin types, especially for sensitive or normal skin types. It helps in relieving skin from rash and itchiness and improving skin elasticity.

What You Need:

  • One banana
  • Two tablespoons of Aloe Vera gel

Few drops of Rose Water

What You Have To Do:

Mash the banana into a bowl and add Aloe Vera gel and Rose Water to it. Make a paste and apply it on a damp face. Rinse it off when it dries and make sure you moisturize your skin after that.

Read - 18 Effective Ayurvedic Face Masks To Treat Your Skin

5. Use Aloe Vera As Face Wash

To use Aloe Vera as a face wash, start by extracting fresh gel from a leaf. Apply the gel on damp skin, massage gently, and rinse with lukewarm water. For added benefits, consider mixing aloe vera with Lemon Juice for exfoliation or Rose Water for soothing effects. Use it once or twice daily for a natural cleanse that suits your preferences and skin needs.

6. Use Aloe Vera As Toner

To make an Aloe Vera skin toner, combine one part fresh Aloe Vera gel with two parts water. Store this mixture in a sealed bottle in the refrigerator. Before using, shake the bottle well. Apply the toner to your cleansed face using a cotton ball. 

Let it dry before continuing with your usual skincare routine. This homemade toner offers a natural way to hydrate and refresh your skin.

7. Use Aloe Vera As Moisturizer

To use aloe vera as a moisturizer, extract fresh gel from a leaf and apply a thin layer to your clean, dry face. For added benefits, consider mixing in a drop of suitable essential oil for the face, Hyaluronic Acid serum, Vitamin E oil, or Rose Water before application. 

Massage gently and allow absorption. Use it daily or as needed, adjusting the amount as required. If using during the day, apply sunscreen afterwards.

8. Use Aloe Vera For Fading Dark Circles

Packed with aloesin, Aloe Vera gel serves as an effective solution for diminishing skin pigmentation. This characteristic makes it adept at reducing the appearance of dark circles while maintaining proper hydration for the delicate skin around the eyes.

To apply, massage aloe vera gel in circular motions before bedtime each night. Allow it to work its magic overnight. Rinse it off the next morning and repeat this routine until your dark circles gradually fade away.

9. Use Aloe Vera For Treating Sunburns

For a refreshing and effective sunburn remedy, consider utilizing chilled aloe vera gel. Simply apply it to the sunburned area two or three times daily. Continue this routine for several days, until the skin's color returns to normal and inflammation subsides. 

Alternatively, you can create a cooling spray by blending 2 parts water with 1 part Aloe Vera. Store the mixture in the refrigerator and ensure to steer clear of the eyes when applying the spray.

10. Use Aloe Vera To Treat Acne and Blemishes

Mix one tablespoon of Aloe Vera gel with a few drops of Lemon Juice to formulate a potent acne treatment. Ensure the mixture is sealed and refrigerated. After cleansing your skin, gently apply the blend once or twice daily onto breakouts and blemishes. 

This proactive approach taps into aloe vera's soothing properties and the astringent effects of lemon juice to combat acne-related concerns. 
You can also add 2-3 drops of Tea Tree Oil to freshly scooped out Aloe Vera gel and massage it into your skin to prevent and treat acne.

Create Skincare Routine With Best Aloe Vera Products

Another way to incorporate Aloe Vera to your daily skincare regimen is to use skincare products that include Aloe Vera in them. 

If one of your hobbies is reading the back labels of skin care products, then you probably already know that Aloe Vera is in a lot of cleansers, moisturizers and night creams. Here are our top recommendations for Aloe Vera based products.

Aloe Vera For Cleansing

Since cleansing is the first step to any typical skincare routine, it is always best to use cleansing products that contain Aloe Vera in it. Aloe Vera can repair and recover skin from the day behind you.

Therefore, if you have sunburns or acne scars or even you just got built up with a tough day of pollution, these Aloe Vera products are your best friends.

1. Sensitive Skin Cleansing Foam

Kama Ayurveda’s Sensitive Skin Cleansing Foam is perfect for delicate skin. It helps in removing excess oils and impurities without stripping away skin’s essential moisture. The cold-pressed Aloe Vera leaf juice in the foam controls flaking, redness, and tightness while providing intense hydration. 

Along with Aloe Vera, this product also contains pure Sandalwood oil and naturally restorative Calendula, which helps in soothing sensitive and irritated skin and healing the damage caused by pollution and environmental irritants.

aloe vera for face cleansing

2. Himalayan Deodar Face Cleanser For Men

Himalayan Deodar Face Cleanser For Men From Kama Ayurveda is a soothing face wash that is filled with natural ingredients. Along with the goodness of Aloe Vera, which heals and smoothens the skin, this cleanser also contains purifying Cedar Wood extract that soothes and tones the skin.

The moisturizing jojoba oil in it helps in minimizing fine lines, promoting skin suppleness, and rejuvenation. The cooling Vetiver root, antibacterial Cumin seed extracts, toning Lavender oil, and anti-inflammatory Patchouli oil acts as natural astringents for perfectly cleansed, refreshed, and healthy skin.

aloe vera for men

3. Rose Jasmine Face Cleanser

Rose Jasmine Face Cleanser is a perfect hydrating face wash that gently and thoroughly cleans your skin and removes light makeup. The Aloe Vera juice and all the other natural ingredients present in the cleanser heals, smoothens, softens and rejuvenates the skin, minimizes fine lines, and promotes skin suppleness. This cleanser helps in keeping the skin soft, young, and moisturized.

aloe vera based face cleanser

Aloe Vera For Moisturising

Aloe Vera may not be the first thing you turn to fix a bad break out or a dark spot. However, it should be on the radar Not only for your face, but Aloe Vera can also do wonders to your entire body. When applied all over the body, it protects your skin from the pollution while giving the moisture of Aloe Vera. It treats minor cuts, wounds, dry skin and severe burns too along with exfoliating, restoring, and providing constant impressive nutrition to the human skin.

1. Rejuvenating And Brightening Ayurvedic Night Cream

Rejuvenating And Brightening Ayurvedic Night Cream from Kama Ayurveda is a powerful Ayurveda based formula created from Aloe Vera and the finest of saffron from Kashmir. This night cream helps in lightening and brightening uneven skin, reducing dark circles and pigmentation marks while also repairing fine lines, age spots, and other signs of aging.

aloe vera based night cream

2. Kokum And Almond Body Butter

Kokum and Almond Body Butter is an enriching body butter made with 100% organic Aloe Vera juice, Sweet Almond oil, Coconut oil, Cocoa butter, and Kokum butter. Rich in fiber, vitamin A, E and minerals, Aloe Vera in this body butter helps in relieving dryness, increasing the elasticity of the skin, regenerating skin cells and improving skin tone.

aloe vera based body cream

3. Shea Lotus Body Butter

The rich and creamy Shea Lotus Body Butter absorbs quickly into the skin, replenishes the body’s natural hydration levels, and enhances skin texture by softening and smoothening it. Aloe Vera in the body butter helps in maintaining the plumped up, youthful appearance of the skin by minimizing the appearance of fine lines and wrinkles.

aloe vera based body butter

4. Himalayan Deodar Body Moisturizer

Himalayan Deodar Body Moisturizer is a luxurious body moisturizer that is rich in Aloe Vera and free of sulfates (SLES), Paraben, and Petrochemicals. It acts as a natural skin conditioner and helps in brightening, refreshing, and nourishing skin. Thus leaving the skin soft, radiant, healthy, and toned.

5. Lavender Patchouli Body Moisturiser

Lavender Patchouli Body Moisturiser, infused with extracts of Aloe Vera, Sunflower, and Olive Oil, transforms dry skin by sealing in a rich blend of lipids and essential ingredients to nourish and nurture continually. The refreshing Patchouli gives a well-hydrated, smooth, and comfortable skin by acting as a natural antibacterial, antiseptic, and anti-inflammatory agent.

Side Effects Of Aloe Vera

The Food and Drug Administration doesn’t regulate any Aloe Vera products. They considered it safe when used as directed. So it is up to you to use the Aloe Vera safely. However, make sure you report to the doctor if at all you find any kind of adverse reactions.

Although rare, some people may have some allergic reactions like redness, swelling, or a rash to Aloe Vera. If such symptoms occur, stop using Aloe Vera immediately. Consult a doctor if you are worried about the signs. Also, never use Aloe Vera on the infected skin. Even though Aloe Vera gel has some microbial properties, it may disrupt the healing process making the infection worse.

If you aren’t allergic to Aloe Vera, it can do wonders on your skin. Just try and see the results yourself.

FAQ’s

Is Aloe Vera Good For Face?

Aloe Vera contains enzymes, antioxidants, vitamins A and C which can treat burns, acne, dry skin and many other skin issues. It is highly inflammatory too. With all these benefits, Aloe Vera is definitely good for face. It’s suitable for all skin types so you can apply on sensitive skin as well.

How To Grow Aloe Vera?

Aloe Vera as a succulent does best in dry conditions. Plant it in a regular potting soil that has been amended with building sand or additional perlite. You can also plant it in a cactus potting soil mixture. Make sure the pot has plenty of drainage holes as aloe vera plants cannot tolerate standing water.

How To Make Aloe Vera Gel At Home?

Take a leaf and cut off the ragged edges first. Then slide the knife right under the skin along the length of the leaf. Now, carefully with the help of a spoon, scoop out all the transparent gooey gel and collect it in a bowl. To preserve the gel for a longer period, add a few drops of grape seed extract or some essential oil.

Is Aloe Vera Useful For Face Pimples?

Yes, Aloe Vera is very useful for face pimples. Using Aloe Vera as a cleanser everyday can boost the blood flow in your skin and kill off harmful bacteria. You can also leave Aloe overnight to spot treat your acne breakout areas.

References:

  1. ALOE VERA: A SHORT REVIEW - https://www.ncbi.nlm.nih.gov/pmc/articles/PMC2763764/
  2. Aloe Vera Gel Research Review - https://www.naturalmedicinejournal.com/journal/2012-09/aloe-vera-gel-research-review
  3. Aloe Vera on skin - https://pdfs.semanticscholar.org/4024/e28c8f9fdad106b1de5627ef20ee5360928e.pdf
  4. In Vivo skin hydration and anti-erythema effects of Aloe vera, Aloe ferox and Aloe marlothii gel materials after single and multiple applications - https://www.ncbi.nlm.nih.gov/pmc/articles/PMC4078333/
  5. Effect of Aloe vera topical gel combined with tretinoin in treatment of mild and moderate acne vulgaris: a randomized, double-blind, prospective trial - https://www.ncbi.nlm.nih.gov/pubmed/23336746
  6. Evaluation of antimicrobial efficacy of Aloe vera and its effectiveness in decontaminating gutta percha cones - https://www.ncbi.nlm.nih.gov/pmc/articles/PMC3410334/
  7. Aloe Vera And Its Uses In Dentistry- A Review - http://www.indianjournals.com/ijor.aspx?target=ijor:jop&volume=4&issue=3&article=001
  8. Aloe vera: Magic or myth - http://www.srmjrds.in/article.asp?issn=0976-433X;year=2013;volume=4;issue=3;spage=119;epage=124;aulast=Agarwal
  9. The efficacy of aloe vera used for burn wound healing: a systematic review - https://www.ncbi.nlm.nih.gov/pubmed/17499928
  10. Aloin Suppresses Lipopolysaccharide-Induced Inflammatory Response and Apoptosis by Inhibiting the Activation of NF-κB - https://www.ncbi.nlm.nih.gov/pmc/articles/PMC6017010/

How To Remove Dark Spots On Face Naturally?

Dark spots can be a common concern for many, often leading to a search for effective remedies. While makeup might offer a quick fix, it's essential to understand the real cause behind these spots. 

At the heart of this issue is melanin, the pigment that gives our skin its color. But why does it sometimes result in dark patches? What triggers its overproduction?

Let's delve into the science behind dark spots and explore effective ways to diminish them.

Another problem that’s closely linked with dark spots is skin pigmentation. So, let’s understand what skin pigmentation is and how it is related to dark spots. Later in this article, we’ll explore the causes of dark spots on the face and body and list some natural remedies to get rid of dark spots. In the end, we will be looking at some preventive measures to reduce the appearance of such dark spots. Let’s get started.

What causes dark spots on the face and body?

Dark spots are caused when certain parts of the skin produce more melanin than the other areas. Apart from sun exposure, hormonal changes, inflammation, conditions like diabetes also influence the production of melanin.

Some of the most common reasons behind dark spots are discussed below:

  • Hormonal changes:

Hormonal changes can be a leading cause of skin pigmentation, especially for women. Melasma is a type of skin pigmentation that appears in the form of dark patches, usually on the cheeks or forehead. This condition is prevalent after pregnancy.

  • Sun exposure:

Exposure to the harmful UV rays of the sun can cause dark spots to appear on the skin. Freckles, sunspots, solar lentigines, or liver spots are the most common type of pigmentation that can be developed due to exposure to the sun. These can be prevented by healthy sun screening habits developed at a very young age.

  • Side effects of medication:

Certain medications can cause specific side effects, such as skin pigmentation and dark spots. NSAIDs or non-steroidal anti-inflammatory drugs produce the most common reactions.

  • Inflammation:

Dark spots may also occur after skin inflammation or injuries to the skin. These can be caused by acne or even eczema. 

  • Irritation due to certain products:

Sometimes, the use of certain products like perfumes or certain hair products can cause skin irritation, causing dark spots to appear on the skin.

  • Diabetes: 

Diabetes can also cause certain areas of the skin to produce more melanin, leading to dark patches.

As you can see, there are varying reasons for developing dark spots, which brings one crucial question. How to remove dark spots from our skin?

First, we’ll look at some of the most effective natural remedies to help get rid of dark spots.

Home Remedies For Dark Spots On Face

Did you know that some of the most effective solutions for dark spots might be sitting right in your kitchen pantry? Nature has blessed us with a plethora of ingredients that not only nourish our insides but can also address various skin concerns.

Let's explore these age-old home remedies that have been passed down through generations and understand how they can be your skin's best friend.

1. Aloe Vera

Aloe vera isn't just a plant; it's a skin savior. Comprising 90% of the body's amino acids and a powerhouse of vitamins A, B, C, and E, its benefits are manifold. From anti-aging to skin nourishment, aloe vera addresses dark spots, reduces skin discoloration, and even offers pain relief with its antiseptic properties.

How To Use:

  • Apply Aloe Vera juice or pure Aloe Vera gel directly to areas with hyperpigmentation.
  • Let it sit for 30 minutes during both morning and evening routines.
  • Rinse your face with lukewarm water.


2. Turmeric

Turmeric's active compound, curcumin, is a powerful antioxidant with anti-melanogenic effects. This means it can naturally reduce melanin production, lightening dark spots and bestowing a radiant, clear complexion.

How To Use:

  • In a bowl, mix one teaspoon of turmeric powder, 1-2 teaspoons of milk, and one teaspoon of lemon juice.
  • Blend until you achieve a smooth paste consistency.
  • Apply the paste to your face, allowing it to sit for 20 minutes.
  • Rinse with lukewarm water and follow up with your favorite moisturizer.
  • Witness a noticeable difference in just 2 days, as this regimen naturally fades spots.
turmeric for dark spots

3. Oatmeal

Oatmeal, often celebrated for its soothing properties, also offers a natural remedy for dark spots. Its exfoliating properties help in removing dead skin cells, which can reduce the appearance of dark spots over time. The amino acids in oatmeal help to lighten blemishes and discolorations on the skin.

  • Grind whole oats to a fine powder.
  • Mix the oat powder with lemon juice, known for its skin-lightening properties.
  • Add a touch of honey for its moisturizing and antibacterial benefits.
  • Apply the mixture to areas with dark spots and let it sit for 20 minutes.
  • Rinse with lukewarm water, gently massaging in circular motions.
  • Repeat regularly for best results.

4. Tomato paste:

Tomato paste is a valuable tool against dark spots. This is mainly due to its rich lycopene content, a powerful antioxidant. Lycopene protects the skin from sun-induced damage, a primary cause of dark spots.

Tomatoes also have natural astringent properties, which tighten the skin and make dark spots less visible. Their vitamin C content can inhibit melanin production, potentially lightening these spots. 

Additionally, the mild acidity in tomatoes provides gentle exfoliation, promoting skin renewal. This results in a brighter complexion. 

  • Extract the pulp from a fresh tomato to get tomato paste.
  • Apply the tomato paste evenly on your face.
  • Allow it to sit for about 10 minutes.
  • Rinse with cold water for a refreshing feel.
  • Experience skin that's soft, silky, and radiates health.

5. Manjistha:

As a potent blood purifier, Manjistha treats the skin from within, promoting a radiant and youthful complexion. Its unique combination of sweet, bitter, and acidic flavors classifies it as an effective pitta pacifier. For addressing dark spots, Manjistha capsules can be consumed once or twice daily. You can also use it as a face pack -

  • Mix Manjistha powder with honey to form a smooth paste.
  • Apply the mixture evenly across your face.
  • Leave it on for 15-20 minutes.
  • Rinse thoroughly with water and pat your skin dry.

6. Buttermilk

Buttermilk, a natural source of lactic acid, is an excellent remedy for rejuvenating the skin. Lactic acid aids in exfoliating dead skin cells, paving the way for a brighter complexion and lightening dark spots. 

  • Dip a cotton ball into fresh buttermilk.
  • For oily or acne-prone skin, add a few drops of lemon juice to the buttermilk.
  • Gently apply the mixture directly onto the dark spots.
  • Allow it to sit for 20 minutes.
  • Rinse your face with clean water.
  • With consistent use, you'll notice a clearer complexion and diminished dark spots.

7. Masoor Dal ( Red Lentils):

Red lentil, commonly known as Masoor dal, is a potent remedy for hyperpigmentation on the face. Packed with antioxidants, these lentils offer numerous skin benefits, promoting a clearer and more even complexion.

  • Grind dried red lentils to a fine powder.
  • Mix the powder with water or yogurt to form a smooth paste.
  • Apply the paste evenly on your face, focusing on areas with hyperpigmentation.
  • Leave it on for 20 minutes.
  • Rinse off with cool water.
  • With regular application, you'll observe a reduction in hyperpigmentation and a brighter skin tone.

8. Green Tea Extract:

Packed with antioxidants, especially catechins, green tea helps combat skin damage and reduce the appearance of dark spots. 

  • Brew a strong cup of green tea and allow it to cool.
  • Dip a cotton ball into the cooled green tea.
  • Gently dab the cotton ball onto areas with dark spots.
  • Leave it on for 15-20 minutes.
  • Rinse off with cool water.

9. Sandalwood:

Sandalwood, revered in traditional skincare routines, is a potent solution for dark spots. Its has natural skin-brightening properties.

  • In a bowl, combine 1 teaspoon of sandalwood powder, 1 teaspoon of orange zest, and enough orange juice to form a thick paste.
  • Apply the mixture to your face, giving special attention to areas with dark spots.
  • Allow the mask to sit for 20 minutes.
  • Gently rinse off with lukewarm water.
  • For best results, repeat this process two to three times a week

10. Apple Cider Vinegar:

Apple cider vinegar (ACV) is renowned for its acidic properties and rich content of acetic acid, making it a popular choice for addressing skin concerns, including dark spots. Its natural exfoliating effect helps in reducing the appearance of these spots, promoting a more even skin tone.

  • Dilute apple cider vinegar with an equal amount of water to ensure it's gentle on the skin.
  • Soak a cotton ball in the diluted ACV solution.
  • Apply it directly onto the dark spots, ensuring even coverage.
  • Leave it on for 15-20 minutes.
  • Rinse off thoroughly with lukewarm water.
  • Repeat this process daily or every alternate day for optimal results.

11. Yogurt

Rich in lactic acid, Yogurt not only exfoliates the skin but also addresses discoloration and age spots. Beyond just lightening, Yogurt enhances the skin's tone and texture, while its anti-inflammatory properties help reduce redness and irritation.

  • Take a tablespoon of plain yogurt in a bowl.
  • Using clean fingers or a brush, apply the yogurt directly to areas with dark spots.
  • Allow it to sit on the skin for 15-20 minutes.
  • Rinse off gently with lukewarm water.
  • For best results, apply daily or every alternate day

12. Papaya

Papaya owes its skin-rejuvenating properties to the fruit acids it contains, specifically alpha-hydroxy acids (AHAs). These AHAs serve as chemical exfoliants, aiding in the removal of dead skin cells, revealing a brighter and more youthful complexion beneath.

Particularly beneficial for those with dry skin, hyperpigmentation, and fine lines, papaya is a natural solution to get glowing skin.

  • Mash a few pieces of ripe papaya in a bowl to form a smooth paste.
  • Apply the papaya paste directly onto areas with dark spots or the entire face for an overall glow.
  • Let it sit for 15-20 minutes.
  • Wash off gently with lukewarm water.
  • Use this treatment 2-3 times a week for optimal results.

13. Saffron 

Revered in Ayurveda for its skin-enhancing properties, Saffron is known to brighten the complexion, reduce dark spots, and impart a radiant glow. Rich in antioxidants, saffron combats free radicals, preventing skin damage and promoting an even skin tone.

  • Soak a few strands of saffron in 2 tablespoons of water or milk for a couple of hours.
  • Once the liquid takes on a golden hue, apply it directly to the areas with dark spots using a cotton ball or your fingertips.
  • Allow it to sit for 15-20 minutes.
  • Rinse off gently with lukewarm water.

Repeat this process 2-3 times a week for best results.

acne scars vs dark spots

14. Cucumber

Known for its cooling and hydrating properties, cucumber is rich in vitamins and antioxidants that help reduce dark spots and soothe irritated skin. Its natural astringent properties help tighten the skin, making dark spots less noticeable.

  • Grate a fresh cucumber to extract its juice or blend it to form a smooth paste.
  • Apply the cucumber juice or paste directly onto areas with dark spots.
  • Let it sit for 15-20 minutes, allowing the skin to absorb its nutrients.
  • Rinse off gently with cool water.
  • For best results, apply daily or every alternate day.

Read - How To Use Tea Tree Oil For Dark Spots?

What is skin pigmentation?

You might have come across terms like 'skin pigmentation' or 'hyperpigmentation' and wondered if they're just fancy names for dark spots. Let's help you with the answers - 

Skin pigmentation, often referred to as hyperpigmentation, encompasses a range of conditions that result in darkened patches of skin. At the core of this is melanin, the pigment that gives our skin its hue.

While melanin is typically spread evenly, certain triggers can cause parts of the skin to produce more melanin, leading to dark spots. Common culprits include prolonged sun exposure and hormonal changes.

Dark spots are just a subset of skin pigmentation issues. 

Regardless of the type of pigmentation, one universal remedy is diligent sun protection. Whatever the type of pigmentation, it can be managed by limiting sun exposure and regular use of sunscreen.

Best Skin Care Habits To Prevent Dark Spots

With dark spots, it is always better to be safe than sorry. Here are some tips to prevent the appearance of dark spots on the skin:

  • Prioritize Sun Protection: Sunscreen is your first line of defense. Opt for one with an SPF of at least 20 and make it a habit to reapply every 2 to 3 hours, especially when outdoors.
  • Nourish from Within: A balanced diet rich in vitamins and minerals can do wonders for your skin. Prioritize fruits and vegetables that are nutrient-dense to maintain a radiant complexion.
  • Add Supplements: If your diet falls short, consider nutritional supplements. Over-the-counter options like Vitamin C and other antioxidants can help bridge dietary gaps.
  • Quit Smoking: Smoking isn't just harmful to your lungs; it can also impact your skin. Research links cigarette smoking to various skin issues, including dark spots.
  • Extra Sun Safeguards: Enhance your sun protection by donning a wide-brimmed hat and sunglasses. These accessories offer additional defense against the sun's harsh rays.

Kama Ayurveda’s Natural Sun Protection is effective in blocking UVA and UVB rays and preventing the appearance of dark spots. It is a gentle, non-comedogenic, non-greasy formula suited to sensitive & oily skin.

Ayurvedic Treatment Of Dark Spots

There are traditional Ayurvedic ingredients as well that use the energy of herbs and oils to treat dark spots. Below are a few Ayurvedic treatments that you can regularly use if you are suffering from dark spots.

1. Kumkumadi Thailam 

The legendary Kumkumadi oil is prescribed for dull, pigmented, damaged, and aging skin. If your concern is how to remove dark spots from your face, then this Ayurvedic treatment is perfect for you. The key ingredient, Saffron, helps illuminate the complexion and repair pigmentation. Kama’s Kumkumadi Miraculous Beauty Fluid Night Serum is one such oil suitable for the face.

After cleansing, dampen your skin. Take 3-4 drops of Kumkumadi oil on your palm, apply over the face with fingertips and gently massage onto the skin until fully absorbed. Allow it to work overnight for the best results. For nightly use only and should not be applied during the daytime.

2. Nalpamaradi Thailam 

Nalpamaradi Thailam is a powerful skin brightening and de-tanning treatment. It is a mix of Sesame oil, Vetiver, Turmeric, Gooseberry, and Indian Madder. The potent Turmeric present in the oil has antioxidant properties that repair pigmentation, uneven skin tone and marks.

To use the oil for dark spots and pigmentation, gently massage it into the skin, ensuring the affected body parts are covered. The treatment works best if left on for 30 minutes. Cleanse post-treatment with a mild cleanser. This oil may stain yellow due to ingredients such as Turmeric; hence suitable precautions must be taken while using it.

3. Jwalini Oil

Described in the Ancient texts, Jwalini Oil is the ideal treatment for clear skin. It contains herbs that are processed in pure Coconut milk and Sesame oil. It is an excellent after-sun remedy that treats tan and hyperpigmentation. You can apply it all over your body. It’s suitable for all skin types but not ideal for those with acne-prone skin. 

To get the best results, take an appropriate amount onto palms and massage gently into skin until well-absorbed. Leave on for 30 minutes and wash off with a mild cleanser.

4. Ayurvedic Night Cream For Dark Spots

As we sleep during the night, our skin is busy rejuvenating and repairing itself. Using a suitable night cream overnight can reduce the appearance of dark spots and can even fade the existing dark spots.

Kama Ayurveda Rejuvenating and Brightening Night Cream is an Ayurvedic night cream that works effectively to remove dark spots from your skin. It is rich in Saffron, which lightens and brightens the uneven skin, reduces dark circles and pigmentation marks while also repairing fine lines, age spots, and other signs of aging.

Dark Spots vs. Acne Scars

Distinguishing between dark spots and acne scars is vital, as their treatments diverge significantly. While dark spots tend to be superficial, acne scars delve deeper, often causing more lasting damage. What we might brush off as mere dark spots could, in reality, be underlying acne scars.

Post-inflammatory hyperpigmentation refers to the brownish spots that linger after a bout of mild to moderate acne. These marks, though persistent, fade over time. In contrast, acne scars result from damage to deeper skin layers, typically stemming from moderate to severe acne episodes.

We are all guilty of popping zits, and it turns out that this is the most common reason for acne scars. Some of the types of acne scars are:

  • Ice Pick Scars: Deep and narrow, these scars have jagged edges, often resembling enlarged pores.
  • Boxcar Scars: Characterized by broad, rectangular depressions with sharp edges.
  • Rolling Scars: Broad depressions with a gentle slope, true to their name.

Scars result from excessive tissue growth and can be challenging to eliminate entirely, though they may face over time. On the brighter side, dark spots can disappear over time, ranging from a couple of months to a few years.

Other Pigmentation treatments:

There are other dark spot treatments as well, which involve the use of chemicals. We do not recommend these treatments as they are not suitable for all skin types and might cause side-effects.

However, to provide you with complete knowledge on the subject, we’re listing some of these chemical treatments. Remember to consult a dermatologist and take professional advice before going forward with any of them.

  1. Face acids:
    Face acids work by exfoliating and shedding the top layer of your skin so that new cells emerge and take the place of old cells. The process evens out the skin and makes it smoother. Various acids are available in the market, but the most common ones are Vitamin C and Salicylic acid.
  2. Chemical peels:
    Chemical peels use acids at a stronger concentration to peel the outer layer of the skin. It is advisable to consult a dermatologist before going ahead with chemical peels to treat dark spots.
  3. Laser peel:
    Laser peel treatment uses targeted beams of light to treat hyperpigmentation and dark spots. There are different types of laser peels. Your doctor or skin care specialist will assess your skin and suggest the best form of treatment.
  4. Intense pulse light therapy:
    IPL therapy is a type of non-ablative laser treatment that is also known as photo facial. IPL therapy usually requires multiple sessions. It promotes collagen production within the skin.
  5. Microdermabrasion:
    Microdermabrasion is a clinical procedure used to treat hyperpigmentation that affects the epidermis only (superficial scarring). It works best on superficial scars.

Frequently Asked Questions About Dark Spots

1. How to remove dark spots on face overnight?

While we all want quick solutions to our skin problems, it's not possible to altogether remove dark spots from the face overnight. There are, however, some things that you can do to get rid of them quickly.

  1. Try out this natural remedy - Take out potato juice and massage it into your skin every day. 
  2. Use a night cream or night serum to treat your dark spots. Allow it to work overnight for the best results.


2. How to remove dark spots caused by pimples?

As we discussed earlier in the article, spots caused by acne or pimples are called acne scars. Unlike dark spots, they are not caused by pigmentation and are difficult to remove. In Ayurveda, Red Sandalwood is considered a useful ingredient for lightening acne scars. You can use Anti-Acne Face Pack with Red Sandalwood as one of the ingredients to lighten dark spots caused by pimples.

3. How to remove dark spots on face fast?

Removing dark spots from the face is a slow process. While some chemical treatments may help you remove dark spots on face fast, they might have side-effects. 


We recommend that you start by developing sun-screening habits and apply night cream or night serum that helps in removing dark spots. Occasionally, treat your face with natural ingredients like lemon juice or potato juice to further accelerate the process. We’ve already shared a list of natural remedies in the article.

4. How to use lemon on face for dark spots?

Lemon is the most common natural ingredient used to treat dark spots as it is rich in Vitamin C. It’s easy to use lemon on your face for dark spots. Just squeeze the lemon into a bowl and add equal parts of water. Applying lemon juice on the skin without diluting might result in irritation. Use a cotton ball to apply the mixture directly to the areas with dark spots on your face and hands. If your face has any bruises, cuts, or dry skin patches, make sure you avoid them while applying lemon on your skin.

Conclusion

In most cases, dark spots on the skin are not a cause of concern, except for cosmetic reasons. However, it is advised to see a doctor if any of the dark patches on the skin either itches, bleeds, tingles, or changes in colour or size as these may be indicators of skin cancer. It is also important to understand that all of the solutions mentioned above might not suit everyone. It is advisable to do a patch test first before applying anything to the face. Home remedies and healthy skincare habits are for everyone, but remember to consult a doctor before trying out chemical peels and other hyperpigmentation treatments. 

References -

How to Use Henna To Dye and Nourish Your Hair

The recent surge in the number of people highlighting or dying their hair makes it seem like hair coloring is a recent phenomenon. However, this isn’t true. The art of hair coloring is centuries old! In the ancient times, people simply used plant-drives natural dyes like Henna and Indigo to dye their hair. 

Among all-natural dyes used across the world, Henna is the most popular and it isn’t without reason. Apart from being an amazing ingredient to naturally dye hair, henna also strengthens, conditions and nourishes your hair from deep within!

Are you thinking of using henna on your hair? If yes, then this guide to using henna to dye and condition your hair will educate you about the various benefits of applying henna on your hair, guide you how to color your hair using henna dye and conclude with some of the best Henna hair masks that you can use to condition your hair. 

What Is Henna?

Henna, also known as Hina, is an evergreen and flowering plant which belongs to the loosestrifes family. Even though most people associate Henna’s origin with India as it forms an integral tradition of Indian weddings, the origin of Henna using henna for beauty purposes was in Egypt. 

The earliest use of Henna was in 1200 BC when it was used to dye the hair and nails of pharaohs. It’s even said that Cleopatra herself used henna to adorn her body. For centuries, mehndi—the art of painting henna on the body—has been believed to bring love, good fortune, prosperity, and protect the wearer against all evil.

henna for hair

Henna is originally grown in Asia and the Mediterranean region, but today, it can also be found in the tropical and semi-arid regions around the world. It requires temperatures of 35 to 45 degrees celsius and grows on deep, sandy soil to ensure optimal production of pigment on the leaves. These leaves are dried and crushed to make a fine powder that provides the red-ish brown dye. This powder is mixed with other natural ingredients like black tea to color the hair.

It’s important to note that there are actually three varieties of henna - Natural henna, neutral henna, and black henna.

Natural henna also known as red henna, produces a rich-brown stain that can darken in the days after it is first applied. Natural henna is a pure form of henna unlike neutral or black henna which may not actually contain henna, but are instead made from other plants or dyes. If you want to dye your hair naturally, without causing any damage from harmful chemicals, this is the henna that you should use.

Neutral henna as the name itself specifies, this kind of henna doesn’t give any kind of colour to the hair. This powder is not from the plant Henna, instead, it is from a plant called Senna Italica. Some people use it as an alternative to henna when they want to condition their hair naturally without dyeing. 

Black henna is derived from Indigo and can contain unlisted dyes and chemicals such as PPD (para-phenylenediamine). PPD stains skin black quickly but can cause severe allergic reactions and permanent scarring if left on for more than 2–3 days. If you don’t like the red tint that comes with using henna and want to dye your hair black, we recommend that you use only pure indigo powder. You can dye your hair black naturally by using Indigo Powder and Henna Powder.

Read - How to use Henna Powder and Indigo Powder as a Natural Hair Dye?

Benefits of Using Henna For Hair

Henna, best known as one of the most popular beauty ingredients in India, has been taking care of most of our hair troubles since the times of yore. Women across the country have been taking their mother’s and grandmother’s advice on applying henna to their hair for years, if not centuries and reaping the benefits out of it. 

benefits of henna

It is a go-to ingredient for every natural hair care enthusiast. But, did you know that apart from being an extremely fabulous ingredient for naturally dyeing hair, henna offers a lot of other benefits for hair? This versatile hair ingredient can be used for maintaining overall hair health. Let’s discover how henna helps boost overall hair strength and growth. 

1. Henna Maintains Scalp Health

Henna has a cooling effect on the scalp. The antifungal and antimicrobial properties of henna help in maintaining the scalp health by fighting against various scalp issues like dandruff, scalp itchiness, etc. It helps in removing impurities from the hair which further helps in preventing dandruff.

2. Henna Balances PH levels and Oil production

Not only does henna helps you in keeping issues like dandruff at bay, but it is also an excellent ingredient for balancing the pH and oil production of your scalp. It helps in removing the excess oils from your hair, unclogging follicles and restoring the normal functioning of the sebaceous glands.

3. Henna Curbs Hair Fall and Boosts Hair Growth

The boosted scalp health, balanced pH levels, and unclogged pores that we discussed above help put a stop to hair fall and promote healthy hair growth. Henna not only helps in growing your hair faster but also improves the texture of your hair.

4. Henna Strengthens And Repairs Hair

The nutrients in henna help repair hair damage while also nourishing your hair. It helps to seal the hair cuticle which results in hair locks that are more lustrous. This indeed helps in improving hair elasticity.

5. Henna Conditions Hair

Henna helps in building a protective barrier around each one of your hair shafts, locking in the moisture and keeping the hair conditioned. It can be very beneficial when we use it along with other hydrating ingredients. Henna helps in minimizing issues like split ends and hair breakage.

How To Mix Henna For Hair?

While the leaves of the henna plant were used for hair care traditionally, modern India is now using henna powder instead to get the same benefits. All you need to do is ensure that you are using only 100% organic and pure Henna Powder. Any chemicals present in henna will impact the color you obtain on your hair and some of these chemicals could even cause hair damage. 

natural organic henna powder

Ready to dye your hair with Natural Henna? Here is all you need to know about mixing henna for hair.

What color will I get when I use henna to dye my hair?

Henna’s coloring properties are due to Lawson, a burgundy organic compound that has an affinity for bonding with protein. The color that results from dying with henna can fall into a broad spectrum, from red to orange, burgundy, chestnut brown. The longer you keep henna on your hair, the deeper and stronger color you’ll get. If you wish to dye your hair black, use Henna Powder with Indigo powder.

How to use Henna to dye your hair?

Some brands recommend creating a mixture of Henna Powder and Indigo Powder to get brown hair. However, when you’re using Kama’s Natural Hair Colour, you only need to apply Henna to dye your hair brown naturally.

Follow these simple steps, to get brown to reddish brown hair. 

  1. Soak the Henna Powder (100 gms for short hair, 200 gms for shoulder-length hair, 300 gms for long hair) in an iron skillet in Tea Water or Coffee Water overnight. (Adding coffee makes the red color of henna more visible.) 
  2. Add a dash of Lemon Juice if you wish. Add Yoghurt or Egg for additional conditioning. 
  3. On the next day, apply the paste on clean, product-free hair for 2 hours, depending on preferred intensity. 
  4. Rinse well with water, repeating as many times as you intuitively need. Do not use shampoo.
  5. Wash your hair with a cleansing shampoo the next day. You can choose shampoos with Ayurvedic ingredients like Hibiscus for hair. Unlike other shampoos, natural shampoos made from Hibiscus cleanse the hair without stripping the scalp from its natural oils.
henna hair packs

Henna itself is an excellent ingredient for boosting hair growth and strength. But for extra nourishment and added benefits, you can use it in combination with other ingredients. Below are some henna hair pack recipes that you can make from the comfort of your home. 

Henna And Amla Hair Pack

  1. In a glass bowl, mix three tablespoons of henna, one cup of amla, and two tablespoons of fenugreek powder with a little water. Make a thick paste. 
  2. Now, add one egg white and squeeze one lemon to the paste.
  3. Leave the mixture to sit for about an hour.

This paste is a nourishing and protein-filled hair pack that helps in curbing hair fall and promoting hair health. As eggs are rich in protein, it boosts hair health. While fenugreek helps in clearing the scalp and reducing hair loss, henna and amla powder curb hair loss.

Henna Curd And Egg Hair Pack

  1. Mix two tablespoons of henna and one tablespoon of Shikakai powder with a sufficient amount of water to make a paste. 
  2. Let this paste sit overnight and in the morning, add one egg and a tablespoon of curd. Apply this mixture all over the hair and scalp and wash it off with lukewarm water after 40 to 45 minutes.
  3. You can apply this pack once a week.

This hair pack helps you in making your hair glossy and much more manageable. It has conditioning properties and is rich in proteins. This pack removes impurities from your hair follicles without drying out the scalp.

Henna And Banana Hair Pack

  1. Make a thick paste out of henna powder by adding a sufficient amount of water.
  2. Let this paste sit for more than 8 hours.
  3. Now, mash a ripe banana in a bowl and add the soaked paste to it. 
  4. Apply the paste to damp hair and leave it on for about 5 minutes. You can apply this pack once a week.

Banana and henna pack reduces split-ends and conditions your hair. This pack helps in making your hair glossy and more manageable.

Henna And Multani Mitti Hair Pack

  1. Make a smooth and consistent paste out of two tablespoons each of Multani Mitti and henna by adding a little bit of water. 
  2. Apply this paste to your hair before you crash on your bed. Wrap the hair with a towel that you wouldn’t mind staining it. 
  3. Use a mild sulfate-free shampoo to wash your hair in the morning.

This pack helps in curbing hair loss caused due to oily scalps. Multani Mitti helps in cleansing your scalp by removing dirt, grease, and impurities. But, this pack is not recommended if you are suffering from sinusitis, migraine, rhinitis, or asthma as it may trigger symptoms.

Henna And Coconut Milk Hair Pack

  1. Warm a cup of coconut milk and add 10 tablespoons of henna powder to it.
  2. Add four tablespoons of olive oil and mix well until it is free of lumps and you get a smooth and consistent paste.
  3. Apply to hair and leave for an hour. Then, wash it off with a mild sulfate-free shampoo.
  4. You can apply this hair pack once a week.

This hair pack is ideal for those with extremely dry hair. Coconut milk is best known for its nourishing and strengthening properties.

Henna And Hibiscus Leaves Hair pack

  1. Grind a few leaves of the hibiscus plant and henna together to get a consistent and smooth paste. You can also add a little bit of water to it.
  2. Then, add a few tablespoons of lemon juice to the paste.
  3. Apply this to the hair and leave it for about 20 minutes. 

This pack helps in controlling dandruff and maintaining scalp health. Studies have shown that hibiscus can aid hair growth.

Henna and Green Tea Hair Pack

  1. Mix a cup of henna powder and a warm cup of freshly brewed green tea together to get a smooth, consistent paste.
  2. Keep it for overnight.
  3. In the morning, add a few drops of lemon juice and mix well.
  4. Apply this to your hair and leave it on for 30 minutes.
  5. You can do this once every month.

This pack helps in coloring your hair and covering greys. Instead of orange-red, if you prefer a brown color, you can substitute green tea with black coffee. This is ideal for those who have oily scalps. Green tea is known for stimulating hair growth.

Who knew henna could do more than just coloring? Include these henna packs to your daily routine and enjoy its benefits. Also, make sure you use organic henna that doesn’t contain any kind of chemicals and additives to reap its benefits.

How To Apply Henna On Hair?

Now that you have learned how to mix henna hair packs, it’s time for us to discuss how to apply henna on hair. Read the following step-by-step guide on how to apply henna to your hair properly.

Step 1: Before applying henna, you need to wash your hair with a mild shampoo. Do not use a conditioner as it can prevent henna from penetrating. Apply come coconut or petroleum jelly to your forehead, neck, and ears to prevent staining. To protect your hands and nails, wear gloves.

Step 2: Part your hair in the center after combing it thoroughly to remove all the tangles. Take a small section about 2 inches wide of hair from the topmost layer and apply henna paste liberally from the roots towards the tips using a brush. Make sure you cave the hair well. Do the same on the other sections of the hair too.

how to apply henna

Step 3: As you move from one section to the other, twist the applied section and wrap it into a bun. You can use a clip or pin to secure it.

Step 4: Once you covered all the sections and made sure the entire hair is applied evenly, take a plastic wrap and cover your hair. This wrap will help henna to set as the cling plastic will help in keeping the henna warm and moist.

Step 5: To remove the henna, flip your hair over and pour some warm water over your hair and massage the henna off with a scalp massager comb. This helps in removing any gritty pieces of henna, But, you have to be gentle when you do this. To get the remaining henna out of your hair, use a conditioner. Rinse the hair with lukewarm or cold water.

Henna takes over 24 to 48 hours to develop properly. Initially, it appears orange, but don’t worry as the color will deepen later.

Henna On Hair - Precautions And Side Effects

It is very important to make sure that the henna you are using is 100% organic. To improve the color results, most of the henna powder manufacturers use chemicals such as PPD (paraphenylenediamine) which are harmful and can result in the following problems.

  • PPD is an allergen that can cause adverse reactions when came in contact with the skin. You might not have a reaction from the first couple of uses. But, the more your skin comes in contact with these chemicals, the more likely you are to have an allergic reaction. (10)
  • Some chemicals in henna powders can also be extremely drying. They may end up over-processing your hair and make it rough, dry and unmanageable. This results in issues like bad hair texture, breakage, dandruff, and extremely unmanageable hair.
  • Also, if henna comes in contact with your hair, it results in redness, watery eyes, itching and irritation. In this case, immediately rinse your eyes with cold water. If the problem persists, we recommend that you visit an eye specialist as soon as possible.
side effects of henna

Now, let us answer some common FAQs on henna for hair.

FAQ’s On Henna For hair

How long does Henna stay in your hair?

Henna is a permanent hair dye and the color is the most vibrant in the color may last between 4 weeks or less. Depending on your hair, you might need to color twice a month. Always keep in mind that henna is very hard to lift out of your hair. So, if you want to dye your hair later, it might be difficult to go for a lighter color shade.

What is the difference between natural henna and black henna?

While natural henna has a greenish-brown or dark green color and has a strong odor, black henna is black in color and has a chemical or no fragrance at all. After applying, natural henna leaves orange color and starts turning dark in 24 to 48 hours. But, black henna immediately leaves a black stain on the skin or hair. While natural henna is a product of the henna plant, black henna is made of chemicals like PPD that can be dangerous. 

Can henna make you sick?

Henna is safe for most adults when used on the hair or skin. But, sometimes if it is not natural, it can cause some side effects such as dermatitis (inflammation on the skin), itching, swelling, redness, scaling, burning, broken skin and scarring of the skin. Rarely, it might cause some allergic reactions such as runny nose, wheezing, hives, and asthma. Henna is considered unsafe when taken by mouth. We recommend not to use henna for children, especially infants.

Can I use Henna powder on chemically treated hair?

Yes, it is safe to use natural and 100% henna and indigo on chemically treated hair. However, it is suggested to wait 5-6 weeks between chemical treatment and hair coloring.

Does henna cover grey hair?

Henna, when mixed with some natural ingredients like amla powder, coffee powder, and curd or plain yogurt, can cover your grey hair.

References:

  1. Pharmacognostical and preliminary phytochemical investigation of Lawsonia inermis L. leaf - https://www.researchgate.net/publication/265028676_Pharmacognostical_and_preliminary_phytochemical_investigation_of_Lawsonia_inermis_L_leaf
  2. Lawsonia Inermis Linn: A Plant with Cosmetic and Medical Benefits - https://www.researchgate.net/publication/299545214_Lawsonia_Inermis_Linn_A_Plant_with_Cosmetic_and_Medical_Benefits
  3. Ethnopharmacological survey of home remedies used for the treatment of hair and scalp and their methods of preparation in the West Bank-Palestine - https://www.ncbi.nlm.nih.gov/pmc/articles/PMC5499037/
  4. Neutron activation analysis of essential elements in Multani mitti clay using miniature neutron source reactor - https://www.researchgate.net/publication/230632005_Neutron_activation_analysis_of_essential_elements_in_Multani_mitti_clay_using_miniature_neutron_source_reactor
  5. Plant-based milk alternatives an emerging segment of functional beverages: a review - https://www.ncbi.nlm.nih.gov/pmc/articles/PMC5069255/
  6. In vivo and in vitro evaluation of hair growth potential Hibiscus Rosa Sinensis Linn - https://www.academia.edu/7424708/In_vivo_and_in_vitro_evaluation_of_hair_growth_potential_of_Hibiscus_rosa-sinensis_Linn
  7. Human hair growth enhancement in vitro by green tea epigallocatechin-3-gallate (EGCG) - https://www.ncbi.nlm.nih.gov/pubmed/17092697
  8. Side-effects of henna and semi-permanent 'black henna' tattoos: a full review - https://www.ncbi.nlm.nih.gov/pubmed/23782354/

27 Beauty Tips To Make You Feel Beautiful Inside Out.

This evening, watching a gorgeous girl in a TV show describe herself as “not being very pretty or attractive” got me thinking about my definition of beauty and wanting to ask you - what’s yours?

What is beauty? Well, the oxford dictionary defines it as, “A combination of qualities, such as shape, color, or form, that pleases the aesthetic senses, especially the sight."

what is beauty

But, what do you think beauty is? Is it the symmetry of your face, it is your bone structure, body shape, color, race, age, weight, or how flat your stomach is? Do you think beauty is what you see on the TV popularised by culture or trends? Or is beauty down to the facialists and makeup artists who transform your face and bring about a bloom of youth in you?

Each culture has a different perception and definition of beauty. For example, the Kayan tribes believe that long giraffe necks are the ultimate sign of beauty. So, people there from age five start priming their necks with heavy brass rings. Similarly, people from several parts of Asia often consider pale and white skin a sign of affluence and beauty.

There are chances that some of these cultural and regional definitions of beauty affected you while growing up.

Redefining what beauty really is

Have you ever looked into a mirror that is completely steamed and fogged up after having a hot and steamy bath? Well, I think that is how we tend to view our beauty.

We can see ourselves, but the mirror has been fogged up by various life experiences and memories as we grew up. And we struggle to fit into our own definition of our beauty. Hence, it’s time we redefine what being beautiful really means to us.

Ayurveda defines true beauty as “Roopam, gunam, vayastyag, iti shubhanga karanam”.

Here roopam is the outer beauty (reflected by a healthy hair and clear, radiant complexion) , gunam is inner beauty (reflected by warm personality and an innocent heart) and vayastyag is lasting beauty (reflected by feeling young and healthy). This holistic definition of beauty is in reach for everyone and is closely associated with overall physical and mental health.

ayurveda philosophy

Real beauty lies in the acceptance of yourself and in realising that all of your flaws are a part of you and make you who you are. Beauty is the radiance of spirit, kindness to ourselves, and to others, having a good character, strength and self-confidence. In simpler words, beauty is being healthy both emotionally and physically.

These are not just my words, an annual beauty survey conducted recently on over 20,000 male and female consumers in 20 markets across the globe revealed that looking healthy is the top-rated definition of beauty. This was followed closely by “hygiene and cleanliness,” “inner confidence,” and “being comfortable in your skin” whereas “looking presentable,” “maintaining a youthful appearance,” “looking your best” fell lower on the list.

Factors Affecting A Beautiful Body

Most beauty tips focus on giving you some hacks that promise instant fix to your problems. But if you focus on the factors listed below, you’ll genuinely experience feeling beautiful.

  • Stress

The primary cause of significant hormonal imbalances inside your body is stress. It also affects your skin by damaging the skin’s barrier function, which reduces its ability to absorb and retain moisture. This dehydrated skin looks dry, patchy, and becomes flaky over time. In ayurvedic terms, stress is related to the balance of the three doshas (Vata, Pitta, and Kapha).

The easiest way to combat stress is to include exercise in your daily routine. Going for a walk and doing yoga and meditation everyday helps in managing stress.

yoga for soul
  • Sleep

Lack of sleep at night makes you feel sleepy and tired the next day. It also makes your skin deal with the lack of rest, which is why the radiance is lost. Problems such as under-eye bags, saggy skin, and dark circles arise. Ayurveda claims that having 7 to 8 hours a day is not enough; one should sleep at the right time as well.

  • Poor Nutrition

Ayurveda chants, “Food is medicine when consumed properly.” What you eat determines how healthy you feel. Make sure you eat foods that are rich in Vitamins and Minerals to maintain a healthy gut and to keep your skin glowing. For detoxifying your skin, add colorful fruits and vegetables to your diet and get supple and acne-free skin.

  • Not Applying Sunscreen

Even if your job doesn’t require you to stay outdoors, even then, your skin gets exposure to the harmful UVA and UVB rays of the sun that cause lasting damage. Hence, you should make use of natural sunscreens with SPF 21 or above. Otherwise, the rays penetrate your skin, weaken the collagen cells, lead to pigmentation and tanning in the long run.

natural sunscreen

Of course, smoking affects your body adversely. But, do you know that it strips your skin of essential nutrients and oxidants, leading to degradation of the basic units of skin-collagen and elastin?

These affected units will lead to uneven skin, sagging and appearance of fine lines. A study has also proved that smoking blocks the pores in the skin which results in acne.

  • Environment

Different types of environmental pollutants have their own effects on our bodies and skin. For example, chemicals such as tar and oil can cause acne or folliculitis as they clog our pores while other materials can cause fluids to build up in the skin and result in tissue break down. They can also lead to issues like bacterial infections, hair loss, and skin pigmentation. If you are not careful, extreme climatic conditions can also damage your body and skin.

It’s essential to wear suitable clothing according to the weather, to apply sunscreen regularly and to keep your face covered to protect it from environmental damage when the air is severely polluted. It is also essential to cleanse your skin in the morning and at night and to use natural oils such as Moringa Oil to reverse the skin damage caused by pollution.

super cleanse for skin

Beauty Tips For Skin And Hair

We are constantly bombarded with products, opinions, and advice galore when it comes to skincare and hair routines. I don’t blame you if you are confused and your skincare routine is all over the place. From your dermatologist asking to include more antioxidants in your diet to your grandmother asking you to ditch the chemicals and go all-natural, everyone has their own opinions and advice.
So, to make your life easy, I’ve stockpiled some beauty tips that are proven to be effective and are simple to follow. Trust me, following even a few of them, will help you feel more beautiful and radiant.

The Best Skin Care Tips for Face and Body

One of the most common mistakes that people commit while trying to take care of their skin is trying to follow what others suggest or what works for them. Ayurveda strongly emphasizes how every individual is different.

1. Know your skin type and how it responds to the weather

The first step is to identify what doshas are prominent on your skin. Here are a few characteristics of different doshas. You might have one or more of them. You might also realise that a few of these doshas get aggravated by change in weather.

Vata Skin Type - Your skin is thin, dry, has fine pores and is usually cool to the touch. You may experience excessive dryness in some weather and your skin easily shows signs of ageing and stress.

Pitta Skin Type - Usually fair in colour and warm to touch, Pitta skin is thicker and can break out easily. This type of skin is also more prone to rashes

Kapha Skin Type - This skin type is thicker and oilier. While people with Kapha skin types don’t have to worry about ageing till much later, they frequently suffer from excessive oiliness and have enlarged pores that attract dirt and cause pimples.

effects of doshas on skin

2. Learn to treat your doshas

While understanding your doshas and treating them is a long process, here are a few beauty tips for your based on your dosha.

Vata Skin Type - Your skin needs moisturisation and hydration as it’s unable to retain moisture. So, make sure you drink ample water and apply natural and nourishing moisturisers to your skin. In winters, you can even apply coconut oil for hydration.

Pitta Skin Type - Your skin is sensitive and you should protect it from harsh conditions like excessive sun exposure. Use natural cleansers and creams meant for sensitive skin and apply sunscreen before you step out.

Kapha Skin Type - Your skin is prone to attracting oil and dirt and hence, you should focus on cleansing well. Apart from cleansing at least twice a day, exfoliate your face once or twice a week.

3. Bathe your skin with milk

When you have irritated or inflamed skin, try having a milk bath for its soothing and calming effects. Milk has tremendous softening and moisturizing properties, thanks to its fats and lactic acid content. You can even dip a cotton ball into a small bowl of raw milk and apply all over the face and neck once a day. This helps in removing the dirt from your pores. Full-fat milk or cream-based masks are wonderful for soothing and nourishing your skin. If you are a vegan, try coconut milk as it has similar properties.

4. Use A Dry Brush To Scrub Your Skin While Bathing

According to Ayurveda, using a natural bristle dry brush on our body is a key to toned and firm skin. It is great for places that retain fluid and helps cellulite. You have to start with your feet, massage in upward, circular motions towards the heart and then rinse it off.

For Vata and Pitta skin types who have sensitive and dry skin, it’s recommended to use softer brushes that are effective but less abrasive from exfoliation. For Kapha skin, you can use a natural bristle brush.

5. Use Aloe Vera On Face On A Daily Basis

Aloe Vera is not just for sunburns. It also helps in making the skin smooth, supple and younger-looking. While some use it as a toner or treatment, others swear by a daily swig and sip it in a juice. You can simply apply Aloe Vera all over your face and neck, leave it on for 15 to 20 minutes and then rinse it off with plain water.

aloe vera benefits for skin

6. Learn To Give Yourself A Massage With Oils

You might have heard that an Ayurvedic massage helps in managing stress, but did you know that it also boosts the radiance of your skin? Abhyanga, an ayurvedic massage done with warm oil not only moisturizes you deeply, but also gives you a radiant looking skin afterwards. When done regularly, it offers many health benefits. You can actually give a massage to yourself by working from your face down to the soles of your feet. Even a two-minute massage before bed with a suitable oil can do wonders for your skin.

Read - Which body massage oils are recommended by Ayurveda?

7. Apply Facial Oils

My face goes through a lot every day, it tackles the tests of the weather, regular touches like scratching my nose and rubbing my eyes etc.. I thought maintaining a youthful and healthy glowing skin is impossible. But thanks to Ayurveda, I found some facial oils that balance my dosha, detox my skin and provide it with a youthful nourished glow I have been searching for. One of them is the timeless recipe called Kumkumadi Oil which is suitable for all skin types. For a naturally glowing skin, you can choose a natural facial oil according to your skin type/dosha and start using it on your face regularly.

kumkumadi oil review

8. To Cure Dry And Flaky Lips, Mix Sugar And Vaseline

Are you a self-proclaimed lipstick addict? If you don’t give your lips a treatment once in a while, do they look unhealthy? Do they look cracked and sore all the time? If yes, then you should definitely try this hack. Mix sugar and vaseline together and massage on your dried and tired lips. It works just like a lip scrub. Also, make sure you apply a natural lip balm on your lips at least once a day to provide your lips with a healthy dose of hydration.

9. Do not forget the good old CTM

One common skin care regimen for all skin types is the popular CTM - Cleanse, Tone and Moisturize routine. Every morning and night, make sure you wash your face with a natural cleanser and then use a toner like Rose Water that is suitable for all skin types. In the morning, follow it up with a day cream and at night, follow it up with a night cream or a night serum.

kama ayurveda skin care ritual review

Want to try CTM but don’t know how to get started? Kama’s Day Care Regime and Night Care Regime are great to begin with!

What To Eat For Healthy skin

It’s futile to use expensive products for your skincare routine and makeup routine when you don’t eat healthy. Because ultimately no matter what you apply from the outside, it is what you eat that makes you glow. Look at the following beauty tips about eating your way to a healthy and glowing skin.

10. Eat At least Five Portions Of Raw Fruits And Vegetables Everyday

Free radicals, pollution, sunlight and smoking can cause wrinkles and age spots. So, to help protect your skin from cellular damage and free radicals, eat fruits and vegetables that contain powerful antioxidants. Beta Carotene, found in sweet potatoes, pumpkin and carrots, and lutein found in papaya, spinach and kale are potent antioxidants that are important for healthy skin and normal skin cell development. Aim at least five portions of food rich in antioxidants in a day.

11. Go For Low GI Carbs

The GI (glycaemic index) is a system that ranks carbohydrate-based foods on how quickly and slowly that gets broken down into glucose in the body. Try to eat low GI or slow-releasing carbohydrates like beans, pulses, porridge etc. High GI foods like sugary drinks and biscuits damage collagen and accelerate wrinkles.

12. Eat Enough Vitamin C and Vitamin E

Vitamin C is rich in antioxidants, supports the immune system, helps blemishes heal properly and promotes radiant skin. Vitamin C is needed for the body to produce collagen which helps in strengthening the capillaries. Vitamin E protects from cell damage and supports skin growth. Foods high in vitamin C and vitamin E include oranges, papaya, strawberries, blueberries, broccoli, guava, almonds, avocados, hazelnuts, sunflower, beetroot and corn oils.

beetroot benefits for skin

13. Eat Plenty Of Zinc

Zinc in the body is responsible for the normal functioning of sebaceous glands in the skin, keeping skin soft and supple and repairing skin damage. Foods that are rich in Zinc include whole grains, seeds and nuts.

14. Stay Hydrated

Dehydration makes your skin look dry, tired and slightly grey. It needs moisture to stay healthy and flexible. While all fluids count towards your daily intake, water is the best source of hydration. You should at least drink six to eight glasses of water a day.

Keep a large bottle of water on your desk to remind you to drink while working. Caffeine-free herbal teas also do the job pretty well. Also, fruits and vegetables like watermelon, cucumber and courgette contribute to overall fluid intake. The added benefit is that the minerals that these foods contain accelerate the hydration of your body and skin.

water to stay hydrated

Best Hair Tips

14. Use a hair Protection Serum Before Using Your Hot Tools

Well, we all love our hair after a blowout or a heat styling session. We also know that excessive styling can do a number on our hair. No, I am not saying that we need to part with our hot tools totally, but we should make one adjustment to our routine when we are using heat to style hair. We should apply a protective products like heat-protecting serum or a spritz first before straightening, curling or blow-drying our hair.

15. Learn how to shampoo your hair properly

There are different shampoos for oily, dry and combination hair types. So, find the appropriate one that suits you better. Also, make sure you cleanse your scalp and the hair roots properly. Shampoo should always be concentrated on the scalp, washing lengths and hair tips will lead to dry and dull hair that lack lustre. Scalp that produces oil sheds the skin regularly and must be cleaned properly. This oil if not cleaned well from the scalp can lead to scalp odour, stench, dandruff and stickiness.

pitta dosha effects on hair

16. Try Paper Towels For Beachy Waves

Hair stylists recommended using a paper towel to help air-dry your hair while keeping your curls intact. Instead of blasting the curls with hot water and crushing them with a heavy towel, simply scrunch up your damp curls with a paper towel and to help them spring to life. In the mornings, you can wet your hair and do the same thing without using a hair dryer.

17. Replace Your Hair Towel With An Old T-shirt

Use a clean T-shirt instead of a regular towel to wrap my hair after you shower. Doing so can cut down frizziness and breakage. Try this simple hack to get softer, smoother and shinier hair.

Homemade beauty tips

We might be using an endless array of products daily for our skin and hair. But once in a while going back to what our grandmas used to repeatedly tell us is fun and nostalgic, not to mention, very effective.

There are certain age-old remedies that are very effective and have stood the test of time. Even Ayurveda recommends us to follow them to look and feel beautiful. Dive in to know some of these ‘dadima ke nuske’.

clean ayurvedic beauty solutions

18. Quick Restoring Masks

The following face masks help in curing skin problems naturally and bring out the lost radiance. You can prepare most of these yourself by using the ingredients in your fridge/kitchen.

For Lifeless And Dull Skin
Mix apple juice and honey and apply a thin layer to your face. Leave it for 5 minutes.

For Dark Circles And Puffy Eyes
Finely grate one potato and apply it to the area under your eye. Leave it on for 15 minutes and then rinse it off with plain water.

For Irritated Skin
An irritated skin can be calmed with a buttermilk mask, just apply on your face and neck for about 15 minutes and rinse it off.

19. A Natural Exfoliant pack - Ubtan

Mix one teaspoon of besan or gram flour, a pinch of turmeric powder, half a teaspoon of milk, a few drops of lime juice and add water to get a smooth paste. Apply this paste all over the face and leave it on for about thirty minutes until it dries. Rinse it off with plain water. Lime juice and the lactic acid in milk mildly brightens and exfoliates the skin. Being a fantastic antiseptic, turmeric helps with acne and of course, besan is a great exfoliating agent.

ubtan benefits for skin

If you don’t want to prepare your own Ubtan everytime, you can simply choose Kama Ayurveda’s Ubtan and directly apply it on your face by mixing it with rose water.

Read - The 2 Best Ayurvedic Ubtan Recipes for a glowing skin

20. Homemade Kohl

Aren’t you guilty of using chemical products for your skin, especially for your eyes since they are the most sensitive ones? Want to make Kohl in a quick and easy way?

You can actually make kohl at home by placing a copper bowl over a diya while keeping it a little gap to allow the flame to get oxygen. You can burn the diya with any type of oil (sesame oil, canola oil or castor oil) and let it flame for about an hour or two. The black residue that is left in the copper bowl can be used as kohl.

21. Three Ingredient Hair Mask For Dull and Lifeless Hair

A simple three-ingredient hair mask can be your saviour from hair dryness. You just need a ripe banana, honey and yoghurt. Blend together mashed banana, two teaspoons of honey and 2-3 tablespoons of yoghurt (depending upon the length of hair) in a bowl. Apply this along the length of the hair from top to bottom and allow it to stay for at least 20 to 30 minutes. Then rinse it off using a mild shampoo.

All these ingredients are loaded with nutrients that keep your hair healthy and strong. Honey is an excellent moisturizing agent and is also anti-bacterial in nature, yoghurt is dense in calcium and vitamin D and bananas are packed with the goodness of antioxidants and potassium. Therefore, when combined together, this hair mask will bring back the lost moisture of the hair and makes it look lively and bouncy.

If you have a very oily scalp, then you can simply apply orange juice and honey on your hair as a hair mask.

beauty tip for oily hair

To protect your hair some the damage caused by hot tools, you should use a hair protective product. Try this homemade remedy to prepare a hair protective spray on your own.

Take one teaspoon of coconut oil, two teaspoons of your regular hair conditioner, one teaspoon of sweet almond oil, five drops of geranium/ylang ylang/tea tree essential oil and one cup of distilled water. Take a spray bottle and pour half a cup of distilled water, then add the remaining ingredients. Now, top up the bottle with the remaining distilled water. Shake well and use this as your hair protective spray.

Beauty Tips For Men

If you really care about the health of your skin, your body, your hair, then there is nothing wrong in having a bit of a beauty regimen. Beauty isn’t gender specific and there’s no reason for men to care any less about your skin. With the following simple beauty tips for men below, you can keep your body happy without doing overdoing yourself.

22. Keep Your Skin Moisturized

Are you really taking care of your skin- the largest organ in the body? Do you make sure it is healthy and hydrated? If not, then it’s time to start doing it! Drink plenty of water and apply lotion after your shower. Also you need to use two, one for your body and one for your face. Yes, moisturisers and face creams are for men too!

kama ayurveda men cream review

23. Use Shampoo That are Especially For Men

Men should use shampoos that are tailored to them as their scalp is more likely to become itchy, irritated and react poorly to certain ingredients. They also tend to produce more oil when compared to women. So, you should grab a shampoo that can cleanse your hair without over-drying it. Look for shampoos with natural ingredients such as Aloe Vera and Amla for best results.

24. Look Up For Shave Creams After You Groom

Blades can cause irritation and in-grown hairs. So, if you are not using an aftershave cream, then you should immediately start using one. Choose the one with soothing and anti-oxidant ingredients that will save your skin from redness and irritation. Also, do not forget to prep your skin before shaving by washing your face with a mild natural cleanser.

men face cleanser

25. Men Must Use Conditioner Too

Most men assume that they don’t need conditioner. Well, if your hair is under two inches then you might be able to get without using it. But, if at all you have longer hair, then you should definitely add a bottle of conditioner to your shower shelf. A conditioner will help you in adding back the moisture your shampoo strips away.

26. Scrub before you shave

Removing dead cells from the skin leaves healthy and radiant skin for both men and women. Exfoliate your skin well by using a face scrub that buffs away dirt, oil and old cells that might be matting down your facial hair and blocking your razor’s path. Use a scrub on your face before you shave. This will close the pores and soothe the skin. After shaving, pat dry your face and apply a lightweight moisturizer made with shea butter or cocoa butter that help in making your skin soft and comfortable.

face scrub men

27. Whiten Your Smile

Healthy white teeth, not only looks good but also saves your time and money at the dentist’s office. You should brush, floss and use a mouthwash on a daily basis. That way, you can lower the risk of gum diseases, cavities, bleeding and infections. If you are a serial smoker or drink a lot of coffee that makes your teeth look yellow and unhealthy, talk to your dentist about whitening options. Simple hygiene adds to your overall beauty!

Conclusion -

These tips are only for you to look and feel healthy and definitely don’t define your beauty. All these beauty tips are useless if you use any external yardstick to measure your beauty. Because ultimately beauty comes from within.

When you look at a flower or a sunset or a piece of art, you don’t judge it. You simply appreciate it for what it is, don’t you? I think it is now time for you to appreciate yourself as you would do to any other masterpiece. It's time for a new mirror that is wiped clean from the fog of comparisons, accusations, expectations and judgement. Take a look, a real hard look and embrace you as you, accept you as you - beauty.

How to get glowing skin naturally

If you ask a woman about what she desires in life, having a picture-perfect glowing skin is one thing that she’ll place on the list. But sadly, there’s no easy fix to get a radiant skin.

The only way to get glowing skin naturally without any makeup, is regular skin care.

But lack of sleep, stress, ageing, pollution, harmful sun rays, excessive smoking, drinking alcohol and following an unhealthy diet rips that natural glow from the skin, leaving it dull and shabby.

Have you been there, too? Then, don’t worry. You cannot always protect your skin from environmental stressors as they are unfortunately a part of our lives. Work related stress also continues to take a toll on our skin health. (1)

However, you can always follow simple remedies and a healthy diet to restore the lost radiance to the skin. Ayurveda has many such glowing skin secrets that can help us in protecting our skin.

how to get glowing skin

Ayurvedic tools like facial oils, packs, scrubs and ubtans gently nourish your skin, cleanse the pores and help the skin breathe better. And what’s more interesting is that you can find most of these ingredients in your kitchen!

So, if you’ve always wondered how you can get a glowing skin, these natural remedies for healthy and radiant skin will be your answer.

1. Apply Turmeric Paste on your skin

Turmeric is one of the most powerful Ayurvedic ingredients for skin. In Sanskrit, it’s known by names such as “Haridra”(“The Yellow One”), “Gauri” (“The One Whose Face is Light and Shining”) and “Kanchani” (“Golden Goddess”). These names and the ancient traditions of women applying turmeric (haldi) on their face are evidence of its ability to reveal a glowing complexion.

turmeric for a glowing skin

How To Make: Mix one teaspoon of Turmeric powder with 4 tablespoons of Gram Flour and add enough milk or water to form a smooth paste.

How And When To Apply: Apply the paste to your face and neck and leave it on for about 15 to 20 mins. Then, rinse it off with plain water. Repeat this process once or twice a week.

Why This Works: Turmeric contains a substance called curcumin which has very strong antioxidants and anti-inflammatory properties. So, it eliminates the harmful free radicals that damage the skin. Turmeric also keeps the skin supple and glowing by enhancing collagen production. Gram flour makes the skin clean and bright by gently cleansing it. (2,3)

2. Use Saffron and Honey mask on your skin

Saffron is the most expensive spice in the world and not without reason. Only three strands of saffron can be extracted from a single Saffron flower. Saffron is a time-honoured Ayurvedic ingredient that balances all three doshas, nurtures the skin and makes it blemish free and radiant. (4)

saffron for a glowing skin

How To Make: Soak a few strands of Saffron in one tablespoon of honey and leave it for a couple of minutes.

How And When To Apply: Apply the Saffron-infused Honey on the face and neck and wash it off after 10 minutes. Repeat this three to four times a week.

Why This Works: Saffron is an ancient remedy to get glowing skin naturally. The antioxidants present in it helps in keeping the skin healthy and protects it from sun damage.

3. Use Kumkumadi Oil as facial serum at night

Kumkumadi Tailam (made from 16 unique herbs and oil) is one of Ayurveda's most effective glowing skin home remedies. The name Kumkumadi comes from one of its key ingredients - red-gold Saffron, which is known as Kumkuma in Sanskrit.

How To Make: As the process of preparing Kumkumadi Oil at home is complex and requires many ingredients to be used in the exact proportions, it’s recommended to buy Kumkumadi Oil from Ayurvedic beauty brands. For instance, Kama Ayurveda’s Kumkumadi Brightening Serum has Kumkumadi Oil which will help you get a perfect glowing skin.

kumkumadi oil for glowing skin

How And When To Apply: At night, take (2-3 drops) of Kumkumadi Serum on your palm, apply over the face with fingertips and gently massage onto the skin until fully absorbed.

Why This Works: Kumkumadi oil works as a natural skin illuminator by lightening the skin tone, improves skin texture and brightens dull skin.

Also read - Kumkumadi Tailam: Ultimate Guide To The Miracle Beauty Oil

4. Tone your skin with Rose Water

Rose is a special Ayurvedic ingredient that has soothing properties. It’s known to balance Sadhaka Pitta which in turn controls our emotions and makes us calmer and happier. By removing stress along with impurities from our skin, rose water helps in getting a natural glow.

rose water for glowing complexion

How To Use: Though there are ways to make rose water at home, we recommend you to use Pure Rose Water prepared by using the steam distillation method. Kama Ayurveda’s Pure Rose Water is one such option.

How And When To Apply: Soak a cotton ball with rose water and apply it all over the face and neck. Repeat this process every morning and evening. Alternatively, store your bottle of rose water in the refrigerator.

Why This Works: Rosewater is generally used as toner as it cleanses and refreshes the skin. By stimulating blood circulation, it also brightens the skin tone and balances the pH of the skin (5).

Also read - 5 Secrets About Kama Ayurveda Rose Water

5. Use Sandalwood Powder on your skin

Sandalwood is famous for its fragrance that’s known as The Fragrance of Paradise according to Hindu religion. Sandalwood induces Saumanasya Janana (Tranquillity, Placidity, Mind-Body Union) and is a long-lasting solution for smooth, taut and younger-looking skin.

sandalwood for glowing skin

How To Make: Mix two spoons of Sandalwood powder and Rose Water in a bowl to make a smooth paste.

How And When To Apply: Apply the paste all over the face and neck and rinse it after 15 to 20 mins. Repeat this twice a week.

Why This Works: The antiseptic properties in Sandalwood prevents pimples, acne and sores from developing. As one of the oldest blood purifiers, it also helps in removing pigmentation and dark spots.

Alternatively, you can use Kama Ayurveda’s Suvarna Haldi Chandan Face Pack. The Pure Chandan Oil in Suvarna is from sustainably sourced trees in Maharashtra, the heartwood of which has taken 60 years to mature.

6. Exfoliate gently with Lemon Sugar scrub

lemon for glowing skin

How To Make: Take two teaspoons of Lemon juice and two teaspoons of Sugar and mix them well in a bowl. Add a few drops of honey to prepare the scrub.

How And When To Apply: Apply the mixture on the face, scrub it in the circular motions and leave it on for 10 minutes. Wash it off with lukewarm water. Scrub this way twice a week.

Why This Works: Lemon helps in cleansing, bleaching and removing the tan from the skin (6,7). The sugar granules work as a scrub and help in getting rid of the dead skin. Lemon is considered as one of nature's best skin brightening agents.

7. Apply ripe Papaya on your skin

Ripe papaya contains an enzyme called papain. It acts as a mild exfoliator which gently removes the top layer of dead cells on the face and makes your skin radiant and younger-looking.

papaya for glowing skin

How To Use: Take a few pieces of ripe Papaya and add one teaspoon of Sandalwood powder or Multani Mitti and one teaspoon of honey. Mix these ingredients to get a paste-like consistency.

How And When To Apply: Apply the paste all over the face and neck and leave it for 20 minutes. Rinse off with cool water. Repeat this once every week.

Why This Works: Papaya also helps us in clearing the dirt and oil that can lead to acne and breakouts on the face (8). Multani Mitti absorbs the excess oil and honey moisturizes and hydrates the skin. Honey also helps in reducing the blemishes (10). Overall, this face pack acts as an anti-ageing and skin firming pack which helps you get a glowing skin.

8. Moisturize your skin with honey

honey for glowing skin

How And When To Apply: Apply pure Honey evenly on a clear and damp face and massage it thoroughly for a few minutes. Then, wash it off with lukewarm water. Do this on every alternative day.

Why It Works: The anti-microbial and hygroscopic properties in honey gives you clear and soft skin. As it is rich in antioxidants, honey will reduce blemishes and make the skin soft and healthy (11).

9. Massage your skin with Aloe Vera gel

aloe vera for glowing skin

How To Use: Mix one tablespoon of Aloe Vera gel from the aloe vera plant with a pinch of turmeric and one teaspoon of honey in a bowl. You can also add a teaspoon of milk to it.

How And When To Apply: Apply the mixture all over the face and neck and leave it for about 20 minutes. Wash it off with lukewarm water and pat dry it. Do this once or twice a week.

Why It Works: The ultimate remedy for skin problems is Aloe Vera. It nourishes, heals and rejuvenates the skin to give it a natural glow (12).

10. Apply ripe Banana paste on your skin

banana for glowing skin

How To Use: Mash a ripe Banana and with it with two teaspoons of milk and make it a smooth paste.

How And When To Apply: Apply the paste all over the face and neck. Leave it on for about 20 minutes and then rinse it off with plain water. Now, rub an ice cube all over the applied area for a few seconds. Do this once or twice every week.

Why It Works: A ripe Banana contains vitamin A, B, C and E, minerals such as potassium, etc. These minerals hydrate the skin, lighten the blemishes and leave it soft and glowing (13).

11. Apply Milk on your skin

How to get glowing skin naturally? The answer lies in one of your most common day-to-day beverages! The lactic acid present in Milk has a mild bleaching action that reveals a brighter complexion.

How To Use: Add two teaspoons of Milk to 1 teaspoon of honey and 1 teaspoon of besan and mix them well to form a homogenous paste. Alternatively, you can simply add Saffron to milk and leave it overnight and use the milk next morning on your skin.

How And When To Apply: Apply the paste all over the face and neck and leave it for 20 mins until it gets dry. Then rinse off the paste with warm water. Do this twice a week for best results.

Why It Works: This remedy is an age-old formula for a healthy and soft skin. People say Cleopatra’s beauty routine too included milk and honey. Raw milk is rich in skin-friendly ingredients such as saturated fat, protein, calcium, and vitamin C. (14)

milk for glowing skin

12. Use Green Tea on face to get a glowing skin

How To make: Boil one tablespoon of Green tea leaves in water until they impart colour. Then turn off the flame and cool it down. Now take 2 spoons of the solution and mix it with 2 teaspoons of brown sugar and 1 teaspoon of cream. Mix it well and make a smooth paste.

How And When To Apply: Apply the paste all over the face and neck and scrub it gently in circular motions. Wash it off after 10 minutes with cold water. Repeat the process once or twice a week.

Why It Works: Green tea leaves maintain the collagen production in the skin as they are rich in flavonoids. They help in maintaining the elasticity of the skin and reversing the signs of ageing (15). Green tea leaves also make your skin glow.

13. Drink Bitter Gourd juice for a glowing skin

How To Make: Take 2 or 3 Bitter Gourds, peel them and remove the seeds. Wash them thoroughly with water. Now, cut them into small pieces and blend them with 2 teaspoons of lemon juice. Add salt and black pepper for taste.

When To Drink: Drink the bitter gourd juice early every day or at least every alternate day.

Why This Works: Bitter gourds help in improving digestion and eliminating almost all infections. It’s the best food for skin glow as it works internally by purifying the blood (16, 17).

14. Orange Peel For Glowing Skin

How To Make: Take a few pieces of Orange peel and blend them well with 2 teaspoons of rose water. Make a thin smooth paste.

How And When To Apply: Apply the paste all over the face and neck and leave it on for about 10 minutes. Wash it off with cold water. You can do this once every few days.

Why It Works: The large amounts of citric acid and vitamin 3 in Orange will refresh the skin and relieve acne. It also helps in firming the skin and giving it a natural glow (18).

15. Coconut Oil For Glowing Skin

coconut oil for glowing skin

How To Make: Take a few drops of extra virgin coconut oil and warm it up. You can also add sugar granules to exfoliate the skin.

How And When To Apply: Apply the oil all over the face and neck and massage the skin gently in circular motions. Leave it on for an entire night. You can do this every night before going to bed. To exfoliate the skin, you can also add sugar and scrub your face gently every once or twice a week.

Why It Works: This will work best for dry and dull skin as the oil locks the moisture in the skin. Coconut oil also nourishes the skin with essential fatty acids. It gives glowing skin as the phenolic compounds contribute to its antioxidant activity (19).

16. Ubtan For A Glowing Skin

ubtan for bright skin

How To Make: Grind 1 cup of split red lentils (masoor dal) or chickpea flour (besan), ¼ cup of raw rice and 8 to 9 almonds either separately or together. To this, add ½ cup of oatmeal and a pinch of turmeric powder.

Mix this powdered mixture well and add enough water or rose water to make it a smooth paste. Alternatively, you can use Kama Ayurveda Ubtan as it’s one of the most effective glowing skin home remedies.

How And When To Apply: Apply the paste evenly all over the face and neck. You can also apply it all over the body. Let the pack dry and then wash it off with plain water. You can repeat this once every 7 to 10 days.

Why It Works: Ubtan is a face pack recipe that has been passed down from generations. It is mainly used for healthy and glowing skin. The lentils, rice and oatmeal will help in removing dirt and dead cells from the skin (20, 21). We all know turmeric will help in fading out the blemishes and will give a natural glow. Almonds also help in nourishing the skin and keep it hydrated (22).

Diet For Glowing Skin

In Ayurveda, there’s an equal emphasis on eating the right food. A healthy skin is impossible to get and maintain without a healthy diet. Eating fresh fruits and vegetables will help you in getting a younger and glowing skin as they are a storehouse of lots of vitamins and minerals. So, try to include them in your daily diet.

Some of the best fruits for glowing skin are papaya, oranges, guava, mangoes and kiwi. Vegetables like carrots, broccoli, tomatoes, bell peppers and green leafy vegetables also will give you a glowing skin. Remember, what you eat also reflects on your skin.

Read - 17 Best Foods For Glowing Skin According to Ayurveda

To conclude, following these glowing skin tips and using the best products for glowing skin can help you maintain a clear, radiant skin. If you need help in creating the best skin care routine for yourself, you can book a free consultation with our Ayurvedic beauty experts

How To Use Tea Tree Oil For Acne – Expert Guide

Is acne your biggest skin concern? Does your acne leave behind scars that don’t fade away with time? If yes, then you are not alone. As many as 90 percent of the world population is affected by acne at some point in their life.

What’s worse is that research has shown that acne can affect a person’s self-esteem and confidence. Acne can cause a lot of anxiety and the medications used to treat acne often result in side-effects of their own.

So, the question becomes - Is there a way to treat acne naturally? 

And, the answer is using Tea Tree Oil for acne

tea tree oil for acne

You might have noticed Tea Tree Oil becoming a popular ingredient in skin care products and it’s not without reason. Tea tree oil is a natural way of curing skin ailments. It is capable of treating a wide range of problems be it blisters on your skin, or cold sores or hair fall or even acne. 

Native to Australia, the pure essential oil of Tea Tree is prepared by distilling the leaves of a tree named as Melaleuca Alternifolia. This oil is a well-known topical antiseptic and anti-fungal treatment with superb acne fighting properties. 

tea tree oil for skin

Let’s now understand how tea tree oil actually works on the skin to prevent and treat acne.

How To Use Tea Tree Oil For Acne Spots?

Applying tea tree oil to acne spots can be an effective way to harness its antibacterial and anti-inflammatory properties. However, it's important to use it correctly to avoid skin irritation. Here's a step-by-step guide:

  1. Dilute the Tea Tree Oil: 

Pure tea tree oil is potent and can be harsh on the skin if applied directly. Dilute it with a carrier oil like coconut, jojoba, or almond oil. A general guideline is to mix 1 part tea tree oil with 9 parts carrier oil.

  1. Perform a Patch Test: 

Before applying it to your face, do a patch test on a small area of your skin, like the inside of your elbow, to ensure you don't have an allergic reaction.

  1. Cleanse Your Face:

Wash your face with a gentle cleanser to remove dirt and excess oil. Pat your skin dry with a clean towel.

  1. Apply the Oil to Acne Spots: 

Using a cotton swab or a clean fingertip, apply a small amount of the diluted tea tree oil directly onto the acne spots. Avoid rubbing or spreading it over large areas of the skin.

  1. Leave it On: 

Allow the oil to penetrate your skin. There's no need to rinse it off as it should absorb naturally. However, if you have sensitive skin, you might want to rinse it off after 20-30 minutes to avoid irritation.

  1. Moisturize: 

After the tea tree oil has been absorbed, follow up with a non-comedogenic moisturizer to keep your skin hydrated.

  1. Repeat: 

You can apply diluted tea tree oil to your acne spots 1-2 times a day. However, if you notice any redness, burning, or irritation, reduce the frequency or discontinue use.

  1. Monitor Your Skin's Response: 

Pay attention to how your skin reacts over the next few days. If you notice improvement without irritation, you can continue using it as part of your skincare routine.

Remember, while tea tree oil can be effective for mild acne, it might not be suitable for more severe cases. In such instances, it's best to consult with a dermatologist for appropriate treatment.

How Does Tea Tree Oil Help With Acne?

Acne develops when dirt, oil or bacteria gets accumulated in our pores. Those of us who have larger pores are at a greater risk of developing acne. 

If you're dealing with acne, it might be because your skin is making too much oil and not shedding dead skin cells properly. This can clog your pores. 

 acne caused by bacteria


Also, a bacteria called propionibacterium could be causing redness and swelling, and it's tough to get rid of. Here’s how tea tree oil works on acne -  


1. Attacking Acne-Causing Bacteria

Tea tree oil's primary weapon against acne is its ability to combat bacteria. It contains a potent component called terpene, which is effective in killing the microbial action on the skin. 

Specifically, terpene targets Propionibacterium, the bacteria primarily responsible for acne formation. This action not only treats existing acne but also prevents future breakouts. 

Studies have shown that terpinen-4-ol, a major component of tea tree oil, is particularly effective in treating acne, potentially more so than traditional chemical treatments like benzoyl peroxide.


2. Cleansing and Preventing Clogged Pores

Tea tree oil goes beyond just eliminating bacteria. It also acts as a natural cleanser, penetrating and unclogging pores. This is crucial because clogged pores, filled with oil and dead skin cells, are prime spots for acne formation. 

Unlike some cleansers that can't penetrate oil-filled pores, tea tree oil mixes with the natural oils produced by the skin, allowing it to cleanse these pores deeply and effectively.

3. Regulating Sebum Production

For those with oily skin, a common contributor to acne, tea tree oil can be a game-changer. It helps regulate sebum production, reducing the likelihood of excessive oiliness. By controlling sebum levels, tea tree oil minimizes the chances of pores becoming clogged with oil, which is a key factor in acne development.

4. Accelerating Skin Healing

Tea tree oil is not just about prevention; it also aids in healing. Its properties inhibit the growth of harmful parasites and bacteria on the skin, promoting a faster healing process. This is particularly beneficial for those trapped in a cycle of recurring acne.

5. Treats Acne Scars

Recent studies, including one from PubMed in 2015, have highlighted tea tree oil's effectiveness in minimizing the appearance of hypertrophic acne scarring. This suggests that tea tree oil can be a supportive treatment in conjunction with other dermatological procedures for acne scars.

If you’re convinced that the tea tree oil is a natural healer and one of the safest ways of curing acne, let’s explore how to actually use it to get rid of acne.


Also read - How To Use Tea Tree Oil For Dark Spots?

Other Ways To Use Tea Tree Oil For Acne

Tea tree oil does not cause side-effects when used in low concentrations on the skin. But if used directly in high concentration, it might cause irritation.

Before using it as a remedy for your acne, first dab a drop of it onto your skin, if it doesn't cause any irritation or redness then, you can carry on with your remedy preparation. Otherwise, dilute it to the extent that your skin does not react to it. 

Now, let's dig deep into it to explore the best and doable ways of getting rid of acne on the skin by using tea tree oil. 

1. Diluting Tea Tree Oil with Honey

Honey is naturally antibacterial and anti-inflammatory, which makes it useful for treating acne when combined with tea tree oil. It also soothes acne spots and improves overall complexion.

To prepare the mask, blend honey and tea tree oil into a smooth mixture. Store this blend in a glass container to keep it safe from extreme temperatures. To apply, use a cotton swab or earbud to gently dab the mixture onto the acne spots. 

Let it sit for several hours before rinsing off with warm water and gently patting your face dry. This remedy is versatile and can be used either during the day or at night, depending on what works best for your routine.

2. Diluting Tea Tree Oil with Aloe Vera

Aloe Vera is a well-known healer of the skin. If most skin care products tend to dry out your skin, you should use aloe vera and tea tree oil together to treat your acne. Simply scoop out fresh aloe vera gel from the leaf of the aloe vera plant and add a few drops of tea tree oil to it. 

To apply, rub a small amount onto clean skin at night before bed. Make sure your hands are clean before dipping into the container. Rinse with warm water in the morning.

3. Diluting Tea Tree Oil with a carrier oil

You can use Tea Tree Oil after diluting with a carrier oil such as Coconut Oil, Almond Oil or Sesame oil. 

Add one or two drops of essential oil to a teaspoon of your chosen career oil and blend well. When combined, Coconut oil and Tea tree oil produce a magic combination, effective in reducing redness, rashes and acne.

tea tree oil for acne

4. Making A Tea Tree Oil Scrub

If you're struggling with clogged pores, a homemade scrub can be more effective than face masks. You can easily create a tea tree oil scrub with ingredients from your kitchen. Here's a simple recipe:

You'll need:

  • ½ cup of sugar
  • ¼ cup of coconut oil
  • 1 tablespoon of organic honey
  • 10 drops of tea tree oil

Combine all these ingredients in a bowl and mix them thoroughly. Gently massage the scrub onto your skin in circular motions for 2-5 minutes, focusing on areas with clogged pores. Rinse off with warm water and pat your face dry.

After scrubbing, it's crucial to apply a moisturizer. Scrubbing deeply cleanses and opens up your pores, which, while beneficial for removing impurities, can also make your skin more vulnerable to bacteria and fungi. Moisturizing helps to protect your skin by sealing these open pores and keeping your skin hydrated.

Pro tip - If making your own tea tree oil scrub at home is too much trouble, we have the perfect scrub for you that combines tea tree oil with natural exfoliators Walnut Shell Powder and Sugar. It also has powerful anti-acne ingredients such as Coconut Oil, Neem, Holy Basil and Calendula.

tea tree oil scrub for acne

5. Add tea tree oil to your cleanser

Incorporating tea tree oil into your daily skincare routine can be as simple as adding it to your cleanser or moisturizer. 

Simply add 2-6 drops of the oil to your regular cleanser, adjusting the quantity based on how sensitive your skin is. When using the cleanser, massage it gently onto your skin in circular motions, which helps the tea tree oil absorb effectively. 

However, be careful around the eyes to prevent irritation. This method is especially useful for those with acne-prone skin and can be safely incorporated into your daily skincare regimen.

If you're uncertain about how tea tree oil will interact with your current cleanser, consider trying a specialized product like our Anti-Acne Cleansing Foam, which already contains tea tree oil as a key ingredient for combating acne.

tea tree oil cleanser for acne

Read - Which Is The Best Face Wash For Pimples and Marks?

6. Add Tea tree Oil To Your Bath

If you’ve acne on your chest, back and other parts of the body, then you should try this method.

You need to add a few drops of tea tree oil in a bucket of water or Jacuzzi/bath-tub. This will alleviate congestion and add fragrance to your bathing experience. You can try this method once a week as too much use of tea tree oil can cause some side effects. 

Also read - 8 Ways To Use Tea Tree Oil For Healthy Hair

FAQs about Tea Tree Oil For Acne

In the next segment, we will answer your most common doubts related to using tea tree oil for acne. Let’s get started.

How to use tea tree oil for acne scars?

Acne scars are caused when acne penetrates deep into your skin, whereas active acne is limited to skin pores. Studies on tea tree oil have suggested its effectiveness on mild to moderate acne only. But, you can try reducing your acne scars by using tea tree oil and aloe vera mixture.

How to dilute tea tree oil for acne?

For diluting tea tree oil for acne you need to mix it with any carrier oil (coconut oil, sesame oil or almond oil), aloe vera gel, warm water or honey. 

Which is the best tea tree oil for acne in India?

It’s recommended to use 100% pure and natural tea tree oil for best results. In India, Kama Ayurveda offers Pure Tea Tree Essential Oil that is 100% percent natural and clears out acne and pimples.

Alternatively, you can also explore. Kama Ayurvedas’s Anti-Acne range. It has a Tea Tree oil based cleanser, a natural toner and a face pack to help you get rid of acne. 

Can tea tree oil cause any side effects?

Well, tea tree oil is a safe option for most people but can result in symptoms like redness, swelling or irritation in some cases. Always perform a patch test before using the product extensively.

Can I put tea tree oil directly on my skin?

If you've performed the patch test and your skin didn’t show any sign of irritation, then you can directly apply it on your skin in small quantities. Otherwise, it is recommended to dilute the tea tree oil and then use it for topical application.

Conclusion

Ayurveda considers Tea Tree Oil as a must-have essential oil in your medicine cabinet. Don’t miss out on such a valuable essential oil as you have got a chance of curing your acne without any chemicals.

Once your acne cycle is on the onset, you are advised to keep a clean cloth/handkerchief always with you as a failure in maintenance of cleanliness on your part would result in worsening the situation. Reduce the intake of oily food items to further increase the speed of recovery.

References:

  1. https://nccih.nih.gov/health/tea/treeoil.htm
  2. https://www.nejm.org/doi/full/10.1056/NEJMoa064725
  3. https://clinmedjournals.org/articles/ijdrt/journal-of-dermatology-research-and-therapy-ijdrt-2-032.php?jid=ijdr#
  4. https://www.webmd.com/vitamins/ai/ingredientmono-113/tea-tree-oil

Multani Mitti Face Pack For Skin Whitening

Since centuries, Fuller's Earth, or Multani Mitti has been used as a quintessential Indian home remedy for a clean, bright and revitalised skin. It is a potent healing clay with active ingredients that absorb impurities like accumulated sebum, sweat, oil and dirt from the clogged pores. 

With its natural earthy aroma, it one of the earliest substances to be used as a beauty mask. Till date, it’s used as an effective Ayurvedic beauty treatment to make your skin radiant and appealing by getting rid of blemishes and acne scars.

multani mitti

From reducing dark spots to improving the overall skin texture and complexion, multani mitti has a solution for all skin problems. Using it is the simplest way to get that smooth and supple skin that you’ve always wanted.

If you’ve never used Multani Mitti before, let’s walk you through the many ways to use miracle clay to get the best benefits for your skin.


5 Multani Mitti Face Packs

The best thing about Multani Mitti is that it can be combined with other ingredients to make it suitable for different skin types and to treat various skin problems. It has lime which kills the harmful bacteria and cleanses the skin deeply. 

It is also rich in minerals like Aluminium Silicate and Magnesium Silicate that provide the clay its excellent adsorbent properties. Whenever you apply Multani Mitti on your face, it leaves you feeling fresh and radiant. 

multani mitti face packs

If your skin becomes dull and you start noticing fine lines and wrinkles, you can use Multani Mitti to tighten up your skin. It also has a cooling and soothing action due to which it’s used more regularly during summers.

  1. 1. Multani Mitti Face Pack For Oily Skin

Excessive production of sebum results in oily skin. While sebum is essential to protect the skin from environmental pollutants, when it’s produced in very high amount it results in a lot of skin issues. 

If you have oily skin, you might notice that your skin attracts a lot of dirt and even looks dull from time to time. This makes you prone to acne, pimples and skin infections. The excess sebum attracts impurities from the surroundings that block the pores.

Multani Mitti is immensely helpful for those who have oily skin type. Even with a single application you will notice that the excess sebum from your skin surface is absorbed. It also prevents clogging the pores which clears acne and helps in getting a soft and smooth skin.

How to use - 

To make Multani Mitti face pack for oily skin, combine one spoon of Multani Mitti with the following ingredients -

  • Half a spoon of Orange Peel Powder
  • 1/4th spoon of Turmeric Powder (haldi)
  • One spoon of lemon juice
  • One spoon of honey. 

You will get a thick paste by mixing these ingredients and apply it on your face. Let the face pack completely dry and then wash it off with water. This pack will reduce excess oil from the face and improve the overall structure.

multani mitti face pack for oily skin

Alternatively, you can use Kama Ayurveda’s Suvarna Haldi Chandan Face Pack. It is a 100% natural face pack and is a combination of Multani Mitti with powerful Ayurvedic ingredients like Turmeric, Sandalwood, Orange Peel Powder, Oatmeal and Rose. Combine it with Lavender Water/Vetiver Water or Aloe Vera for oily skin.

Why it works -
The high concentration of Vitamin C in Orange Peel makes it a powerful source of antioxidant protection for skin. Orange Peel Powder helps minimise oiliness in skin and complements Multani Mitti in its mattifying action, by minimising the appearance of enlarged pores

mutlani mitti ayurveda

  1. 2. Multani Mitti Face Pack For A Brighter Complexion

The secret behind a glowing complexion is deep cleansing. Every day your skin is exposed to dust, pollutants and chemicals that sometimes penetrate deep into the skin and cause it to look dull. It also makes the skin age faster and causes fine lines and wrinkles.

Want to clean your face efficiently and get rid of these impurities? Multani Mitti will help you cleanse the skin deeply and remove the toxins from the innermost layers. 

How to use -

To make Multani Mitti face pack for combination skin, combine one spoon of Multani Mitti with the following ingredients -

  • Half a spoon of Sandalwood Powder
  • 1/4th spoon of Turmeric Powder (haldi)
  • Rose water or Milk

Mix the ingredients to prepare the paste. Apply the face pack and leave it on until it dries completely and then wash it off with water.

multani mitti and sandalwood face pack

Alternatively, you can use Kama Ayurveda’s Suvarna Haldi Chandan Face Pack. It has the complexion enhancing ingredients Turmeric and Sandalwood which make it an effective Ayurvedic Face Pack. Mix it with Rose Water for youthful vibrance, smoothness and luminosity.

Why it works -
In Sanskrit, Turmeric is referred to as Gauri meaning 'The One with a Shining Face'. As a natural, anti-inflammatory exfoliator, Turmeric is briskly, but gently clarifying. Together, Multani Mitti combined with Sandalwood and Turmeric produces a smooth, blemish-free, and luminous complexion.

haldi chandan face pack
  1. 3. Multani Mitti Face Pack For Dry Skin

Multani Mitti can make dry skin soft and supple by combined with other skin nourishing ingredients. It is rich in Calcium which acts as a natural moisturizer and protects the skin from harmful effects of the sun, thereby preventing it from dryness and dullness.

How to use - 

Here’s how you can prepare Multani Mitti face pack to add radiance to dry and dull skin. Start with the following ingredients. 

  • One spoon crushed and ground almonds
  • Half a cup of milk

Add these ingredients to Multani Mitti to prepare a face pack of suitable consistency. Apply it on your face and leave it on until it gets dried completely (or for about 30 minutes). Wash it off when it dries completely.

Alternatively, you can use Kama Ayurveda’s Suvarna Haldi Chandan Face Pack. It has Multani Mitti mixed with other ingredients that are well-suited for dry skin. Use it with Rose Water or Mogra Water as both of them work well for dry skin. You can also add crushed almonds/almond oil and milk/yogurt to this face pack.

multani mitti face pack for dry skin

Why it works -
Almonds and milk combined with Multani Mitti provides dry skin the much needed hydration and nourishment.


  1. 4. Multani Mitti Face Pack For Acne and Blemishes

Multani Mitti is an effective natural treatment for acne and blemishes. With regular use, even acne scars can be healed. Its antibacterial action and its ability to regulate sebum production prevents and treats acne. It clarifies and smoothens the overall skin texture.

How to use - 

To prepare Multani Mitti face pack for acne and blemishes, add the following ingredients to two spoons of Multani Mitti -

  • One spoon of Neem Leaf powder
  • 1/4th spoon of Turmeric Powder
  • Rose Water

Prepare the paste using these ingredients and apply it evenly on your face. Let it dry completely before washing it off with water.

You can use Kama Ayurveda’s Suvarna Haldi Chandan Face Pack for this. It has Neem and Rose which make it an effective Multani Mitti face pack for acne and blemishes. Add Vetiver Water or Lavender Water to prepare the face pack for even better results.

Why it works -
The absorbent, exfoliating, deep-cleansing and anti-bacterial properties of Multani Mitti, along with the antibacterial action of Neem, helps in reducing acne and give a blemish-free glowing skin. Rose works as an astringent which helps in reducing large pores that attract impurities and result in acne.

  1. 5. Multani Mitti Face Pack for Pigmentation And Tanning

Multani Mitti soothes sunburns and clears pigmentation caused by sun exposure. It has a cooling effect and its anti-tanning properties make it an effective treatment for skin pigmentation conditions like Melasma that are caused due to sun exposure.

How to use - 

To use Multani Mitti for treating pigmentation, combine with one spoon with Multani Mitti with the following ingredients. 

  • 2 spoons of papaya fruit pulp
  • 1 spoon oatmeal powder
  • 1/4th spoon turmeric powder
  • 1/4th spoon sandalwood powder
  • Rose water

Prepare a smooth paste by mixing these ingredients and apply it evenly on your face. Let it dry and then wash it off with water.

Alternatively, use Kama Ayurveda’s Suvarna Haldi Chandan Face Pack to treat pigmentation. It has Oatmeal, Turmeric, Rose and Sandalwood among other Ayurvedic ingredients which make it an effective Multani Mitti face pack for pigmentation and tanning. You can add papaya fruit pulp to it to make it more effective.

Why it works - 
Anti-inflammatory and deeply hydrating, oatmeal is a boon for dry, allergy-prone and sensitive skin types. It complements anti-tan properties of Multani Mitti and helps in treating skin issues resulting from sun exposure. 

How Multani Mitti Benefits The Skin?

As you can see, Multani Mitti can be combined with different ingredients to make face packs to treat specific skin issues. Irrespective of your skin type, it will definitely give you the following benefits.

  • Improves skin texture and brightens the complexion
  • Fights acne and pimples
  • Reduces fine lines and wrinkles
  • Reduces skin inflammation and protects the skin against allergens
  • Has a cooling effect that gives relief from rash, itching and irritation
  • Detoxifies the skin and helps in getting rid of pollutants and impurities
  • Prevents acne and pimples
  • Treats sunburns, tanning and pigmentation

For best results, apply Multani Mitti on your face twice a week. If you use it too often, then it might strip your skin of its natural moisture content. 

FAQ about using Multani Mitti Face Packs

Here, we’ve discussed some common questions about using Multani Mitti for face.

  1. 1. Can Multani Mitti be used as a scrub?

Multani Mitti is rich in iron which helps in improving blood circulation on face and helps in growth of new cells. Scrubbing with Multani Mitti will help in getting rid of dead cells and make the skin look vibrant. To use Multani Mitti as a scrub, you can add freshly ground walnuts, almonds and sugar granules. Use this paste to gently scrub your face.

If you are looking for natural scrubs, you can also use Ayurvedic Ubtan for scrubbing. Read about best ubtan recipes for a glowing skin.

  1. 2. Can Multani Mitti get rid of dark circles?

To use Multani Mitti for dark circles, combine it with half a potato grated finely. To this add lemon juice and yogurt to prepare a paste. Apply it underneath your eyes and leave it on for 20 minutes before washing it off.

  1. 3. Can I use Multani Mitti Face Pack daily?

It’s not advisable to use Multani Mitti on face daily as it may rip the skin of its natural moisture and cause excessive dryness. You may use Multani Mitti Face Pack twice a week.

  1. 4. Can I store Multani Mitti?

Multani Mitti has a long shelf life so it can be stored. Storing it in an air-tight container is helpful. You can even keep it refrigerated to increase its shelf life. Buy only 100% natural and pure Multani Mitti for long shelf life.

  1. 5. How to use Multani Mitti to prevent visible signs of ageing?

You can combine Multani Mitti with Sandalwood which prevents premature aging, Oatmeal which prevents age related dehydration, Rose which prevents lines & wrinkles and Orange which a powerful antioxidant. You can even use Kama Ayurveda’s Suvarna Haldi Chandan Face Pack as it has all these ingredients combined with Multani Mittu and it is helpful in reducing visible signs of ageing.

  1. 6. Are there any side effects of using Multani Mitti?

There are no known side-effects of using Multani Mitti. However, in some cases skin might be allergic to natural face packs. Perform a patch to be sure that the face pack is suitable for your skin type.

Conclusion 

Multani Mitti is one of the most useful traditional skincare ingredients. It helps skin in different ways like diminishing pore sizes, removing blackheads and whiteheads fading freckles, soothing sunburns, cleansing skin, improving blood circulation, complexion, reducing acne and blemishes and gives a glowing effect on skin as it contains healthy nutrients.

The best way to use Multani Mitti as a part of your skincare routine is in the form of face packs.

References -

  1. Multani Mitti Benefits for Face and Skin Conditions - https://www.ayurtimes.com/multani-mitti-fullers-earth-benefits-uses/#multani-mitti-for-dry-skin
  2. Activation and Clarifying Properties of Fuller’s Earth - https://insa.nic.in/writereaddata/UpLoadedFiles/PINSA/Vol09_1943_1_Art15.pdf
  3. Formulation and Evaluation of Cosmetic Herbal Face Pack For Glowing Skin - https://www.ijrap.net/admin/php/uploads/1887_pdf.pdf

How To Use Tea Tree Oil For Hair Growth: Benefits and Uses

If you are fed up with health issues related to your scalp and couldn’t find a long term solution for it, you have landed at the right place, where you’ll find a natural cure for your hair and scalp problems. 

Tea tree oil is an essential oil that has been used for medicinal purposes for hundreds of years. It can do wonders and make your hair and scalp healthy. Using tea tree oil on your hair and scalp is the most natural way of cleansing your hair without causing any damage or dryness.

tea tree oil for hair

It is often said that scalp related problems are genetical, but in today’s time, pollution and other environmental factors play a huge role as well. 

Tea tree oil has antimicrobial properties which makes it an excellent cleaning agent. Using it on your hair helps in fighting all many types of bacteria, viruses, and fungi that accumulate in hair and scalp from the environment.

Before we explore how this tea tree oil does wonders for your hair, let’s understand a little more about this essential oil.

What is tea tree oil?

The natives of Australia living in Queensland region cultivated Tea Tree shrubs extensively. Tea tree oil is extracted by the steam distillation of fresh leaves and wood from these tea tree shrubs. This essential oil is pale yellow or clear in color and has a fresh camphoraceous odor.

What makes tea tree oil so popular among common masses? At least once, you must have got a recommendation for using tea tree oil for any particular problem related to your body. 

Once the medicinal properties of Tea Tree oil were discovered, it became a popular anti-septic used for curing cuts, burns, and boils.

Tea tree oil has since been used as a medication, from acne to cold sores, blisters to fungal infection, dandruff to bacterial infection and many more. If you have any of the above-mentioned ailments, tea tree oil can become your savior. 

tea tree oil for hair benefits for hair and scalp

The use of tea tree oil for treating hair and scalp problems is comparatively recent. Today, tea tree oil is used as an ingredient in a lot of hair products. Let’s now have a look at the many benefits of tea tree oil for hair and understand how to use tea tree oil to solve our hair problems.

Why use tea tree oil for hair?

When you talk about hair health, it’s actually the scalp that you are referring to. The scalp has follicles, the minute openings that are responsible for the growth of hair. When these follicles are clogged by the pollutants which are present in the atmosphere, you start facing hair problems like hair fall.

Tea tree oil has proven to be beneficial in such cases where problems like dandruff and hair loss are prevalent due to improper cleaning of hair follicles leading to clogging of dirt and impurities. 

Overexposure to the sun is another problem for the hair as it depletes the natural moisture of the hair. This hampers the growth of hair resulting in dead skin and dryness of hair. Tea tree oil moisturizes your scalp and provides it with the essential nutrients and supplements that would support the growth of hair.

In the coming section, we’ll explore how to use tea tree oil for hair to treat the most common hair problems.

How to use Tea Tree Oil For Hair?

Using tea tree oil is therapeutic for hair. It has anti-fungal, anti-bacterial, anti-inflammatory and anti-oxidant properties that are useful for the hair. Using tea tree oil makes hair follicles more receptive to nutrition and this promotes overall hair growth. 

Now that you know how tea tree oil tends to improve hair and scalp health, let’s have a look at a few ways to use tea tree oil for hair and make it a part of our hair care regime. It’s important to note that tea tree is powerful and should not be applied directly to the hair.

  • 1. For Daily Cleansing

Daily cleansing with tea tree oil includes using tea tree oil with your shampoo. Take a few drops of tea tree oil and a small amount of shampoo. Mix both the tea tree oil and shampoo so that the consistency of the mixture is maintained. Apply the mixture on wet scalp. This would result in clean hair follicles and ensure good health of hair.

  • 2. Hair Growth Treatment

Tea tree oil improves blood circulation and removes all toxins from the scalp, paving way for healthy hair growth. It also stimulates the dormant hair follicles and brings them to life. It prepares the hair and scalp to absorb nutrients efficiently, which helps in hair growth.

To use tea tree oil as a hair growth treatment, mix it with any carrier oil like Coconut, Almond, or Sesame oil. Apply the mixture of oil onto your scalp and massage it. You can even give yourself a hot oil treatment by warming the oil prior to its application. After washing the hair, you’ll get a refreshing feeling and your scalp will be free from any fungi and bacteria that may have got deposited over time.


Read - 10 Hair Growth Oils Recommended by Ayurveda


  • 3. For Hair And Scalp Dryness -

Tea tree oil is very useful in treating hair dryness. It provides supplements to the scalp and removes blockages in the hair follicles. With the use of tea tree oil, the hair grows with a healthy amount of nutrients and this prevents hair from becoming dry and brittle. Conditions like seborrheic dermatitis, which lead to scaly dry patches on the scalp can also be treated with tea tree oil.

For treating dryness related issues, you need to mix the tea tree oil with a carrier oil like Coconut oil or Olive oil and massage it for 10-15 minutes onto the scalp. Wash the hair normally and repeat this process daily and you’ll observe some changes.

  • 4. For Dandruff -

The root cause of dandruff varies from person to person. Oily, irritated skin, bad hair hygiene and skin conditions like contact dermatitis, or fungal infections can result in dandruff. The anti-fungal action of tea tree oil helps in removing dandruff without causing any dryness. 

Add 10-15 drops of tea tree oil with every ounce of shampoo and massage it onto the hair. Let it stay there for at least 3-5 minutes before rinsing thoroughly. By acting as a natural conditioner, it soothes the scalp and prevents flakiness. 

  • 5. For scalp itchiness -

If you have itchiness, dryness or dandruff, then tea tree oil hair mask will help you to overcome these problems. First, choose a base for your hair mask. Both avocado paste and yogurt have a thick consistency and are suitable for this. Add honey to the base along with a few drops of tea tree oil. Apply the mask onto hair and then massage it with fingers onto the scalp. Wash it off after 15-20 minutes.

tea tree oil hair mask

6. For oily scalp -

Tea tree oil controls the excess oil production by the sebaceous glands and keeps the scalp moisturized. It is non-comedogenic which means it does not clog the pores and decreases bacteria on the skin’s surface.

You can mix baking soda, tea tree oil, and honey and apply the paste to your scalp. Gently massage it for about 10 minutes. Leave it on for 30 minutes before washing it off. This can be repeated twice a week to maintain the pH of the scalp, remove extra oil and keep the scalp healthy.

7. For getting rid of lice

Hair lice are caused by bad scalp health and are transferred from scalp to scalp. They are harmful to overall health as they suck the blood from the scalp, causing inflammation and itchiness. Tea tree oil has insecticidal properties that help in providing relief from hair lice. Components like 1,8-cineole and terpinen-4-ol are present in tea tree oil which kill lice. The oil also prevents lice eggs from getting attached to hair and scalp.

To use tea tree oil to clear lice, mix about 7-8 drops with a spoon of any vegetable oil and leave it overnight. Wear a shower cap to allow better absorption into the hair. In the morning, remove the shower cap and comb with a fine comb 5-6 times before washing off with a hair cleanser.

8. For daily conditioning

You can make a tea tree oil spray to use as a leave-in conditioner. All you need to do is take distilled water and add some drops of tea tree oil to it. Some people even add chamomile tea to this spray. Irrespective of what ingredients you use to prepare your spray, it should contain about 5 percent tea tree oil. Store this mixture in a spray bottle and spray it on your hair whenever you like to give it a dose of natural conditioning.

 tea tree oil leave-in conditioner

FAQ about using Tea Tree Oil for hair

Can I apply tea tree oil without any carrier oil or shampoo?

It is not recommended to apply tea tree oil directly onto your scalp as it is extremely concentrated and is like to irritate the skin.

For how much time can I leave tea tree oil on my scalp?

Tea tree oil ensures the health of your hair. So, it can be left on hair overnight for deep penetration if it is diluted with a carrier oil. With the continuous use of tea tree oil, the scalp will regain its lost moisture and nutrients resulting in shiny, smooth hair.

Can tea tree oil cause any side effects?

The use of tea tree oil can result in allergic reactions. If you are using it for your hair then, try to get fresh tea tree oil otherwise preserved tea tree oil can result in allergies on your scalp. Before using tea tree oil directly onto your scalp, perform a patch test on your skin.

Which is the best tea tree oil in India?

Kama Ayurveda’s Tea Tree Oil is steam distilled from the leaves and twigs of Tea Tree and is 100% natural. It is very beneficial for the health of hair and scalp with its ability to soothe dry flaking, remove dandruff and can even be used for the treatment of lice. It is one of the best tea tree oil available in India.

References - 

  1. 1. Tea Tree Oil For Seborrheic dermatitis - ncbi.nlm.nih.gov/pmc/articles/PMC2888552/
  2. 2. Treatment of dandruff with 5% tea tree oil shampoo - 10.1067/mjd.2002.122734
  3. 3. Tea tree oil. (2016). - nccih.nih.gov/health/tea/treeoil.htm
  4. 4. A review of applications of tea tree oil in dermatology. - 10.1111/j.1365-4632.2012.05654.x
best tea tree oil in india

How To Get Pink Lips Naturally – 14 Simple Home Remedies

Do you notice that your lips are often the first to get affected due to harsh weather? Conditions like environmental pollution and dehydration result in dry, chapped and pigmented lips. 

If you’ve always wondered why that happens, here’s your answer - the skin of the lips is the thinnest and the most sensitive. 

Yes, you read it right. That part of your face that we forget about, requires attention and care. You have to make taking care of your lips a part of your daily skincare regimen.

How To Make Your Lips Naturally Pink? (H2)

Having beautiful pink lips without makeup is the dream. To help you make that dream come true, we’ve listed 12 home remedies to get natural pink lips.

Even if your lips have become dark and dull with time there's no need to worry! It’s totally possible to undo the damage and get those healthy pink lips. All you need to do is set aside 15 minutes every day to take care of your lips. Let’s begin.

1. Exfoliate your lips with honey and sugar scrub

One of the major reasons for lips turning dark is the accumulation of dead cells. Natural lip scrubs are highly effective in slough off dead skin to reveal smooth and soft lips.

How to make  -Take one tablespoon brown sugar or white sugar and one tablespoon honey. Simply mix the ingredients together to prepare the scrub.

How and when to apply - Lightly massage the scrub on your lips for one minute. Leave the scrub on your lips for a few minutes. Then, wash it off with plain water. Use this scrub twice or thrice a week to get good results.

Why it works -

Brown sugar is very gentle on the lips and exfoliates them well without causing any discomfort. Sugar is also rich in antioxidants that prevent lips from getting damaged from the sun. Sugar contains glycolic acid that conditions the lips and prevents it from environmental toxins.

The enzymes present in honey help in lightening the color of the lips. Honey also provides the lips with a healthy dose of moisturization.

2. Use rose petals and milk on your lips

Rose petals nourish, soften and lighten your lips naturally. Together with milk, they work as a wonderful remedy for discoloration and repair dark, patchy lips.

How to make  -Soak 5-6 rose petals in a half a cup of milk overnight. Strain the petals from the milk in the morning and mash them to make a paste. Apply this paste to your lips and leave it on for 15 minutes. Add a few drops of milk if the paste is too thick to apply on lips. 

How and when to apply - 

Since rose petals are gentle on the lips, you can repeat this remedy every day. Make it into a night treatment to see significant changes.

Why it works - 

Rose petals and milk are both natural moisturizers. Rose extract balances and restores lips to healthy hydration and health. If your lips are dehydrated, you will benefit from using Kama Ayurveda’s Rose Lip Balm every day. The natural oils present in it will keep lips protected and beautifully soft

rosy lips

3. Apply milk and turmeric pack on your lips

turmeric for skin brightening

Turmeric is a well-known Ayurvedic ingredient that helps in treating pigmentation. But its use isn’t limited to skin brightening. Turmeric combined with milk is used for treating dark lips.

How to make -

Mix half a teaspoon of turmeric in one teaspoon milk to form a paste. Apply this paste to your lips and leave it on for about 5 minutes. Once the paste has dried, scrub it off gently. Clean your lips with warm water and then apply a hydrating lip balm.

How and when to apply -

Repeat this process on alternate days to see a significant change. You can apply it on your lips at any time of the day.

Why it works -Turmeric and milk together help in treating pigmentation and help in restoring natural pink lips. Scrubbing off the paste also helps in getting rid of dead cells. 

4. Apply beetroot juice on your lips

beetroot for pink lips

If you’ve ever eaten beetroot, you’d have noticed how it turns everything from the tongue to the teeth pink. Beetroot has naturally occurring red pigments that help in making your lips pink.

How to use -There are many ways to use Beetroot for your lips. The simplest one slicing the beetroot and rubbing it on your lips. Alternatively, you can extract beetroot juice and mix it with honey to apply it on your lips. 

How and when to apply -

Since beetroot and honey are completely natural, you can apply them the mixture on your lips and leave it on overnight. 

Why it works -

Apart from having natural red pigments, beetroot also acts as a natural exfoliator. When you rub it on your lips, it helps in removing dead cells and lightens pigmented lips.

5. Apply ghee on your navel

While most remedies to get pink lips naturally emphasize on providing nourishment to the lips, this is a hack that will work for you if you’ve dry and dark lips. It might seem like it has got nothing to do with lips, but it works internally to repair the lips.

How and when to apply -

Simply apply warm ghee to your navel before going to bed every night. 

Why it works -

The first part of the body that’s created after conception is our belly button. It’s a miraculous part of our body that can detect which part of the body requires nourishment and can pass it on. Applying ghee on the belly buttons heals the lips by providing it the necessary nourishment.

6. Exfoliate your lips with lemon and sugar

If your lips aren’t chapped, the applying lemon and sugar can help in getting pink lips naturally.

How to make -Cut out a slice of lemon and sprinkle some sugar on it. Rub the lemon slice on the lips for about 2-3 minutes.

How and when to apply -You can repeat this remedy for your lips once every three days.

Why it works -

Lemon is a natural bleaching agent that helps in lightening the lips and sugar is a gentle exfoliator that helps in getting rid of dead cells. 

This remedy works well to naturally lighten the lips if the skin of your lips and around your lips isn’t too sensitive or chapped. Since lemon is acidic, it may cause some irritation. If you experience any discomfort, stop applying it and choose any of the other remedies.

7. Apply mint leaves and lemon on your lips

Mint leaves are just perfect for bringing back life to dry and dull lips. They hydrate the lips to bring back the natural pink tinge that all of us desire.

How to make

Crush 5-6 mint leaves and squeeze half a lemon to it. Add a few drops of honey to make the mixture easy to apply on the lips.

How and when to apply -

You can repeat this treatment once every three days.

Why it works -

Both mint leaves, as well as lemon, have bleaching properties. Mint leaves are also helpful for smokers as it helps in removing dark nicotine spots and stains. Mint extracts also correct damage done by environmental pollutions and extreme weather.

For getting naturally pink lips, you can also use Kama Ayurveda’s 100% Natural Mint Lip Balm. It’s a repairing and refreshing lip treatment that rescues parched and dehydrated lips.

8. Apply pomegranate seeds and milk to your lips

Pomegranate is one of the healthiest food to include in your diet. But, did you know that pomegranate can also help you get those beautiful pink lips? Here’s a simple remedy that you can follow.

How to make -

Take about half a cup of pomegranate seeds and grind them. To this, add milk or cream to make a paste.

How and why to apply - 

Apply this paste on your lips and leave it on for 10 to 15 minutes. Wash off with warm water after it dries. You can repeat this natural treatment for your lips every day. Even applying it two to three times a week will help you get results.

Why it works - 

Pomegranate seeds contain a compound called punicalagin which curbs the production of melanin. This helps in curing pigmentation and prevent lips from turning dark on being exposed to the sun.

9. Apply crushed strawberry to your lips

Natural berries contain essential vitamins and minerals that prevent lips from turning dark. It’s for this reason that a lot of lip balms in the market are strawberry flavored. To get the best benefits of strawberry, you can apply it directly to your lips.

How and when to apply - 

Simply crush a strawberry and add a teaspoon of honey to it. You may even add a few drops of olive oil. You can apply this mixture to your lips 3-4 times a week.

Why it works -

Strawberries contain Vitamin C and a lot of anti-oxidants that brighten up the lips. Honey and olive oil hydrate and moisturize the lips which further help in revealing the natural pint tint.

10. Apply almond oil to your lips

The most common reason for dark lips is lack of moisture and hydration. Ayurveda recommends Almonds for treating skin and lip dryness related issues. Here’s a simple remedy for using almond oil on your lips.

How and why to apply -

Take about a tablespoon of almond oil and squeeze some lemon to it. Apply the mixture on your lips and leave it till the oil gets absorbed properly.

Why it works -

Almond oil replenishes the lips and prevents it from getting chapped while lemon acts as the natural bleaching agent that lightens the lips and makes them naturally supple and pink. 

You can also use Kama Ayuveda’s Almond and Coconut Lip Balm. It has organic almonds that treat damaged skin and also locks-in the natural oils to keep the lips protected and beautifully soft.

11. Apply Aloe Vera Gel on your lips

Aloe Vera is undoubtedly one of the most beneficial plants for natural beauty and healing. It does wonders for your skin and your lips. And, it’s the easiest plant to grow in your garden.

How and why to apply -

Scoop out the aloe vera gel from a fresh leaf. Add a few drops of olive oil or coconut oil. Store it in a container and refrigerate. You can use it as a lip balm as often as you like, even several times a day.

Why it works -

Aloe Vera is rich in Vitamin E which helps in restoring the moisture. It also has soothing properties that help in healing dry and chapped lips. It facilitates the growth of new cells which helps in getting natural pink lips.

12.  Apply beeswax lip balms to your lips

beeswax for pink lips naturally

Lip balms are the most important part of your lip care regimen. So, it’s essential to choose them wisely. Most lip balms in the market contain artificial and petroleum-based chemicals to moisturize. 

However, there’s a healthier natural alternative that you should look for in your lip balms - beeswax. The use of beeswax seals the moisture inside your skin and keeps your lips moisturized for the long term. 

How to use -

All Kama Ayurveda’s lip balms have organic natural beeswax as the base. You can choose one of these lip balms your daily lip care needs. Following these ancient texts of Ayurveda, Kama Ayurveda's natural lip care products impart moisture, gloss, and locks the natural oils in for beautiful, healthy and pink lips.

13. Moisturize with Vitamin E Essential Oil

Vitamin E is renowned for its fat-soluble antioxidant properties which are highly beneficial for skin health. It can enhance the health of your lip skin, imparting a pink and supple appearance. 

Vitamin E also has the ability to aid in skin cell regeneration, stimulate circulation, and ward off lines and wrinkles.

How to use - 

To leverage the benefits of Vitamin E, take a capsule and carefully break it open. Directly applying its contents to your lips can significantly soften them and bestow a natural pink hue.

14. Massage lips with Coconut Oil

Coconut oil is a recognized emollient. Emollients function as non-cosmetic moisturizers, which are instrumental in retaining skin's moisture. Given that lips tend to lose moisture faster than other parts of the body, using an emollient like coconut oil for massage is particularly beneficial.

How to use -

For optimal results, only apply pure, extra virgin Coconut oil on your lips. This Coconut oil hasn't undergone any chemical alterations or refining while also guaranteeing maximum benefits for your lips.

Lifestyle Tips To Get Pink Lips Naturally

While cosmetics offer temporary solutions, there are more sustainable, lifestyle-based approaches to maintain the natural pink hue of your lips. Here are some holistic tips to ensure your lips stay soft, healthy, and naturally pink.

1. Take Makeup Off Your Face -

As tempting as it might be to leave makeup on due to exhaustion, always remove it before bedtime. This especially applies to cosmetics on the lips. Post-removal, moisturize with a natural lip balm or oil to maintain hydration.

2. Avoid Smoking

It leads to lip discoloration and early wrinkle formation around the lips. The nicotine and benzopyrene in tobacco smoke stimulate melanin production, darkening the lips over time. Besides these cosmetic concerns, smoking has several detrimental health effects.

3. Hydrate Internally

Dry, cracked lips not only look unhealthy but can be painful. To counter this, ensure you drink ample water as lips often reveal signs of dehydration first. Consider substituting your regular coffee or tea for water. Also, moderate alcohol consumption as it can dehydrate and lead to dry lips.

4. Avoid Products With Chemicals

To achieve and maintain naturally pink lips, consider avoiding lipsticks laden with harmful chemicals. These can be particularly drying and may lead to discolored or paler lips over time.

5. Wear Sunscreen

A study highlighted that only 37% of diligent sunscreen users protect their lips. Opt for a lip balm with SPF 15 or higher, applied daily and refreshed often, to shield lips from harmful UV rays.

Consistently applying sunscreen to the lips and skin is crucial to prevent sunburns, hyperpigmentation, and premature aging. Regardless of skin type or weather conditions, always apply SPF to lips and face when outdoors.

6. Prep Before Applying Lipstick

Prior to applying lipstick, lightly brush your lips with almond or coconut oil or apply lip balm. This acts as a protective barrier, ensuring lips remain moisturized and aren't dried out by the lipstick.

What Causes Dark Lips?

Lip color varies among individuals due to differences in melanin levels, the pigment that determines skin and lip coloration. Naturally, people with darker skin might have darker lips due to higher melanin content. However, several factors can exacerbate or induce darker lip shades:

  1. Natural Melanin Variation: Lip darkness is a direct result of the melanin concentration in the skin. More melanin leads to darker tones, while less results in lighter shades.
  2. Hyperpigmentation: This condition darkens specific patches of the skin, including the lips. Its common causes encompass:
    • Pregnancy: Hormonal shifts during pregnancy can lead to the darkening of certain areas, including the lips. These typically return to their usual shade post-childbirth.
    • Sun Exposure: The body produces extra melanin as a defense against UV rays. Using lip balms with SPF 30 or above is crucial to guard against sun-induced darkening.
    • Medical Treatments: Cosmetic procedures, like laser therapy, can target excessive melanin production. However, these might come with temporary results and potential side effects. Consulting a dermatologist is advisable.
  3. Lifestyle and Habits: Chronic smoking can darken lips. Similarly, habits like habitual lip-sucking can lead to discoloration. External factors, including hydration levels and sun exposure, also influence lip color. Natural remedies using honey or rose oil can be beneficial.
  4. Other Causes: Sudden lip discoloration can arise from blood clots, low blood sugar, frostbite, vitamin deficiencies, and certain medications. Additionally, medical conditions such as Addison's disease can result in darker lips.

In summary, while melanin determines the baseline lip color, various internal and external factors can change this natural hue, leading to darker lips.

FAQs on How to Get Pink Lips Naturally

How can I make my lips pink fast?

Making lips pink fast requires a combination of immediate actions like exfoliating with a natural sugar scrub, moisturizing with a hydrating lip balm, and using natural lip tints like beetroot or raspberry juice. Consistent care and hydration can enhance and maintain the natural pink hue.

How can I remove dark lips?

Dark lips can be lightened by avoiding harmful habits like smoking, excessive caffeine intake, and constant lip biting. Incorporate lip care routines that include exfoliation, moisturization, and protection against sun exposure with SPF lip balms. Natural remedies like honey, lemon juice, and rosewater can also help in lightening dark lips.

How do you get rid of black lips to pink?

Transitioning from black lips to pink involves a combination of lifestyle changes and consistent lip care. Avoid smoking, excessive alcohol, and sun exposure without protection. Use natural lightening agents like turmeric and milk paste or almond oil massage. Drinking plenty of water and maintaining a healthy diet rich in vitamins will also contribute to restoring the natural pink shade.

What makes lips become pink?

The natural pink hue of lips is due to the blood vessels underneath the thin skin of the lips. Factors such as skin complexion, genetics, blood circulation, and overall health play a role in determining lip color. Natural remedies and proper lip care can enhance this pink hue.

Are Pink Lips Healthy?

Yes, naturally pink lips are typically an indication of good health, proper hydration, and adequate blood circulation. However, sudden or unnatural pinkness might indicate irritation or an allergic reaction.

Why Do Lips Turn So Pink All Of A Sudden?

Sudden pinkness in the lips can be attributed to various factors such as changes in blood circulation, allergic reactions, temperature changes, or consumption of certain foods. If the change is accompanied by discomfort or swelling, it might be best to consult with a healthcare professional.

References -

How To Build Your Own Skincare Routine

Great skin is a result of good skincare habits and a healthy lifestyle. 

While it’s essential to follow a good skin care routine, it isn’t complete in itself. The 5,000 year-old-science of Ayurveda emphasizes on the mantra ‘True beauty comes from within’.     

For this reason, Ayurvedic skin care routine focuses on balancing the whole body and supporting the digestive system with a healthy diet while treating each individual according to her specific dosha.

Sounds difficult? It isn’t. 

Once you become intuitively tuned to understand what your skin needs, you’ll be able to approach skin care and beauty in a holistic manner. Below, we’ve broken down the key elements of chalking out the perfect skin care routine for yourself. 

Let’s get started.

THE BASICS OF SKIN CARE

Your skin care routine essentially consists of these three basic steps.

  • Cleansing - Removing impurities from the skin
  • Toning - Balancing the skin
  • Moisturizing - Hydrating the skin

The main objective of following a skin care routine is simply to reveal your best natural skin and a glowing complexion. 

Following this basic CTM routine helps you understand how your skin’s changing with time. Sometimes, you might need to tweak the products that you’re using based on how your skin is responding to the current weather conditions. 

Think of these steps as a way to revisit your skin twice a day to establish a relationship with it.

At Kama Ayurveda, we believe natural and organic products are the best skincare treatments that we can give to our skin. Regular exfoliation combined with a regime of CTM (Cleansing, Toning & Moisturizing) can take you a long way in your skincare journey.

PATIENCE IS THE KEY TO A GREAT SKIN

How many times have you decided to be regular with your CTM only to give up in a week or so? Don’t worry, we’ve all been there.

But remember, all good things take time. There’s no magical product that can restore your skin’s glow and health quickly. 

The entire point of creating a skin care regime for yourself is to stick to it long enough to see results and changes. So, don’t forget all about taking care of your skin until you've got an important event to attend. 

Because of so m any options available in the market, it’s important to remember a few things while choosing products for your skin.

  • A lot of skin care brands promise instant solutions to your problems. Harsh chemicals used in these instant solutions do more harm than good in the longer run.
  • Organic and natural skincare products are the most gentle on the skin. Choose products with minimum possible side-effects and no chemicals.
  • Results only come with consistent use. Use a product regularly for at least six weeks to observe changes. 
  • As an exception, discontinue the product if you experience skin breakouts, rashes or irritation.
  • As a conscious customer, opt for organic and vegan products that are not tested on animals and are cruelty free. Products that cause harm to the planet are not going to be good for your skin, either.

#1 CLEANSING 

Cleansing your skin twice or thrice a day is essential to remove the environmental pollutants and dirt that clog the pores. When the skin isn’t cleaned well, the chances of breakouts increase.

Cleansing the skin is pretty-straight-forward. However, finding a suitable cleanser for your skin isn’t.

We recommend using natural cleansers that gently remove impurities and make-up without stripping the skin of its natural oils. It helps to know your skin type and your Ayurvedic dosha.

Below, we’ve listed some of the best Ayurvedic ingredients for cleansing that you should look for in a cleanser.

  1. Aloe Vera - Referred to as the miracle plant in Ayurveda, its cooling and gently hydrating properties make it a wonderful addition to any skin regime.

  2.  Neem - Ayurveda refers to Neem asSarva Roga Nivarini ('Universal Cure of Ailments'). It’s calming for acne-prone skin.
  3.  Tulsi - Tulsi (Holy Basil), is the 'Queen of Herbs' known for its cleansing and toning properties.


    4. Sandalwood - Ayurveda says that Sandalwood induces Saumanasya Janana ('Mental Coherence & Placidity'). It is a powerful antiseptic, that curbs excessive sebaceous gland activity and cools inflamed skin.
Skin Type Recomm. Cleanser by Kama What it does Key Ingr.
Oily and Acne-Prone Anti-Acne Cleansing Foam It dries out active acne, unclogs and tightens skin pores, and reduces the frequency of breakouts. Neem, Tulsi and Tea Tree Oil
Dry and Sensitive Skin Sensitive Skin Cleansing Foam or Mridul Soap-Free Cleanser Calms distressed skin, removes impurities and excess oils without stripping away skin’s essential moisture. Sandalwood, Aloe Vera, and Calendula
Any Skin Type Rose Jasmine Face Cleanser A gentle foaming cleanser with a rich blend of Ayurvedic ingredients to effectively cleanse and lift away makeup and impurities. Aloe Vera, Jojoba Oil, Essential Oils of Rose and Jasmine

READ - HOW TO CLEAN FACE LIKE A PRO - 6 SIMPLE STEPS

#2 TONING

Skin Type Recommended Toner by Kama Ayurveda What it does
Acne-Prone Skin Pure Rose Water Tightens and clarifies pores, while removing residual makeup/dust traces from the skin’s surface.
Oily and Irritated skin Pure Lavender Water Has a calming action makes it perfect for sensitive, irritated skin prone to rashes and allergies. 
For Men and Combination Type Skin Pure Vetiver Water

Lends a cooling sensation to the skin. It also acts like a natural astringent and a face mist spray that hydrates the skin and balances its pH level.
Dry and Sensitive Skin Pure Mogra Water Suitable skin toner for sensitive skin with anti-inflammatory properties that relieve stressed skin and balance the pH level of the skin.


READ - 5 SECRETS ABOUT KAMA AYURVEDA ROSE WATER

#3 MOISTURISING

The main purpose of using a moisturizer is to hydrate and nourish the skin.

Regular cleansing of face and exposure to the environment results in the skin losing its natural moisture. The skin’s natural ability to retain moisture also reduces as we age. Therefore, it’s recommended to use moisturizer as part of your skin care routine throughout the year.

Ayurveda recommends using natural ingredients for skin moisturization. The requirements of the skin vary according to the skin type. Look for Ayurvedic ingredients like Coconut Milk, Sesame Oil, Essential Oils in your face moisturizers. Shea Butter and Kokum Butter are recommended for moisturizing the body.

DO YOU NEED A SEPARATE NIGHT CREAM?

CTM needs to be your morning and night skin care routine. However, your day and night moisturizer has different functions.

Your day cream is ideally of lighter consistency and provides your skin with adequate protection from environmental stressors and the radiation from the sun. It also prevents skin breakouts and gives a healthy glow to the skin.

Your skin’s requirements vary from season to season. You can actually ditch your day cream for sunscreen in summers. But don’t forget your night cream as it repairs the skin after a tiring day out in the sun. We’ve combined some of our best skin care tips for summer in this blog.

READ - CLEANSE SHEILD HEAL - SUMMER SKIN CARE TIPS BY KAMA

#4 PROTECTING AGAINST THE SUN

An extension of moisturizing, sunscreen is considered the most important skin care product for use all round-year. By using sun protection daily, you can minimize the appearance of fine lines and imperfections in skin texture. 

WHAT TO LOOK FOR IN A SUNSCREEN?

First of all, it’s important to note that there are two kinds of sun radiations namely UVA and UVB rays. A broad-spectrum sunscreen is able to block out both types of radiation. For this, ingredients like Zinc Oxide and Titanium Dioxide are used. Both of them are non-comedogenic and suitable for sensitive as well as acne-prone skin.

Zinc Oxide is a naturally occurring mineral and one of the safest skin-protecting ingredients against the harmful effects of ultraviolet (UV) rays. It filters out both UVA and UVB rays, thus forming a shield that keeps UV radiation from penetrating the skin and causing cell damage. 

Titanium Dioxide is another active mineral ingredient that works naturally to block the sun’s rays. It protects skin from UVB radiation and is considered to have no risk of skin sensitivity.

Sunscreen that contains these ingredients is called physical blocker while the sunscreens with ingredients like oxybenzone and octinoxate are called chemical blockers. 

Note - Chemical blockers can irritate and cause skin reactions for those with sensitive skin, while all-natural physical blockers are completely safe for the skin.

HOW AND WHEN TO APPLY SUNSCREEN?

As a rule of thumb, apply sunscreen 30 minutes before sun exposure, and reapply at least every two hours. Physical sun blockers like Kama Ayurveda’s Natural Sun Protection can be applied last in your skin care regimen, but before applying any make-up. It’s a natural broad-spectrum sunscreen that suits all skin types. 

Sunscreen is the most crucial part of your skin care routine and should be used every day to maintain healthy skin.

Noticed your skin getting tanned lately? We’ve got some simple remedies for you to undo the damage. 

READ - HOW TO REMOVE TAN - 10 EFFECTIVE HOME REMEDIES

MOVING BEYOND THE BASICS

Now that we’ve discussed the basics, let’s move on to understanding what else you should add to your skin care routine. These additions are based on your skin type. For instance, if you’ve large pores, face packs are recommended for you. And if your skin is dry, then regular oil massage is useful.  

Let’s explore a few great additions to your skincare routine.

#5 AYURVEDIC TREATMENTS AND FACIAL OILS/SERUMS

The age-old science of Ayurveda focusses on herbal oils as a means for treating various skincare issues. When applied on the skin, these naturally-sourced healers cure skin problems, keep the skin pores in check and locks in moisture for a healthy glow.

WHAT IS A FACE OIL OR FACE SERUM?

In recent times, face oils and face serums have become popular as an alternative or addition to using creams. We recommend facial oils made from Ayurvedic herbs as they are 100% natural. 

Below are some popular Ayurvedic herbal oils that are recommended for use as face oils. 

Kumkumadi Oil - The legendary Kumkumadi Oil is prescribed for dull, pigmented, damaged skin. It has special qualities that help skin look young, radiant, and healthy.
READ - KUMKUMADI OIL - ULTIMATE GUIDE TO THE MIRACLE BEAUTY OIL

Neem Oil - Rich in antioxidants, Neem Oil has been used for centuries for treating both skin disorders. Its antibacterial action treats skin issues such as acne, rashes, hyper-pigmentation, burns, and abrasions while protecting and moisturizing the skin.

READ - HOW TO USE NEEM OIL FOR SKIN?

WHAT ARE AYURVEDIC SKIN TREATMENTS?

Unlike facial oils/serums, Ayurvedic skin treatments are herbal oils that can be applied all over the body. The various types of Ayurvedic body treatment oils include brightening natural oils and de-tanning oils. 

These oils can be massaged all over the body as the Ayurvedic practice of Abhyanga, also known as self-massage. Some of the popular Ayurvedic body oils are -

  1. 1. Coconut Oil - is a natural conditioner for dry and sensitive skin.

  2. 2. Almond Oil - is an excellent emollient for dry, flaky, irritated skin. It is also a pure and natural dry skin serum that smoothens the skin from head to toe.

  3. 3. Nalpamaradi Oil - is a powerful de-tanning treatment that repairs pigmentation and treats sun-damaged skin.

  4. 4. Sesame Oil - repairs skin damage caused by harmful UV rays and can also be used as a massage oil. It absorbs easily to skin.

READ - HOW TO USE NALPAMARADI TAILAM TO REMOVE TAN

#6 EXFOLIATION

Exfoliation is simply a process of removing the dead cells from your skin’s surface. Irrespective of your skin type, you’ll benefit from exfoliation as it removes the build-up of dead cells that cause skin dullness. 

Wondering how often should you exfoliate? Well, that depends on your skin type and the face scrub that you choose. 

Ayurvedic scrubs such as Ubtan are 100% percent natural and contain ingredients like oatmeal and chickpea flour that are gentle on the skin. If you’re using such Ayurvedic scrubs for your face and body, you can even use them regularly. When using other scrubs, exfoliate once or twice a week.


READ - THE 2 BEST AYURVEDIC UBTAN RECIPES FOR A GLOWING SKIN

Unlike the chemical scrubs that have plastic microbeads, herbal face scrubs are made with natural substances that give an exfoliating effect to the skin. Almonds, Oatmeal, and Chickpea flour are some ingredients to look for in natural scrubs.

#7 FACE MASKS AND FACE PACKS

Our skin has to fight various environmental damages like pollution and sun exposure on a regular basis. Which is why, since ancient times, women have been using natural masks to deep clean the pores and exfoliate the skin to achieve a healthy glow. 

These face masks are skin remedies that work wonders in keeping acne, pigmentation, aging, and other concerns at bay. By using natural masks regularly, you can heal your skin and combat stubborn skin issues.

Ayurvedic herbal face masks can be used weekly. They absorb oil and can have a mild exfoliating effect — so they’re great for oily areas. Some ingredients to look for in your natural face masks are - Multani Mitti, Ashwagandha, Sandalwood, and Turmeric

Face packs are also recommended as a part of bridal skincare regimen a month prior to the wedding. They soothe the skin and help in relaxation. 

READ - BRIDAL SKIN CARE - 11 PRE-BRIDAL TIPS FOR A GLOWING SKIN

#8 LIP CARE

Taking care of your lips is an extension of skin care. So, don’t forget to include it in your skincare routine.

The most common problem that our lips go through is dryness and chapping. Sometimes, the build-up of dead cells on the lips leads to lips losing their natural colour. This causes dark and pigmented lips.

The ancient science of Ayurveda suggests a Vata-balancing diet and other natural ways to hydrate, moisturise and nourish the lips. It’s recommended to use a natural lip balms and lip scrubs regularly to maintain beautiful and healthy lips.

#9 AYURVEDIC DIET FOR GLOWING SKIN

As we mentioned at the beginning of the blog, Ayurveda emphasizes on the importance of a good diet to bring out that healthy glow. What you eat and how you feel shows on your skin.

So, as the last part of your skin care routine, we’re listing some food items to include in your diet for a glowing skin.

1. Water - This one’s a no brainer. You definitely need to have at least 2 litres of water if you want your skin to remain hydrated.

2. Fruits - Having seasonal fruits provide your skin with its dose of nutrients like Vitamins and antioxidants. Want a clean skin with no blemishes? Start eating fruits regularly.

3. Green Leafy Vegetables - Full of antioxidants and essential nutrients, green leafy vegetables like broccoli, spinach, lettuce are great for your skin.

4. Yogurt - A lot of skin ailments are caused by stomach issues. Having yogurt everyday is the easiest way to maintain a healthy gut and combat these issues.

5. Green Tea - Green tea is known to protect your skin from signs of ageing. It’s loaded with catechins which help in improving overall health of the skin.

It’s important to stick to healthy food choices and avoid extra sugary, processed and fatty foods that are known for causing skin problems. In addition, make sure you exercise everyday to improve your overall gut health and bring out a healthy flow on your skin.

SKIN CARE ROUTINE - CONCLUSION

In this blog, we’ve talked about the different elements of a skin care routine and their functions for your skin. We’ve also discussed how taking care of your gut and your stress levels is just as important as using the right products on your skin. 

Now, you’re ready to build your own skin care routine by picking up the elements and products that are most essential for you. So, get started!