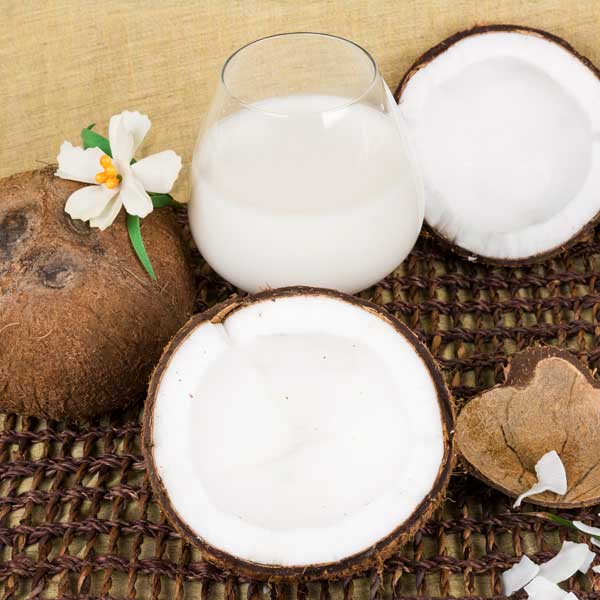
Aloe vera and coconut oil are like a power duo for your hair. Aloe vera is not just a plant that looks cool in your living room; it's packed with vitamins and minerals that make your hair healthy. Coconut oil is also a hair care favorite for many because it's so good at making your hair stronger and adding shine.
In this article, we'll show you different ways to use aloe vera and coconut oil for your hair. Whether you need to fix dry hair, want to grow your hair longer, or are just looking for a natural option for your hair care, this combination could be a great choice.
10 Benefits Of Aloe Vera and Coconut Oil for Hair
Researchers and hair experts have found that when you mix aloe vera with coconut oil, it can benefit your hair in many ways. For example, if you have dandruff, this combo is great because it can fight off the fungus that causes dandruff and calm an itchy scalp.
Also, if you're worried about your hair falling out or getting thin, aloe vera and coconut oil might be just what you need.
Let’s look at some of the top benefits of using this combination for hair.
1. Prevents Hair Fall and Thinning:
The combination is rich in vitamins like A, B12, C, E, and folic acid, along with amino acids, which are key to preventing hair thinning, strengthening hair roots, and reducing hair fall.
2. Natural Hair Styling Gel and Serum:
Aloe vera, rich in vitamins and minerals, acts as a natural hair serum and can be used as a styling gel, especially for dry and frizzy hair.
3. Dandruff Treatment:
Aloe vera and coconut oil both have anti-inflammatory and antifungal properties, making them effective against dandruff and scalp irritations caused by Malassezia globose, a common fungus.
4. Deep Cleanses Oily Hair:
Aloe vera cleans excess oil gently, while coconut oil maintains moisture and hydration levels, offering a natural solution for oily hair.
Boost Hair Growth:
Both ingredients are rich in essential vitamins and nutrients that contribute to cell turnover and hair strength, promoting hair growth and reducing breakage and loss.
Aloe vera is believed to help in stimulating hair growth due to its rich proteolytic enzymes. Combined with the nutrients in coconut oil, it can promote healthier hair growth.
Nourishes Hair:
Coconut oil is known for its deep moisturizing properties. It penetrates the hair shaft and reduces protein loss from hair. Aloe vera also contains enzymes and vitamins that moisturize and protect hair.
Protection from Hard Water:
This combination can help in styling dry or frizzy hair, and it's also effective in protecting hair from hard water by maintaining the pH level of your hair.
Natural and Chemical-Free Hair Care:
Using these natural ingredients is a chemical-free alternative to many hair care products, which is beneficial for those with sensitive skin or those looking to reduce their exposure to chemicals.
Boosts Strength and Shine:
Coconut oil helps in reducing damage to the hair, making it stronger. Aloe vera adds shine and softness to hair, making it look healthier.
Repairs Hair Damage:
The combination can help repair sun damage and restore the hair’s natural sheen and texture due to their nourishing and conditioning properties.
Using coconut oil and aloe vera for hair care can be done in various ways, each method catering to different hair needs.
1. Basic Hair Mask
A simple hair mask can be made by combining coconut oil and aloe vera. Here's a commonly used method:
Ingredients: 2 tablespoons of fresh aloe vera gel and 1 tablespoon of virgin coconut oil.
Preparation: Mix the ingredients in a bowl until they form a smooth, blended paste.
Application: Apply the mask from the mid-shafts of your hair towards the tips, then massage it onto your scalp.
Duration: Leave the mask on for about 30 to 60 minutes.
Rinse: Wash off the mask thoroughly with water.
This mask can be used once a week for moisturizing and nourishing your hair.
2. Overnight Deep Conditioning
For deeper conditioning, you can leave the mask on overnight:
Ingredients: 2 tablespoons of fresh aloe vera gel and 1 tablespoon of virgin coconut oil.
Preparation: Mix the ingredients in a bowl until they form a smooth, blended paste.
Covering: Wrap your hair in a shower cap or towel to prevent the mask from drying out.
Duration: Leave the mask on overnight.
Rinse: Wash your hair in the morning.
This method is suitable for intense nourishment and is especially beneficial for dry and damaged hair.
3. Scalp Treatment
For scalp issues like dandruff or itchiness:
Application: Focus the application of the mixture primarily on your scalp.
Massage: Spend a few minutes massaging the mixture into the scalp.
Duration: Let it sit for about 30 minutes to an hour.
Rinse: Wash off with water.
This method can help soothe scalp irritation and combat dandruff.
4. Styling Gel
Aloe vera can also be used as a natural styling gel:
Preparation: Extract fresh aloe vera gel.
Application: Apply the gel directly to your hair for styling.
This method is great for managing frizz and styling dry or curly hair.
Precautions and Tips
Patch Test: Always perform a patch test to ensure you're not allergic to either ingredient.
Quality of Ingredients: Use pure and organic aloe vera gel and virgin coconut oil for the best results.
Frequency: Depending on your hair type and condition, adjust the frequency of application.
Rinsing: Ensure thorough rinsing to prevent any residue build-up.
FAQ: Aloe Vera and Coconut Oil for Hair
Q: What are the benefits of using aloe vera and coconut oil for hair?
A: Aloe vera is rich in vitamins and minerals that nourish hair, promote hair growth, and moisturize the scalp. Coconut oil penetrates the hair shaft to reduce protein loss, strengthens hair, and adds shine. Together, they can help in moisturizing hair, reducing dandruff, promoting hair growth, and soothing the scalp.
Q: How do I make a hair mask with aloe vera and coconut oil?
A: Mix 2 tablespoons of fresh aloe vera gel with 1 tablespoon of virgin coconut oil. Apply this mixture to your hair, starting from the mid-shafts to the ends, and then massage it into your scalp. Leave it on for about 30-60 minutes before rinsing it off.
Q: Can aloe vera and coconut oil help with hair growth?
A: Yes, both aloe vera and coconut oil are known for their properties that can promote hair growth. Aloe vera contains enzymes and vitamins that can stimulate hair follicles, while coconut oil provides the necessary nutrients and hydration to strengthen hair and prevent breakage.
Q: Is this combination suitable for all hair types?
A: Aloe vera and coconut oil are generally suitable for all hair types, including oily, dry, frizzy, and curly hair. However, individuals should adjust the amount used based on their specific hair type and condition.
Q: How often should I use aloe vera and coconut oil on my hair?
A: For best results, you can use this treatment once a week. This frequency helps maintain hair health without overburdening your hair with excessive moisture or oil.
Q: Will aloe vera and coconut oil help with dandruff?
A: Yes, both ingredients have properties that can alleviate dandruff. Aloe vera's soothing effect helps calm scalp irritation, while coconut oil's moisturizing properties help reduce dryness and flakiness associated with dandruff.
Q: Can I leave the aloe vera and coconut oil mixture on my hair overnight?
A: While you can leave it overnight for deep conditioning, it's not necessary. A duration of 30-60 minutes is typically sufficient. If you choose to leave it overnight, wrap your hair to avoid staining your bedding.
Q: Are there any side effects of using aloe vera and coconut oil on hair?
A: Generally, there are no severe side effects. However, some people might experience an allergic reaction to aloe vera. It's always recommended to do a patch test before applying it to your hair.
Q: Can I use store-bought aloe vera gel instead of fresh gel?
A: Yes, you can use store-bought aloe vera gel if fresh gel is not available. Make sure it's pure aloe vera gel without added fragrances or alcohol.
Q: How should I wash off the aloe vera and coconut oil mask?
A: Rinse your hair thoroughly with lukewarm water and then shampoo as usual. Ensure that all the mixture is washed out to avoid any residue in your hair.
Taking care of our hair is more than just a routine; it's key to having hair that not only looks good but feels great too. Day-to-day life throws a lot at our hair – from sun and pollution to the heat from styling tools – and this can leave it looking tired and dull.
That's where hair masks come in as a hero for your hair.
In this blog, we're going to dive into the world of hair masks and discover how they can help us achieve that dream of silky, shiny hair.
14 Top Hair Masks For Silky and Smooth Hair
Hair masks are not just any hair product; they're like a superfood for your hair.
They go deep into your hair, giving it the intense care and nourishment it needs to bounce back stronger and look better.
We'll explore ingredients that make hair masks so special, and how they work to make your hair feel softer and smoother. You'll also get to learn about different types of hair masks – from ones you can whip up in your kitchen with natural ingredients to the best ones you can find in stores.
1. Banana And Olive Oil Mask
Bananas are excellent for hydrating and moisturizing dull, lifeless hair. Rich in potassium, they help in balancing the pH of your scalp, which is vital for maintaining hair health.
Olive oil complements this by bringing in its richness in fats and vitamin E, both of which are essential for giving your hair a sleek and shiny appearance. When combined, these ingredients work to restore moisture and sheen to your hair.
How to Use:
Blend one ripe banana until lump-free.
Mix with one tablespoon of olive oil.
Apply to your scalp and hair length.
Leave for 20 minutes, then rinse with warm water.
2. Apple Cider Vinegar Mask
This mask works wonders because apple cider vinegar is superb for hydrating your hair and bringing back its natural shine. The addition of honey enhances this effect, offering deep nourishment. Together, they revitalize the hair, making it look more vibrant and healthy.
How to Use:
Mix apple cider vinegar with one tablespoon of honey.
Apply the mixture with your fingertips.
Leave it on for 30 minutes.
Rinse well with shampoo and follow with a conditioner.
3. Oats & Almond Oil Hair Mask
Oatmeal mixed with almond oil and milk creates a protein-rich concoction that is highly beneficial for dull and lifeless hair. The mask provides the necessary nourishment, thanks to the proteins in oats and almond oil's natural goodness, resulting in softer and shinier hair.
How to Use:
Blend 4 tablespoons of oats in a cup of milk.
Add a few drops of almond oil.
Apply and leave for 30 minutes.
Rinse off with cold water for shiny results.
4. Castor Oil Hair Mask
Castor oil is infused with fatty ricinoleic acid, making it an effective solution for achieving silky smooth hair. It combats frizz and deeply conditions the hair, helping to improve its overall texture and appearance.
How to Use:
Warm some castor oil.
Massage it into your scalp and hair length.
Cover with a light cloth.
Rinse off after 40 minutes with warm water.
5. Banana Honey And Yogurt Mask
The combination of bananas, honey, and yogurt works effectively due to the unique properties of each ingredient. Bananas, with their carbohydrates, potassium, and vitamins, are perfect for locking in moisture. Yogurt, rich in lactic acid, helps combat dryness and dullness. Honey adds to the smoothing effect, making your hair soft and manageable.
How to Use:
Blend banana with honey and yogurt.
Apply to damp hair.
Leave for 40 minutes.
Rinse with cold water.
6. Avocado, Olive Oil, And Manuka Honey
Avocado, olive oil, and manuka honey from a powerful trio for hair care. Avocado helps heal and moisturize a dry scalp and acts as a natural detangler. Olive oil protects the hair from heat damage, while manuka honey provides essential nourishment and adds a glass-like shine, making this mask a luxurious treatment for your hair.
How to Use:
Mix 1 avocado, 2 tablespoons of olive oil, and 2 tablespoons of manuka honey.
Apply the smooth paste to your hair.
Cover with a shower cap for 45 minutes.
Wash off with cold water.
7. Coconut Oil
Coconut oil is a natural powerhouse for hair care. It softens and tames thick, dry hair effectively. Its antimicrobial properties are beneficial in fighting dandruff and scalp issues. When used correctly, coconut oil can strengthen the hair and help maintain its health and luster.
How to Use:
Melt a small amount and apply it to hair.
Use a teaspoon for fine hair and a tablespoon for thick hair.
Apply as a pre-shampoo treatment or as a deep conditioning treatment.
8. Milk and Honey Mask
Milk and honey are a perfect pair for hair care, especially for fine hair. Honey, with its keratin content, helps strengthen the hair and prevent breakage. Whole milk, loaded with proteins, amino acids, and vitamins, supports hair structure and softens it. This combination is excellent for treating damaged hair and restoring its natural shine and smoothness.
How to Use:
Mix one cup of milk with one tablespoon of honey in a spray bottle.
Mist onto hair after shampooing.
Leave it for 10-20 minutes.
Rinse with warm water for shiny results.
9. Aloe Vera Mask
Rich in vitamins E and C, Aloe Vera provides antioxidants that protect hair from free radicals, strengthening and repairing strands. Its hydrating properties are exceptional, attracting and retaining moisture to combat dry hair. Aloe's anti-inflammatory qualities also soothe irritated scalps, making it a versatile ingredient for overall hair health.
How to Use:
Mix pure aloe vera gel with water to create a light spray for a quick hair refresh.
For a deeper treatment, mix a tablespoon of aloe vera with your favorite conditioner or mask.
Apply it on wash day, focusing on the scalp and hair lengths.
10. Brown Sugar and Coconut Oil Mask
This combination is a treat for your scalp. Brown sugar acts as a gentle exfoliant, clearing away flakiness and reducing dandruff and itchiness. Coconut oil enhances scalp health, stimulating hair growth and preventing hair loss. It penetrates deep into follicles, moisturizes hair, adds shine, and helps prevent breakage and split ends. Together, they promote a healthy scalp and longer, stronger hair.
How to Use:
Mix two tablespoons of brown sugar with one tablespoon of coconut oil to form a paste.
After shampooing, work this mixture into your hair, focusing on the scalp.
Gently massage to exfoliate the scalp.
Rinse thoroughly and follow with your regular conditioner.
11. Olive Oil and Coconut Oil
Olive oil and coconut oil are natural emollients, locking in hydration to keep hair smooth, soft, and shiny. Olive oil is particularly effective for dry ends, providing a polished look. The combination of these oils, especially when warmed, allows deeper penetration into the hair cuticle, enhancing their effectiveness for achieving high-gloss shine.
How to Use:
Mix one-fourth cup of olive oil with one tablespoon of heated coconut oil.
Apply the warm mixture to your hair, ensuring even coverage.
Cover your hair with a shower cap for enhanced absorption.
Leave on for 10 minutes, then rinse with warm water.
12. Green Tea Hair Mask
Green tea is an excellent antioxidant for the hair and scalp, protecting them from environmental stressors. It helps slow down the shedding process, contributing to a healthier hair growth cycle. Additionally, it can reduce oil production and dandruff, making it beneficial for those with dull, fine, or thinning hair, or an oily scalp.
How to Use:
Steep green tea leaves for five minutes and let the tea cool.
Add a few drops of honey to the tea for added hydration and shine.
Pour the mixture into a spray bottle.
Mist onto the scalp and hair, massaging from scalp to ends.
Leave it for 10 minutes, then rinse out.
13. Rice and Avocado Mask
Rice water is rich in inositol, which aids in repairing damaged hair, helping to retain the natural curl pattern. Avocado adds a boost of nourishment, addressing the common issue of dryness in curly hair. This mask is a powerhouse for curly hair, providing the essential hydration and repair needed for healthy curls.
How to Use:
Soak 1 cup of rice in 2 cups of water, then strain to remove the rice grains.
Mash half an avocado and mix it into the rice water.
Apply this mixture to your hair, ensuring even coverage.
Leave it on for 20-25 minutes.
Rinse off thoroughly.
14. Coconut Oil and Cinnamon Hair Mask
Coconut oil provides deep hydration and moisture to hair, strengthening and nourishing the strands. Cinnamon has antimicrobial properties, stimulates scalp circulation, improves blood flow to hair follicles, and supports hair growth and strength.
How to Use:
Combine 1 tablespoon of coconut oil with 1 teaspoon of cinnamon in a bowl until well blended.
Part your hair and apply the mixture to your scalp, focusing on areas where you desire growth.
Gently massage the mixture into your scalp to stimulate blood flow.
Tie up your hair and cover with a shower cap or towel.
Leave the mask on for 30-45 minutes, then wash it out with your regular shampoo and conditioner.
Application Techniques for Maximum Benefit From Hair Masks
When it comes to hair masks, how you apply them can be just as important as the mask itself. By following the best practices, you can maximize the benefits and leave your hair looking its best.
1. Start with Damp Hair:
For most hair masks, damp hair is ideal. This doesn't mean soaking wet; instead, gently towel-dry your hair after washing to remove excess water. Damp hair is more porous, which means it can absorb the mask's nutrients more effectively.
2. Use a Wide-Toothed Comb:
After applying the mask, use a wide-toothed comb to evenly distribute the product from roots to ends. This ensures every strand gets coated and benefits from the mask. Be gentle to prevent breakage, especially if your hair is prone to tangling.
3. Timing is Key:
Most hair masks should be left on for about 20 to 30 minutes. However, always check the product's instructions, as some may require more or less time. Leaving a mask on for too long, especially protein masks, can lead to hair becoming too heavy and potentially brittle.
4. Frequency Matters:
The frequency of mask application depends on your hair type and needs. As a general rule, once a week is sufficient for most hair types. If you have extremely dry or damaged hair, you might benefit from it twice a week. Be cautious with protein-based masks; too much protein can make hair stiff and brittle, so limit these to once a month or as needed.
5. Cover Your Hair:
After applying the mask, cover your hair with a shower cap. This traps heat from your scalp, opening up the hair cuticles, and allows for deeper penetration of the mask's nutrients.
6. Apply Heat for Deeper Penetration:
For an extra boost, apply gentle heat while your hair is covered. This can be done by using a warm towel or a hairdryer on a low setting. The heat further helps the hair cuticles to open and the mask to penetrate deeper into the hair shaft.
7. Rinse Thoroughly:
After the recommended time, rinse the mask out thoroughly with lukewarm water. Avoid hot water as it can strip away moisture. If your mask is oil-based, you might need to shampoo lightly to remove any residue.
By following these steps, you can ensure that your hair reaps the maximum benefits from your hair mask treatment, leaving it nourished, hydrated, and looking its best.
Are you looking to revive your natural hair color or combat the early signs of graying? While it’s not always possible to reverse hair graying to your natural color, some home remedies can help you darken your hair. These remedies for black hair offer a range of options to suit different hair types and needs.
And the best part is that you can use them regularly without worrying about the side effects that come with using chemical and synthetic hair dyes.
20 Best Home Remedies For Black Hair
These remedies are not just about achieving a darker shade; they're also about nourishing your hair from the roots to the tips, ensuring it stays healthy, vibrant, and full of life.
1. Mustard Oil
Rich in antioxidants, vitamins, and minerals, mustard oil stimulates hair growth and improves melanin production, which darkens hair.
Mustard oil is also known to stimulate blood circulation in the scalp. Research suggests that improved blood circulation to hair follicles may help in pigment retention.
How to use:
Warm the mustard oil slightly. Massage it into your scalp and through your hair. Cover your hair with a shower cap and leave it on for about 30-60 minutes, then shampoo as usual.
2. Amla Powder
Amla (Indian gooseberry) is high in vitamin C and tannins, which promote hair pigmentation.
Amla is also rich in antioxidants. Studies have shown that antioxidants can protect hair follicles from damage by free radicals, potentially slowing down graying.
How to use:
Mix amla powder with lukewarm water to create a smooth paste. Apply it to your hair and scalp, ensuring full coverage. Leave it on for about 45-60 minutes. Rinse with lukewarm water.
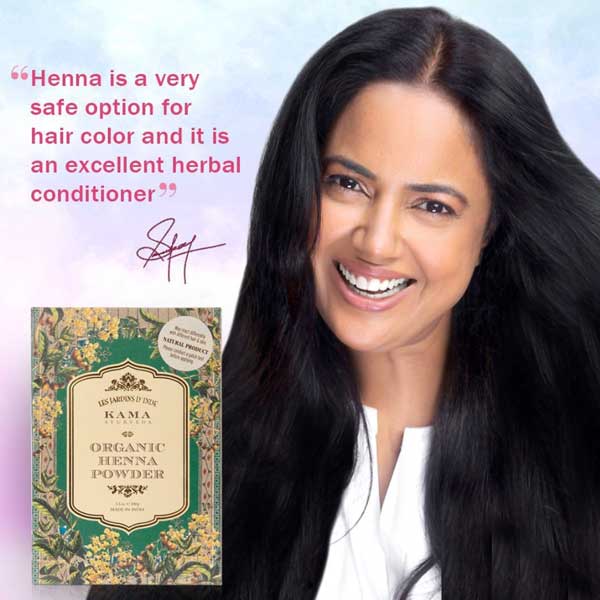
3. Henna Powder
Henna naturally dyes hair with a reddish hue, which can appear darker on some hair types.
The Lawsonia inermis plant, from which henna is derived, has been historically used for hair coloring and conditioning. Its natural dyeing properties are attributed to lawsone, a compound present in henna leaves.
How to use:
Mix henna powder with water, tea, or coffee and let it sit for several hours. Apply the paste to hair, leave it for a few hours, then rinse.
4. Indigo Powder Dye
Indigo, when used after henna, can turn hair from reddish-brown to black.Its effectiveness as a natural dye has been recognized for centuries.
How to use:
First, apply henna as described earlier. Then mix indigo powder with water to create a paste. Apply it evenly to your hair, leave it for 1-2 hours depending on the desired shade, and then rinse off.
5. Walnut Shells
Walnut shells contain a natural dye known as juglone. Research indicates that juglone can impart a strong natural dye, which is why walnut shell powder is often used in natural hair coloring formulas.
How to use:
Crush walnut shells and boil them in water for 30 minutes. Strain the liquid and let it cool. After shampooing, use the strained liquid as a final rinse. Repeat regularly for best results.
6. Black Tea Rinse
Black tea contains tannins that can darken hair.
The tannins in black tea can also contribute to strengthening hair strands. Regular use of black tea rinses can reduce hair shedding, according to some anecdotal evidence.
How to use:
Brew a strong black tea and let it cool. After shampooing your hair, use the tea as a final rinse. Leave it on for 20-30 minutes before rinsing with cold water.
7. Coffee
Coffee contains dark pigments that can stain hair, giving it a darker appearance.
The caffeine in coffee not only darkens hair but is also believed to stimulate hair growth, as suggested by some studies. It’s thought to target DHT, the hormone responsible for hair loss.
How to use:
Brew a strong cup of coffee and let it cool. Mix it with your regular hair conditioner. Apply this mixture to your hair, leaving it on for 20-30 minutes. Rinse thoroughly.
8. Methi Seeds (With Amla)
Methi (fenugreek) seeds are rich in folic acid, Vitamin A, Vitamin K, and Vitamin C, and are a powerhouse of minerals. These nutrients are known to boost scalp health and prevent hair loss.
How to use:
Soak methi seeds in water overnight. Grind them to a paste and mix with amla powder and water. Apply the mixture to your hair and scalp. Leave it on for about an hour, then rinse.
9. Almond Oil And Lemon Juice
Almond oil is rich in Vitamin E, which is known for its hair nourishing properties. Lemon juice, while slightly acidic, can help in cleansing the scalp and removing dead cells.
Almond oil nourishes the hair while lemon juice provides a natural shine that makes dark hair appear richer.
How to use:
Mix a few drops of lemon juice with a tablespoon of almond oil. Massage into your scalp and through your hair. Leave it on for about 45 minutes, then shampoo as usual.
10. Curry Leaves and Oil
Curry leaves are known to restore melanin in the hair, the pigment responsible for hair color.
Curry leaves are also a source of beta-carotene and proteins, which can reduce hair loss and increase hair growth. The combination with coconut oil enhances the penetration of these nutrients into the scalp.
How to use:
Boil a handful of curry leaves in coconut oil until they turn black. Let the oil cool, then apply it to your scalp and hair. Leave it overnight and wash your hair in the morning.
11. Ridge Gourd Oil
Ridge gourd is believed to restore the pigment cells in hair follicles.
Ridge gourd is also traditionally known for its enriching properties in terms of hair health. It’s believed to restore the natural pigment of the hair and improve texture.
How to use:
Sun-dry ridge gourd slices and soak them in coconut oil for 3-4 days. Strain the oil and apply it to your scalp and hair. Leave it on for at least an hour, then wash off with a mild shampoo.
12. Onion Juice
Onion juice can improve hair health and, due to its sulfur content, potentially affect hair color and nourish hair follicles.
How to use:
Grate or blend an onion to extract its juice. Apply the juice to your scalp and hair. Leave it on for 30 minutes, then wash your hair with a mild shampoo.
13. Shikakai Powder
Shikakai adds a subtle dark tint to the hair. Shikakai also has a low pH, making it a great natural cleanser that doesn’t strip hair of its natural oils. Its saponins gently cleanse the scalp and hair.
How to use:
Mix shikakai powder with water to form a paste. Use it in place of shampoo. Massage into your scalp and hair, leave it on for a few minutes, then rinse thoroughly.
14. Black Pepper and Lemon Dye
Black pepper contains natural pigments and, combined with lemon, can darken hair. Black pepper contains piperine, a compound that could potentially stimulate pigmentation. However, this application should be used with caution due to the potential for skin irritation.
How to use:
Mix a tablespoon of freshly ground black pepper with the juice of one lemon. Apply to your hair, focusing on the roots. Leave it on for about an hour, then rinse with cool water.
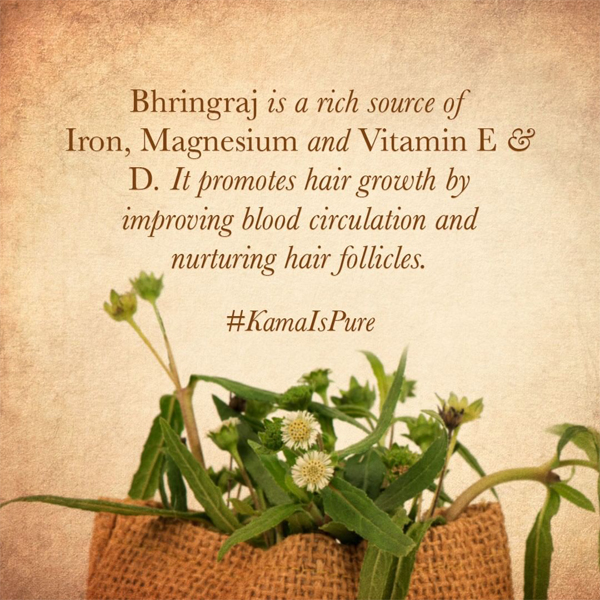
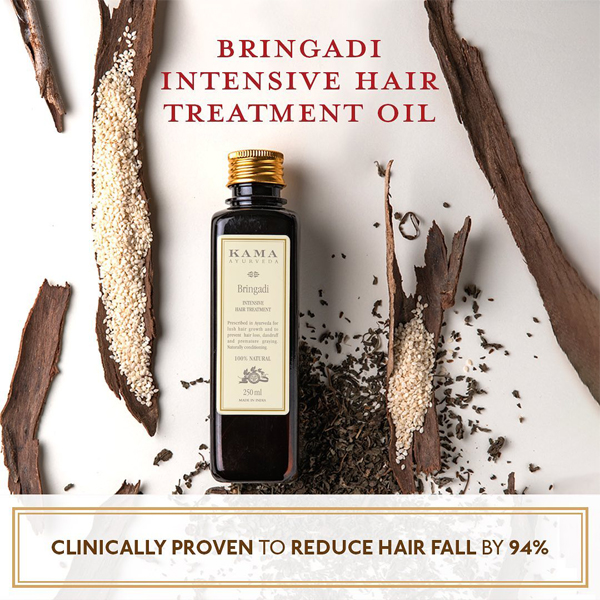
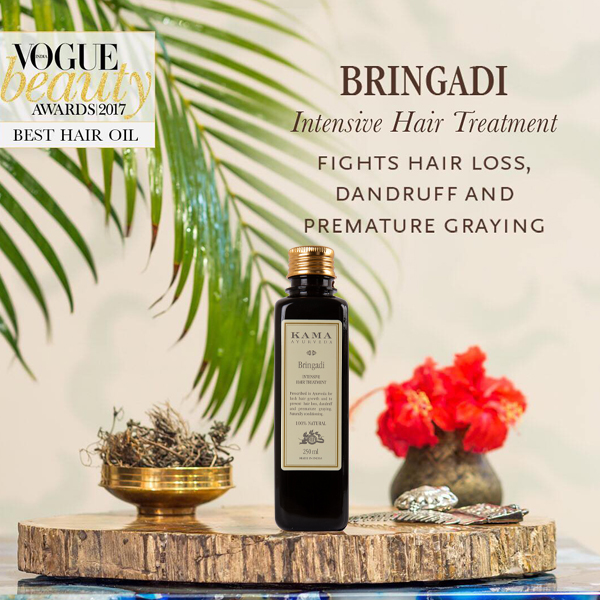
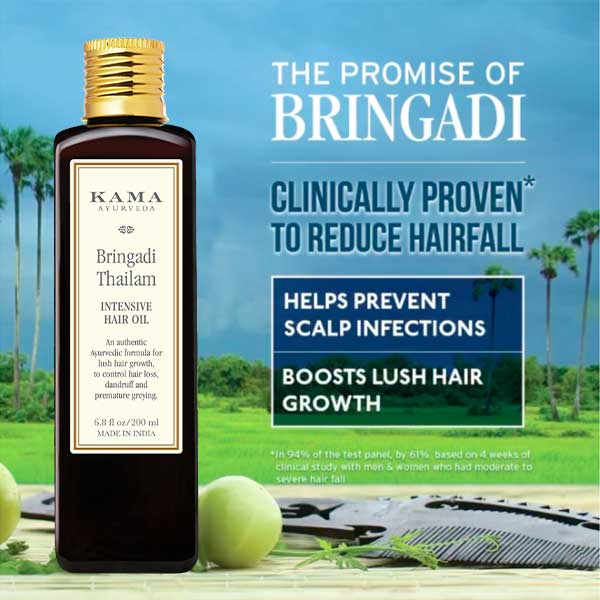
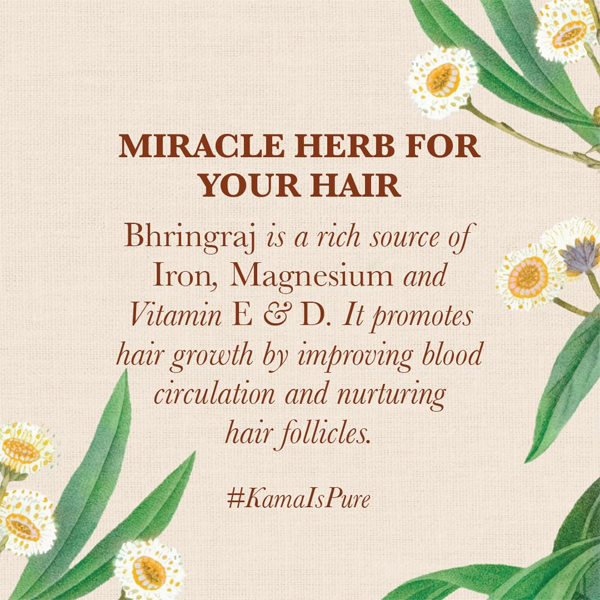
15. Bhringraj
Bhringraj (Eclipta alba) is known for its medicinal properties, particularly in Ayurveda for hair growth and color restoration.
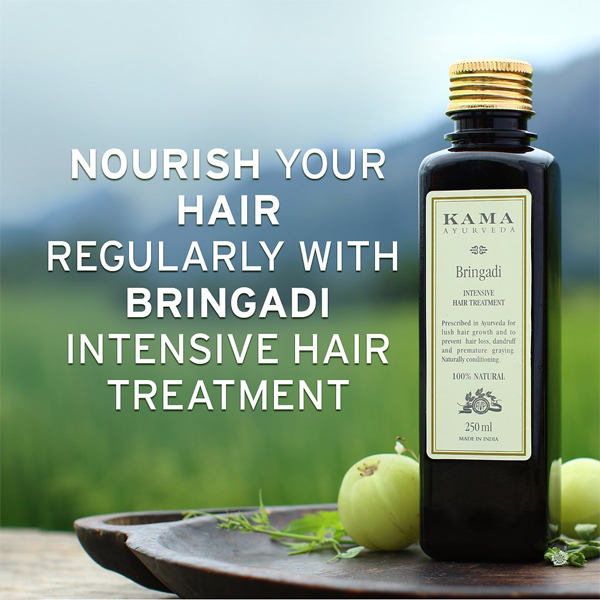
How to use:
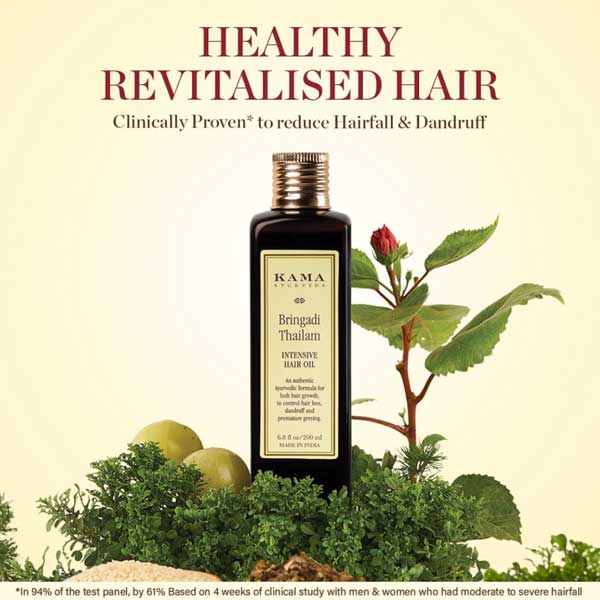
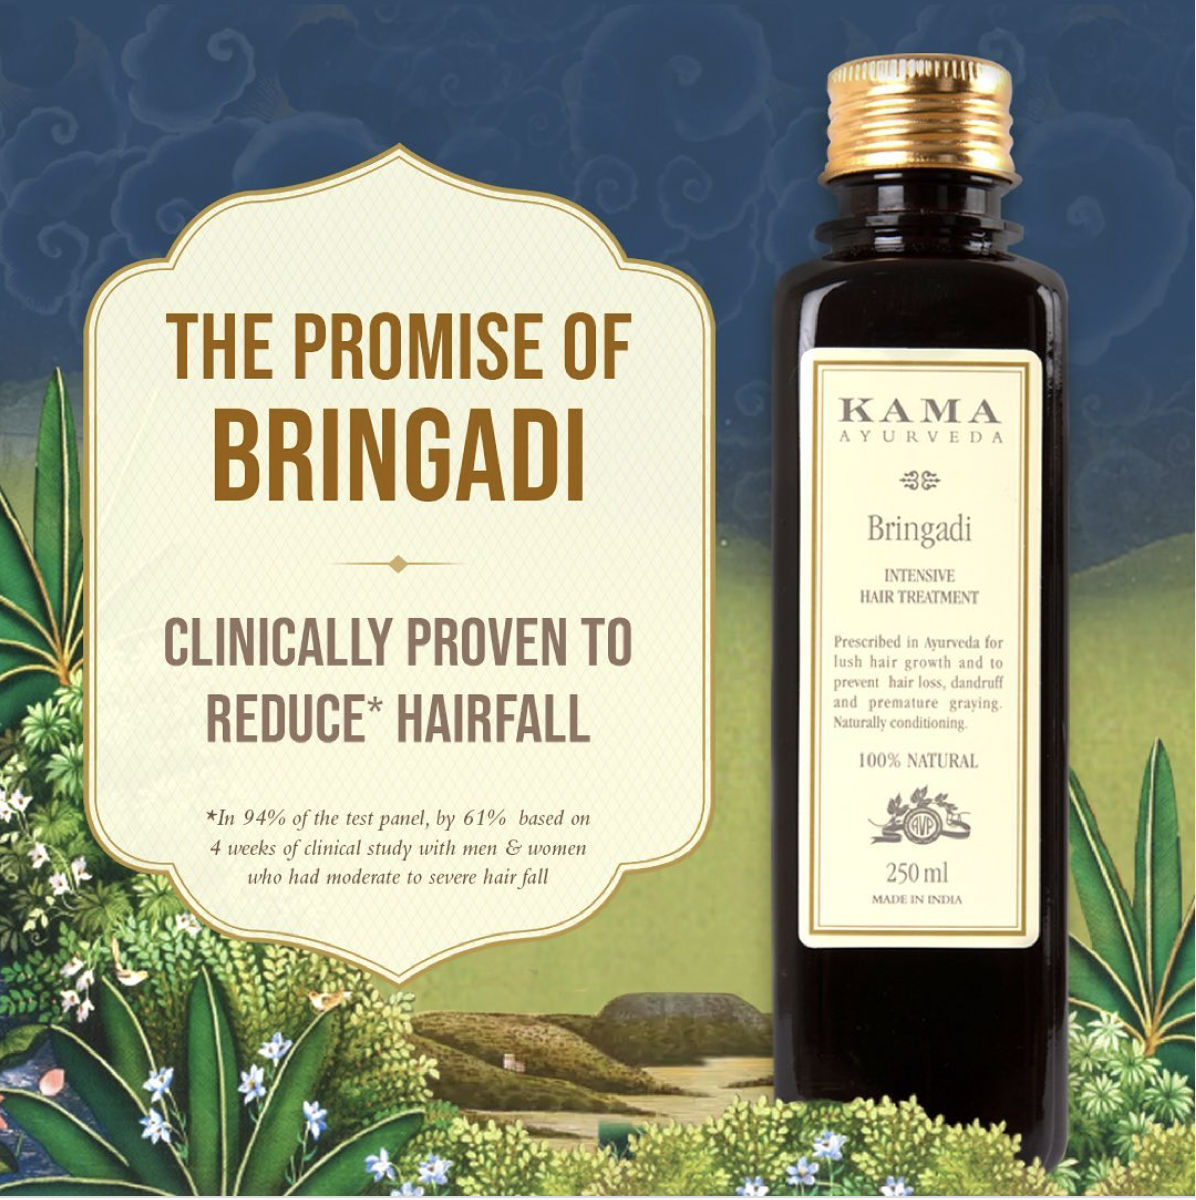
Mix Bhringraj powder with water to make a paste. Apply to your scalp and hair. Leave it on for about an hour, then rinse off with lukewarm water. Alternatively, you can use Bhringraj infused oil like Kama Ayurveda’s Bringadi Intensive Hair Treatment.
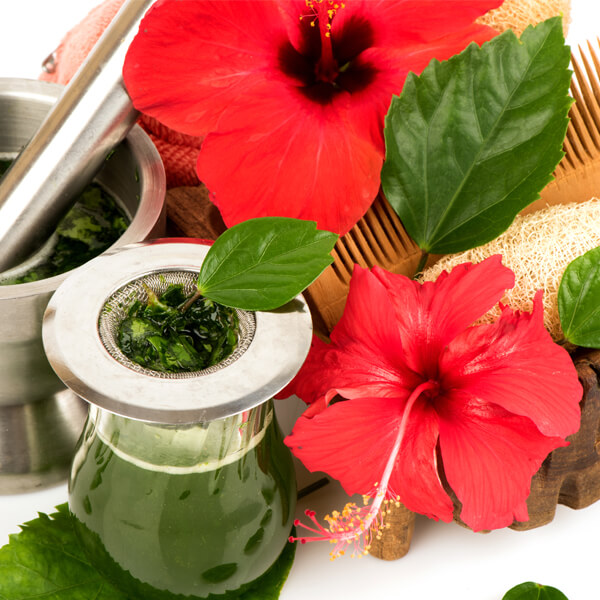
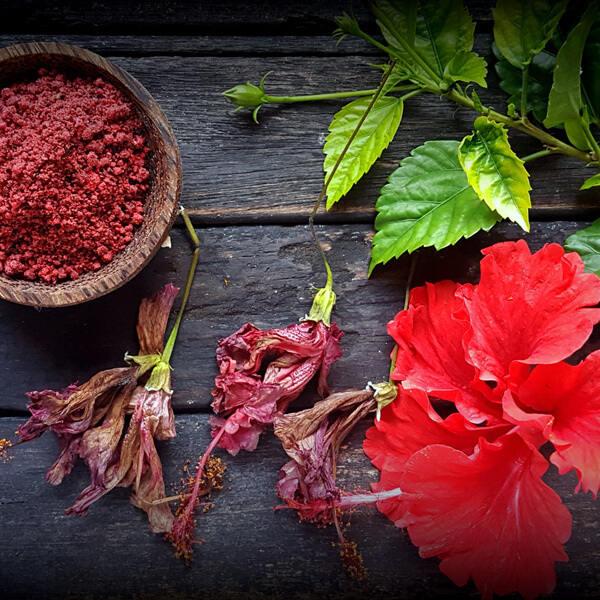
16. Hibiscus
Hibiscus nourishes the hair and can add reddish highlights, which appear darker on some hair colors.
Hibiscus is also rich in amino acids, Vitamin A, Vitamin C, and alpha-Hydroxy acids along with other nutrients, which are beneficial for the scalp and hair.
How to use:
Grind hibiscus flowers to make a paste. Apply it to your hair and scalp. Leave it on for about an hour, then rinse off with lukewarm water.
17. Mulethi and Ghee
Mulethi, or licorice root, enhances hair by darkening, thickening, and adding shine. Ghee tackles dryness and frizz with its deep moisturizing properties. Amla juice, loaded with Vitamin C and antioxidants, contributes to hair health and conditioning.
How to use:
Mix 1 kg of homemade ghee, 1 liter of Amla juice, and 200 gm of Mulethi. Heat the mixture until the water evaporates, let it cool, and store in a glass container. Apply the cooled mask to hair and scalp before showering, leaving it on for at least 30 minutes. Rinse with lukewarm water, using a mild shampoo if needed.
18. Black Sesame Seeds
These seeds are considered a source of essential fatty acids and trace minerals, which are vital for maintaining scalp health and hair color.
How to use:
Consume a tablespoon of black sesame seeds daily. Alternatively, you can apply black sesame seed oil to your hair, leaving it on for an hour before washing.
19. Ashwagandha
Known for its stress-reducing properties, Ashwagandha can help in reducing hair loss due to stress. Its antioxidant properties also contribute to scalp health and darkening hair colour.
How to use:
Include ashwagandha in your diet as a supplement or mix ashwagandha powder with water to make a hair mask. Apply it to your hair and leave it on for 30-45 minutes before rinsing.
20. Cocoa Powder
Cocoa is known for its rich brown color and can impart warm brown tones to the hair, especially effective for those with lighter hair colors. However, it may not significantly darken hair to a black shade, particularly for those with naturally dark hair.
How to use:
Mix cocoa powder with yogurt or conditioner to form a paste. Apply this to your hair, leave it on for 30 to 60 minutes, and then rinse off. This can give a subtle color boost and enhance the health of your hair.
Can White Hair Turn Black Again?
White hair typically cannot turn black again naturally. The graying of hair is largely influenced by genetics and aging, which affect the production of melanin, the pigment that gives hair its color. When the hair follicles stop producing melanin, hair turns gray or white.
Here are some key points to consider:
Aging: As people age, melanin production in hair follicles gradually decreases, leading to gray or white hair.
Genetics: The timing and extent of graying are largely determined by genetics. Some people experience graying early (as early as their teens or twenties), while others may not see gray hair until much later in life.
Health and Lifestyle: Factors like stress, smoking, poor nutrition, and certain health conditions can contribute to premature graying.
Reversibility: Once a hair follicle stops producing melanin, it typically doesn't start again. There have been some anecdotal reports and a few studies suggesting that reduction in stress or changes in nutrition can restore pigment in hair, but these are not universally accepted or consistent findings.
Hair Dyes and Natural Remedies: While it's not possible to naturally turn white hair black again, many people use hair dyes or natural remedies to color their hair. Natural remedies may impart some color or improve the health and appearance of hair but won't change its natural color back to black.
Medical Research: There is ongoing research in understanding the biology of hair pigmentation, including studies on potentially reversing gray hair. However, as of now, there is no widely accepted scientific method to restore the natural hair color once it has turned gray or white.
So, while you can manage white or gray hair through various treatments and dyes, turning it back to its original color naturally is currently not feasible.
Other Tips To Darken Hair Naturally
Getting black hair naturally involves a combination of maintaining healthy hair, using natural hair dyes, and, in some cases, enhancing the hair's dark pigmentation through diet and lifestyle choices.
Here are several methods to achieve or maintain naturally black hair:
Healthy Hair Care:
Keep your hair healthy and hydrated. This can make your natural hair color appear darker and more vibrant.
Avoid excessive use of heat styling tools and harsh chemicals, as they can lighten and damage hair.
Natural Dyes and Rinses:
Henna and Indigo: Henna alone gives a reddish-brown color, but combining it with indigo can give a black color. First, apply henna, then apply indigo for a black tone.
Black Tea Rinse: Regular rinses with strong black tea can darken hair over time. It's a gentle method and can also provide some shine.
Diet and Supplements:
A diet rich in iron, vitamins (especially B vitamins), and minerals can help maintain healthy hair and its natural color.
Some supplements are specifically designed to support hair health and pigmentation, but it's essential to consult with a healthcare provider before starting any new supplement.
Natural Oils and Herbs:
Certain natural oils, like coconut oil, can enhance the richness of your hair color.
Herbs like sage, rosemary, and amla are traditionally used to darken hair and improve its health.
Avoid Sun Bleaching:
Prolonged exposure to the sun can lighten your hair. Wearing a hat or using hair products with UV protection can help maintain your natural color.
Remember, the effectiveness of these methods can vary based on your natural hair color and type.
When choosing a moisturizer for your skin, it’s important to consider your skin type. For instance, if you have dry skin, heavy and oil-based moisturizers will help lock in the natural oils and keep the skin hydrated.
However, if you have oily-skin that is prone to acne and breakouts, you should avoid heavy moisturizers. For oily skin and normal skin type, gel based moisturizers are recommended.
What Is A Gel Moisturizer?
A moisturizer that is water-based and mostly free of oils is a gel moisturizer. These moisturizers are quick to absorb and have ingredients that help the skin remain hydrated for a long time.
They are specially suited for oily and acne-prone skin as they don’t add any oils to the skin surface or clog pores. If your pores are already clogged, the last thing you want to do is add an oil moisturizer on the top.
Some people with oily skin tend to skip moisturizers all-together to prevent their skin from appearing greasy. But doing that can result in excessive dryness, making the oil glands go into an overdrive and produce even more oil. This leads to clogged pores and breakouts.
Gel moisturizers are a great alternative to traditional creams that work by creating a barrier on the skin to lock in the moisture. Gel moisturizers on the other hand are quick absorbing and do not leave any heavy feeling residue on the skin surface. Gel moisturizers are also perfect for use during hot climatic conditions.
The composition of gel moisturizer lends it some unique advantages over traditional creams. Here are a few of them -
Light-weight Formula (H3)
Do you often worry about the greasy heavy feeling left behind by moisturizers? With gel moisturizers, your skin will feel light and fresh with every use without compromising on providing the essential hydration.
Quick Absorbing (H3)
The gel moisturizers are quickly absorbed into the skin and work as an excellent base for make-up. It’s easy to layer your make-up on this moisturizer as compared to heavy creams.
Non-Greasy (H3)
Since there are almost no oils in the formulation of gel moisturizers, they do not leave behind any greasy residue. They leave the skin smooth and soft to touch.
Hydrating (H3)
Research has proven that gel moisturisers are able to increase the water content on the surface of dry, dull skin. This results in more radiance, clarity, and improved texture.
Oil Control (H3)
Gel moisturizers help regulate oil production, reducing shine and greasiness. This can lead to fewer acne breakouts and a clearer complexion over time.
Soothing Effect (H3)
These moisturizers can have a cooling effect, soothing irritated or acne-prone skin. This is especially beneficial after exposure to harsh environmental factors or treatments.
Improves Texture (H3)
Regular use of gel moisturizers can make skin smoother and more even. Over time, this can lead to a more refined and healthy-looking skin surface, enhancing overall skin appearance.
While the light texture of gel moisturizers suits oily and normal skin type, it is not suitable for dry, dehydrated skin. Most of the time, the thicker the cream, the more moisturizing it is. Oil-based creams are better suited for dry skin.
Best Moisturizer For Oily Skin - Our Top Recommendation
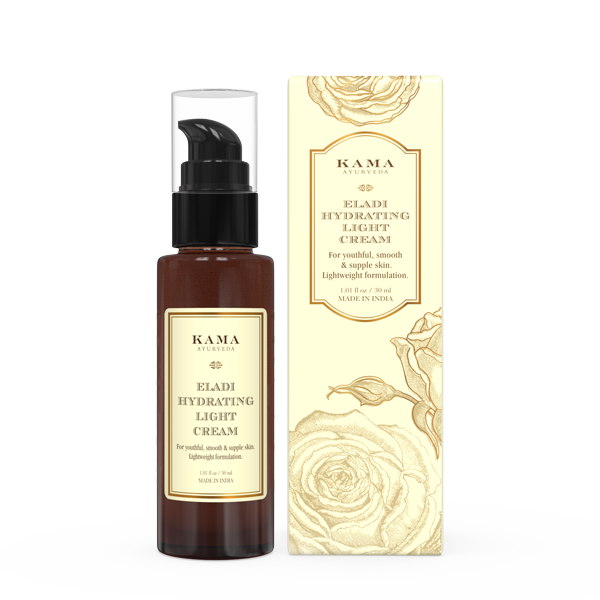
We recommend Kama Ayurveda Eladi Light Cream for use as a gel moisturiser. Its light emulsion technology moisturises the skin without leaving it greasy. It’s proven to boost moisture and smoothen skin within 10 minutes of use. It leaves your skin feeling youthful and supple with every use.
Some of its key benefits for the skin include - improvement of skin texture, skin hydration and nourishment, prepping before makeup and balancing of sebum.
The moisturizer is based on an Ayurveda-inspired formula and has unique natural ingredients such as Eladi, Costus, Cardamom, Cinnamon Leaf extracts and Beetroot extracts and plant-derived emollients.
Eladi is well-known for treating acne and pigmentation. Costus and Cardamom enhance skin texture and provide moisture. Plant-based emollients leave the skin nourished and smooth to touch. The cream is also rich in Vitamin E that retains the moisture and prevents damage from the sun.
Beetroot extracts have anti-inflammatory and antioxidant properties to relieve dryness while Cinnamon Leaf extracts help firm the skin.
You can add this cream to your daily skin care regime. Cleanse and tone your skin in the morning before applying this gel moisturizer.
We strongly recommend using natural gel moisturizers that do not contain any chemicals or harsh ingredients such as alcohol. They should also be free of fragrance and dyes as they may cause skin allergies.
Gel Based Moisturizer For Oily Skin - FAQs
Who should use gel moisturizers?
Gel moisturizers are particularly effective for people with oily or acne-prone skin. They don't add oil to the skin's surface and are absorbed quickly, making them suitable for hot climates or warmer months as well.
What are the main benefits of gel moisturizers for oily skin?
They are lightweight, quickly absorbed, non-greasy, and hydrating. Gel moisturizers also help in attracting water from deeper layers of the skin to the surface, improving skin hydration and texture.
Can gel moisturizers be used by people with dry skin?
Gel moisturizers may not be the best option for people with very dry skin or conditions like eczema, as they are less moisturizing over an extended period compared to thicker creams.
What key ingredients should I look for in a gel moisturizer?
Look for ingredients that minimize drying effects and boost hydration, like plant based emollients. Additionally, choose products free from fragrance and dyes to avoid irritation, especially for sensitive skin.
Abhyanga, an ancient practice from Ayurveda, India's traditional system of medicine, is a unique form of massage that's about more than just relaxation. It's a daily ritual where you massage your body with warm, herbal oil.
This isn't just any massage – it's a way to care for your body and mind, to make yourself feel balanced and rejuvenated.
In this article, we'll explore the gentle art of Abhyanga, how it benefits you, and how you can incorporate it into your daily routine. It's a simple yet powerful practice that can help you feel more connected with yourself, bringing a sense of calm and well-being into your life.
What Is Abhyanga?
Abhyanga is a traditional self-massage technique from India, deeply rooted in the ancient wellness system of Ayurveda. It involves gently massaging the body with warm, often herbal-infused oil. This technique goes beyond just easing muscle tension; it's a holistic practice aimed at improving overall well-being.
In Abhyanga, the use of specific oils and gentle massage strokes are believed to help balance the body's energy, promote emotional well-being, and enhance physical health.
How To Select The Right Oil For Abhyanga
Selecting the right oil for Abhyanga is crucial for maximizing its benefits. The choice of oil largely depends on one's individual constitution or dosha:
For Vata: This dosha is characterized by dryness and coldness. Sesame oil, with its warming and nourishing properties, is ideal for Vata types. It helps in moisturizing and soothing the dry Vata skin.
For Pitta: This dosha has attributes of heat and intensity. Cooling oils like coconut or sunflower are recommended for Pitta. These oils help in calming the inherent heat of Pitta skin types.
For Kapha: Being heavy and cool in nature, Kapha types benefit from warming and light oils like mustard or grapeseed. These oils stimulate and invigorate the Kapha body without increasing heaviness or oiliness.
Seasonal Considerations: In warmer months, lighter oils are preferable, whereas in colder seasons, heavier oils can be more beneficial.
Herbal Infusions: Infusing oils with herbs specific to your needs can enhance the therapeutic effects of Abhyanga. For example, adding calming herbs for stress relief or invigorating herbs for boosting energy.
Quality of Oil: Always choose high-quality, organic, and cold-pressed oils to ensure you receive the full benefits without any harmful additives.
It's advisable to consult an Ayurvedic practitioner to determine the most suitable oil for your specific needs and constitution.
Steps To Follow For Abhyanga (Self Massage)
For an effective Abhyanga self-massage:
Prep the Oil: Warm your oil gently, it’s your potion for relaxation.
Scalp Soothing: Begin with your head, massaging the scalp in soothing circles.
Face and Ears Pampering: Gently massage your face and ears, nurturing every curve.
Limbs and Joints Dance: Glide along your arms and legs, and dance around the joints with circular motions.
Abdomen and Chest in Harmony: Move in gentle, rhythmic circles over your abdomen and chest.
Feet Focus: Give extra love to your feet, they carry you through the day.
Relax and Absorb: Post-massage, take a moment to soak in the tranquility.
Warm Bath Finale: Conclude with a warm, soothing shower or bath.
Soft Towel Hug: Pat your body dry with the softest touch.
Top Benefits Of Abhyanga - Self Massage
Regularly practiced, Abhyanga (Self Massage) is seen as a way to nurture the body, reduce stress, and maintain a healthy balance of mind, body, and spirit.
It's a therapeutic ritual that combines the healing properties of touch with the natural benefits of medicinal herbs, providing a soothing and rejuvenating experience. Let’s look at its top benefits -
1. Enhanced Circulation and Detoxification
Traditional Ayurvedic texts, like the Charaka Samhita, emphasize the role of Abhyanga in promoting circulation and aiding in the removal of metabolic wastes.
Modern research supports this, suggesting that massage can enhance blood flow and lymphatic drainage, aiding in the detoxification process.
2. Stress Reduction
The Sushruta Samhita, another key text in Ayurveda, highlights the calming effects of oil massage.
Contemporary studies align with this, showing that massage therapy can significantly reduce cortisol levels (a stress hormone) in the body, thus alleviating stress and anxiety.
3. Improved Muscle and Joint Health
Ayurvedic principles state that Abhyanga can balance Vata dosha, which governs movement and is associated with the muscles and joints.
Research in sports medicine often finds that massage can reduce muscle stiffness and improve joint mobility, which is in line with these traditional beliefs.
4. Skin Revitalization
The use of herbal oils in Abhyanga is known for their skin benefits, as mentioned in Ayurvedic texts.
Modern dermatological research confirms that certain oils can hydrate the skin, improve elasticity, and provide essential nutrients, leading to healthier skin.
5. Better Sleep Patterns
The calming effect of Abhyanga on the nervous system, as described in Ayurvedic literature, is believed to promote better sleep.
This is corroborated by studies in the field of sleep medicine, where massage therapy has been shown to improve sleep quality, particularly in individuals with sleep disorders.
6. Balancing Body Energies
The concept of balancing doshas (Vata, Pitta, Kapha) through Abhyanga is central in Ayurvedic texts. While the direct correlation of this principle is challenging to measure in modern science, the overall holistic improvement in health through regular massage is well-documented.
7. Immunity Boost
Ayurveda suggests that regular Abhyanga can strengthen the body's immunity. This is supported by scientific research indicating that massage can boost the immune system by increasing the activity of natural killer cells and reducing inflammatory cytokines.
8. Emotional Well-being
The psychological benefits of massage, including emotional healing and enhanced well-being, are well recognized in both ancient texts and contemporary psychological studies.
The tactile stimulation during a massage is known to release endorphins, the body's natural 'feel-good' hormones.
9. Aging and Vitality
Ayurvedic texts like Charaka Samhita suggest that regular Abhyanga promotes youthfulness and vitality. Contemporary research on skin care indicates that massage can improve skin elasticity, potentially reducing signs of aging.
10. Muscle Tone and Firmness
The improvement in muscle tone and limb firmness through Abhyanga aligns with Ayurvedic principles of balancing Vata.
Modern physiotherapy research supports the notion that regular massage can enhance muscle tone and firmness.
What to Expect Before, During, and After Abhyanga
Before Abhyanga:
Prepare by selecting an appropriate oil based on your dosha. Warm the oil to a comfortable temperature. Choose a calm, warm place for the massage, ensuring privacy and comfort.
During Abhyanga:
Start with a scalp massage, moving to the face and ears, then covering each part of the body with mindful strokes. Use circular motions on joints and long strokes on limbs. The process should be meditative and unhurried, focusing on nurturing and relaxation.
After Abhyanga:
Allow the oil to soak into your skin for about 15 minutes. This helps in deeper penetration of the oil for maximum benefit. Following this, take a warm bath or shower, which aids in removing excess oil and further relaxes the body.
Post Abhyanga, you might feel a profound sense of relaxation and rejuvenation. Your skin will likely feel nourished and softer. Many people also report better sleep quality and a reduction in stress levels after regular Abhyanga practice.
This routine encapsulates a holistic approach to self-care, aligning with the principles of Ayurveda for physical and mental well-being.
FAQs About Abhyanga
Q: How often should you perform Abhyanga? A: Ayurveda suggests incorporating Abhyanga into your daily routine for optimal benefits. However, even practicing it a few times a week can be beneficial.
Q: What type of oil should be used for Abhyanga?
A: The choice of oil depends on your dosha (body type) and the season. Common oils used include sesame oil for Vata, coconut oil for Pitta, and sunflower or mustard oil for Kapha. Herbal-infused oils tailored to specific needs can also be used.
Q: Can Abhyanga be done at home?
A: Yes, Abhyanga can be easily practiced at home. It can be a self-massage or performed by a family member. The key is to use warm oil and follow the recommended massage strokes.
Q: Is Abhyanga suitable for everyone?
A: While Abhyanga is generally safe, it's not recommended for pregnant women, people with certain medical conditions, or those who have just undergone surgery. It's always best to consult with a healthcare provider or an Ayurvedic practitioner before starting.
Q: How long does an Abhyanga massage take?
A: A full Abhyanga massage can take anywhere from 15 to 45 minutes, depending on how much time you have and the extent of the massage.
Q: What should I do after an Abhyanga massage? A: After the massage, it's recommended to relax for a bit to allow the oil to absorb into the skin. Following this, a warm bath or shower can help to remove excess oil, leaving the skin feeling refreshed and nourished.
Q: Can Abhyanga help with specific health issues?
A: While Abhyanga is known for its overall wellness benefits, it can also be tailored to address specific health issues like muscle stiffness, joint pain, or stress. However, it should be part of a comprehensive treatment plan for specific health issues.
Q: Are there any precautions to take during Abhyanga? A: Yes, it's important to use oil that's comfortably warm and not hot, to avoid slipping during the massage, and to be gentle on sensitive areas of the body. If you have any health concerns, consult a professional before starting.
The wonders of herbal shampoos have been discussed and written about for years. However, if there's one plant that appears in almost all the Ayurvedic texts that impart knowledge on herbal beauty products, it is undoubtedly Aloe Vera.
From replenishing your dull skin to conditioning your hair, Aloe Vera can be used for several purposes, and its results are bound to blow your mind.
Aloe Vera is also used as an active ingredient in shampoos, thanks to how efficiently it takes care of dry and unruly hair. So if you're looking for a quick fix to tame your dull hair, this article has got you covered in the best Aloe Vera shampoos in India.
Is Aloe Vera Shampoo Good For Hair?
Yes, Aloe vera is known for its hydrating qualities, as it contains a high percentage of water along with polysaccharides that help in moisturizing and conditioning the hair and scalp.
This can be particularly beneficial in drier climates or during seasons when hair tends to become more brittle. Additionally, aloe vera has natural enzymes that can help exfoliate the scalp and unclog hair follicles, promoting healthy hair growth.
Top Benefits Of Using Aloe Vera Shampoo
Aloe Vera is much more than just an ingredient offering calming coolness. There are several reasons experts recommend using Aloe Vera shampoo to overcome numerous hair issues.
It contains proteolytic acid that repairs the damaged skin on your scalp while improving follicle health. Besides, it helps combat hair fall, fight dandruff, and nourish your hair. Here’s a list of all the benefits that Aloe Vera offers for hair.
Stimulates Hair Growth
Aloe Vera has been used for ages to stimulate hair growth. It is rich in vitamin B12, which helps induce the hair follicles' anagen or hair growth phase. Further, its gel stimulates blood circulation in your scalp, which promotes hair growth.
Conditions Hair
Are you looking for a natural conditioner? Well, this miracle plant is perfect for you. It contains Vitamin C, Vitamin E and antioxidants that contribute to maintaining hair health and structure. Further, it helps maintain smooth, shiny, and healthy hair.
Soothes Itchy Scalp
Aloe Vera has some anti-inflammatory and anti-microbial properties that help relieve an itchy scalp and soothe other symptoms of scalp irritation. Besides, it has antifungal properties that help fight the fungus associated with dandruff and other scalp problems.
Protects Hair
Repeated and prolonged hair exposure to the sun's UV rays can cause brittleness, roughness, discoloration, and dullness. However, it is believed that Aloe Vera juice protects your hair from UV rays damage.
Aloe Vera is effective in gently removing the extra sebum and product residue from your hair. Further, it leaves your hair clean, soft, and smooth!
Aloe vera's soothing and hydrating properties make it an excellent ingredient for almost all hair types. That said, finding the best aloe vera shampoo for yourself can be a tremendous task.
Therefore, I have chosen the two best aloe vera shampoos for you. These ayurvedic shampoos mentioned below offer unique benefits, so finding your perfect match will be easy.
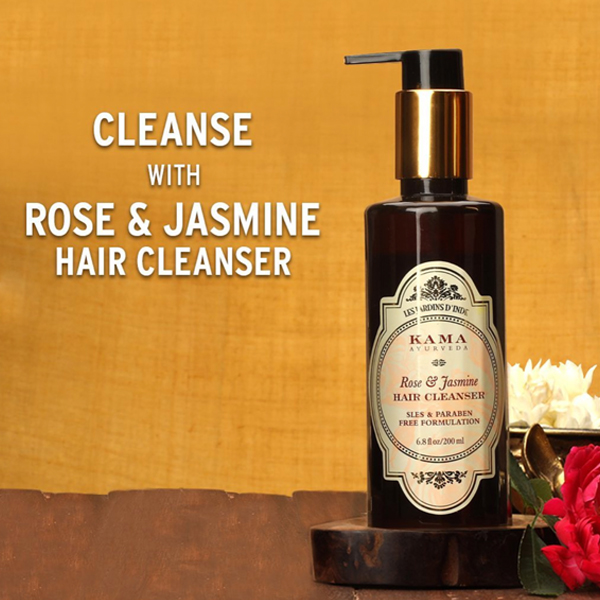
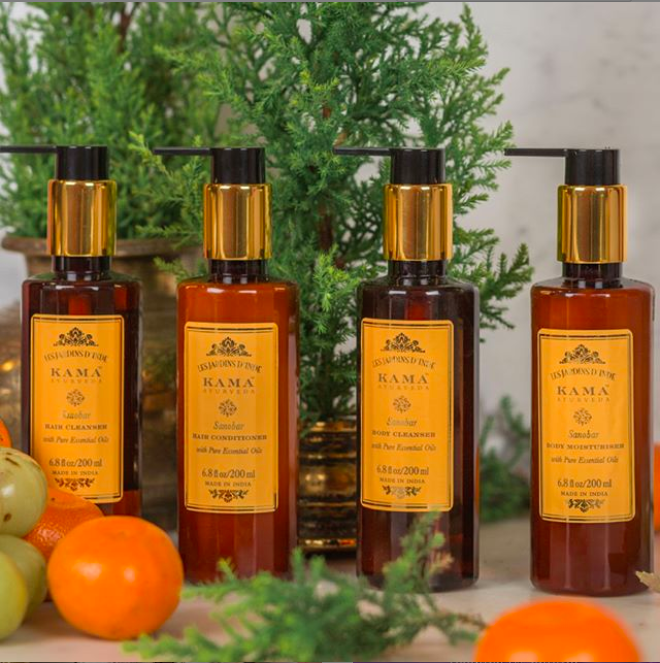
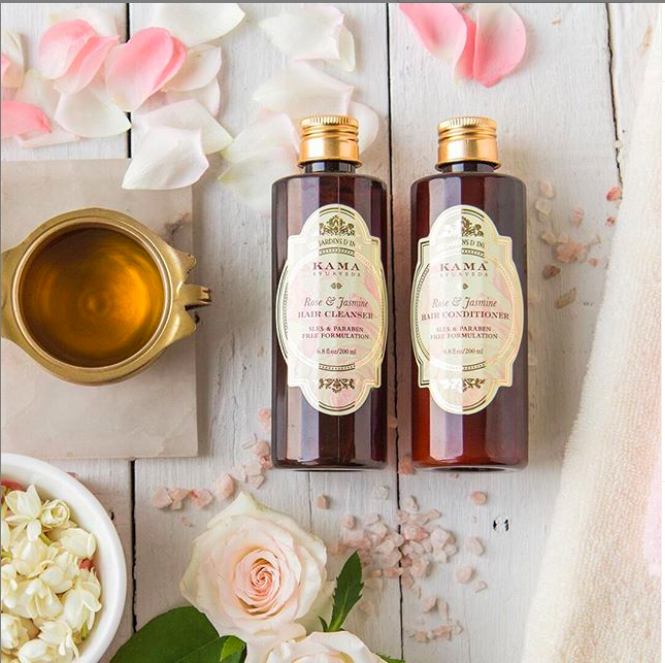
1. Kama Ayurveda Rose and Jasmine Hair Cleanser
Kama Ayurveda's Rose and Jasmine Hair Cleanser is a perfectly safe, mild natural hair cleanser free of SLES (Sulphates), Parabens, and Petrochemicals. It is infused with powerful Ayurvedic ingredients that rebuild and revive dry, damaged hair.
OrganicAloe Vera Juice and Hibiscus Extract reduce hair loss, promote growth and hydrate deeply. Besides, pure Essential oils ofRose andJasmine protect hair health and vibrancy. In addition, the vegetable source Soy Protein binds moisture and improves hair's tensile strength and elasticity.
It strengthens hair weakened by chemical processes, heat styling, and environmental exposure by gently restoring moisture. Furthermore, Rose and Jasmine hair cleanser cleanses hair and scalp effectively without stripping its natural oils, leaving it soft and shiny.
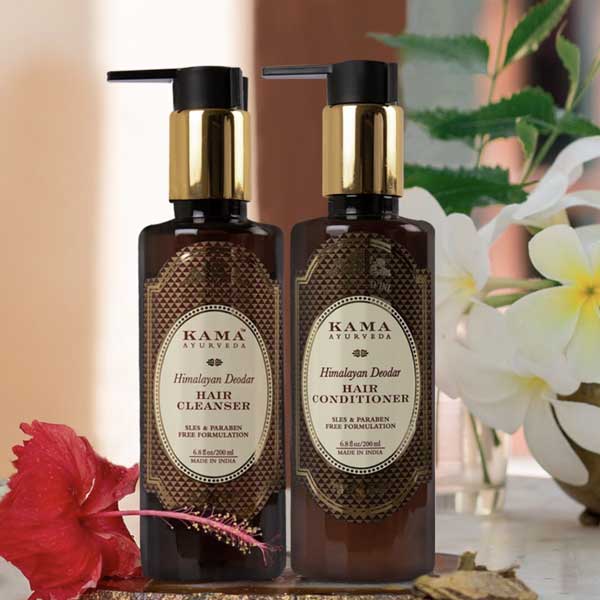
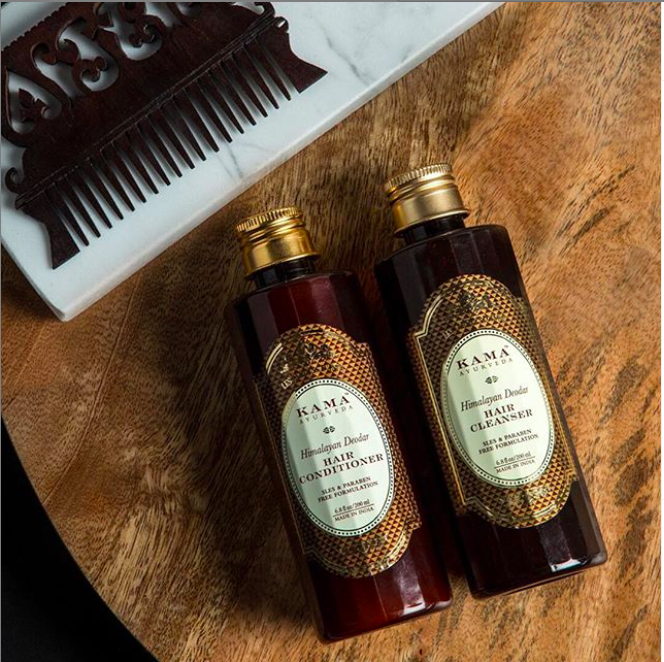
2. Kama Ayurveda Himalayan Deodar Hair Cleanser
Himalayan Deodar Hair Cleanser is a mild hair cleanser, free of SLES (Sulfates), Parabens, and Petrochemicals formulated to gently cleanse hair without stripping its natural oils to make it soft and shiny.
The product contains organic Aloe Vera juice and Hibiscus extract that reduces hair loss, promotes hair growth, and conditions your hair. Further, it is blended with pure essential oils of Himalayan Deodar to give you nourished and healthy hair. The cleanser also contains vegetable source Soy Protein that binds moisture and improves hair's tensile strength.
The shampoo makes your hair resilient against daily environmental aggressors while protecting it from heat damage and brittleness. It is effective in taming frizzy hair, strengthens the follicles, and detangles your tresses with its moisturizing and nourishing properties.
Sometimes, we unwillingly damage our hair because of not choosing the right shampoo. The correct shampoo should suit your hair and provide the right balance of moisture and nutrition. Here is a list of a few things you should consider while choosing the best Aloe Vera shampoo for yourself.
1. Try Avoiding Harsh Chemicals
You must always pay attention to the shampoo's label and check the ingredients contained in it. Some toxic chemicals, such as silicones, in your shampoo can flatten your hair cuticle. Besides, it can further generate build-up and damage your hair.
So, if your scalp is sensitive, it might cause painful irritation too. Therefore, ensure to stay away from harsh ingredients such as parabens, phthalates, sulfate silicone, etc.
2. Always Consider Your Hair Type
Most of the products mention what type of hair they are suitable for, and you should choose the shampoo which suits the best according to your hair needs. For instance:
Aloe vera shampoo is excellent for dry hair as it provides nourishment and hydration. Further, it is enriched with some natural oils and emollients that add shine to your dry hair and relieve your dry scalp.
If your hair is color-treated, certain chemicals and ingredients can make your color fade. So, always look at shampoos that are labeled as 'color-safe.' Also, you can go for a sulfate-free shampoo or one that contains SPF.
Always read the packaging of the shampoo and look out for buzzwords that suit your hair needs, like hydrating, smoothing, anti-frizz, curl-defining, anti-dandruff, etc.
If you're opting for natural ingredients, it is always safe for your hair. Therefore, look for a moisturizing shampoo that contains ingredients like jojoba oil, shea butter, olive oil, avocado oil, or coconut oil, as they don't strip away the moisture from your hair.
FAQs related to Aloe Vera Shampoo
Is aloe vera shampoo good for hair fall?
Aloe vera shampoo can be beneficial for hair fall. It contains proteolytic enzymes that help remove dead skin cells from the scalp, unclog hair follicles, and promote healthy hair growth. Additionally, its anti-inflammatory properties can soothe the scalp and reduce conditions that may contribute to hair loss.
Can I use aloe vera shampoo daily?
Yes, aloe vera shampoo is gentle enough for daily use. It's a natural ingredient that provides hydration and moisture to the hair, making it healthier and shinier. However, it's important to choose a quality product formulated for daily use and free from harmful chemicals.
What are the benefits of aloe vera in shampoo?
Aloe vera in shampoo offers hydration, since it is primarily made up of water. It also contains polysaccharides that help with scalp exfoliation and strengthening hair follicles. Aloe vera shampoos can be particularly beneficial during summer or in drier climates when hair tends to become more brittle.
Who should use aloe vera shampoo?
Aloe vera shampoo is suitable for anyone, especially beneficial for those with dry or damaged hair, an itchy or sensitive scalp, or those looking to promote healthy hair growth. Its enzymes, vitamins, and minerals can soothe, nourish, and hydrate the scalp and hair.
What should I look for when choosing an aloe vera shampoo?
When selecting an aloe vera shampoo, ensure it contains a significant amount of aloe vera extract or gel. Avoid harsh chemicals and synthetic ingredients that could damage hair or scalp. It should be suitable for your hair type and effective in addressing specific hair concerns like dandruff or hair loss.
Conclusion
Aloe vera has been a beloved botanical ingredient that made its way into hair-care formulas. It promises shinier, smoother, and glossier results and touts impressive reparative benefits to your hair.
Therefore, if you are seeking an effective and enriching shampoo to add to your hair care routine, this article is at your rescue. The above two ayurvedic shampoos are just what you need to nourish and hydrate your hair and increase its shine. Further, it helps you tackle common issues like dandruff, itchy scalp, dryness, and flat hair.
The natural glow reflecting off your face speaks volumes about your health, your lifestyle, and your skincare regime. Simply following a CTM (cleanse, tone and moisturize) every morning and night can do wonders for your skin.
But if you’re serious about taking care of your skin, there’s another crucial step that you should not forget about - the weekly exfoliation with a face scrub.
What Is a Face Scrub and Why Do You Need It?
Simply, think of face scrub as an extension of your cleansing ritual.
Using a cleanser twice a day is helpful in cleaning most of the dirt and impurities from your face. However, it’s not very effective in removing old and dead skin cells.
That’s where a face scrub comes handy. Unlike a regular soap or cleanser, a face scrub has small particles, beads, or chemicals that exfoliate these dead cells, making way for new ones.
Are Face Scrubs Always Good For Your Skin?
Ayurveda has identified skin exfoliation using natural ingredients as essential, not only healthy and clear skin, but also your overall health and wellbeing.
If you grew up in an Indian household, you must be familiar with Ubtan, the traditional Ayurvedic body scrub using natural herbs and grains. Apart from these herbs, salt and sugar scrubs have also been used in traditional Ayurvedic face and body scrubs.
However, not all scrubs are good for your skin.
There are studies suggesting that the chemical scrubs that use microbeads as exfoliants result in skin damage. These chemical scrubs are too harsh and the microbeads present in them can bruise the skin.
A good face scrub should be gentle on the skin and not cause any irritation. For this reason, we highly recommend the use of Ayurvedic, or homemade face scrubs made with natural
ingredients only. These natural face scrubs are safe for the skin and do not cause any excessive dryness or irritation.
Now, if you’re ready, let us walk you through the world of face scrubs. This article is your ultimate guide to natural face scrubs. If you read on, you will discover the benefits of using a face scrub, learn to use scrubs the right way, identify the best face scrub for your skin, and learn to prepare some homemade DIY face scrubs as well. Let’s get started.
8 Benefits Of Using A Natural Face Scrub
Before we move on to discuss various natural face scrub options, let us look at the benefits of using a face scrub. The benefits of using a face scrub are numerous. Here are some of the reasons why you must include a face scrub in your skincare routine.
1. It Unclogs Your Pores
You might be aware that clogged pores result in acne problems. But, did you know that they can also make your skin appear dull?
Our pores tend to look darker and larger from the buildup of oil and sebum in the skin. Using a face scrub will remove all the dead and dry skin cells and other pollutants from seeping into your pores causing blackheads and whiteheads. It unclogs your pores, making your skin look young and fresh.
2. Helps Skin Care Products Penetrate Deeper
Exfoliating your skin helps serums, facemasks, creams, and other skincare products penetrate faster and deeper into your skin. Dead skin cells act as a barrier between your skin and the products you use.
By using a face scrub to exfoliate your skin, you’ll be removing the dead skin and unclogging pores which in turn helps skin care products absorb better in your skin.
3. Prevents Acne
Clogged pores may cause acne. Hence, it is of no surprise that exfoliating your face regularly can prevent acne breakouts on your face. However, use only a mild and gentle exfoliator if you already have a lot of active breakouts on your face. Scrubbing your facial skin with gritty exfoliants and loofahs can irritate your skin and inflame them.
4. Evens Out Skin Tone
Dark spots, irregular texture of the skin, and pigmentation can indeed be frustrating. The exfoliants in your face scrub break down and remove dry skin and dead skin. It also smoothens the texture of your skin. This makes your skin look uniform and even-toned.
5. Increases Cell Turnover
Scrubbing your face increases cell turnover which in turn boosts skin radiance. So say hello to fresh looking, ultra dewy skin. Cell turnover is the method by which skin cells mature and rise to push the existing dead cells out of the way. Regularly exfoliating your skin can encourage cell turnover which leaves your skin looking young and healthy.
6. Stimulates Blood Circulation
When you gently scrub your face, the physical action contributes to stimulating blood flow to the skin's surface. This increased blood circulation brings more oxygen and nutrients to the skin, which can help in cell regeneration and overall skin health. Improved blood flow can also give your skin a natural, healthy glow and can aid in reducing the appearance of fatigue or dullness.
7. Prevents Acne
Regular and gentle exfoliation with a face scrub can play a crucial role in acne prevention, particularly for individuals with oily or acne-prone skin. By removing dead skin cells and unclogging pores, face scrubs can prevent the build-up of oil and bacteria that often lead to acne formation. It's important to note, however, that while exfoliation can help in preventing new breakouts, it should be done gently to avoid irritating existing acne.
8. Allows Smoother Makeup Application
One of the immediate cosmetic benefits of using a face scrub is the smoother application of makeup. Exfoliation removes the outer layer of dead skin cells that can cause makeup to look flaky or uneven.
This results in a smoother skin surface, allowing for a more even and seamless application of foundation and other makeup products. Makeup tends to last longer and look more natural on well-exfoliated skin.
However, it's important to moisturize the skin after exfoliation and before makeup application to ensure the best results and to keep the skin hydrated.
While homemade scrubs are great for the skin, it can be tedious to make them every time you want to exfoliate the skin. Wouldn’t it be wonderful to have a face scrub made completely from these natural ingredients? A face scrub that packages all the goodness of nature and Ayurveda into a jar? We’ve wished for the same and created one for you.
Let’s introduce you to the best face scrub made entirely from natural and Ayurvedic ingredients.
Best Face Scrub in India - The Ultimate Natural Ayurvedic Scrub for Face
If you live in India, then you know that we have specific skin challenges of our own. The number one problem for Indian skin is pollution. India has some of the most polluted cities in the world. Pollution and dirt can clog your pores causing further skin problems.
India is also close to the equator which makes it more susceptible to sun rays. This constant exposure to sunlight can make your skin look dull and tired. It can cause an increase in skin pigmentation disorders and speed the signs of aging.
While we cannot control these external factors, we can definitely take some precautionary measures and steps to alleviate the problem. One way to do so is to choose the best face scrub with natural Ayurvedic ingredients.
Let’s talk about the Ayurvedic ingredients that make it the best scrub that you can use on your face.
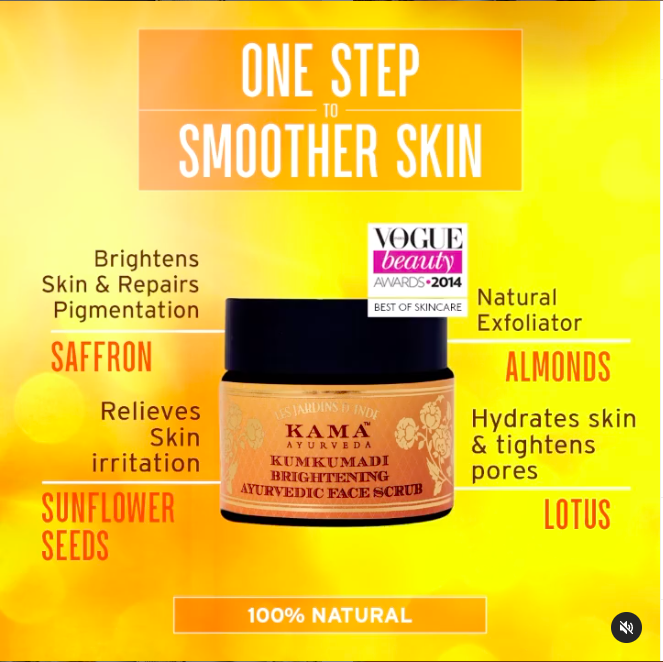
Kumkumadi Oil - Ayurveda has a special facial oil, the Kumkumadi oil that is best suited for these conditions. Kumkumadi Oil is a miraculous beauty fluid created from 12 precious and rare ingredients to help illuminate the complexion, smooth fine lines, and other signs of aging while promoting new cell growth. The key ingredient in Kumkumadi Oil is Saffron, a powerful Ayurvedic ingredient known for its skin rejuvenating properties.
Almonds and Walnuts are gentle exfoliants that are well suited for scrubbing your face. Almonds are packed with vitamin E and antioxidants. Walnut contains Omega 3 and other proteins that keep your skin looking fresh and supple.
Sunflower Seeds - Rich in nutrients such as Calcium, Iron, Magnesium, Zinc and Vitamins A, K and E, Sunflower Oil is used effectively against inflammation and general irritations of the skin.
A face scrub is as essential for men as it is for women. Men can also benefit from exfoliating the skin as it results in a soft and toned skin while removing dirt and grime.
Using natural face scrub helps in repairing the skin, making it look young and fresh. It can also help reduce acne breakouts by reducing residual buildups. When you scrub your face by using a face scrub, it leads to a better and closer shave. Not to mention that you can also get rid of ingrown hair and razor bumps easily through weekly exfoliation.
What natural Ayurvedic ingredients should you look for in a scrub for men?
Saffron and Almonds can work wonders for men’s facial skin. Saffron is an antioxidant that clears skin tone, brightens up your skin, clears the complexion, and reduces pigmentation, dark spots, and other stubborn marks. Almonds are rich in Vitamins E and D and also contain antioxidant properties.
The process of using a face scrub is very simple. Choose any face scrub of your choice - natural homemade or store-bought. Then wet your face and massage the scrub into your face and scrub gently for a few minutes. Remember to be gentle as you do not want to irritate your skin too much.
Then, rinse off your face with water or a damp cloth. Repeat once or twice a week. Remember to moisturize your skin right after.
It is important that you use a face scrub only once or twice a week and not more than that. It might be tempting to get that soft glow every morning, but using a face scrub too often can irritate your skin and peel away delicate skin cells making you feel sore and red. You can use a face scrub any time during the day.
In the following video, you can watch the detailed tutorial for using the face scrub.
Note: If you have inflammatory acne, then scrubbing your face can make it worse. Analise your skin and then decide if you should be using a face scrub or not.
8 Best Homemade Face Scrubs Based On Your Skin Type
Exfoliation has a lot of benefits for the skin. However, if done with the wrong products, it can result in a skin abrasion or bruised skin. So, what’s your best option? Natural or Homemade face scrubs that use natural ingredients as exfoliants instead of chemical microbeads.
Let’s briefly discuss some of the best natural ingredients for a natural or homemade face scrub with their benefits for the skin. In this section of the article, you will find some of the best Ayurvedic homemade scrubs that you can prepare by using the best naturally exfoliating ingredients like Coffee, Sugar, Oatmeal, Almonds and Sunflower Seeds.
1. Homemade Face Scrub for Blackheads - Lemon Honey Sugar Scrub
If you want to remove blackheads naturally, then this DIY face scrub is the one for you. Did you know that lemon can clear blackheads, acne, and discoloration? This homemade face scrub lets you scrub away the blackheads with sugar as an exfoliant. Honey functions as a great moisturizer and a natural antioxidant.
To make this lemon honey sugar scrub, you will need to mix one cup of sugar with half a cup of olive oil. To this, add one tablespoon of honey. Add some lemon juice and stir completely. Apply the mixture on the face and exfoliate for a few minutes before washing it off with cold water.
2. Homemade Face Scrub for Oily Skin - Oatmeal Scrub
Oatmeal is a superfood and can come in handy for most of your skincare needs. Oats can soak up excess oil from your skin and also prevent acne. It has antioxidant and anti-inflammatory properties that can gently exfoliate and remove dry and dead skin cells. It also helps remove the dirt and oil clogged in your pores. Oatmeal is suitable for all skin types, even for extremely sensitive skin.
To make Oatmeal face scrub you will need to mix one tablespoon of olive oil and one tablespoon of whole milk. To this, add 2 tablespoons of oats and let it soak for a while. Then add a few drops of rose water and use it as a face scrub. Gently exfoliate for 3-4 minutes and rinse off with cold water.
3. Face Scrub for Dry Skin - Coconut Oil and Lemon Scrub
A sugar scrub is a great way to pamper yourself and exfoliate your skin. Using sugar scrub will brighten dull, tired-looking skin and promote healthy-looking, glowing skin. Sugar scrub can also be used as a natural facial hair remover.
Lemon exfoliates and softens skin while getting rid of pigmentation and dark spots. The beauty benefits of Coconut oil are numerous and it works as an age-old skin tonic.
To make this coconut and lemon face scrub, take half a cup of coconut oil and add 2 tablespoons of sugar to it. Mix well. Now add 1 tablespoon of lemon juice to this mixture and scrub your freshly washed face gently for a few minutes. Rinse with cold water and pat dry.
4. Homemade Face Scrub for Glowing Skin - Multani Mitti and Aloe Vera Scrub
This aloe vera gel and fuller’s earth DIY face scrub is perfect for tan removal. Multani Mitti leaves your skin feeling cool, soft, and smooth. Aloe vera lightens dark spots and marks. To make this homemade face scrub for glowing skin, mix two cups of fuller’s earth with one spoon of fresh aloe vera gel. You may also add essential oils and rose water to boost the effect. Mix well to create a fine paste and massage it into your face and neck. Scrub for 5 minutes before washing it off with cold water.
5. DIY Coffee Face Scrub For Anti-Ageing
The grainy texture of coffee makes it a great exfoliant in homemade scrubs. The coffee grounds work gently to remove dry and dead skin cells from your skin, making it look supple and youthful. It is also rich in antioxidants which will slow down the aging process.
Coffee scrub combats acne, boosts collagen levels, and reduces cellulite. What more, it also protects the skin from sun damage. The caffeine in coffee also improves blood circulation in the skin.
All you need is 2 tablespoons of ground coffee, 1 tablespoon granulated sugar, and 1 teaspoon olive oil or coconut oil. Add all the ingredients to a glass bowl and mix them together. You can use it as a face scrub and as a body scrub for smooth, glowing skin.
Alternatively, you can mix three tablespoons of coffee with half a cup of yogurt. For those with dry skin, you can replace the curd with milk. Blend it in a mixer and add one teaspoon of honey to it. Apply this mixture on your face and scrub in a circular motion for about 10 minutes. Wash off with cold water and pat dry.
6. DIY Almond And Honey Face Scrub For Sensitive Skin
Almonds are rich in vitamin E and have antioxidant properties that will keep your skin young and glowing. Honey is known for its moisturizing properties, so it keeps the skin smooth and soft. Together, this almond honey face scrub will work wonders for your skin. While all skin types can benefit from this scrub, it is ideal for combination, sensitive and dry skin.
To make this almond honey face scrub, you will need ¼ cup almond meal, 4 tablespoon honey, one tablespoon jojoba oil and a few drops of peppermint essential oil (optional). Take a glass jar, add all the ingredients, and mix well until combined. Store in a dark, cool place.
To use this scrub, take half a tablespoon of the mixture in your hand and add some water to it. Scrub your skin gently and remove with a warm washcloth.
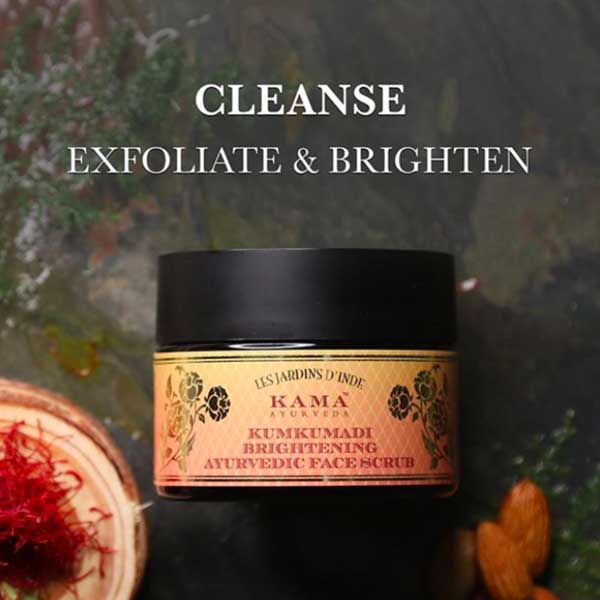
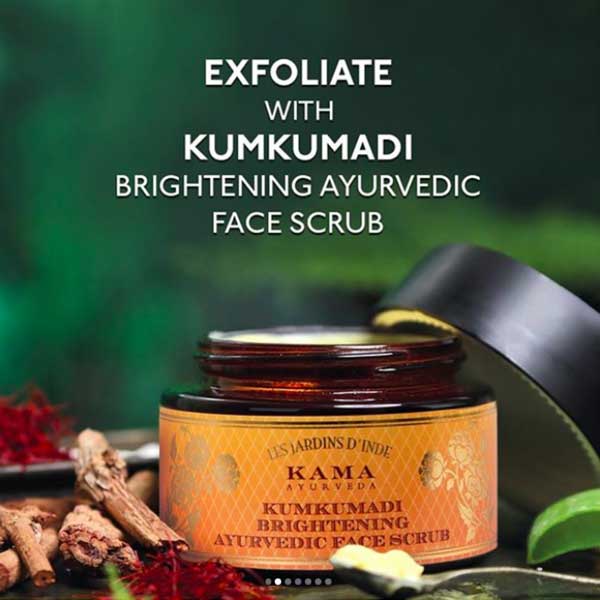
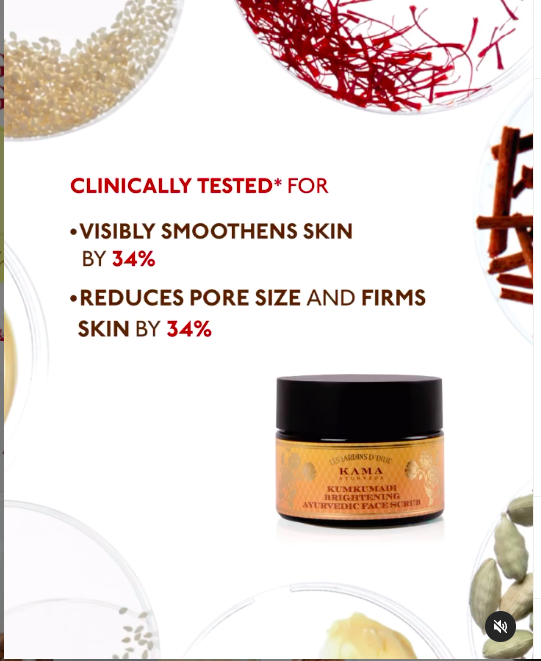
To get the benefits of Almonds for exfoliation, you can also use Kama Ayurveda’s Kumkumadi Brightening Ayurvedic Face Scrub. It contains finely ground Sweet Almonds, rich in Vitamins E & D, that nourish and nurture while lifting away pollutants and impurities for a glowing complexion.
7. Walnuts Face Scrub For Dull Skin
Walnuts are packed with goodness that is highly beneficial for your skin. They are known to treat dull skin and make it soft and glowing. The fiber in walnuts improves blood circulation and Omega 3 and other good fats present keeps the skin youthful and healthy. It also has proteins that heal wounds and antioxidants fight pollution and harmful dust.
To make walnut face scrub, grind two walnuts using a pestle and mortar or a food processor. Add a few spoons of yogurt and honey and mix them together. Massage the scrub into your skin and wash it off with a damp washcloth.
8. DIY Face Scrub with Sunflower Seeds For Damaged Skin
Sunflower seeds are rich in essential nutrients, fatty acids, copper, and Vitamin E. It also has antibacterial and antioxidant properties. Sunflower seeds have the ability to treat dull and damaged skin. It also protects the skin from harmful rays of the sun, treats rashes, acne, and any other skin irritations.
It also is an excellent moisturizer and keeps the skin healthy and hydrated. Using this sunflower seeds face scrub will also slow the process of aging on your skin, making you look young.
To make this face scrub, place the sunflower seeds in a mini food processor and grind them up until the seeds become a very fine meal. Transfer the seeds to an airtight container and store it away. This will last for 1 month at room temperature and more if it is refrigerated.
To use, simply take about half a tablespoon of the powder in your palm and add enough water to make a thick paste. Massage it into the skin and rinse off.
So there you go! That was your complete guide on face scrubs.
Here are our final words for you - Remember to use face scrubs only once or twice a week. Decide on which face scrub is best for your skin based on your skin type and concern. Opt for natural and ayurvedic scrubs as they are the best for your skin.
If you are a Korean beauty fan, then you might have already heard about the popular skincare product called "Face Essence." A face essence is a nourishing liquid that has become an essential part of the daily skin care regimen for millions of people worldwide.
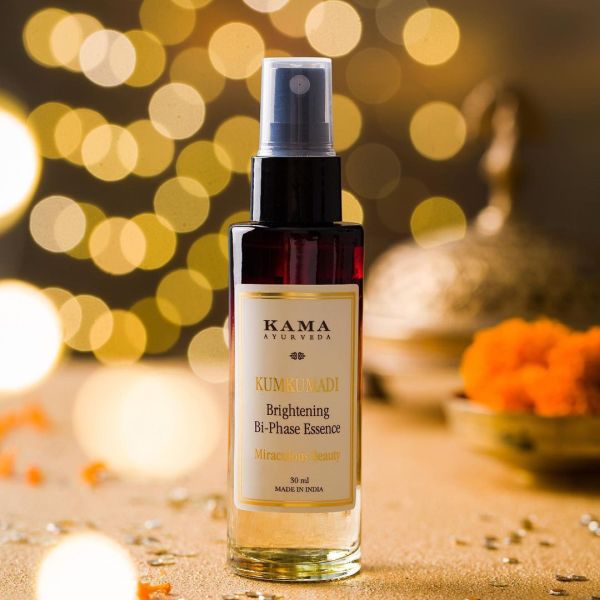
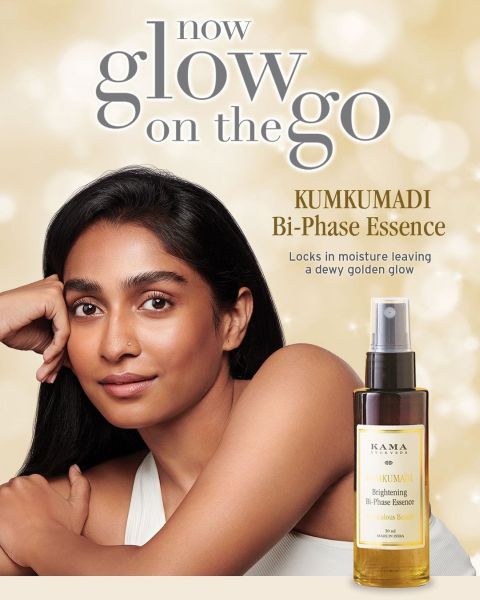
Today, it’s a part of many skincare regimens, and there are Ayurvedic formulations like Kumkumadi Bi-Phase Essence that provide all the benefits of a face essence.
Formulated with potent nourishing and hydrating ingredients, a skin essence is just the product you need for restoring hydration and balance. In this article, let's discuss what a face essence is, how it is different from the serums and toners, how it benefits your skin, and why it is an essential part of your daily skincare routine.
In this article, let's discuss what a face essence is, how it is different from the serum and toners, how it benefits your skin, and why it is an essential part of your daily skincare routine.
What Is Face Essence?
Originating from the K-beauty industry, a face essence essentially works as a primer for your moisturizer while giving your skin a lot of extra benefits. A facial essence, not to be confused with a toner or a serum, has a lower molecular weight and works to penetrate deeper into the skin than a regular moisturizer.
This nourishing liquid combines multiple elements of a skincare routine in just one step. Along with hydrating and re-balancing your skin, it also uses highly concentrated levels of active ingredients to penetrate deeper into your skin barrier. The extra hydration that it gives your skin preps the skin to better absorb all the goodness of the following products, even more so than usual.
Plainly speaking, a face essence is predominantly used to boost the benefits of other skincare products that you use on your skin. Therefore, if you want to obtain a super hydrated, dewy skin, you should include a moisturizing essence in your skincare arsenal.
Essence Vs. Toner - What Is The Difference?
Unlike the face essence, toner is basically an alcohol-based skincare product; it is applied right after cleansing to provide your skin with a deeper cleanse. A good toner also helps tighten pores, create a smoother complexion, and balance skin tone.
In addition, a toner works best for oily and acne-prone skin, while a face essence is beneficial and appropriate for all skin types.
When you look at the bottle of face essence, you might definitely think - Is it just a toner? However, while a facial essence looks like a toner, they both perform two different functions on your skin.
Essence Vs. Serum - What Is The Difference?
Generally, face serum is much thicker and denser than a face essence. This means it works to penetrate even deeper into your skin. The primary role of serum is to help specific issues like acne, discoloration, aging, etc. Moreover, it also needs to be applied before a moisturizer to lock it into the skin thoroughly.
Though both serum and essence contain high levels of active ingredients, they evidently have different roles in a complete skincare routine.
Which Is The Best Natural Face Essence?
There are a host of face essences available in the market, but not all do the job well. If you are looking for the best skin essence that is natural, guilty-free, and doesn't do any kind of harm to your skin, the we recommend you the best natural face essence available in the market - Kama Ayurveda's Kumkumadi Brightening Bi-phase Essence
Kama Ayurveda's Kumkumadi Brightening Bi-phase Essence
The Kumkumadi Brightening Bi-phase Essence is a unique skin essence packed with potent ingredients to hydrate, illuminate and leave your skin with an instant natural glow.
Kumkumadi oil, one of the primary ingredients of the essence, is an ayurvedic formulation that contains potent herbs to brighten dull skin and enhance radiance.
Pure Kashmiri Saffron in this lightweight skin essence gives your skin a dewy, golden look. The Liquorice helps in brightening and removing excess melanin from your skin. The Aloe Vera leaf juice, with its abundance of anti-inflammatory and antibacterial properties, will help soothe and heal your skin. All the excellent properties of the plant-based emollients will smooth out the skin texture while lending a subtle sheen.
Benefits:
The Kumkumadi brightening bi-phase skin essence from Kama Ayurveda helps lock the moisture and impart a natural glow to your skin.
Vitamin E, one of the most potent antioxidants, in the face essence, helps hydrate and strengthen the skin's natural barrier.
Kama Ayurveda's skin essence is lightweight and doesn't leave any sticky residue. It makes the product easy to apply.
How To Use:
Shake well before spritzing onto the face and neck after cleansing and toning the skin. Gently pat on the skin. Later apply sunscreen, night cream, or moisturizer. You can also use it on the go whenever needed.
What Does A Facial Essence Do?
A facial essence primarily helps better absorb additional products like a serum or moisturizer you apply to your skin. As it treats your skin on a cellular level, you will see more results from your essence than any other product you use. With regular usage, your skin becomes smoother and brighter. It will definitely not turn back time but will revitalize your skin to look more youthful.
In addition to providing the necessary hydration, a face essence can also help in -
Protecting skin barrier
Boosting the health of your skin
Rehydrating the skin cells
Balancing skin's pH
Smoothening and softening the skin epidermis.
A recent study investigated the impact of a 12-week treatment of serum and essence on skin. In the study, the participants were asked to apply essence and serum twice daily. After 12 weeks, the researchers found improvements in hydration, firmness, lift, and elasticity. Depending on the other active ingredients in essence, they also found additional benefits like anti-acne and anti-aging.
In a study conducted in 2015, the researchers found that most plant-based skincare products are rich in antioxidants that help exhibit both UV protection and anti-aging benefits. These benefits are most likely to be found in essences that contain plant-based formulations.
When and How To Use A Face Essence?
A face essence should be spritzed after cleansing and toning and before applying serum or moisturizer.
If you want to include essence to your skincare regimen, you should try the following simple routine.
Step 2: Next, apply the toner. To apply, you can use either a cotton pad or just your fingers. Try Kama Ayurveda's pure Rose/ Vetiver/ Lavender water.
Step 3: Spritz 4 to 5 squirts of the Kama Ayurveda's Kumkumadi Brightening Bi-phase Skin Essence onto your face and neck. Do not rub or massage the product in the skin. Just a few gentle pats will do the trick.
Step 4: If you are using a serum, apply it right before your moisturizer. You can use Kama Ayurveda’s Urjasara Hydrating And Replenishing Oil as a face serum. Apply a nourishing natural day cream and follow with a sunscreen like Kama Ayurveda's Natural Sun Protection before stepping out.
Remember, you will always have to apply skin products from light (toner) to heavy (moisturizer). This way, your skin absorbs each product separately. Adding a face essence to this arsenal will help boost skin absorption even more.
FAQs About Face Essence
Q1: How does Face Essence differ from Serum and Toner?
A: Face essence is lighter than a serum and more concentrated than a toner. Essences hydrate and aid in skin repair and cell turnover, while serums target specific skin concerns like wrinkles or dark spots. Toners primarily cleanse and balance the skin's pH.
Q2: How do I apply Face Essence?
A: After cleansing and toning, apply a small amount of essence to your face and neck. Gently pat the product into the skin using your fingertips to aid absorption.
Q3: Can Face Essence be used on all skin types?
A: Yes, face essences are generally suitable for all skin types. However, it's important to choose an essence that caters to your specific skin concerns, such as oiliness, dryness, or sensitivity.
Q4: When should I use Face Essence in my skincare routine?
A: Use face essence after cleansing and toning, and before applying serum and moisturizer. It is typically used both in the morning and evening skincare routines.
Q5: Are there any side effects of using Face Essence?
A: Face essences are generally safe, but as with any skincare product, they can cause reactions in people with sensitive skin or allergies. Always patch test a new product before applying it to your face.
Q6: How long does it take to see results from using Face Essence?
A: Results can vary, but generally, you might start to see improvements in skin hydration and texture within a few weeks of regular use.
Q7: Can Face Essence replace my moisturizer?
A: No, face essence is not a replacement for moisturizer. It is an additional step in the skincare routine that adds extra hydration and prepares the skin for moisturizer.
Q8: Is Face Essence necessary in a skincare routine?
A: While not essential, face essence can be a beneficial addition to a skincare routine, especially for those looking to boost hydration and overall skin health.
Q9: Can I use Face Essence instead of Serum?
A:Essences are lightweight and primarily designed to hydrate and prepare the skin for subsequent products. Serums, on the other hand, are more concentrated and targeted for specific skin concerns like aging, pigmentation, or acne. While you can use an essence for added hydration, it should not be considered a complete replacement for a serum, especially if you have specific skin issues you're addressing. For the best results, using both in your routine – essence first, followed by serum – is recommended.
In Ayurveda, there’s a special significance of oils derived from herbs, also known as herbal oils. Centuries-old Ayurvedic text describes many useful herbs for hair. Among all of them, there stands out a clear winner - Bhringraj, the king of herbs!
Also known as False Daisy, Bhringraj is a miraculous herb hailing from the sunflower family. The leaves of Bhringraj tree are used to prepare Bhringraj oil, the most beneficial oil for hair growth.
We all want thick, lustrous, and healthy hair and we are willing to go lengths to make that happen. Hair packs, hair treatments, serums, shampoos, vitamin supplements - chances are you’ve tried it all but observed only little or no change!
Do you often wonder where your efforts are lacking? Well, sometimes it’s the simplest things that can bring the best results. According to Ayurveda, the simple secret to hair health is regular oil massage Bhringraj herb infused oil such as Bringadi Oil or Bhringraj oil.
Bhringraj (also known as Mahabhringraj hair oil) oil is an oil derived from the leaves of the Bhringraj plant that is cultivated in the humid tropical regions across the world. The oil has special significance in Ayurveda and medical science.
Enriched with the goodness of nature, Bhringraj oil is rich in nutrients such as Iron, Vitamin E, magnesium, polypeptides, steroids calcium, vitamin D. The oil is also rich in proteins that make it even more beneficial for hair.
Bhringraj Oil Vs Bringadi Oil - Are They The Same?
You might have heard of two types of oil - Bhringraj and Bringadi. Both the oils have Bhringraj herb and both of them are well-known for their immense benefits for hair. However, there’s one difference between the two.
Bhringraj oil purely consists of Bhringraj herb. While Bringadi Oil is based on Ayurvedic recipe and consists of potent herbs like Bhrinraj, Amla, Indigo, Hibiscus and Balloon Vines extracted into pure Sesame oil.
So, which among the two is more beneficial for hair? Bhringraj oil provides your hair a high dose of nutrition and helps combat many problems such as dryness, dandruff and hair fall. Bringadi oil does all that, and a lot more.
For instance, Kama Ayurveda’s Bringadi Oil is an all-in-one hair treatment for hair loss, premature graying, and dandruff. By conditioning the hair deeply, it restores and nurtures damaged hair back to health.
It’s also clinically proven to reduce hair fall by 61% based on 4 weeks of clinical study with men and women who had moderate to severe hair fall. So, if you’re looking for a solution to your hair fall woes, Bringadi might be the better choice for you.
In this article, we’ll discuss Bhringraj Oil as well as Bringadi Oil in detail. Let’s start with the benefits of Bhringraj oil.
What are the benefits of Bhringraj for hair?
Bhringraj works like a miracle to solve hair care problems like hair fall and premature graying. According to Ayurveda, it’s a ‘Rasayana’ that has special properties of age reversal and rejuvenation. The most common way of using Bhringraj on hair is in the form of Bhringraj oil or Bringadi Oil. Let’s look at how they benefit hair -
1. Treats dandruff and dry scalp
Bhringraj oil is dense and has a higher specific gravity as compared to other oils. For this reason, it can penetrate deep into the scalp and treat dryness. Bhringraj oil can be warmed and applied to hair to treat dandruff. It also provides relief from the itchiness and greasiness caused by dandruff.
2. Treats baldness and helps in hair growth
Regular massage with Bhringraj oil improves blood circulation. When the nutrients present in the oil reach the root of the hair, they strengthen the hair follicles and prevent baldness. These nutrients present in the oil help in facilitating the growth of hair.
Did you know that stress is one of the biggest reasons behind hair fall? Bhringraj oil is a natural therapy for hair fall with a soothing fragrance. Massaging your scalp and hair with bhringraj oil relaxes the mind and prevents stress-induced hair fall.
Another reason for hair fall is the lack of nutrition in hair. Bhringraj oil is rich in nutrients that provide the hair and the scalp with all the necessary nourishment, thereby preventing hair fall.
4. Promotes hair growth
Did you know massaging your hair with Bhringraj oil can increase the flow of blood to your head? The oil is known to cause vasodilation, a process through which the blood vessels get widened up, resulting in improved blood flow to the roots of the hair. This process promotes hair growth.
5. Prevents graying of hair
Bhringraj leaves are used to obtain black dye, which is used for coloring hair. When combined with Indigo, Balloon Vine and Amla, Bhringraj oil works as a treatment to prevent graying of hair. The combination is available in the form of Bringadi Intensive Hair Treatment.
6. Makes hair lustrous
Bhringraj is rich in nutrients which provide deep conditioning to hair and bring out the natural shine. The secret to Indians’ lush, glossy hair is a traditional Ayurvedic recipe that consists of potent herbs like Bhrinraj and Amla extracted into pure Sesame oil. This recipe is known as Bringadi oil.
7. Repairs hair damage
If your hair is dry, brittle and rapidly losing volume, it means that you’re suffering from hair damage issues. Hair damage can be a result from many factors such as excessive use of heat styling products, exposure to the sun or using the wrong products.
Using Bhringraj herb infused natural hair cleanser such as Bringadi Hair Cleanser is known to be effective in treating multiple hair damage issues. Infused with Bhringraj herb, Bringadi Hair Cleanser is clinically proven to show 5X improvement in natural hair volume and 6X improvement in hair tensile strength.
This hair cleanser is paraben and sulphate free, which makes it suitable for damaged hair.
8. Improves Sleep Quality
Bhringraj oil, when massaged onto the scalp, can have a calming effect. It is believed to help in reducing stress and promoting better sleep, which indirectly can also benefit hair health.
9. Conditions Hair and Improves Hair Health
It acts as a natural conditioner, leaving hair soft and lustrous. It improves hair texture and helps in managing frizzy hair. Rich in vitamins and minerals, Bhringraj nourishes the hair, improving its overall health.
10. Enhances Hair Texture
Regular use of Bhringraj is believed to increase the volume of hair, making it appear thicker and fuller. It can also enhance the texture of your hair, making it silky and smooth. This is particularly beneficial for individuals with rough, dry, or frizzy hair.
How To Use Bhringraj Oil?
Bhringraj oil can be massaged directly into the scalp. For better results, it can be heated for about 30 seconds before application. Gently massage the oil in circular motions for about 15 minutes and leave it in hair for at least 30 minutes. After that, wash it off with a mild natural cleanser.
How to make Bhringraj Hair Oil?
Bhringraj hair oil is derived from the leaves of the Bhringraj plant.
Here’s a simple process that can be followed to make Bhringraj oil - Spread Bhringraj leaves outside in the sun to dry for two to three days. After that, immerse these dried leaves in a jar of coconut oil or sesame oil. Leave the pot in the sun for another two to three days until the color of the oil changes to light green.
Though Bhringraj oil can be prepared at home, Bhrigandi leaves can be hard to find, and the process of making the oil can be time-consuming. Hence, it’s recommended to buy Bhringraj oil from certified Ayurvedic brands.
The addition of certain other hair-friendly herbs makes Bhringraj oil even more effective for hair. Kama Ayurveda combines Bhringraj with other hair-friendly herbs like Amla, Indigo, Sesame, and Balloon Vines to create a unique hair oil known as Bringadi. Together, these herbs make the oil an intensive hair treatment that prevents hair loss, scalp irriations, dandruff and premature graying.
How To Use Bringadi Oil?
Gently massage Brigandi oil into hair, ensuring that the entire scalp is covered. The treatment works as a natural conditioner if left on for 30 minutes. Cleanse post-treatment with a Bringadi Hair Cleanser and warm/normal water.
If you want to warm Brigandi oil, use the indirect warming method. Place the required quantity, in a container into warmed water and let it warm before applying it to hair.
Bhringraj oil is combined with other hair-friendly Ayurvedic herbs to prevent baldness and hair fall. Together with these herbs, it’s possible to accelerate hair growth.
1. Amla and Bhringraj
Amla or Indian Gooseberry strengthens the hair roots and promotes hair growth. Amla is abundant in Vitamin C, which is an essential nutrient for the synthesis of collagen. Collagen in hair helps in strengthens and helps in growing faster.
You can use Brigandi Intensive Hair Treatment to get combined benefits of Bhrigraj and Amla for hair growth. Alternatively, you can add Amla powder to Bhringraj oil and warm them together before applying to scalp and hair.
2. Indigo and Bhringraj
Indigo is a natural hair dye which also prevents premature greying and promotes hair growth. Indigo powder can be added to Bhringraj oil and warmed before its application on hair and scalp. Alternatively, Brigandi Intensive Hair Treatment can be used. It has the goodness of Bhringraj as well as Indigo and can be used to promote hair growth.
Is Bhringraj Oil Good For Hair?
Bhringraj, also known as Eclipta Alba promotes hair growth, reduces greying and balding and makes the hair darker. It also keeps the hair lustrous. It can be applied in the form of Bhringraj oil or in the form of Kama Ayurveda’s Herbal Hair Oil - Bringadi Intensive Hair Treatment.
With Bhringraj as one of the key ingredients, it provides the hair with all the nutrition and benefits. Other hair-friendly Ayurvedic herbs like Amla, Indigo and Balloon Vines present in the oil further boosts its benefits and uses for hair problems.
Hair Spa is a comparatively modern term that became popular in India only in the last decade. However, using nourishing treatments to strengthen your hair was a prominent practice even during ancient times.
Ayurvedic texts reveal that during the Vedic period, women “oiled their hair with Coconut oil scented with Jasmine, Rose, or Sandalwood.” Sounds lovely, right? This wonderful practice of hair oiling is one way to give yourself the hair spa experience at home.
In this article, we’ll cover everything that you need to know about the hair spa. Let’s get started with the basics.
What Is A Hair Spa?
A typical hair spa consists of oil massaging, shampoo, hair mask, and conditioning. Together, these steps help recover the hair's shine and moisture, which is often lost due to pollution and dryness.
A hair spa treatment's primary function is to improve your hair's texture and overall shine. Think of your hair spa as a “hair rebirth therapy.” It restores vital oils and moisture to your hair roots.
Apart from providing numerous benefits to your hair, it also helps to relax and de-stress. Did you know that many of our major marma points (sites of vital energy) are located at the scalp? The head massage helps secrete serotonin and melatonin, creating a calming effect on the body and mind.
Top 5 Benefits Of Hair Spa
Just like a facial or a face clean-up cleanses and rejuvenates our skin to bring out the natural glow, a hair spa brings out the natural luster of hair. A monthly hair spa is recommended to nourish the scalp and make the hair roots stronger. In this section, we’ll look at some of the top benefits of a regular hair spa.
1. To Strengthen Your Hair Follicles
Do you know what determines the ultimate strength of our hair strands? The hair roots, also known as the hair follicles, form the foundation of our hair. Well-nourished hair follicles mean more robust and healthier looking hair.
Unfortunately, many factors like poor diet, overuse of chemical products, and pollutants in the environment weaken the hair roots over time.
When we massage hair oil to our scalp as a step of the hair spa process, our hair follicles get moisturized. The application of a suitable hair mask is also extremely beneficial. Therefore, a monthly or bi-weekly hair spa is a great practice to keep your hair roots healthy.
Compliment this ritual with a balanced diet with a healthy dose of nuts every day, and you’re all set to keep your follicles strong.
2. To Recover From Hair Damage
Environmental pollution and sun exposure are not the only factors responsible for hair damage. Did you know that your hair is continuously getting damaged even while you sit indoors in an air-conditioned environment? Your hair dryness is often a sign of hair damage, and the way to fix it is to provide your hair with intense conditioning.
Regular hair spa treatments not only moisturize the hair but also increase its ability to hold moisture. The overall texture of hair improves as hair recovers from damage.
3. To Maintain Oil Balance In The Scalp
Some of us have a dry scalp while others suffer from oily scalp problems. Either way, balancing the natural oils produced by the sebaceous glands in our scalp is the key to healthy hair growth. If your scalp is too oily, it attracts dirt and dust. While on the other hand, a dry scalp could cause itching in dandruff.
Your spa treatment should be unique, and it should address your specific concerns. For instance, if you have a dry scalp, you can benefit from adding Cinnamon or Lavender Essential Oil to your head massage oil. For an oily scalp, you can add Peppermint or Tea Tree Essential Oil.
4. To Boost Blood Circulation And Reduce Stress
In Indian households, it’s a common practice for lovers, parents, and children to give each other scalp massages. This practice has profound benefits as it reduces stress, induces sound sleep, and stimulates hair growth.
An essential step of the hair spa treatment, head massage is well-known for promoting blood circulation. With better blood circulation, the hair follicles receive more oxygen and nutrients, thereby revitalizing the scalp and improving hair growth.
5. To Remove Impurities From The Scalp And Hair Roots
Some of the dirt gets accumulated deep inside our pores on our scalp. Such clogged impurities are detrimental for hair health as they hamper hair growth and could even lead to infections.
Steaming is an important step in a hair spa treatment and is usually done after oiling (or applying the leave-in conditioner). Steaming opens up these pores and assists in the removal of the debris from the scalp. As the pores open, the nutrients can also penetrate your hair follicles better, improving your hair's growth.
Now that we know all the benefits of a regular hair spa treatment, let’s learn how to do it at home. You can get a hair spa done at a salon as well. However, a lot of people prefer doing a hair spa at home for the following reasons.
It’s much more affordable.
You can opt for all-natural products to prevent hair damage.
You can leave the oil overnight for better results.
You can use home-made masks made from natural ingredients.
How To Do A Hair Spa At Home?
Follow these simple four steps to give yourself a hair spa at home. Here’s how you can pamper your hair without spending too much time or money.
1. Oiling
Salon spa treatments often exclude this essential step for hair nourishment. However, when you’re doing a hair spa at home, there’s no reason to miss out on the numerous benefits of oiling your hair.
According to the ancient science of Ayurveda, herbal oils are the most beneficial for our hair. The centuries-old ritual of hair oiling nourishes the cells, rejuvenates dry hair, stimulates circulation in the scalp, and promotes hair growth. The oil also naturally cleanses and detoxifies the scalp and hair roots.
You can choose your hair oil based on your hair concerns. Here are our top recommendations.
Extra Virgin Coconut Oil - If your hair is dry and damaged, and needs some deep conditioning, we recommend the timeless pure Coconut oil for oiling. Traditionally, Coconut oil was heated, and flowers like dried hibiscus, holy basil, and marigold petals were added to the concoction to prepare a natural conditioner. You can even add essential oils to this oil to further enhance its benefits.
Organic Sweet Almond Oil - If your hair is brittle, rough, and lacks luster then you will benefit from naturally conditioning Sweet Almond Oil. It’s a non-sticky, fast-absorbing oil that smoothes hair cuticles and adds luster to damaged hair.
Organic Sesame Oil - If your hair is heat-damaged from the application of hair dryers or straighteners, then Sesame oil is perfect for your hair. Sesame oil is also a great carrier oil and you can add other potent oils like Neem oil or Essential oils to get more benefits for hair and scalp.
Bringadi Intensive Hair Treatment Oil - If your top hair concern is hair fall, dandruff, or graying of hair, then you should use this 100% natural herbal oil. It’s a traditional Ayurvedic recipe that contains herbs like Bhringraj, Indian Gooseberry, and Indigo infused with Sesame oil.
Irrespective of the hair oil that you choose, the process is the same. Warm a small amount of oil, take it in your palms, and apply it gently all over your scalp and then massage it from the roots to the tips.
Leave it for at least 20 minutes (you can even leave it on overnight), and then cleanse post-treatment with a mild hair cleanser and warm water.
If you add Neem oil, dilute it by taking 50-50 of Neem oil and suitable carrier oil. When using an essential oil, add 2-3 drops to a tablespoon of carrier oil.
2. Steaming
Steaming your hair after oiling allows the oil to penetrate deeper into the hair and scalp to better absorb the oil's nutrients. You don’t need any appliances for steaming when you’re doing a hair spa at home. You can provide a steam treatment to your hair by following these simple steps.
Heat water in a suitable utensil. Once the water is warm, dip a towel or cotton cloth in it and squeeze to remove excess water.
Wrap this towel around your head. This will open up the pores and help the oil penetrate deep inside the scalp and nourish the hair. Let it stay on your hair for at least 15 to 20 minutes.
3. Wash and Condition
After steaming your hair, the next step is to wash them with a suitable natural hair cleanser. You must use only lukewarm water for this step. Washing your hair with hot water can weaken the roots and even cause dandruff or itchy scalp problems. Use a conditioner and then wash it off. After washing your hair, let them dry naturally. Do not use a blow dryer.
4. Hair Mask
The final and the most important step of a hair spa is the application of a hair mask. An ideal hair mask is customized to suit the requirements of your hair. However, a hair mask's primary purpose is to lock in all the moisture content and nourishment into the hair.
You can prepare your hair mask by using natural ingredients to get the best benefits. According to Ayurveda, a hair mask or ‘Shiro Lepa’ is one of the best treatments for hair and scalp. Here are a few popular Ayurvedic hair masks that you can experiment with.
1. Amla, Reetha, and Shikakai Hair Mask
Mix two tablespoons of Amla juice, a tablespoon of Reetha powder, a tablespoon of Shikakai powder, and two tablespoons of Rose Water. Make a paste and apply it all over your hair and scalp. Wash it after 30 minutes. This mask will restore natural luster and prevent dandruff.
2. Coconut Milk and Honey Hair Mask
Combine four tablespoons of Coconut milk, four tablespoons of crushed Hibiscus, and three tablespoons of Honey to prepare a thick paste. Apply the paste on your hair and scalp. Leave it on for 30 to 40 mins before washing.
3. Aloe Vera Mask
Aloe Vera has restorative properties that help in keeping the hair strong and healthy. To use Aloe Vera as a hair mask, you can apply it directly on your scalp and hair or mix it with Almond oil or Coconut oil. Rinse it off after 20 minutes.
You can also prepare your own hair masks by using other hair nourishing natural ingredients like Avocado, Curd, Eggs, Apple Cider Vinegar, Honey, Onion juice and even Bananas.
Conclusion
Hair spa treatments contribute to a healthy scalp and nourished hair. They should be done at least once a month to achieve the best results. In this article, we share a simple 4-step process to do hair spa at home. You can now treat your hair with this beneficial hair therapy without spending on expensive salon hair spa treatments. If you’re using only natural products for your hair spa, you can even do it once every 15 days to get more glossy hair and reduce hair fall.
Along with a monthly hair spa, follow these simple tips to take care of your hair post-treatment.
Avoid using heating appliances to style your hair.
Do not tie your hair too tightly as it might lead to hair breakage.
Cover your hair with a hat or a cotton cloth when you step out in the harsh sun.
Recently, when shopping for hair products, you might have come across many hair cleansers claiming to be ‘Sulphate and Paraben Free Shampoo’. Are you curious to know how they are different from other shampoos? In this post we’ll talk about their benefits and also share our top recommendations.
Parabens and Sulfates were used in shampoos for a long time. Parabens were known to be preservatives that increased shelf life of the products and Sulfates were known to be effective detergents for cleansing dirt and oils.
However, research revealed that both these constituents had an adverse impact to overall health.
Why Use Sulphate and Paraben Free Shampoo?
Parabens are Xenoestrogens, which are chemicals that have similar constituents as human hormones. For this reason, they can mimic our hormones and upset the natural balance of our body, leading to multiple health issues.
Parabens such as methylparaben, propylparaben, and butylparabens are often used as preservatives in cosmetic products because they are comparatively cheaper than other safe preservatives. But, you should always choose paraben free products.
Sulfates are detergents, which cleanse effectively but also strip away the natural moisture from the scalp, causing excessive dryness and irritation. They can also degenerate cell membranes and even trigger hair loss.
If you’ve dry and coloured hair, you should definitely opt for sulfate free shampoos as coloring hair already dehydrates your hair. These shampoos also help you retain your hair color longer.
Top Benefits Of Using Sulphate and Paraben Free Shampoo
1. Hair Nourishment
When you use shampoos that are gentle on your hair and scalp, they will preserve the natural oils, moisture and overall texture of your hair.
2. Color retention
They replenish the lost moisture in the hair and help preserve the hair color for a long time.
3. Prevents scalp issues
Since they are mild, they help in preventing scalp conditions such as irritation and itching. They also control scalp inflammation.
4. Preserves natural hair texture
By keeping the hair moisturized, sulfate and paraben free shampoo help maintain the natural hair texture and preserve curls.
5. Environment friendly
The chemical free shampoos are also safe for use and are good for the environment.
6. Stronger hair
Mild shampoos cause no damage to hair and scalp, which helps in preventing hair fall and breakage.
6 Best Sulphate and Paraben Free Shampoo
Sulfate-free and paraben free shampoos benefit all hair types and textures but are especially suited for hair that is already dry, damaged or chemically treated. It also helps to have natural ingredients in your shampoo and no harsh chemicals. Here are our top recommendations -
1. Bringadi Hair Cleanser
Our number one pick is Bringadi Hair Cleanser. Suitable for all hair types, it calls on the Ayurvedic ingredients such as Amla, Bhringraj and Indigo to gently cleanse your scalp and hair without stripping their natural oils.
It’s an effective nourishing, repairing and volumizing hair cleanser that is also proven to reduce hair fall, dandruff flakes & oily scalp. One of the key ingredients of this hair cleanser, Bhringraj, is referred to as Kesharaja 'King of Hair' in Ayurveda. It is naturally rich in Magnesium which helps in repairing damaged & brittle hair.
Weak and thinning hair will love every drop of Himalayan Deodar Hair Cleanser. This gentle shampoo moisturizes, and improves the tensile strength of the hair shaft and follicle with Vegetable sourced Soy protein.
It also contains volumizing ingredients such as Aloe Vera and Hibiscus extract that also balance the oil in hair and scalp. Essential oil of Himalayan Deodar stimulates hair growth and makes the hair stronger.
3. Rose & Jasmine Hair Cleanser
This is a restoring and balancing cleanser that uses Vegetable source Soy protein to improve hair’s tensile strength and elasticity. It also has other powerful Ayurvedic ingredients such as Aloe Vera Juice and Hibiscus Extract that rebuild and revive dry and damaged hair. The Pure Essential oils of Rose and Jasmine protect hair health and restore natural shine.
Bonus - This shampoo is also suitable for treated and coloured hair. It restores strength in hair weakened by chemical processes, heat styling, and environmental exposure replenishing the lost moisture.
If you’re looking for a hair cleanser that is not only sulphate and paraben free, but also 100 percent natural then this herbal hair wash powder is the perfect choice for you. It is made with a unique blend of herbs to keep hair luxuriant and glossy. This blend is especially suitable for sensitive, damaged scalp conditions.
It has powerful Ayurvedic hair nourishing ingredients such as Tulsi, Shikakai, Green Gram and Vetiver that help keep the scalp clean and healthy without stripping natural oils. Simply mix the hair wash powder in a bowl with warm water to create a paste and apply on the wet scalp. Massage well till no residue is left and then rinse off with lukewarm water.
5. Lavender Patchouli Hair Cleanser
This gentle cleanser — packed with calming and protecting ingredients such as Lavender and Patchouli Essential oils — replenishes moisture for smoother hair texture. While Lavender soothes the scalp, Patchouli acts as a natural antibacterial, antiseptic, and anti-inflammatory agent to repair scalp damage.
The aroma of this cleanser is calming and stress-relieving. Further, the extracts of Hibiscus in the shampoo also add moisture, making it the best choice for dry and damaged hair.
Please note that this shampoo does contain a small percentage of SLES and Parabens. However, it’s mild and contains natural ingredients that help reverse damage to the hair.
Looking for a mild sulphate and paraben free hair cleanser for oily and greasy hair? Then, this refreshing shampoo with Pure Essential Oil of Orange is perfect for you. Orange essential oil acts as a natural antibacterial agent that invigorates scalp and restores a naturally healthy shine to hair.
The cleanser also has Hibiscus and Amla extract that clarify and tone oily scalp without stripping away moisture. Woody and purifying Cypress essential oil in this shampoo revitalizes the scalp to stimulate hair growth.
Please note that this shampoo does contain a small percentage of SLES and Parabens. However, it’s mild and contains natural ingredients that help reverse damage to the hair.
How To Use Sulphate and Paraben Free Shampoo?
Wet your hair completely and apply a moderate amount of shampoo all over your scalp.
When cleansing your hair, focus more on the scalp area as the ends of your hair are already drier. Massage the scalp and work your way down to the ends. For a deeper cleanse, you can follow the same steps as above and then apply a second layer of shampoo to your scalp and spread evenly. After rinsing, always follow with a conditioner or nourishing hair mask.
Do you constantly get bothered with the frizzy strands, itchiness, and dryness of your hair, or do your fingers get entangled with your hair whenever you try to style it? Don't worry! You are not alone.
These hair issues are common not just with women but also with men. In fact, these hair issues are a signal that you need to start taking better care of your hair.
While most people pay attention towards pampering their skin, hair care is often neglected. Your hair also needs regular nourishment; the best way to do it is by using a hair mask. Hair masks are creamy formulas that are made for giving hair a good healthy boost.
If you are spending your money buying expensive conditioners and shampoo but still experiencing hair damage, then you need to give hair masks a try because the best Ayuredic hair masks can do wonders for your hair instantly.
So, what actually is a hair mask? Let's get to know about different hair masks and their benefits in detail.
What Is A Hair Mask?
At times your hair craves extra kindness and attention. Hair masks are nothing but a richer version of hair conditioners. A typical hair mask includes rich ingredients like natural oils, butter, and more nourishing ingredients in heavy concentrations when compared to your usual conditioners.
Straightening irons, styling, coloring, UV rays, endless pollution, humidity, salt and chlorine water, ufff, your hair goes through a lot! All these factors could cause severe hair damage. But don't worry! Here comes our knight in shining armor - the hair masks!
Hair treatment masks help in reducing hair breakage and make hair healthy from the comfort of your home. It is an intense conditioning treatment that assists in healing damaged hair.
Whatever your concern is, a hair mask could be a solution. It softens and restores moisture and gives shine to your locks in a matter of a few minutes.
What Are The Benefits Of Using A Hair Mask?
As we discussed before, a hair mask is a deep conditioning treatment that features more nourishing ingredients than most hair conditioners have.
Deep conditioning your hair is very crucial, mainly in the winters and summers. A hair mask helps in pumping moisture to the hair while also preventing breakage, making it thicker and more robust.
They even have the potential to rehydrate your dry hair and maintain color in the colored hair. The best part about a hair mask is that you can get a pampering treatment and stunning hair in the comfort of your own home.
Here are the key benefits that you experience after adding hair masks to your hair care regime.
Smoothens hair and restores shine
Repairs damaged hair and hair breakage
Moisturizes intensely
Protects color of the hair
Rehydrates dry hair
Great way to pamper your hair
Promotes hair growth
Repairs Split ends
Makes your hair strong
Results in a healthier scalp
Help in getting rid of frizziness
What Are The Best Ingredients For A Hair Mask?
Hair masks take conditioning to the next level. They repair hair and prevent any future damage. If your hair is fine, you can go with a lightweight mask that is packed with hair-benefitting ingredients. But if your hair is damaged or dry, go with a heavy mask that contains the most nourishing ingredients. Remember, not all ingredients work for you, so choose accordingly, keeping in mind your scalp and hair type.
Here are the most popular ingredients to experiment with when making the best hair mask that can do wonders on your locks.
1.Banana
Bananas are wealthy in vitamins, proteins, potassium, and magnesium that soften and nourish hair. A banana hair mask offers ample hydration to improve shine and manageability if you have damaged or dry hair. (1)
Also, bananas can control and prevent dandruff while moisturizing your scalp. You can say adios to the lifeless, rough, and dry hair as a hair mask made with bananas could ensure that you can never have an awful hair day again.
Not just a kitchen staple, Coconut oil is known to be rich in proteins that potentially strengthen and moisturize hair when utilized in a hair mask. It is considered a natural conditioner for every hair type. (2)
Also, research proved that coconut oil is packed with anti-inflammatory properties that can help with dry scalp and dandruff. The Laurie and Chain fatty acids in the oil penetrate deep into your hair to highly nourish hair and scalp.
3. Eggs
Egg for hair is the most surviving conventional haircare tradition across the world. When artificial hair products strip natural oils, egg masks are an effective tool to uplift and moisturize hair. Rich in biotin and protein, eggs offer much-needed luster and nourishment for the damaged tresses. They even prevent breakage of hair, condition the scalp and improve hair growth. When you have eggs in your hands, you don't need to be afraid of anything; eggs keep your hair-related issues at bay. (3)
4. Honey
We love Honey for its sweetness and the floral notes that are hard to describe. But did you know Honey can do wonders to your dry and frizzy hair? This natural ingredient is a humectant, so it quickly pulls moisture from the air and shifts it to the scalp for glossy strands. (4)
Being an emollient, honey, when applied, turns into a great conditioner that smoothens hair. It is packed with antiseptic, antioxidant, and antibacterial properties that clean and maintain scalp health and strengthen follicles.
As Honey is rich in minerals and vitamins, using it for hair leaves your tresses looking softer, healthier, and shinier.
There are numerous reasons to make almond oil highly crucial to healthy and beautiful hair. Almonds are super rich in nutrients, proteins, Vitamin E, potassium, monounsaturated fatty acids, zinc, and much more. (7)
With almonds as the main ingredient in your hair mask, you can easily achieve the soft, silky, and shiny hair you always desired. Almond oil also helps in rebuilding and repairing existing damage and restoring elasticity and moisture. When almond oil is applied to the scalp, it reduces inflammation and improves hair growth.
6. Olive Oil
Be prepared to give your hair a luxurious treat with the aroma of Olive Oil. Olive oil is a hair-healing treatment that seals moisture to your hair fiber and reduces hair breakage. Olive oil is infused with vitamins E, K, F, and A. It absorbs the skin quickly and offers moisture.
Mixing olive oil with your hair oil and massaging it will manage your hair and make it healthy. It provides deep conditioning and controls dandruff. Olive oil is the one thing you need for every hair woe. (5)
From the time of yore, henna is known to take care of hair troubles. Rather than just being an excellent ingredient to dye hair, henna is known to nourish and strengthen the tresses deep within. Henna's natural properties affect the scalp, improve follicle health, and remove dirt and grease from the scalp, including dandruff. (6)
Henna's antimicrobial and antifungal properties soothe and condition hair. It helps in taking care of dry hair and split ends.
As neem has antifungal properties, it keeps the dandruff-causing bacteria away from the scalp. Further problems integrated with dandruff-like irritation or itchy scalp can be resolved with neem.
Applying neem oil on the scalp will also help in enhancing hair follicles and boosting hair growth. Neem oil is the natural and safe alternative to deter grey hair and repair damaged tresses. Its antioxidant, antibacterial, and anti-inflammatory properties help with treating scalp issues. (8)
Neem is a perfect conditioning agent for frizzy and rough hair that can counter the consequences of hair thinning caused by environmental pollution or stress.
Who doesn't wish for voluminous hair? But the truth is - not everyone is blessed with it. Don't be worried; we got the yogurt to the rescue. Rich in antibacterial and vitamin B5 and agents, yogurt is the best tonic that boosts hair growth. Dandruff can damage your hair, but do you know what damages dandruff? It's Yogurt! (9)
Proteins in yogurt stimulate healthy and strong hair and cleanse the scalp. With yogurt hair masks, you can restore shine and boost hair growth.
10 Best Ayurvedic Hair Masks At Home For Hair Growth
Everyone has their preferences when it comes to hair masks. Few people need a hair mask just for treating damage, while others want to add a dollop of moisture and radiance.
To be honest, to make our hair happier, we may need to empty our pockets. But, thankfully, we can make these hair masks at all the comforts of home with the ingredients that are already in your pantry.
Homemade hair masks are best for repairing and smoothening cuticles that are damaged from pollution, coloring, etc. Also, each mask is made for a specific hair type, either oily, dry, frizzy, coarse, and wavy.
But, before heading to the kitchen and whipping out hair masks, remember to know the thin line between applying every product to hair and making a good blend that does something for the hair. So, that leaves us with plant-based ingredients that are holistic, where every element offers a variety of advantages that never have a negative effect.
After trying out terrible recipes, we cut through the disturbance and save you from hair disaster by introducing you to the best hair mask recipes for every hair problem and hair type.
1.Henna Amla Hair Mask - To stimulate hair growth
Henna Amla hair mask is undoubtedly the best DIY natural hair mask for hair growth. Every ingredient in this powerful mask has been tested as a remedy for treating hair issues and offering healthy and strong hair. Both Amla and Henna are known to curb hair loss. Henna also removes extra dirt and grease when it's used for hair regularly; it not only cures dandruff issues but even keeps it away from coming back again.
This hair mask is filled with proteins that prevent hair fall and nourish hair. Eggs are wealthy in protein, and this is crucial for healthy hair. Fenugreek clears the scalp and minimizes hair loss.
Ingredients
Amla Powder - 1 Cup
Henna Powder - 3 Tablespoons
Fenugreek Powder - 2 Tablespoons
Egg White - 1
Lemon - 1
Instructions:
Make a good paste of Amla, henna, and fenugreek powder by including a little water in the mixture.
Also, add lemon juice and one egg white to the mix.
Let this mixture soak for an hour.
Then apply this mixture to the hair, right from the roots, and work it throughout your hair length.
Leave it for 45 mins to an hour.
Then rinse it with cool water and mild sulfate-free shampoo. Don't use hot water that can cook the egg in your hair pack.
Both Honey and Coconut oil are known to be the magical ingredients for hair repair. Coconut Oil, as discussed above, keeps hair soft, moist and also prevents hair from breakage. It is loaded with fatty acids, which can penetrate hair deeper than ordinary conditioners. This leads to beautiful shiny, silky and soft hair.
Coming to Honey, its benefits for hair are endless! Honey is best to retain moisture and curbs hair from fleeing, thus making it the best component for repairing hair. Being an emollient, Honey also helps in softening, smoothening, and bringing the most shine to the hair.
Ingredients
Coconut Oil - 1 tablespoon
Honey - 1 tablespoon
Instructions
Mix the above mentioned elements in a bowl
Now, transfer this mixture to a pot and heat it till it's melted
Apply this mix to your hair from top to bottom, then cover your hair using a shower cap
Leave it for 15-20 mins before rinsing with lukewarm water.
Honey, Egg, and ACV hair mask helps in treating those frizzy and dry strands. A pack of eggs, olive oil, and Apple cider vinegar can transform a damaged hair into a healthy one. This mask is a home treatment to hydrate, nourish and give that shine to your hair.
It also helps in removing product buildup and maintaining pH levels. The mask seals hair cuticles with needed moisture for healthy hair growth while protecting them from undue dryness.
ACV, Honey, and Egg hair masks are perfect if you are looking for practical and less harsh options.
Ingredients
Honey - 1 teaspoon
Egg - 1
ACV - 1 tablespoon
Instructions
Combine Honey, egg, and apple cider vinegar in a bowl.
You could half or double this recipe based upon one's hair's length.
Apply the mask to the hair, starting from the scalp and working down to the ends. Let it sit for 30 - 40 minutes before washing it properly.
The hair mask is suitable for every hair type.
4. Banana, Honey, and Yogurt Mask - Smoothen Frizzy
Want to smooth that frizzy hair? Then get ready to prepare the magical Banana, Honey, and Yogurt hair mask. This hair pack works better for every hair, mainly beneficial for dry hair due.
As bananas are super rich in carbohydrates, potassium, and vitamins, they are perfect for locking in moisture. Yogurt, rich in lactic acid, can combat dullness and damaged hair. Yogurt, as said above, works best as a moisturizing agent. It supplies smoothness to the hair while attacking the dullness and frizz of hair. Both Honey and yogurt work together as an excellent conditioner for your hair.
Ingredients
Banana - 1
Yogurt - 2 Tbsp
Honey - 1 Tbsp
Instructions
Mix mashed banana and yogurt along with Honeywell till they are well blended.
Apply this blend to moist hair from top to bottom.
Then tie your hair up. You can also cover it by using a shower cap.
5. Amla, Reetha, and Shikakai Hair Mask - To prevent dandruff
The potent mix of three herbs, Amal, Reetha, and Shikakai, works wonders in preventing dandruff when applied on hair and scalp.
Being rich in antioxidants and flavonoids, Amla is known to reduce radical damage, ensure your scalp doesn't lose color, and even improve hair length. Amla keeps your scalp safe from itching and saves you from unnecessary hair loss. Reetha is an anti-inflammatory herb that gets rid of itchy scalp and scalp irritation. The Amla, Reetha, and Shikakai hair mask is a total saver from dandruff.
6. Bhringraj and Neem Hair Mask - To Prevent Premature Greying
Bhringraj provides such a cooling effect on the scalp and prevents premature graying and hair loss. Applying neem oil regularly can help in treating premature graying. Neem is an antibacterial agent that battles with fungus on the hair and scalp.
Ingredients
Bhirimgraj leaves
Neem leaves
Water
Instructions
Make a thick paste of both neem and Bhringraj leaves using water.
Then apply it to the scalp and leave it on for about two hours.
Wash off with a mild shampoo.
Try to apply this paste once a week for better results.
Alternatively, you can also treat your hair with Bringadi Intensive Hair Treatment Oil. With nourishing ingredients like Bhringraj, Amla, Sesame seeds, Indigo and Balloon Vine it works as an all-in-one hair mask. It is a treatment for hair loss, premature graying and dandruff. It also restores and nurtures damaged hair back to health.
You should apply it for at least 30 minutes prior to hair wash and then wash hair with natural hair cleanser like Bringadi Hair Cleanser for best results.
7. Coconut Oil and Sugar and Essential oils - To repair flaky scalp
If you start to see flakes on the scalp, it can be due to scalp infection or heat around your home. This exfoliating hair treatment helps with removing and reducing flakes and works as the best scalp scrub.
As coconut oil, as discussed above, is rich in fatty acids with high anti-inflammatory properties, you got yourself a good help for treating the scalp through this make. Both peppermint and tea tree oil are rich in antifungal properties, which makes them the best option to treat fungal scalp issues like the flaky scalp.
8. Avocado and Olive Oil Mask - To Strengthen Hair
Combat hair damage from styling tools, hair color, and chemical treatments with the enriching Avocado and Olive Oil hair mask. This mask is a boon for weakened hair. It's loaded with omega-3 fatty acids, crucial for strengthening hair and adding a glossy sheen.
Ingredients
Avocado - Half
Olive Oil - 1 Tbsp
Honey - 1 Tbsp
Essential Oil (any choice) - 3 Drops
Instructions
Blend the half avocado, olive oil, honey, and essential oil until you get a smooth mixture.
Apply the mix to damp hair. Start from the ends and work your way up to the scalp using your fingertips.
Pull your hair up into a bun and cover it with a shower cap for better results.
Use a blow dryer to heat your shower cap-covered hair for 10 minutes. This helps to activate the ingredients.
Leave the mask on for an additional 20 minutes.
Finally, wash your hair with shampoo.
9. Green Tea and Peppermint Mask - To Soothe Scalp
Green Tea is a fantastic remedy for soothing the scalp. When combined with peppermint oil, known for its anti-inflammatory and hydrating properties, it becomes a powerful treatment for dry, irritated scalp skin. The addition of apple cider vinegar enhances the mixture, known for its ability to balance pH levels and add shine to hair.
Ingredients
Green Tea - 1 cup (brewed and cooled)
Peppermint Oil - 2 drops
Apple Cider Vinegar - 1 Tbsp
Instructions
Brew a cup of Green tea and let it cool down to room temperature.
Add 2 drops of Peppermint oil and 1 tablespoon of Apple Cider Vinegar to the cooled tea. Stir the mixture thoroughly to ensure the ingredients are well combined.
Apply the tonic to your scalp, gently massaging it in with your fingertips. This step not only helps in distributing the mixture evenly but also stimulates blood flow to the scalp.
Allow the mixture to sit on your scalp for at least five minutes. This duration lets the ingredients penetrate the scalp and exert their soothing and healing effects.
Rinse the tonic out thoroughly.
10. Aloe Vera and Honey Hair Mask - To Control Oil
This hair mask combines honey, lemon, and aloe vera – ingredients known for their respective antibacterial, astringent, and hydrating properties. The mask aims to balance oiliness without stripping your hair of its natural moisture.
Ingredients
Honey - 2 tablespoons
Aloe Vera Gel - 1 tablespoon
Lemon Juice - 1 squeeze from a lemon wedge (or half a teaspoon if using bottled lemon juice)
Instructions
In a mixing bowl, combine the honey, aloe vera gel, and lemon juice. Stir the ingredients together until you achieve a uniform mixture.
Dampen your hair and apply the mask, focusing on the scalp. The application process is crucial as the scalp is typically the oiliest part.
Use your fingers to rake the mixture through your hair, ensuring even coverage, especially on the scalp.
Allow the mask to sit on your hair for 15 minutes. This duration lets the ingredients work their magic, cutting through grease and nourishing the scalp.
Rinse your hair thoroughly after 15 minutes. You don’t necessarily need to shampoo your hair post-treatment, but you can if you feel the need.
How To Apply A Hair Mask?
Unless you have severe and highly damaged hair or dry hair, a hair mask should be applied once a week. If you need extreme hair care, then use a hair mask after every hair wash cycle. Here is the routine to follow while applying a hair mask for better results.
Shampoo and rinse hair according to the regular routine
Then pat hair dry by using a towel for absorbing moisture. Don't let it dry completely.
Make a dollop of hair mask based upon your hair length and apply it evenly
Let the hair mask stay for 10 - 15 minutes or the required amount.
Then, using lukewarm water, rinse thoroughly.
For better results, finish off with cold water. As cold water can seal the cuticles.
It is always recommended to go with a towel dry or air dry to prevent heat damage on newly conditioned locks.
A little bit of mask is enough, so work in portions and don't use the whole jar at once. These simple directions, with regular use, can make your hair shine like a diamond.
FAQ's
How long should you leave a hair mask on your hair?
For better results, apply a hair mask in the shower; the steam helps unlock the hair's cuticle. Leave the mask on your hair for two minutes to 10 minutes.
For less porous hair or tightly coiled textures, you need to use fingers to work in the product. Then wrap hair in a damp and hot towel for 5 minutes.
Can you leave a hair mask on for too long?
It mainly depends on the hair mask you are using. For moisture masks or Hydrating Masks, you can leave your mask overnight but make sure to use a hair cap.
For protein treatments, it is better to follow label instructions, as leaving your hair mask too long makes hair absorb more protein, leading to hair breakage.
How Often Should You Use a Hair Mask?
It is always recommended to use a hair mask once a week. If your hair looks dry and more damaged than usual, make it two to three times a week.
Why Should You Use a Hair Mask?
A deeply nourishing hair mask could do wonders for your hair strength and shine. It's very crucial if you have got frizzy, damaged, and dry hair.
Hair masks are packed with refreshing and hydrating ingredients. They target specific hair issues and types too. For example, a hair mask for dry scalp is formulated with oils or butter-like argan oil, shea, etc.
These ingredients help in adding shine and replenishing hair. Other healing ingredients, like Honey, are helpful for damaged hair. Trust me, regular usage of hair masks will bring the best out of your hair.
Did you know that everything about your daily bathing ritual impacts your skin texture? The soap you use and the water temperature, in particular, determine how your skin feels after the shower.
If you have dry skin, it calls for paying special attention to your bathing ritual to ensure that it nourishes your skin instead of stripping it off the moisture content.
With the wide range of options available in the market, it can be challenging to choose the right soap for your skin. The wrong soap will do more harm than good. Therefore, you must use only the best soaps for dry skin.
7 Best Soaps For Dry Skin With Natural Ingredients
Dry skin requires a gentle touch and nourishing ingredients that can replenish and maintain its moisture balance. Each of these soaps are crafted with natural ingredients to cater specifically to the needs of dry skin.
Whether your skin is inflamed, dull, dehydrated, or just in need of a gentle, hydrating cleanse, these soaps will keep your skin feeling soft, supple, and hydrated.
Recommended in Ayurveda for its calm & cooling properties, Vetiver is aromatic and has conditioning properties that rejuvenate the skin. The oil distilled from the roots of Vetiver moisturizes dry skin and soothes inflamed skin. This handmade Natural Khus Soap gently cleanses your skin and revives your tired mind and body.
Gently cleanse your body while elevating your senses with the fabled roses' exquisite aroma from Kannauj, with this deeply conditioning body soap made using Extra Virgin Coconut Oil. The Rose essential oil treats while Rose Water maintains the pH level of the skin.
Rose essential oil has antibacterial, anti-fungal, and antiviral properties. This makes the soap ideal for topically treating a host of skin conditions that could lead to skin irritation.
The Vanilla and Oatmeal Soap is a Vitamin E enriched soap that relieves dryness, increases elasticity, and reduces aging leaving skin soft and smooth. Vanilla acts as a natural antioxidant and Oatmeal gently exfoliates for clean and soft skin.
The soap also has skin nourishing ingredients such as Organic Extra Virgin Coconut Oil, Rice Bran Oil, Cocoa Butter, and Castor oil. This soap is an excellent choice for those who have dry and sensitive skin.4. Rose, Cinna
Rose Orange & Cinnamon soap is a perfectly natural blend of skin-nourishing ingredients such as Organic Extra Virgin Coconut, Jojoba and Castor oil. Pure Rose oil balances the pH of the skin and acts as a toner. The essential oils of Orange & Cinnamon help skin cell growth, increase blood circulation, and remove toxins. Coconut & Jojoba oil relieve dryness, improve the skin's elasticity, delay aging while hydrating and moisturizing the skin.
This soap is an ideal body cleansing blend of Holy Basil Essential Oil, Extra Virgin Organic Coconut Oil, Castor Oil, and Beeswax. Basil enhances the luster of dull-looking skin and also treats acne and other skin infections. Natural Beeswax in this soap contains Vitamin A, which softens and hydrates dry skin.
Navaa Retexturising Soap is a pure vegetable soap formulated with Coconut Oil and Castor Oil. It also has natural soothing ingredients such as Green Cardamom, Nutmeg, Beauty Berry and Cinnamon.
This cleansing formulation smoothes, polishes and retextures dry skin to leave it even, toned and stress free. This soap cleans and protects skin from environmental pollutants, damage and toxins.
A pure vegetable soap for the face and body that suits dry and mature skin and keeps skin smooth and supple. Created with a unique combination of skin care and protection-enhancing herbal oils and extracts.
These include Coconut Oil and Castor Oil, both of which are skin-friendly oils that keep skin healthy and moisturized. Also contains Neem extracts that protect the skin from bacteria, toxins and inflammation.
Ayurvedic Take On Cleansing Dry Skin
Cleansing the body is one of the simplest and most abiding beauty care rituals that has a special significance in Ayurveda. The act of cleansing is associated with purification of both mind and body. Before commencing any task of importance, it is necessary to take a bath, be it offering service to the Divine or starting a new day.
With its focus on using natural oils to moisturize and treat various issues, Ayurveda recommends the use of plant-based, nourishing natural soaps to wash off all oils as well as impurities. These herbal, all-natural soaps also rejuvenate the body and mind.
Every day, we are exposed to a multitude of toxins and impurities. Therefore, it is best to avoid harsh, chemical soaps that strip the skin of its natural oils and radiance. Using natural soaps helps keep your skin clean and naturally healthy.
Ingredients To Look For In Soap For Dry Skin
The dry skin condition can occur due to various reasons - climate, aging, environmental pollution, or application of the wrong skin products. While some of these factors remain beyond our control, we can strive to choose the best products for our skin type.
Have you ever felt your skin become excessively dry right after you take a shower? Dehydrated, dull skin is often the first sign of skin dryness, and if the skin feels like that after a shower, it means that you’re not using the right soaps.
It’s a good practice to check the key ingredients in your soap. Natural soaps made from plant oils are best suited for your skin. Let’s look at some of the top ingredients for dry skin.
Coconut Oil
Almost every article with tips for taking care of dry skin talks about Coconut oil's numerous benefits. Not only is Coconut oil an excellent moisturizer for dry skin, but also one of the most nourishing ingredients in dry soap. It has rich and healthy fatty acids that condition and soften the skin.
Castor Oil
Castor oil is one of the best ingredients you can find in a soap for dry skin. Do you know that it’s a special oil that has moisturizing as well as hydrating properties? This means that the oil not only moisturizes the skin but also increases its ability to hold moisture. Castor oil has unique compounds called triglycerides that moisturize the skin while the oil acts as a humectant and helps retain the moisture.
Jojoba Oil
Jojoba oil is indeed a plant wax that acts like an oil. It’s a wonderful ingredient in soap as it has a unique ability to function as our natural skin barrier does. Jojoba oil also has anti-inflammatory and healing properties, making it an effective treatment for dryness, flaking, and itching.
Beeswax
Beeswax is another great ingredient for dry skin. It can act as an occlusive, which means that it can create a protective layer on the skin to seal in the moisture. It also has hypoallergenic and moisturizing properties, making it an effective treatment for dry skin and even more severe eczema issues. Natural Beeswax contains Vitamin A, which softens and hydrates dry skin.
Essential Oils
Fragrant natural soaps use plant and herbs based essential oils to provide the scent. Unlike artificial fragrances, these essential oils have unique benefits for the skin. Some essential oils like Lime, Basil, Vetiver, and Rose are excellent for dry skin. Apart from providing a fragrant bathing experience, they also rejuvenate, nourish and revive the skin.
Ingredients To Avoid For Dry Skin
When choosing a soap, remember that what appeals to the senses may harm the skin. Now that we've discussed the top ingredients to look for in soap for dry skin, let's look at the ingredients that you should avoid to prevent dryness.
Sodium Lauryl Sulphate
Sodium Lauryl Sulphate (SLS) is a compound added to soaps and detergents for its cleansing properties. However, it's a surfactant, which means it has drying properties.
While the compound isn't harmful, it may cause excessive dryness of skin for those who already have dry skin conditions. You can look for labels such as 'sulfate-free' in your soap or check the ingredients to ensure that it is free from SLS.
Artificial fragrances and alcohol
If you have dry skin, then soap with artificial fragrance or alcohol as one of the ingredients is harmful to your skin. It may dry the skin and even result in skin irritation.
Synthetic Dyes
Not all that looks good is good for you - this holds for soaps. Do you feel fascinated by the soaps in fancy colors? Just like artificial fragrance, even artificial colors in the soap are harmful to the skin.
Have you noticed how most of the natural soaps look dull? This is because they are free from synthetic dyes. These artificial colors are achieved chemically and can have adverse effects on the skin.
With this, we conclude our list of best soaps for dry skin. You can choose the one that best matches your skin requirements.
FAQs Related To Best Soaps For Dry Skin (H2)
What are the key ingredients to look for in soaps for dry skin?
Look for ingredients like shea butter and natural oils (coconut, almond, olive) known for their moisturizing properties. Ingredients like hyaluronic acid and glycerin are also beneficial for hydrating dry skin.
Can using soap every day dry out the skin?
Not necessarily, if you choose soaps with the right formula for dry skin. Opt for nourishing and hydrating ingredients that help maintain the skin's moisture balance.
Are there specific soaps recommended for extremely dry skin?
Soaps enriched with natural oils like shea butter, coconut oil, and almond oil are excellent for extremely dry skin. These ingredients help deeply moisturize and nourish the skin, leaving it soft and supple.
Is it safe to use soaps with a cream base for dry skin?
Yes, cream-based soaps are great for extra-dry skin. They provide a lush, emollient-rich lather that can deeply nourish and moisturize the skin.
What about soaps for dry, sensitive skin?
For sensitive, dry skin, choose soaps with gentle, soothing ingredients like calendula extract, panthenol, and ingredients that combat free radicals and oxidative stress.
Navigating the world of hair care, especially when it comes to hair loss, can be daunting for men. This article dives into the best hair oils, offering a natural and effective solution for those seeking to strengthen, nourish, and rejuvenate their hair.
Whether you're grappling with thinning, balding, or simply aiming for healthier locks, we've explored a range of oils suited to various hair types and concerns. Join us as we uncover the top hair oils that promise to revitalize your hair care routine.
7 Best Hair Growth Oils For Men To Prevent Hair Fall
Gentlemen, if you've been overlooking hair oiling, it's time to reconsider. Regular oiling is a cornerstone of healthy scalp and hair growth. It combats dandruff, strengthens hair roots, and regulates scalp oil production.
Neglecting this essential hair care step could lead to hair loss. Embracing hair oiling can be a game-changer for your hair health.
Let's look at some of the best hair oils that can relieve all your stress to make your hair stronger and thicker than ever.
1. Coconut Oil
Coconut hair oil is an ancient ingredient for hair care that has always been passed through generations. It is an excellent oil suitable for every hair texture. Coconut oil is the perfect carrier oil because it is very soft and glides easily on your scalp.
The oil contains essential vitamins and minerals for hair. It also works as a conditioner because it is high in antioxidants and vitamin E.
For men, applying Coconut oil once or twice a week is enough. Apply the oil gently on your scalp, gently massage with your fingertips and wash it after 20 minutes. Keep the oil on your scalp overnight for better results.
Sesame oil is extracted from Til seeds or sesame seeds and is one of the oldest oils known to man. It is very high in antioxidants, vitamins, omega fatty acids, and minerals like magnesium, protein, and calcium.
Moreover, this oil has antifungal and anti-inflammatory properties that can treat various hair and scalp-related issues.
Massage the oil into your scalp along with your hair from the roots to the tip. Warming the oil before applying will also improve the results. Allow it to sit on your hair for around 20 minutes before washing it with gentle hair shampoo and warm water. Apply the oil once or twice a week.
Bringadi oil is beneficial, especially for men, because it prevents problems like baldness. It works as an all-in-one Ayurvedic treatment for hair loss, dandruff and premature graying. It also restores healthy hair growth and provides nourishment to your scalp and your hair.
Massage gently into hair, making sure that your scalp is entirely covered. The oil can provide natural conditioning to your hair if you leave it for at least 20 minutes. Cleanse the area after the treatment with a gentle shampoo and lukewarm water.
4. Tea Tree Oil
Tea tree oil can prove to be a best friend for your mane. It can efficiently deal with hair-related problems like baldness and dryness and promote healthy hair growth. Much research supports using tea tree oil for various hair health benefits. The tea tree oil combined with shampoo can fight dandruff and hair dryness.
Apply a shampoo containing 5% tea tree oil and massage gently to help with dandruff. Follow this process twice or thrice a week. If you want shiny and healthy hair, dilute a 1 to 10 ratio of tea tree oil to any carrier oil such as Almond oil or Coconut oil. To achieve the best results, apply the mixture daily.
Lavender Essential oil has antimicrobial properties, according to research conducted in the year 2014. This means it aids in the prevention of the growth of bacteria as well as fungi. When the oil is applied to your hair or scalp, it plays a massive role in preventing problems like itchy scalp, dandruff, and various other infections.
According to multiple studies, Lavender oil also helps treat baldness or alopecia, which is very common in men.
The most basic way to apply Lavender oil for hair growth is to incorporate it into your shampoo routine once or twice a week. Use around 2-3 drops of Lavender essential oil in your regular shampoo to wash your hair. Massage softly on your scalp for an additional minute for maximum effect.
6. Castor Oil
Castor oil plays a vital role in promoting healthy hair by increasing the blood flow to the scalp. Applying it once a month can increase hair growth by up to five times your regular rate.
Castor oil, derived from the Castor bean, is high in ricinoleic acid, generally a type of fatty acid known to fight inflammation. It is believed that when castor oil is applied to the scalp, it promotes healthy hair growth and prevents a lot of hair loss.
Apply a few drops of castor oil to your scalp and gently massage it to promote healthy hair growth. Castor oil can also be used as a proper hair mask on dry hair, especially in winter. Apply the oil to your scalp and hair, and then cover it with a shower cap for about 2 hours. Shampoo your hair thoroughly and style it in your way.
7. Argan Oil
Argan oil is primarily used as a moisturizer for hair due to its high concentration of fatty acids, particularly linoleic acid, and oleic acid. The argan oil has been shown to lubricate the hair shaft and help in moisture retention.
It is also high in vitamin E, which adds a fatty layer to your scalp and hair, prevents dryness, reduces frizziness, and increases shine. Argan oil also contains antioxidant properties that are excellent for treating hair-related problems.
Apply the Argan oil to your hair and gently massage it to your scalp. Now wrap your hair using a towel and let it soak. Allow the hair mask to flow into your hair for 20 to 30 minutes. Now finally, shampoo and condition your hair using lukewarm water.
In India, the oiling of hair has always been a weekly ritual. People tend to forget oiling their hair regularly when they grow up. However, hair care is essential to prevent hair from falling. Without care, your hair quality degrades, making it more dry and brittle.
To maintain the shine and strength of your hair, you need to massage your scalp with suitable hair oil for men regularly.
4 Top Benefits of Using Hair Growth Oil for Men
Hair oiling is the action of pouring oil into your hair and rubbing it into your scalp to promote moisture, luster, and shine. The process of hair oiling for men is necessary to soften hair and replenish vitamins and minerals lost due to frequent washing. The ancient science of Ayurveda also recommends this hair care method, and it has been used in India for centuries.
Let's look at some of the essential benefits of hair oiling, especially for men. Here's what proper hair oiling can do for you -
Hair Repair
The process of hair repair begins with scalp care. If you love experimenting with your hair and enjoy using various hair styling products and treatments, then hair oiling is critical for your hair. Hair oils play an essential role in strengthening your hair follicles and restoring the proper amount of protein. Hair oiling is also vital for repairing hair damage.
Prevent Scalp Irritation
Dryness is the most common cause of scalp irritation. When dealing with scalp dryness, it is essential to use hair oils. When your skin lacks moisture, it develops a dry scalp, which leads to irritation and causes your skin to flake off. If you have a dry, itchy scalp, the immediate solution is to properly oil your hair and provide the appropriate amount of moisture to your scalp.
Hair Styling
Nobody can prevent men from styling hair with different grooming gels and creams. These cosmetics may also contain harmful chemicals that are very dangerous for your hair. It is strongly advised to oil your hair regularly to look stylish, vibrant, and natural at the same time. You can pull off any look with that shine and stylish look that no cosmetic product can ever achieve.
Prevent Hair Thinning
Applying hair oil twice or thrice times per week stops your hair from falling and prevents it from thinning. Hair oiling can add texture to your hair and make it appear thicker and healthy for both men and women.
These are some of the magical spells that hair oiling can perform on your hair. You must be grateful to your mothers and grandmothers for giving you the best "hair champis" (hair oil massages) in your childhood days.
But now that you're grown up, you must keep your hair healthy and shiny all the time by oiling them regularly yourself.
Why Do Men Suffer From Hair Loss And Hair Fall?
Hair thinning, male pattern baldness, and Alopecia are some of the various scalp issues that men face nowadays. Men who enter adulthood experience hair loss due to hormonal changes in their bodies.
Poor lifestyle, personal life crisis, workplace stress, and poor hair care are some other reasons that can cause men severe hair loss and baldness.
Using Improper Hair Care Products
Men are frequently hesitant when it comes to understanding hair care and skin care. They tend to buy any product that appeals to them and begin using it. However, some products make hair more brittle, dry, and rough. The first step is to identify a suitable hair care routine after determining their hair type and texture.
Oily scalp is very common in men. The excess amount of sebum and sweat creates a massive room for dandruff, and you can get itchy and flaky scalp after that. If you use a harsh chemical based shampoo to solve such issues, you will notice the desired results, but that would be temporary. The problem comes back as soon as you stop using such shampoos.
It is always advisable to use hair oils to provide proper nourishment to your scalp and restore the damaged hair follicles. Moreover, you should only use natural and herbal shampoos in your hair care regime.
Following An Unhealthy Diet
Just like you treat the external circumstances of hair loss, you must also address the internal causes simultaneously. Your hair count also depends on the nutrients that your body derives from food. If you overeat oily fast food, you may experience drastic hair loss.
Fresh greens and home-cooked meals are proven to be essential for your body's nutrient levels, vitamins, and minerals. A well-balanced diet of good proteins, fats, and carbohydrates is crucial.
It is important to remember that protein is the main component of our hair that makes it healthy and thick. One way or the other, protein must enter your body to ensure hair health. Therefore, make it a point to nourish your body with enough protein and iron. With a better diet, your hair fall problems will reduce.
Excess stress and anxiety
Mental health problems have become an unavoidable part of modern life. We are frequently overwhelmed by the fast-paced, competition speculation, and hectic daily lives. We must deal with our workplace tensions to lead a healthy life.
Lack of sleep and anxiety also harm our hair health. Some people suffer from premature baldness and sudden hair loss because of excessive stress and anxiety.
Tension can be relieved with stress-busting head massages. Give yourself a head massage and try using a healthy hair growth oil for men, and it will help in the growth of your hair.
Too much hairstyling
The use of hair styling products and heat styling is harmful to your hair. Extreme heat and chemicals can permanently damage your hair follicles, resulting in drastic hair loss.
Try choosing hairstyles that complement your personality while also causing the least amount of damage. Do not forget to keep oiling your hair simultaneously.
Lack of Oiling
In normal circumstances, our scalp loses up to 100 tresses a day. When the rate of hair loss exceeds, we refer to it as hair loss. Hair loss that lasts for months will also end up reducing your total hair follicle count. A healthy scalp and hair require nourishment from within. This is why hair oiling is an effective way for men to prevent hair loss and restore all the damage.
FAQs related to Hair Regrowth Oils For Men
What are the benefits of using hair oil for men?
Hair oils can hydrate, smooth dry or damaged hair, and promote healthy hair growth. They also strengthen hair follicles, reduce frizz, and improve hair texture.
How do you apply hair oil effectively?
Apply a small amount to your palms and rub through damp hair, focusing on mid-lengths to ends. For some oils, you can apply them before using heat tools for styling.
Can hair oils be used on beards?
Yes, many hair oils are versatile and can be used for both hair and beard care, offering nourishment and moisture.
Are there any downsides to using hair oils?
Some hair oils might have a strong scent or leave a greasy residue if used excessively. It's important to use the right amount based on your hair type.
Is hair oil suitable for all hair types?
While there are hair oils for various hair types, including thick, curly, or fine hair, the effectiveness can vary. Choose an oil that suits your specific hair type for best results.
Exfoliation in skincare is a process of sloughing off dead cells from the surface of our skin. The multitude of face scrub options out there might have got you wondering - how to exfoliate skin the right way? Well, this post will answer all your questions.
Let’s get started with the basics - Did you know that exfoliation is basically of two types - mechanical exfoliation and chemical exfoliation?
Mechanical exfoliation involves physically scrubbing our skin using a scrub, dry brush, or any other skincare tools used for exfoliation. For example, you might have used a face scrub as a part of your skincare routine or a facial.
On the other hand, in chemical exfoliation, you use salicylic acid, glycolic acid (alpha hydroxy acid), or other enzymes that can chemically break down the surface build-up. Most exfoliators are liquids, but you can also find the exfoliating ingredients in face wash, face creams, and more.
What Is Exfoliation?
Exfoliation, whether achieved through physical scrubs or chemical agents, fundamentally eliminates dead skin cells accumulated on your skin's surface.
As we age, our skin's natural capacity to shed these cells slows down, potentially leading to a dull and tired complexion. Regular exfoliation not only helps in maintaining a fresh and vibrant appearance but also increases the efficacy of other skincare products by allowing them to penetrate more deeply.
7 Top Benefits Of Skin Exfoliation
Skin exfoliation is always refreshing. It’s like setting back your complexion to its natural and fresh state, especially when you wear lots of makeup and your skin feels congested.
Everybody says that exfoliation is a crucial step in a well-rounded skincare regimen. But, what else does an exfoliation habit accomplish other than sloughing off dead skin cells?
Well, skincare experts say that it does a lot more than that! Regular exfoliation increases skin’s clarity, youthfulness, radiance, and this is just a start. The following is the list of other benefits.
Unclogs Pores (H3)
Dead skin cells seal the pores, and when the sebaceous glands produce oil, it gets stuck under those dry skin cells clogging the pores. This causes breakouts as there is no way for the oil to go.
Exfoliation is an effective way to unclog these pores. Exfoliation also avoids stubborn stoppages in the form of blackheads and whiteheads (which are hard to get rid of).
When you sweep away the dry and dead skin along with the other surface debris that might remain on your skin after cleansing, you automatically stop them from making their way into your pores.
Prevents Acne
Just like how unclogging pores helps in preventing blackheads and whiteheads, in the same way, it also helps in preventing other blemishes. Exfoliation also prevents clogging of pores, which in turn reduces acne.
Helps Other Skincare Products Penetrate Deeper
Exfoliation unclogs pores, smoothens the surface of the skin, and removes all dry and dead skin. This allows your skincare products (serums, moisturizers, and the like) to penetrate the skin deeper.
Dead skin is a barrier between your serums and skin. By removing it, you allow everything to work better. When the rich, nourishing ingredients penetrate deeper into the skin, they work more effectively. Exfoliation is crucial for your expensive serums and moisturizers to work their magic. The last thing we want is your serums and moisturizers to be blocked by pore-clogging material and dead skin.
Evens Skin Tone
Dark spots, hyperpigmentation, rough texture, and acne scars - those who suffer from these skin issues know how challenging it is to treat them. Many inconsistencies in your skin are mainly due to the dead skin cells that haven’t been shed yet. Thankfully, exfoliation helps in evening out your skin tone.
The exfoliants break down dead and dry skin cells while smoothening the skin texture. Over time, your skin begins to appear more uniform. A proper exfoliator also helps in brightening your skin.
It helps look for a natural face scrub that is clinically proven to show these results for the skin. For instance, Kama Ayurveda’s Kumkumadi Face Scrub has natural ingredients such as Saffron, Sunflower Seeds, Lotus, and Cardamom. It’s proven to be effective in smoothening the skin, reducing the pore size, and firming the skin.
Benefits of exfoliation also include stimulating the circulation of oxygen-rich blood to the skin’s surface. Exfoliating the skin also promotes the stimulation of lymphatic drainage for internal cleansing. The former helps in boosting cellular health to reveal glowy, radiant skin. The latter is a form of skin detoxification that works to remove toxins and harmful debris.
Increases Cell Turnover
Apart from boosting circulation, exfoliation also helps in boosting skin’s radiance by helping cell turnover. By removing dead, dry, or dying cells, skin also keeps fresh and healthy cells on the surface. This results in the clear, bright complexion we all dream of.
Stimulates Collagen Synthesis
Last, but not least, exfoliation also helps in stimulating collagen synthesis. This in turn helps in improving skin’s integrity, texture, and keeping the skin look young, tight, and plump.
The rate at which our skin produces collagen slows down significantly as we age. Still, the very act of exfoliation creates a mild trauma in your skin which helps kick-start your collagen production. This process activates the fibroblasts so that more collagen will be synthesized in the dermis.
Though there are many benefits of exfoliation, there isn’t one particular method that suits all. So, before exfoliating your skin, you need to know what your skin type is. Most importantly, special skin conditions like rosacea and hypersensitivity should be kept in your mind.
All types of exfoliation may not work for all skin types. If you have any skin condition, you should consider consulting a dermatologist or better avoid exfoliating altogether.
The following is a step-by-step procedure that will help you set up an exfoliating routine at your home.
Step 1: Choose The Right Products
Choosing the right product for exfoliation is a crucial step. Besides considering your skin type, you also have to note which body part you wish to exfoliate. You should not use an exfoliation product meant for your face's delicate skin on the body and vice versa. Also, rugged regions like elbows or heels might need special attention.
Remember that your facial skin might cycle between dry and oily or normal to sensitive based on different factors. So, you might need to change the product accordingly. Also, note that different exfoliants work better for men and women.
If you choose a physical exfoliator like a natural face scrub, apply it to a clean, dry face while avoiding sensitive regions like the area around your eyes. If you use a chemical-based exfoliator like a serum, massage a few drops before applying a moisturizer.
Step 3: Getting The Exfoliator To Work
If you are using a face scrub, massage it in your skin with wet fingers. If you use a chemical exfoliator, dry fingers evenly massage the product on the skin.
Step 4: Wash Off
If you use a face scrub, rinse clean with lukewarm water. A chemical exfoliator should, however, have to be left on.
Step 5: Moisturize
Applying a moisturizer to the skin immediately after exfoliation is very important as it will help prevent any damage and keep your skin hydrated and healthy.
How To Exfoliate Skin - 5 Best Natural Ingredients
Did you know it is completely possible to get great exfoliation and radiant skin using ingredients in your kitchen? The results are greener, cleaner, and cheaper. The following is the list of ingredients that are great exfoliants. Have a look and mix up your own quite easily.
Honey
Honey helps in speeding up the natural exfoliation process. It has humectant qualities that help in attracting moisture, making it a great hydrating facial scrub. (5)
Take a nice-sized dollop into your clean hands. Massage your face gently in a circular motion and rinse clean with warm water.
Yogurt
Yogurt is a great exfoliator. It contains lactic, which has the same alpha hydroxy that is found in skincare treatments. Yogurt helps in soothing, smoothening, and evening out skin tone. (6)
Apply enough plain yogurt all over the face and neck. Let it sit for 20 minutes, and then wash off with clean water.
Sugar
Sugar cane is rich in glycolic acid, which is another alpha hydroxy that helps in boosting new skin cell production. It also smoothes and softens the skin. (7)
Make a paste using half a cup of white or brown sugar and enough olive or grapeseed oil. Apply the mixture all over the face and neck and massage gently with fingers in circular motions. Let it sit for about 10 minutes and rinse clean with warm water.
Lemon Juice
Lemon juice is another excellent source of natural alpha hydroxy acid that helps in removing dead skin cells. (8)
Blend one quarter a cup each of lemon juice, grape juice, apple juice and can sugar until all the sugar gets dissolved. Then apply the paste all over the face using a cotton pad. Leave it on for about 10 minutes and rinse clean.
Papaya
Papaya is rich in the enzyme Papain. Papain is a great exfoliator that dissolves dead skin cells. It can also heal skin and lighten fine lines and age spots.
Select green papaya as papain is most potent in young fruits. Mash the fruit and make a fine smooth paste. Apply it all over the face and neck and leave it on for about 15 minutes. Then, rinse clean.
How Often Should You Exfoliate
The jury’s still out on this thing. While exfoliation is a key step in your skincare regimen, how often you should do it entirely depends on you. Cell turnover, on average, occurs every 28 to 30 days in younger adults. This gets slowed down as we age. The complete cell turnover can take up to 50 days in older adults.
Therefore, if you are a young adult, it is recommended you exfoliate on the first day of every month. As the fresh layer of skin on the surface turns over completely for around 30 days.
The frequency of exfoliation also depends on your choice of face scrub. If you opt for an all-natural face scrub like Kama Ayurveda’s Kumkumadi Brightening Ayurvedic Face Scrub, you can reap the benefits of exfoliation twice a week.
Instead of using chemicals or plastic microbeads, this all-natural face scrub has natural exfoliants such as almonds and walnuts, making it safe for frequent use.
Over-exfoliating with harsh facial scrubs will remove the skin’s only protective barrier. If you remove this protective barrier, your skin gets exposed to all the environmental toxins, including the sun (the factor which causes the most severe damage to the skin).
So, it is always advisable to use products that encourage a natural cell turnover and also helps in keeping your skin healthy and hydrated.
Another great way to reap the benefits of exfoliation every day without harming your skin is to use a mild, natural cleanser with exfoliants. Kama Ayurveda’s Mridul Soap Free Face Cleanser is a traditional blend of herbs, cereals, and pulses ground to a cleansing powder that mildly exfoliates facial skin.
How do you know that you are over-exfoliating your skin? The following are the signs that you are over-exfoliating your skin.
Irritation Or Redness
Too often or too harsh exfoliation can result in irritation, redness, inflammation, or burning sensation on the skin. Subsequently, your skin becomes very sensitive and will react to every product that you use.
If such is the case, opt for milder products and use rich emollients. Also, you need to take special care when your skin is wet, to avoid rubbing your skin as much as possible.
Dry Flaky Skin
Over-exfoliation results in dry skin as it rips off skin’s natural oils, keeping it healthy and hydrated. It removes moisture making the skin look dry and flaky. Extreme dry and flaky skin can also lead to the appearance of wrinkles and fine lines. To alleviate this condition, use a good moisturizer or a serum.
Increased Breakouts
As exfoliation damages the protective layer on the skin, it makes the skin more prone to bacterial infections. This results in increased acne breakouts.
If this is the case, you should stop exfoliating and switch to milder products. Ensure that your skincare products are free from all harmful chemicals to avoid the side effects of exfoliation. Opt for organic and natural skincare product brands such as Kama Ayurveda.
If the skin’s condition doesn’t improve, do check with your dermatologist.
Though the proper exfoliation procedure adds to your glow, giving your healthy, youthful skin, make sure you do not overdo it. As over-exfoliating your skin might result in the same skin conditions that you are aiming to treat.
FAQs related to Skin Exfoliation
Can exfoliation help with acne? Yes, regular exfoliation can help prevent acne by removing dead skin cells that clog pores.
Is exfoliation suitable for all skin types?
Exfoliation is generally beneficial, but the method and frequency should be adjusted based on skin type. Sensitive skin may require gentler exfoliation.
How often should I exfoliate? This depends on your skin type and the exfoliation method. Generally, it's recommended 1-3 times a week.
Can over-exfoliation harm the skin? Yes, over-exfoliation can lead to skin irritation, redness, and increased sensitivity.
Should I exfoliate in the morning or at night? Either is fine, but if you use chemical exfoliants, nighttime may be better to avoid sun sensitivity.
Do I need to use sunscreen after exfoliating? Yes, exfoliation can make your skin more sensitive to the sun, so using sunscreen is crucial.
Citrus limon (Lemon) Phenomenon—A Review of the Chemistry, Pharmacological Properties, Applications in the Modern Pharmaceutical, Food, and Cosmetics Industries, and Biotechnological Studies - https://www.ncbi.nlm.nih.gov/pmc/articles/PMC7020168/
Coconut oil, beloved for its hydrating properties and rich nutrients, is more than just a cooking ingredient—it's a skincare superstar.
Looking for a natural moisturizer for your face? Coconut oil to the rescue! Its rich fatty acids deeply hydrate and nourish the skin. In need of a gentle makeup remover? Coconut oil effortlessly dissolves even waterproof makeup, leaving your skin clean and soft.
Battling with skin irritations or conditions like eczema? The anti-inflammatory properties of coconut oil soothe and calm the skin.
Whether it's providing barrier protection or serving as a natural lip balm, coconut oil is a versatile, all-in-one solution for your facial skincare needs. In this article, we'll dive into how coconut oil can benefit your face, from moisturizing dry skin to potentially reducing signs of aging.
Benefits Of Using Coconut Oil For Face
What makes coconut oil stand out in the world of oils is its high concentration of lauric acid (also known as dodecanoic acid) and caprylic acid. These acids fight inflammation and enhance immunity. Plus, they give coconut oil its strong antimicrobial properties, making it a unique and effective choice for skin care.
It’s important to note that only 100 percent natural, pure, and organic Coconut oil will provide the best benefits for your skin. We recommend Kama Ayurveda’s Cold Pressed Extra Virgin Coconut oil for application on the face.
If you're struggling with dark circles or spots of hyperpigmentation, coconut oil might be a helpful remedy. This natural oil is known for its lightening properties, thanks to its rich content of fatty acids and antioxidants like Vitamin E. These components can help reduce the darkness under the eyes and even out skin tone.
Additionally, its anti-inflammatory qualities can help reduce puffiness around the eyes. However, it's important to remember that dark circles can sometimes indicate other health issues, so it's a good idea to understand their root cause.
2. Induces relaxation
In our increasingly hectic lifestyles, taking a moment to relax is essential. Massaging your face with a bit of coconut oil can be a soothing escape. The act of massaging helps release tension in the facial muscles, potentially reducing stress-related symptoms like headaches or jaw clenching.
Additionally, the natural, mild fragrance of coconut oil is known to have a calming effect, which can enhance relaxation and mental well-being.
3. Works as a moisturizer
Coconut oil is an excellent choice for achieving that dream of having smooth, supple skin free from dry patches. Its high content of fatty acids, particularly lauric and caprylic acids, enables it to deeply moisturize the skin. These acids help to maintain the skin's natural barrier, preventing moisture loss.
Additionally, coconut oil's ability to penetrate the skin's deepest layers means it not only hydrates on the surface but also nourishes from within. This results in long-lasting hydration, making your skin feel soft, smooth, and elastic.
4. Acts as a sunscreen
Coconut oil can provide a basic level of sun protection, making it a suitable option for brief outdoor activities. Its natural properties create a barrier on the skin, offering some defense against UV rays, which are responsible for sunburns and tanning.
With an SPF rating between 4 and 5, coconut oil can be a natural alternative for short sun exposures, like a quick walk or a brief swim.
However, it's important to note that while coconut oil does offer some sun protection, its SPF is much lower than the recommended SPF 30 or higher for extended sun exposure. For longer durations outdoors, it's crucial to use a stronger, dedicated sunscreen to safeguard your skin effectively against sun damage.
5. Make-up remover
Coconut oil's oily and slick nature makes it an effective makeup remover. It easily breaks down and lifts off even water-resistant makeup, cleaning your skin thoroughly.
Plus, it leaves your skin feeling moisturized after use, unlike some makeup removers that can dry out your skin. This natural alternative is gentle yet efficient, making it great for removing makeup while caring for your skin.
6. Consists of anti-aging properties
Coconut oil is packed with antioxidants, including vitamins A and E. These antioxidants help combat the damage caused by free radicals, which can accelerate skin aging due to sun exposure.
Additionally, coconut oil is known to promote collagen production, a key factor in maintaining skin elasticity and firmness. This can help in reducing the appearance of fine lines and wrinkles.
While research specifically linking coconut oil to wrinkle reduction is limited, the general understanding is that increased collagen can lead to tighter, more elastic skin, potentially reducing wrinkles.
7. Works As Natural highlighter
For those times when you need a quick touch-up but don't want to apply full makeup, coconut oil can be a handy solution. Just dab a small amount on your cheekbones, the bridge of your nose, and under your brow bone.
It'll catch the light beautifully, giving your face a natural, subtle glow. This trick highlights your features without the need for traditional makeup, perfect for enhancing your look in a simple and effortless way.
8. Enhances those eyelashes and eyebrows
Taking care of your eyelashes and eyebrows is an important part of grooming, and nourishment is key to keeping them healthy. Coconut oil can be just the right nourishing agent for this.
Applying a small amount of coconut oil to your eyebrows and eyelashes can improve their texture and promote thickness. Its natural properties help in conditioning and strengthening these hairs, making them appear fuller and more vibrant.
9. Heals bruises and blemishes
This oil is known for its healing properties, largely due to the presence of monolaurin, a compound derived from lauric acid. Monolaurin is a fatty acid celebrated for its antibacterial qualities.
High-quality coconut oil can aid in the healing process of wounds, reducing the risk of infection. It also plays a role in minimizing scarring and preventing the formation of blemishes once the skin heals. Its soothing and reparative properties make it an excellent natural option for treating minor facial injuries and maintaining the skin's smooth appearance.
10. Works as a lip gloss
Switching to a more natural look? Coconut oil can be a great alternative to traditional lip gloss. Applying a bit of coconut oil to your lips can give them a glossy, healthy sheen, enhancing your natural beauty.
Besides adding a subtle glow, it also keeps your lips moisturized, tackling issues like dryness and chapping. With coconut oil, you get the dual benefits of a gloss and a lip balm, and since it's all-natural, there's no worry about having to remove it later. It's a simple, effective way to keep your lips looking and feeling great.
Should I use coconut oil for the face?
Whether or not to use coconut oil on your face depends on your skin type and specific concerns. Coconut oil is known for its benefits, particularly for dry skin, due to its moisturizing properties. However, its suitability for acne-prone skin is a topic of debate.
While coconut oil has antimicrobial, anti-bacterial, and anti-inflammatory properties, which can theoretically help against acne, it's also high in comedogenic ratings. This means it can clog pores, potentially exacerbating acne issues, whiteheads, or blackheads.
The effect of comedogenic products like Coconut oil varies depending on factors like pore size and skin type; it might not have the same impact on oily skin as it does on dry skin.
Given these conflicting views, the use of coconut oil for acne treatment remains controversial, and it's generally not recommended for those with acne or oily skin, as it could aggravate these conditions.
If you decide to use coconut oil, opt for a 100% pure, natural, and organic variety to minimize side effects. For instance, Kama Ayurveda’s Cold Pressed Extra Virgin Coconut Oil is a recommended option for facial application. Always consider your skin type and consult with a dermatologist if you're unsure about incorporating coconut oil into your skincare routine.
On the brighter side, there are many medical conditions for which Coconut oil is a scientifically proven treatment. If you suffer from any of these skin conditions on your face, you can benefit from using Coconut Oil.
Atopic dermatitis:
In common terms, this disease is also known as ‘Eczema’. It usually affects the pediatric population. The physical symptoms include redness and itching sensation. Presently, there is no cure for Eczema or it may heal over a while, however, the flaring symptoms could be alleviated or controlled.
The presence of lauric acid in coconut oil owes to its antimicrobial properties which makes it advantageous in controlling bacteria, fungi, and viruses. Thereby, posing as an effective remedy for such a skin condition
Staphylococcus aureus:
This bacteria causes serious infections including pneumonia as it hinders the functioning of your upper respiratory tract in most of the cases. With regards to the skin, it can form an abscess, dry scaly patches, boils, furuncles, and cellulitis which are painful.
Studies claim that to modulate the immune system Virgin Coconut oil might be used. In many cases, this bacteria occurs along with the presence of Atopic dermatitis and the benefit of coconut oil for it has been mentioned afore.
Xerosis:
This skin condition is also characterized by itchy, scaly, and dry skin. The skin barrier function seems to be affected here. Studies state that Coconut oil has helped patients by improving their skin hydration and has significantly increased the lipids at the skin surface level. Thereby, it has been proved that coconut oil is an effective moisturizer and as beneficial as mineral oil.
How To Use Coconut Oil For Face?
If you want to start using Coconut Oil for your face, there are many ways to introduce it in your skincare regime to reap its benefits.
Coconut Oil As A Face Cleanser
Pour Coconut oil on your palms (you can be generous with the amount) and rub them together. Apply the oil thoroughly all over the face. Massage it for some time to allow penetration into your skin. This will help in dislodging the impurities and dirt from the skin.
Next, take a cotton cloth and wipe the oil away. In case your skin is dry, wash your face with plain water. For other skin types, follow up with cleansing of the skin with a mild natural cleanser.
Coconut Oil As A Moisturizer
Before hitting the bed, take 1- 2 drops of coconut oil rub it within your palms just to warm it a bit and gently massage it on to your face and neck. You would be surprised to wake up with silky smooth skin. This routine could even be followed after having a shower to maintain your face moisturized throughout the day.
Note - We do not recommend the overnight application of Coconut oil if your skin is acne-prone or oily. You can also mix coconut oil with Aloe Vera and apply on your skin for a dose of hydration.
Coconut Oil As A Makeup Remover
Being able to use a natural product to remove make-up would surely do justice to your skin. There are two ways you could coconut-oil to get rid of the make-up, depending on the quantity of makeup
Removing Light make-up: Apply Coconut oil on your face, rub it gently all along melting and smudging away the make-up. Do not do this for long since cosmetic products contain chemicals and mixing them all over your face would do more harm than good. So, immediately wash away with your regular face wash as soon as you smudge them.
Removing Heavy make-up: Dip multiple cotton balls in coconut oil. Keep them aside. Next, gently smear the makeup beginning from the mascara, eyeshadow, eye-liner. Take another cotton ball and wipe away the lipstick. After this, you can use two different ones to clean the T- area of your face (forehead, bridge of the nose, chin) and the other to wipe off the products applied on your cheeks.
When you have applied different products like mascara, lipstick, blusher, eyeshadow, highlighter, etc this method of removing make-up will work better for you. Finally, wash your face using a mild face-wash along with warm water.
Coconut Oil As A Face Scrub
Using coconut oil as a face scrub is a great addition to your skincare routine, especially if you're dealing with dust and pollution. To make this natural scrub, mix two teaspoons of coconut oil with two and a half teaspoons of brown sugar in a bowl. Stir it until well combined.
When you're ready to use it, gently scrub your face with the mixture in a circular motion, paying extra attention to be gentle, especially around the delicate under-eye area. The facial skin is thinner and more sensitive, so it's important to avoid being too harsh to prevent abrasions.
After scrubbing for about half a minute, rinse the scrub off with lukewarm water. The coconut oil in the scrub helps maintain your skin's moisture, leaving it feeling soft and hydrated, while the sugar acts as an exfoliator, removing dead skin cells, blackheads, and whiteheads.
This scrub can be particularly beneficial for those exposed to a lot of dust and pollution. Depending on your skin's needs and how often you're exposed to pollutants, you can use this scrub every other day or twice a week.
Coconut Oil As A Facial Oil
To use coconut oil as a face oil, start by choosing high-quality, virgin coconut oil, as it's pure and more skin-friendly. Once you're sure your skin is compatible with the oil, take a small amount of coconut oil - just a few drops - and warm it between your palms.
This makes the oil easier to apply. Then, gently massage the oil onto your face in a circular motion, focusing on areas that are particularly dry or in need of extra nourishment.
Coconut Oil with Honey for Dry Skin
Honey is rich in antioxidants and can collectively foster collagen production. Take out that natural sweetener from your shelf and give it a role in your skincare functions. It can do wonders for your skin when used with Coconut oil.
To get on with the procedure, mix one tsp coconut oil along with one tsp honey in a bowl. Coconut oil and honey both are adhesive. Due to this, the resultant product would be extremely gooey and sticky. Apply a thin layer of it over your face and relax for 10mins to 20mins. After that wash the mixture with regular water and pat dry. Your skin would surely be glowing radiantly after a couple of applications.
Coconut oil with Lemon for Tanned Skin:
Suffering from a tanned skin? This mask could be at your service. Lemon being a citrus fruit, is pretty high on the pH index level and filled with vitamin C which helps as an anti-oxidant and at the same time reduces the melanin.
Lemon even decreases excess oil from the skin and embodies anti-inflammation properties. To make the mixture, squeeze half a lemon in a bowl and add one tbsp of Coconut oil to it. Apply it generously over the face. Leave the product for 10 minutes and later rinse it off with lukewarm water. This mask can be effectively applied twice a week. Care must be taken to not use this mixture in case of excessively dry skin.
Coconut oil with Baking Soda For Gentle Exfoliation:
Ever thought these ingredients used in your baking could also aid with your skincare. Baking soda acts as a natural toner, it gives a firmness to the skin especially saggy skin. It also contains mild exfoliating properties. As it is alkaline it seamlessly maintains the pH level of the skin.
To get on with the procedure add 2tsp coconut oil to 1 tsp baking soda. Make a paste by mixing the product. Gently apply this product over your face, be careful that you do not allow the mixture to enter your eyes or mouth. Leave it to dry for 10- 15 minutes. After this wash your face with cold water and pat dry.
Coconut oil with Turmeric for Glowing Skin:
Turmeric is used favorably in every other cuisine across the globe. This ingredient is even used extensively for providing a natural glow to your skin. Turmeric contains antioxidants and anti-inflammatory properties which makes it ideal for reducing redness and puffiness along with reviving your skin complexion and bringing back that faded radiance.
By using turmeric along with Coconut oil, you get benefits of both the magic ingredients, leaving your skin wholly nourished. To form this mixture, blend half tbsp turmeric along with two tsp coconut oil into a thick paste. Apply this mixture over your face and leave it for about 20 minutes. Wipe the mixture off with a damp cloth and then rinse the face with warm water. Surely, you’ll be amazed at how replenished and soft the skin would feel.
Coconut Oil As A Lip Scrub
Creating a natural lip scrub with coconut oil is an effective way to gently exfoliate and deeply moisturize your lips, especially if they are chapped or dry. To make this scrub, take a small amount of coconut oil – its hydrating properties will provide the base for the scrub.
Mix it with a teaspoon of sugar; the granules of the sugar act as a natural exfoliant, gently removing dead skin cells from the surface of your lips. You can use either brown or white sugar based on your preference.
Gently rub the mixture onto your lips in circular motions for a minute or two. This process not only removes dead skin but also improves blood circulation in your lips, making them appear plumper and rosier.
After scrubbing, rinse off with warm water or wipe away with a damp cloth. Your lips should feel smoother and softer immediately. This scrub can be used a couple of times a week to maintain healthy, hydrated lips.
Final Words
It is always advisable to do a patch test before using any skin product whether it is natural products like coconut oil or synthetic ones. You could apply a small quantity of the test product on your elbow, wrist, or neck. Wait for 24 hours and if your skin seems comfortable with it you can induce it in your daily skincare routine.
We would also like to remind you that it’s important that you use only pure, organic, and natural Coconut oil on your face to prevent any reactions or side effects. We recommend Kama Ayurveda’s Cold Pressed Extra Virgin Coconut oil for application on the face.
Coconut oil’s every benefit and drawback has been backed by science. The utilization of it depends on the skin type you possess and your need. So, go ahead if it suits you and reaps the mesmerizing benefits of this amazing oil that nature has gifted us.
In Ayurveda, Hibiscus is one of the most renowned herbs for promoting hair growth. Yes, you read it right! Those bright and beautiful flowers growing in the gardens all around you have extraordinary healing properties.
If you suffer from hair loss, then Hibiscus flowers and leaves will serve as the perfect remedy for you and stop hair fall. Both hibiscus flowers, as well as hibiscus leaves, are used to cure hair problems.
Studies suggest that complete recovery from dormant hair follicles and bald patches is possible by using Hibiscus flowers. (1,2)
Top Benefits Of Hibiscus For Hair
If you’re only just discovering the benefits of Hibiscus for hair, we’ve listed all of them to help you understand Hibiscus better and see if it’s a fit for your hair care needs.
1. Stimulates hair growth
Lost hair volume and luster over the years? The naturally occurring amino acids in hibiscus flowers provide the hair with the nutrients that help in promoting hair growth. These amino acids produce a special kind of structural protein called keratin, which is the building block of hair.
Keratin binds the hair and makes them less prone to breakage. It also promotes the overall thickness of hair strands and makes hair more manageable. So, instead of turning to expensive keratin treatments that damage hair, you can start using Hibiscus on your hair.
2. Conditions hair
The chemicals present in most of the shampoos strip the hair away from its natural oils. Have you noticed your hair turning dry and dull? Don’t worry, you can use Hibiscus to nourish your hair and seal its natural moisture content!
Hibiscus flowers and leaves contain a high amount of mucilage which acts as a natural conditioner. It’s because of this naturally occurring conditioner that crushed Hibiscus flowers and leaves feel slimy to the touch.
3. Prevents Baldness
Many research papers have been published after studying the use of hibiscus extract for treating baldness. All of these papers suggest that using hibiscus is a safe way for re-growing hair.
The use of hibiscus is as effective as the drugs used to treat baldness (Minoxidil and Finasteride). In addition to being equally effective, Hibiscus doesn’t cause any of the harmful side effects associated with these drugs!
4. Treats Dandruff and Itchy Scalp
Does your scalp suffer from excessive oil secretion causing problems like dandruff and itchy scalp? Hibiscus acts like an astringent and reduces the oil secretion by the glands. Using Hibiscus leaves for hair maintains the pH balance of hair in addition to providing an overall soothing and cooling effect.
5. Prevents Premature Greying
Traditionally, Hibiscus was used as a natural dye to mask grey hair. The antioxidants and vitamins present in Hibiscus help in producing melanin, the naturally occurring pigment that gives hair its natural color.
Convinced about using Hibiscus to cure your hair problems? Below, we’ve listed some of the best ways to use Hibiscus for your hair.
How To Use Hibiscus For Hair?
As you already know, there are many uses of Hibiscus for solving hair related issues and maintaining overall hair health. But how exactly do you use Hibiscus flower for your hair?
Both Hibiscus flower and Hibiscus leaves can be used for hair in multiple ways as both of them have immense benefits for the hair. Let’s look at some easy and effective ways.
1. Hibiscus Oil For Hair Nourishment
Hibiscus oil rejuvenates the scalp and promotes hair growth. In short, it provides your hair with all the above-mentioned benefits of hibiscus. You can use it on your hair thrice a week to provide deep nourishment and improve blood circulation.
Process -
To prepare Hibiscus oil at home, take about 8 hibiscus flowers and 8 hibiscus leaves and grind them into a fine paste.
Heat about a cup of coconut oil and add the paste to it.
Let the mixture heat together and then keep it aside to cool down.
Your hibiscus oil is ready to use. Massage your scalp with it for about 10 minutes and leave it on for about 30 minutes for best results.
After that, wash your hair and scalp with a mild cleanser.
You can even store the remaining Hibiscus oil for future use.
2. Hibiscus Shampoo For Gentle Cleansing
Another great way to use Hibiscus for hair is in the form of shampoos. Because of their lather producing nature, Hibiscus leaves and flowers can be easily formulated into shampoos. Unlike other shampoos, natural shampoos made from Hibiscus cleanse the hair without stripping the scalp from its natural oils.
Kama Ayurveda’s Sanobar Hair Cleanser is a mild hair and scalp cleanser with Hibiscus flower as one of its key ingredients. It nourishes and energizes hair to restores its healthy shine. It also has hibiscus extract that clarifies and tones oily scalp without stripping away essential moisture.
You can even make your own Hibiscus Hair Shampoo at home. Simply take about 15 Hibiscus leaves and 5 Hibiscus flowers. Boil them in water and grind to make a paste. To this paste, add gram flour to make an organic shampoo.
3. Hibiscus Conditioner For Smoother Hair
The amino acids (Keratin) in Hibiscus make it an excellent conditioner. Hibiscus nourishes the hair follicles, softens the hair and makes it more manageable.
To reap the nourishing benefits of Hibiscus for your hair, you can use conditioners that have Hibiscus as the key ingredient. One such conditioner is Kama Ayurveda’s Rose and Jasmine Hair Conditioner that combines Hibiscus extract with the essential oils of Rose and Jasmine to soothe and repair hair and make it stronger, shinier, and softer with every wash.
If you wish to make your own Hibiscus hair conditioner, all you need to do is create a paste by crushing about eight hibiscus flowers in water. Apply this paste to your scalp and hair. Leave it on for an hour and then wash it with lukewarm water. This simple Hibiscus rinse works as a deep conditioning treatment.
4. Hibiscus and Amla Hair Mask For Hair Growth
Another way to make a hair mask using Hibiscus is to use it with amla powder. You can even Hibiscus powder for hair growth mask instead of using Hibiscus leaves.
Process -
To prepare this mask, combine equal quantities of Hibiscus powder and Amla powder in water to make a smooth paste.
Apply it all over your hair and scalp.
Leave it for 40 minutes and then wash it off with a mild shampoo.
This mask will strengthen your hair follicles and help in maintaining scalp health. It also conditions the hair and makes it smooth and manageable. Hibiscus together with Amla helps in preventing hair fall and split-ends.
5. Hibiscus and Yogurt Hair Mask For Stronger Hair
If you wish to make your hair roots strong, you can prepare Hibiscus hair mask using yogurt.
Process -
Simply grind about 3-4 Hibiscus leaves and one Hibiscus flower to make a paste.
To this add about a cup of yogurt to make a smooth and consistent hair mask.
Apply this mask on your hair and leave it on for an hour.
Then, wash off the mask with lukewarm water and shampoo your hair using a mild cleanser.
Apart from making hair roots strong, this hair mask also helps in preventing premature greying of hair.
6. Hibiscus Hair Mask for Treating Alopecia
Aloepia is the medical name for the condition of baldness. Hibiscus is a natural remedy for treating baldness. According to Ayurveda, the hair roots can get damaged due to excessive heat in the body. This leads to hair loss and a patchy scalp.
To treat this condition, prepare a paste by grinding 6-8 flowers and leaves of Hibiscus.
Apply it on the affected areas and leave it on for 3 hours. Wash it off and repeat the process twice a week to promote hair growth.
7. Hibiscus Hair Mask With Aloe Vera For Shiny Hair
Organic Aloe Vera Juice and Hibiscus Extract create body, volume, and bounce by balancing and removing excess oils from the hair shaft, without compromising the integrity of the hair.
You can use shampoos that have Aloe Vera and Hibiscus as the key ingredients. Kama Ayurveda’s Himalayan Deodar Hair Cleanser is a gentle formulation that clarifies hair leaving them soft, shiny, more manageable and frizz-free.
Alternatively, you can create a paste of Aloe Vera and Hibiscus flowers. Apply this paste to your hair and leave it on for 45 minutes. Rinse it off with lukewarm water. This hair mask will add shine to your hair and leave them soft and smooth.
8. Hibiscus And Almond Oil For Nourishing Hair
For ease of application and better conditioning, Hibiscus can be combined with Almond Oil or Olive Oil and then applied to hair.
Process -
Grind about 5 Hibiscus flowers and 5 Hibiscus leaves to form a paste.
To this, add a teaspoon of Almond Oil (or Olive Oil).
Apply this mixture to your hair and leave it on for 30 minutes before washing off with lukewarm water.
This mixture will help in deep conditioning of hair and nourish hair follicles.
9. Hibiscus Hair Pack For Preventing Dandruff
If you want to use Hibiscus to treat dandruff, then this specific hair pack will be most helpful.
Process -
To prepare it, soak a tablespoon of fenugreek seeds in water overnight.
In the morning, grind these seeeds with a bunch of Hibiscus leaves to make a fine paste.
To this paste, add half a cup of buttermilk and grind again to make a smooth paste.
Apply this to your scalp and leave it on for an hour. Wash it off with a mild shampoo.
You can apply this hair pack once a week to get rid of dandruff.
10. Hibiscus Hair Pack with Henna For Dandruff Treatment
If you apply henna to your hair as a part of your hair care regime, you can add Hibiscus to it to prevent dandruff.
Process -
Grind Hibiscus flowers and Hibiscus leaves with Henna powder (or Henna leaves) to make this hair pack.
Add half a lemon to this mixture and apply it generously all over your scalp and hair.
This pack will balance the pH of your scalp, fight oiliness and build-up of dandruff. Leave it on for an hour and then wash it off with a mild cleanser.
11. Coconut Milk with Hibiscus For Split Ends
Coconut milk is an excellent remedy for dry hair. Combined with Hibiscus, it helps in preventing split ends and repairs hair by conditioning them.
Process -
Add crushed Hibiscus petals to Coconut milk.
To this mixture, add Honey, Aloe Vera, and Yogurt to prepare a smooth paste.
Apply this paste to your hair and leave it on for 30 minutes before rinsing it off with lukewarm water.
This hair pack will help in preventing hair-splitting and breakage due to dryness. If your hair is brittle, then you should consider using this on your hair at least once a week.
12. Hibiscus and Onion For Hair Regrowth
If your hair seems to be losing volume and thickness, then this hair pack of Hibiscus and Onion will be helpful as both the ingredients boost hair growth.
Process -
Start by grinding one onion to make pulp. Strain this pulp to obtain onion juice.
Similarly, grind hibiscus leaves also with water to make paste and then strain it obtain its juice.
Mix the two juices and start applying them to your hair and scalp.
Leave the mixture on your hair for 15 minutes and then wash it off with lukewarm water.
You can use this mixture on your hair as often as thrice a week. Using it regularly will help in increasing the overall volume and thickness of your hair. You can even add Ginger juice to this to further enhance hair growth.
13. Hibiscus and Egg for Hair Growth
Egg white is added to hair masks to provide hair with the necessary proteins. Hibiscus hair mask can also be made by combining it with eggs whites.
Process -
Take about 3 crushed Hibiscus flowers and add them to 2 Egg whites.
Mix the ingredients thoroughly to get a smooth paste.
Apply the paste to our hair and let it stay for about 20 minutes. After that wash it off with a mild cleanser.
This pack helps in controlling oiliness and hair fall. It also regulates the overall pH level of the scalp and promote hair growth.
14. Neem leaves and Hibiscus For Hair Growth
Using Neem leaves on hair is a recommended solution in Ayurveda for maintaining scalp health. Combine it with Hibiscus and you get the perfect remedy for hair thinning.
Process -
Obtain Neem juice by grinding the neem leaves and keep it aside.
To this, add the juice obtained by grinding and straining Hibiscus leaves.
Leave it on your scalp for 20 minutes. After that, wash it off with lukewarm water.
You can use this mixture on your hair twice a week to nourish your hair follicles and keep your scalp healthy.
15. Hibiscus And Amla Hair Mask For Hair Growth
Simple and natural, this mask combines the growth-promoting properties of amla with the nourishing benefits of hibiscus for healthier, stronger hair.
Combine equal parts of crushed hibiscus flowers and leaves with the amla powder. Gradually add water to the mixture until it forms a smooth, consistent paste.
Apply the mixture evenly to your scalp and hair. Ensure that the mask coats your hair thoroughly for maximum benefits.
Once your hair is fully covered, leave the mask on for about 40 minutes. This duration allows the nutrients to penetrate deeply into the scalp and hair follicles.
Rinse out the mask using a mild shampoo. This step is crucial to remove any residue and ensure that your hair is clean and refreshed.
16. Hibiscus And Ginger Mask For Hair Regrowth
The revitalizing natural blend of ginger and hibiscus leaves is known to stimulate hair regrowth and awaken dormant follicles.
Combine ginger juice and crushed hibiscus flowers in a bowl to achieve a smooth consistency.
Section your hair and massage the mixture into your scalp, gradually working it down to the hair tips.
After covering all your hair, leave the treatment on for 20 minutes.
Wash off the treatment with lukewarm water.
This treatment is a powerful combination for anyone looking to enhance hair density and vitality. It should be used twice a week for vest results.
Conclusion
Hibiscus is a powerful ingredient for your hair that helps in curing a lot of hair problems without causing any harmful side effects. Hence, it’s a wonderful idea to start including in your hair care regimen.
Be it in the form of shampoos that contain Hibiscus or in the form of natural DIY Hibiscus hair treatments, you’ve plenty of options to choose from.
Who could have thought that this flower with an assuming appearance and no fragrance will turn out to be a magical cure for your hair related hassles? Not just the flower, but even Hibiscus leaves are so effective for hair.
Have you tried using Hibiscus for your hair? Let’s know about your experience in the comments below.
In the sun-kissed regions of Southeast Asia and the Pacific Islands, there’s a secret to radiant skin that has been whispered from one generation to the next - Coconut oil.
Rich in Vitamin E, a potent skin-repairing antioxidant, and lauric acid, known for its anti-inflammatory properties, coconut oil is a time tested natural remedy for dark circles. In this article, let’s understand how to use coconut oil to get rid of dark circles.
Why Use Coconut Oil For Dark Circles?
Dark circles often tell tales of fatigue, stress, or simply genetics. Let's uncover the reasons behind coconut oil's popularity as a remedy for those pesky under-eye patches.
1. Rich in Beneficial Fatty Acids:
Coconut oil is packed with small-chain fatty acids that are known to reduce inflammation and improve circulation. These properties can be particularly beneficial for the delicate skin under the eyes, which is prone to puffiness and discoloration.
2. Natural Moisturizer:
One of the primary causes of dark circles is dehydration. Coconut oil acts as a natural moisturizer, hydrating the skin and preventing it from drying out. Its emollient properties ensure that the skin remains soft and supple.
3. Skin Strengthening:
As we age, the skin under our eyes becomes thinner, making the blood vessels more visible and leading to the appearance of dark circles. Coconut oil has skin-strengthening qualities, which can potentially thicken the skin barrier, making these blood vessels less prominent.
4. Antioxidant Properties:
The oxidative stress caused by free radicals can exacerbate skin problems, including dark circles. Coconut oil possesses antioxidant properties that combat these free radicals, promoting healthier skin.
5. Promotes Cell Turnover:
Some studies suggest that coconut oil can expedite cell regeneration. This means that the application of coconut oil can lead to the faster replacement of damaged skin cells with new ones, potentially reducing the appearance of dark circles over time.
6. Safe and Natural:
In a world where many skincare products are laden with chemicals, coconut oil offers a natural alternative. While it's always essential to conduct a patch test to rule out allergies, coconut oil is generally considered safe for topical application.
7. Cost-Effective:
High-end under-eye creams and treatments can be expensive. Coconut oil, on the other hand, is a cost-effective solution that offers multiple benefits, not just for dark circles but for overall skin health
How To Use Coconut Oil For Dark Circles
To maximize its potential and ensure the best results, follow this step-by-step guide to using Coconut Oil for dark circles:
Choose the Right Coconut Oil:
Opt for cold-pressed, virgin coconut oil. This type retains the most nutrients as it hasn't been exposed to high temperatures or chemicals during processing. It's often labeled as "virgin" or "extra virgin."
Preparation:
Gently cleanse your face to remove any makeup, dirt, or impurities. Pay special attention to the under-eye area, ensuring it's free from any residual makeup or creams.
Pat your face dry with a soft towel, taking care not to rub or pull the delicate skin under the eyes.
Application:
Scoop out a small amount of coconut oil with your fingertip. Remember, a little goes a long way. Next, warm the oil between your fingers to liquefy it, making it easier to apply.
Gently dab and massage the oil onto the dark circles. Use soft, patting motions to encourage absorption without stretching the skin.
Avoid getting the oil directly into your eyes. If it does enter, rinse your eyes with water immediately.
Optimal Timing:
The best time to apply coconut oil is before bedtime. This allows the oil to work its magic overnight, deeply nourishing the skin while you sleep.
If you choose to apply it during the day, wait a few minutes to let the oil absorb before applying any makeup or sunscreen.
Consistency is Key:
For noticeable results, make this a regular part of your skincare routine. Apply coconut oil daily or at least several times a week.
DIY Treatments:
Enhance the benefits by combining coconut oil with other natural ingredients. For instance, a mixture of coconut oil and turmeric can offer added skin-lightening properties, while blending with almond oil can provide extra hydration.
Safety First:
While coconut oil is generally safe for topical use, it's essential to conduct a patch test before extensive application. Apply a small amount on your wrist or behind the ear and wait for 24 hours to check for any allergic reactions.
What Causes Dark Circles?
Did you know that dark circles aren’t simply caused by a lack of sleep. There are many factors that could result in those under-eye shadows.
Understanding the root causes of dark circles is the first step in addressing and treating them effectively. Let’s understand a few of them -
Aging: As we age, our skin becomes thinner, especially around the eyes. This thinning makes the blood vessels beneath the skin more visible, leading to the appearance of dark circles.
Fatigue: Lack of sleep or excessive tiredness can cause the skin to become pale, making blood vessels more prominent and the area beneath the eyes darker.
Genetics: Dark circles can run in families. If your parents or grandparents had them, you might be more predisposed to having them too.
Eye Strain: Staring at screens (computers, TVs, phones) for prolonged periods can strain the eyes, causing blood vessels around them to enlarge and darken the surrounding skin.
Allergies: Allergic reactions can lead to increased blood flow to the area beneath the eyes, causing them to appear darker.
Dehydration: Insufficient water intake can make the skin under the eyes appear dull and the eyes sunken, creating shadows.
Sun Exposure: Overexposure to the sun can prompt the body to produce more melanin, the pigment responsible for skin color, leading to pigmentation in the under-eye area.
DIY treatments with Coconut Oil using Dark Circles
Coconut oil, with its nourishing and moisturizing properties, can be combined with various natural ingredients to create effective DIY treatments for dark circles. Here are some popular recipes:
1. Coconut Oil and Turmeric:
Ingredients: A pinch of turmeric powder and a teaspoon of coconut oil.
Method: Mix the two ingredients to form a paste. Apply it gently under the eyes and let it sit for about 10 minutes before rinsing off. Turmeric has anti-inflammatory properties and can help lighten the skin.
2. Coconut Oil and Almond Oil:
Ingredients: Equal parts of coconut oil and almond oil.
Method: Blend the oils and apply the mixture under the eyes before bedtime. Almond oil is an effective remedy for dark circles, also known for its skin-lightening properties and ability to reduce puffiness.
3. Coconut Oil and Vitamin E:
Ingredients: A few drops of vitamin E oil and a teaspoon of coconut oil.
Method: Mix and apply under the eyes. Vitamin E is an antioxidant that can help repair damaged skin cells and improve skin elasticity.
4. Coconut Oil and Aloe Vera:
Ingredients: A teaspoon of coconut oil and a teaspoon of aloe vera gel.
Method: Blend the ingredients and apply to the under-eye area. Aloe vera is soothing and can help reduce inflammation and puffiness.
5. Coconut Oil and Cucumber:
Ingredients: A few cucumber slices and a teaspoon of coconut oil.
Method: First, place the cucumber slices on your eyes for about 10 minutes. After removing them, massage the coconut oil gently into the skin. Cucumbers have a cooling effect and can help reduce swelling.
6. Coconut Oil and Green Tea:
Ingredients: A used green tea bag and a teaspoon of coconut oil.
Method: After steeping your green tea, allow the tea bag to cool. Place it on your eyes for about 10 minutes. Once removed, apply coconut oil to the area. Green tea contains antioxidants that can help reduce puffiness and dark circles.
Remember, before trying any DIY treatment, it's essential to conduct a patch test to ensure you don't have any allergic reactions to the ingredients. Also, consistency is key, so apply these treatments regularly for the best results.
Potential Side Effects of Using Coconut oil For Dark Circles
Using coconut oil for dark circles is generally considered safe for most people, especially when applied topically. However, as with any skincare product, there can be potential side effects. Here are some to be aware of:
Skin Irritation: Some individuals might experience redness, itching, or a burning sensation after applying coconut oil. This could be a sign of an allergic reaction or sensitivity to the oil.
Acne Breakouts: Coconut oil is comedogenic, meaning it can clog pores. For those with acne-prone or oily skin, using coconut oil might lead to breakouts or exacerbate existing acne.
Milium Cysts: These are tiny, white bumps that can form on the skin when keratin gets trapped under the skin's surface. While not directly linked to coconut oil, heavy oils or creams can sometimes contribute to their formation, especially around the delicate eye area.
Eye Irritation: If coconut oil gets into the eyes, it can cause temporary blurriness or a stinging sensation. It's essential to apply the oil carefully to avoid direct contact with the eyes.
Worsening of Dark Circles: In rare cases, if an individual is allergic or sensitive to coconut oil, the skin's reaction might darken the under-eye area further.
Ineffectiveness: For some, coconut oil might simply not work in reducing dark circles, especially if the circles' primary causes are genetic or due to bone structure.
It's always a good idea to conduct a patch test before using coconut oil extensively, especially in sensitive areas like under the eyes. If any adverse reactions occur, it's advisable to discontinue use and consult a dermatologist or healthcare professional.
How Effective Is Coconut Oil For Dark Circles As Per Research?
While coconut oil holds promise as a potential remedy for dark circles due to its skin-beneficial properties, more targeted research is needed to establish its definitive effectiveness. Here’s what current research tells us about its impact -
Traditional Use and Anecdotal Evidence:
Coconut oil's use as a skin moisturizer and healer dates back to ancient civilizations, especially in tropical regions. Many individuals swear by its benefits for reducing dark circles based on personal experiences and traditional practices.
Skin-Nourishing Properties:
Scientifically, coconut oil is known to be rich in medium-chain fatty acids, which have moisturizing properties. It also contains antioxidants and anti-inflammatory compounds, which can benefit the skin. These properties suggest that coconut oil can hydrate the under-eye area, reduce inflammation, and potentially lighten dark circles.
Limited Direct Research:
While there's ample research on coconut oil's benefits for skin health, direct studies focusing on its effectiveness for dark circles are limited. Most evidence is anecdotal, and results can vary from person to person.
Cell Regeneration and Repair:
Some studies suggest that coconut oil can promote wound healing and collagen production. Enhanced collagen production can potentially thicken the skin under the eyes, making blood vessels less visible and thereby reducing the appearance of dark circles.
Safety and Tolerance:
Research indicates that virgin coconut oil is generally safe for topical application and is well-tolerated by most individuals. However, as with any skincare product, reactions can occur, especially in those with sensitive skin.
Comparison with Other Treatments:
While coconut oil offers a natural and cost-effective approach, there are other treatments like chemical peels, laser therapy, and specialized under-eye creams that have undergone more extensive research for dark circle reduction. The effectiveness of coconut oil compared to these treatments remains a topic of debate.
Conclusion
In conclusion, while coconut oil holds promise as a potential remedy for dark circles, individual results may vary. It's essential to approach its use with an open mind and realistic expectations. If dark circles persist or worsen, consulting a dermatologist or skincare specialist is advisable.